When you click on links to various merchants on this site and make a purchase, this can result in this site earning a commission. Affiliate programs and affiliations include, but are not limited to, the eBay Partner Network.
Has anybody installed the EOS splitter and side skirts using only the screws, and without using the double sided tape? How well has it held up? I know the splitter is held on with like the main 6-8 bolts in the fascia, plus an additional 6 screws, so I’d think that would be plenty secure, but the instructions call for double sided tape also. My splitter and side skirts will be delivered on the 24th, and I’m going to install them. However, my car is my DD, so if something happens to the splitter or side skirts and I need to replace it, I’d like it to be easier. I’ve heard that once that double sided tape sets, it’s pretty difficult to actually get off. Heat probably wouldn’t help, as the entire front is covered in PPF and I’d rather not mess that up. Thanks for any input!
Last edited by cdominguez; Dec 19, 2019 at 11:40 AM.
You can always get the tape off. I would recommend using it...I have the EOS splitter and side skirts. installed with the screw and 3m tape. I wipe out the splitter the first month I had it.. I ordered a New one. removed the old splitter with little issue. some fishing line or some waxed dental floss will help remove the tape. I have a heat gun but did not need to use it. I have removed Old Badges from other cars that have been on their for years using heat and dental floss. People have removed factory side spears on their C5's after 10 years, without issue.. some heat fishing line and some goo gone.
Bill
From: In a parallel universe. Currently own 2014 Stingray Coupe.
C7 of the Year - Modified Finalist 2021
MO Events Coordinator
St. Jude Co-Organizer
St. Jude Donor '03 thru '26
NCM Sinkhole Donor
CI 5, 8 & 11 Veteran
Yeah, you would be able to get the tape off if you want to go ahead and use it. As E-T mentions, a hair dryer, some fishing line and some Goo-Gone will get the tape off.
Here is my write up on the EOS side skirts: https://www.corvetteforum.com/forums...th-photos.html
I used screws and tape. I track my car and wanted to ensure these things wouldn't budge at 140 MPH +. However replacing them would just require cleaning the tape residue off which should be easy based on past experience. There are places where the spacing between the screws might leave a small gap. In these areas the tape helps. However be careful as the skirts come to the front they flatten out so the opposite problem occurs - IE: the tape can become visible.
I had really just heard that once that 3M tape adheres, it REALLY sticks. I’d rather not mess up the Xpel if something happens to the splitter or side skirts. But it sounds like it will come off pretty easily if I needed it to. Hopefully I never need it to, but being my DD, things are far more likely to happen.
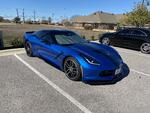
JMII, I like the look of the car with those side skirts. We have the same color car. Mines a 16 Z51 Laguna Blue.
Last edited by cdominguez; Dec 19, 2019 at 01:23 PM.
I drilled out the original plastic rivets when removing the stage I splitter. On installation of my new stage II/III splitter, I used the tape, screws and new rivets. I wouldn't want to just use the screws, didn't feel it was secure enough.
I tried the tape on the front splitter, but didn't like how it was attaching, so I took it off.
I used the existing holes in the front of the splitter and used metric screws and speed nuts to lightly secure the front section of the splitter to the bumper. You have to reach your hand up in some tight areas with the speed nuts. Then, I used the factory holes and hardware from the poverty splitter to attach the back of the splitter. Then I tightened everything down. No flex, no gaps, It's not going anywhere.
FYI, don't expect every hole to align perfectly. Be prepared to open up some holes on the splitter, and to drill a few new holes underneath the bumper to align the speed nuts.
I'm waiting on the side skirts, they are due in Jan 2020. I will try the tape on the skirts and see how it works.
FYI, if anyone installs the Stage 3 front winglets, you will most likely need 6 longer screws (3 each side) to secure the winglets to the inner front fender. After much searching, I found the correct hardware. I had to purchase a bag of 25, so I have some extras. Anyone that needs 6 can PM me and I will send them to you, N/C.
I installed the splitter today. My side skirts aren't due in until next week. I used both tape and the screws. I seem to have a gap though between the cars bumper and the splitter. I tightened everything down as tight as I could, but there still seems to be a gap. My other problem with it, is that I didn't realize that they didn't pre drill 3 holes until after I started put the tape on and started to secure the splitter. That sure was a pain trying to find where the OEM screws went in after the splitter was half way on. I have a couple of extra holes now from barely missing the factory locations.
Last edited by cdominguez; Dec 24, 2019 at 07:11 PM.
Did anybody do the Stage 2? I just received my winglets(now that they are offering stage 2 in carbon flash instead of only carbon fiber). They didn’t include any mounting hardware, and I threw away my instructions from the splitter and side skirts, but I can’t figure out what this extra drilled hole is for.
I’d venture a guess and say the indented circles are for screws, but why do I have that hole?
I don't have the Stage 2 winglets, but I have seen a few and none of them had that extra hole. It appears that you may have received a used part. I assume that the other side doesn't have the extra hole?If so, I'd contact them with a pic and have them send you a new part.
I don't have the Stage 2 winglets, but I have seen a few and none of them had that extra hole. It appears that you may have received a used part. I assume that the other side doesn't have the extra hole?If so, I'd contact them with a pic and have them send you a new part.
Thats pretty much what I figured. Both of them have that same hole drilled into identical placement. None of the holes go all the way through. But obviously the screws would go into the recessed holes, so that extra hole is on the outside edge. If it was on the inside I’d probably just mount it, and not really care.
I may be wrong (which is Very seldom )...but I believe you're incorrect in saying the holes are on the outside.
The key is to look at the sloped end on the trailing edge of the winglet: reference this picture (sorry it's the best one I could find but google yourself and you'll see what I'm talking about)
The one in your pic would be the passenger side.
The slop is there to blend to the Spat (base models don't have them).
So if there is no holes on the other side that would be the outside. I'm not sure how EOS instructions say to mount them but I'd call and ask if you've thrown them away.
The holes on OEM wings are drilled all the way through which is why you see screw/bolt heads on the outside.
Originally Posted by cdominguez
Thats pretty much what I figured. Both of them have that same hole drilled into identical placement. None of the holes go all the way through. But obviously the screws would go into the recessed holes, so that extra hole is on the outside edge. If it was on the inside I’d probably just mount it, and not really care.
Originally Posted by cdominguez
Did anybody do the Stage 2? I just received my winglets(now that they are offering stage 2 in carbon flash instead of only carbon fiber). They didn’t include any mounting hardware, and I threw away my instructions from the splitter and side skirts, but I can’t figure out what this extra drilled hole is for.
I’d venture a guess and say the indented circles are for screws, but why do I have that hole?
I may be wrong (which is Very seldom )...but I believe you're incorrect in saying the holes are on the outside.
The key is to look at the sloped end on the trailing edge of the winglet: reference this picture (sorry it's the best one I could find but google yourself and you'll see what I'm talking about)
The one in your pic would be the passenger side.
The slop is there to blend to the Spat (base models don't have them).
So if there is no holes on the other side that would be the outside. I'm not sure how EOS instructions say to mount them but I'd call and ask if you've thrown them away.
The holes on OEM wings are drilled all the way through which is why you see screw/bolt heads on the outside.
I found instructions on their website, and it would seem they countersunk the wrong side of the winglet. Or possibly with the carbon fiber ones, they countersunk both sides? The side that has no holes, would look like the referenced photo and install fine. If they had countersunk the other side, you can find bolts that fit inside the hole and then the screws wouldn’t stick out. I bet they put the weird looking hole, so somebody doesn’t install it the wrong way. It forces you to install it the “correct way” without needing guidance. I guess you get what you pay for and for my DD, the cheaper option was the better option, especially since last night driving home, there was a 2x4 in the road that I didn’t see. Already scraped up the bottom of the splitter.
Last edited by cdominguez; Jan 9, 2020 at 07:57 PM.
I found instructions on their website, and it would seem they countersunk the wrong side of the winglet. Or possibly with the carbon fiber ones, they countersunk both sides? The side that has no holes, would look like the referenced photo and install fine. If they had countersunk the other side, you can find bolts that fit inside the hole and then the screws wouldn’t stick out. I bet they put the weird looking hole, so somebody doesn’t install it the wrong way. It forces you to install it the “correct way” without needing guidance. I guess you get what you pay for and for my DD, the cheaper option was the better option, especially since last night driving home, there was a 2x4 in the road that I didn’t see. Already scraped up the bottom of the splitter.
Got it installed. I drilled the bolt side a little larger so the head would sit flat against the winglet. I’ll have to jack the car up and try and adjust the passenger side splitter. I knew it was always a hair off, even though the bolts lined up fine. It didn’t matter much until I put the winglet on, but the passenger winglet is practically rubbing against the car. Hopefully I can pull on the splitter enough and bolt in a new location to secure it and line it up better.
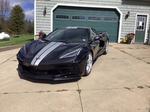
I feel the car looks more complete now. The winglets help to finish off the front end more than without them.
Designer Imagines A Corvette That Looks More Like a Corvette Than the Corvette
Slideshow: A Jaguar designer's personal project imagines what a modern front-engined Corvette might look like if Chevrolet revisited the golden age of the Stingray.





 EOS splitter installation



















 )...but I believe you're incorrect in saying the holes are on the outside.


