



HOW TO: Image Lights C7 specific

Thread Starter
Former Vendor
Joined: Jan 2009
Posts: 12,288
Likes: 23
From: League City Texas
Houston Events Coordinator
St. Jude Donor '11-'12, '14
I believe in the Beer Fairy

4th Gear

Joined: May 2016
Posts: 4
Likes: 8

NOTE: This is on a 1lt 2014 Corvette with parts ordered from TheDoubleAA.com see link below to order yours.
http://thedoubleaa.com/cart/index.ph...roducts_id=201
Tools Needed:
T-30
7mm socket and ratchet
10mm socket and ratchet
wire taps
Good beer
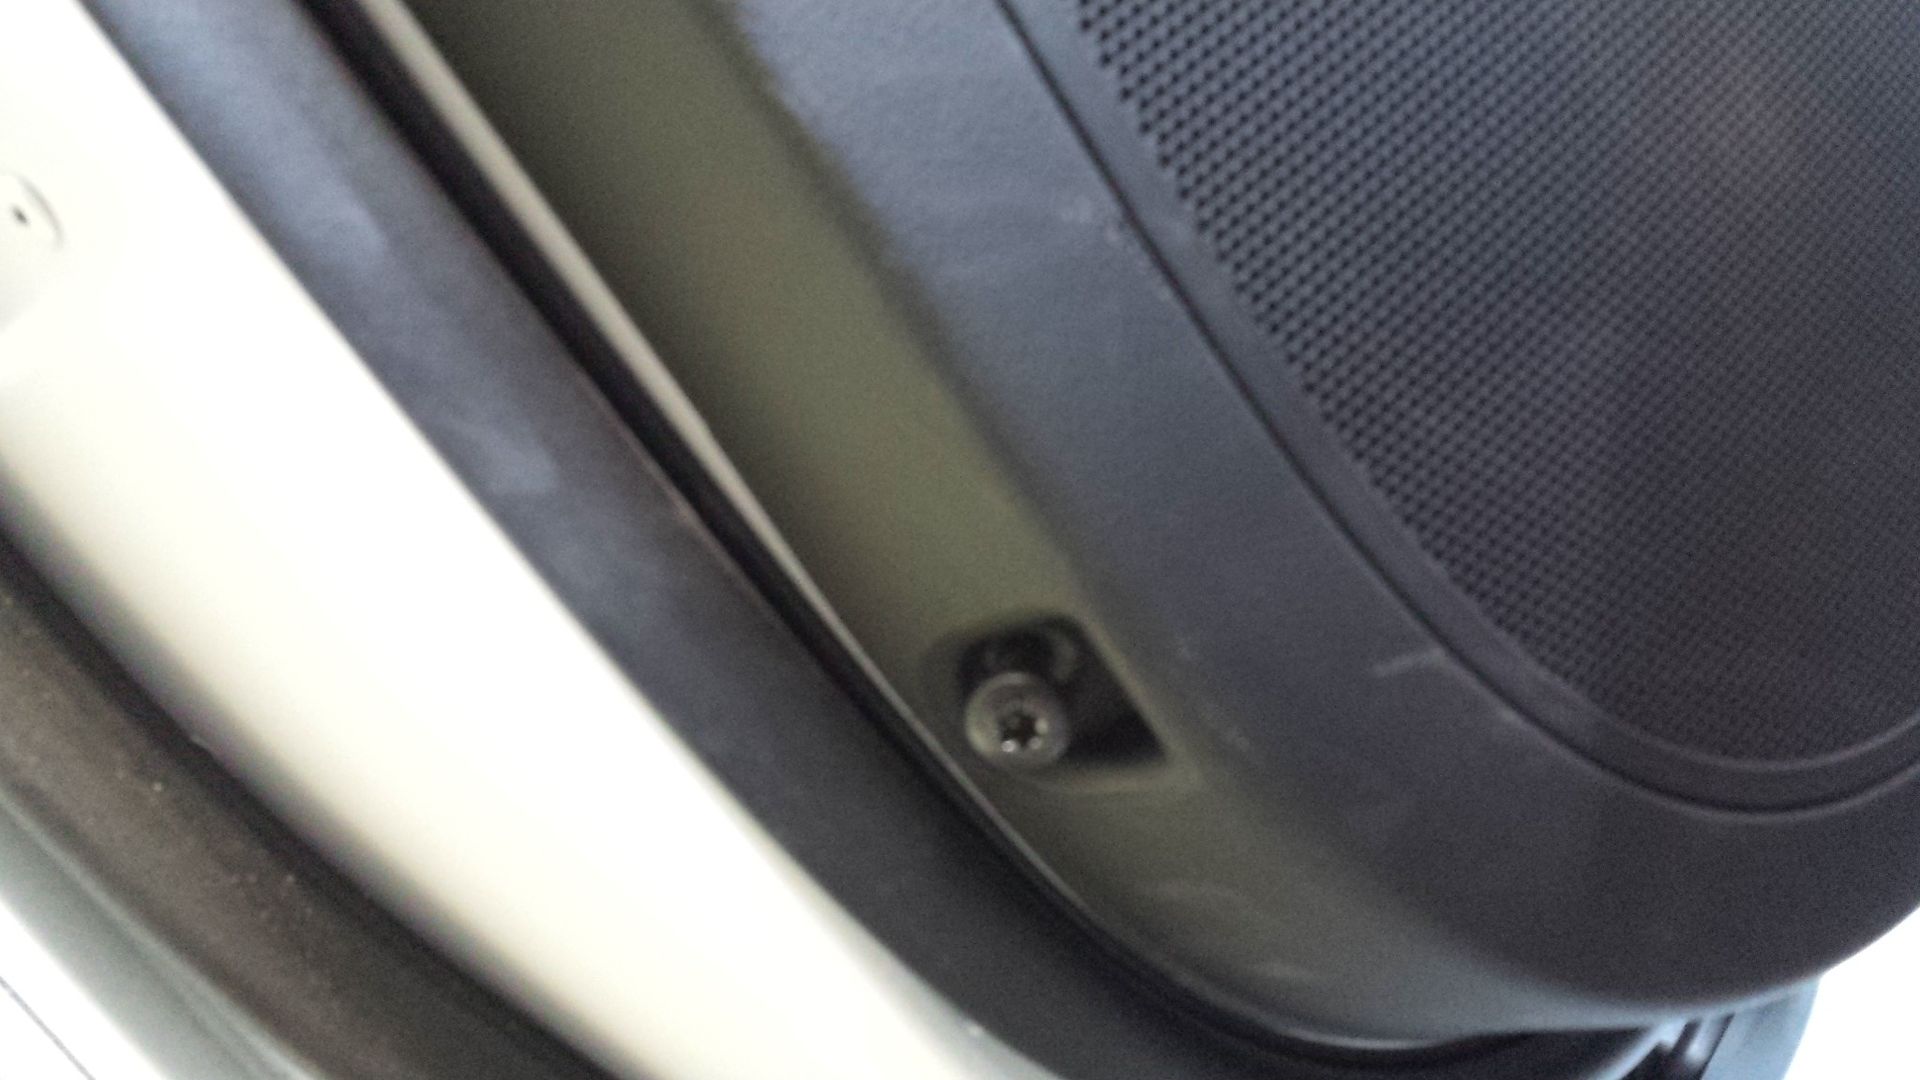
To remove the door panels you'll need to remove the (2) T-30 screws on the bottom of the door. (see Picture)
Next you'll need to pry back the door button release (both doors) to reveal the 10MM bolt. Remove bolt.
On Drivers side there is a panel that hides the 10 MM bolt (pop it off and remove 10 MM bolt)
On passenger door the bolts are behind the door release button and underneath the door pull you can feel for a small hole. the hole hides the 10mm bolt
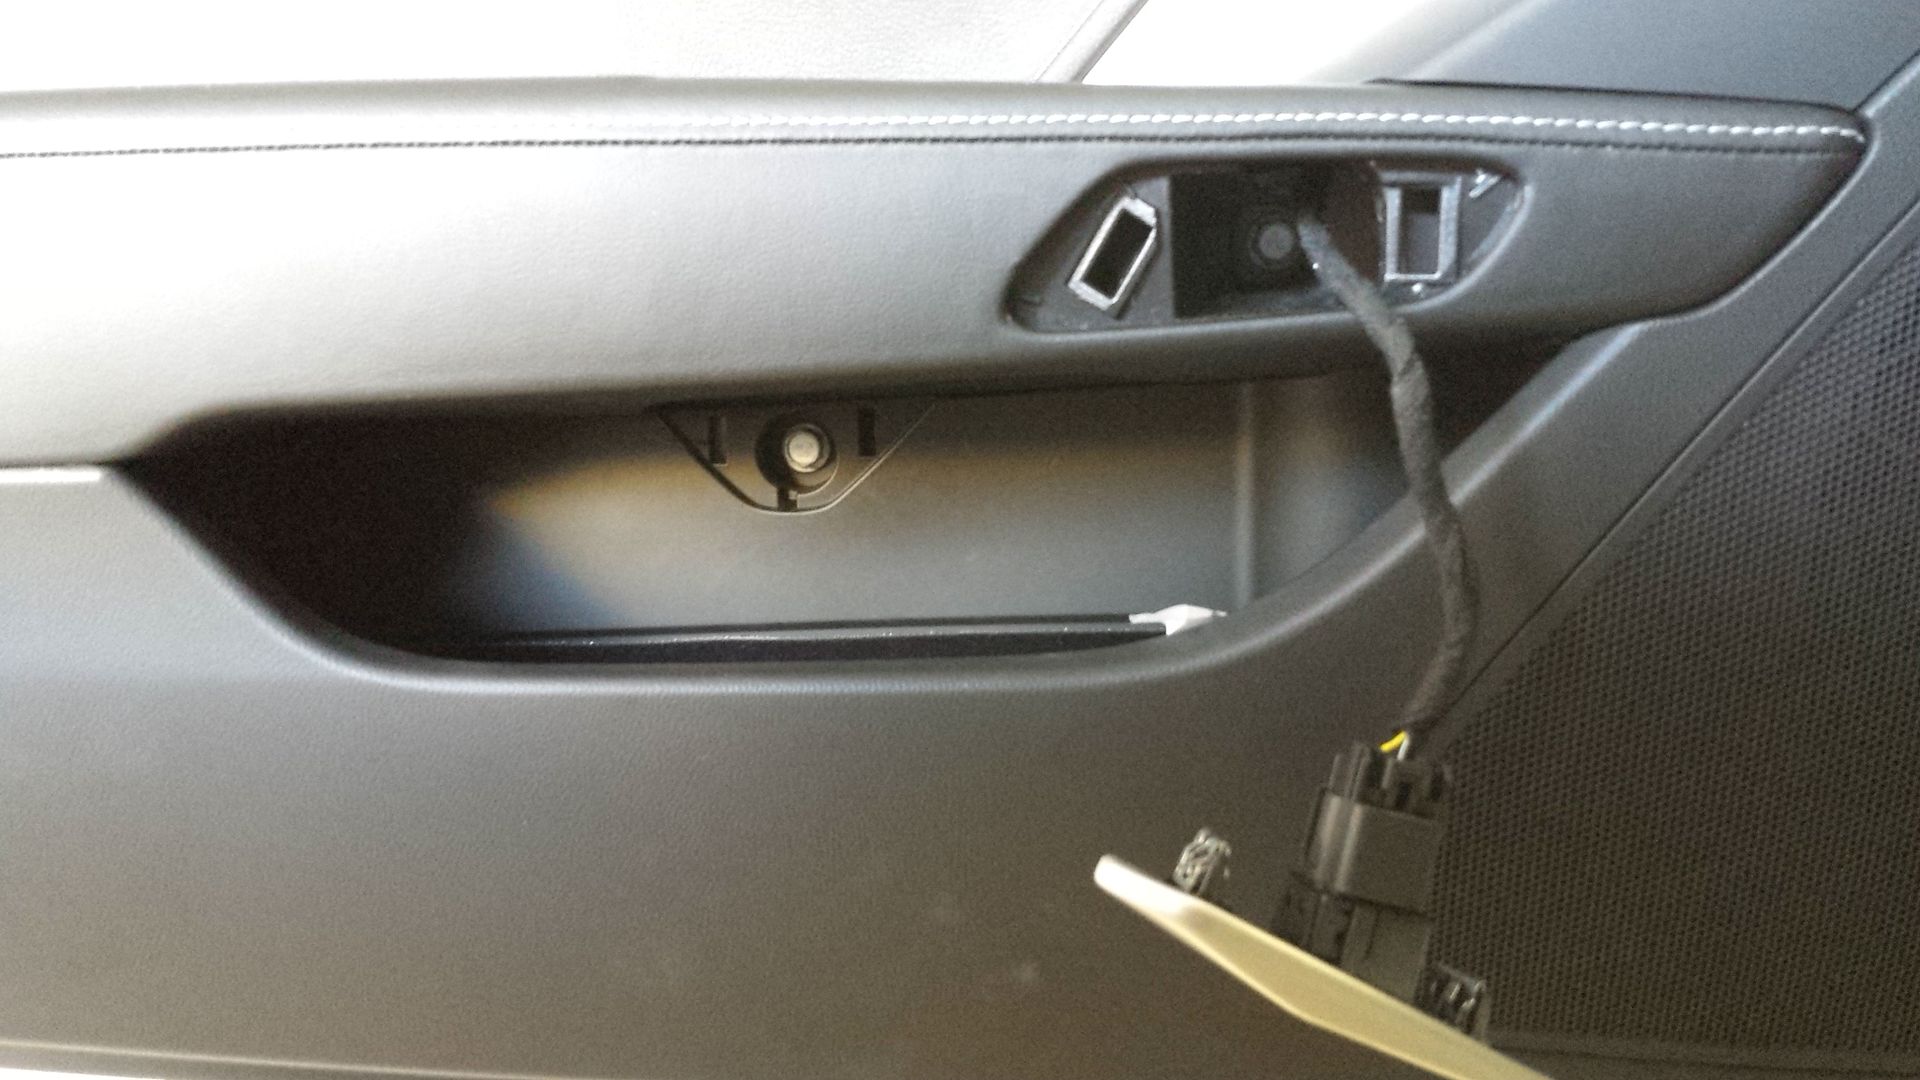
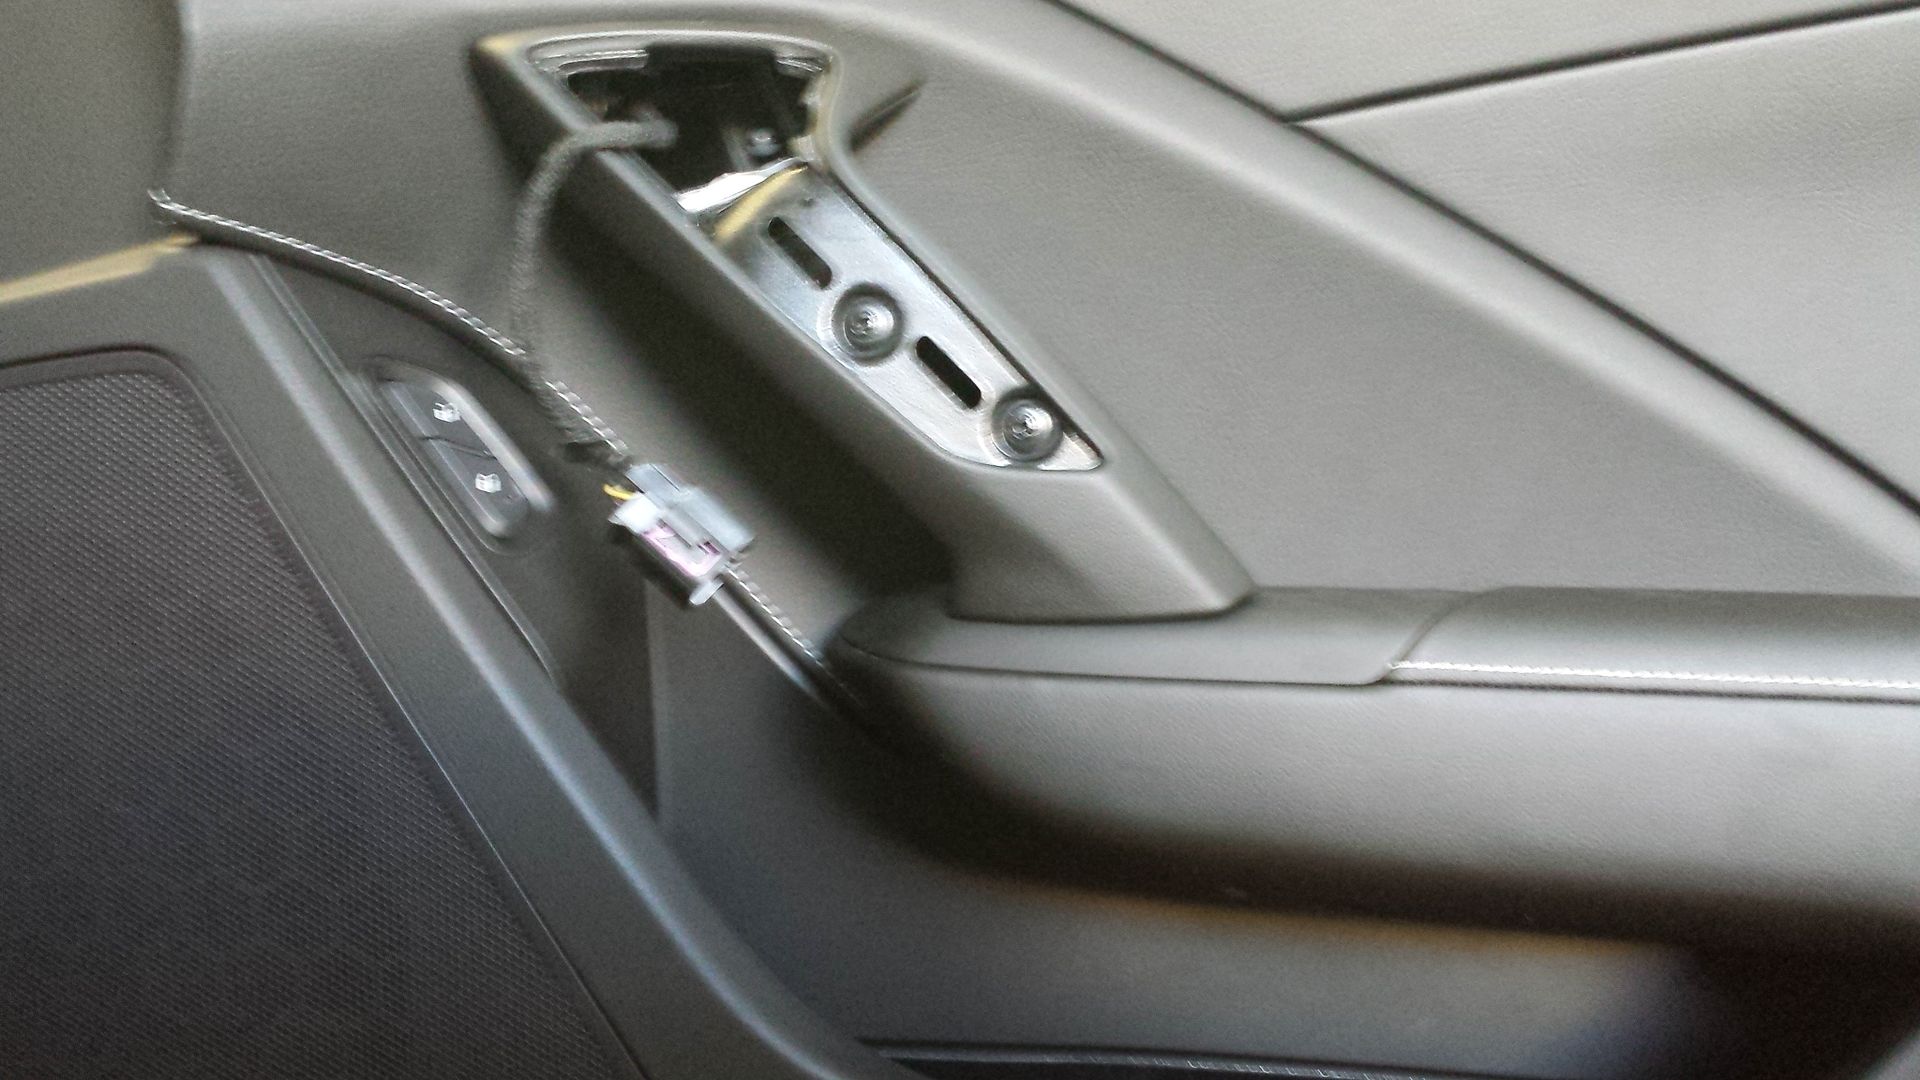
This is all that holds the door panel in via bolts. The rest is Push pins. On the bottom of the doors towards the rear T-30 bolt there is a small indention in the door use you fingers or pry tool to slide in and pry back the door panel. NOTE: Remember you're not doing it right unless it sounds like something is breaking.
Once you start to hear an almost cracking sound that is the sound of the push pins popping out. You'll need to go all around and pull out on the door panel to make sure that you have them all pulled out. Now the tricky part.
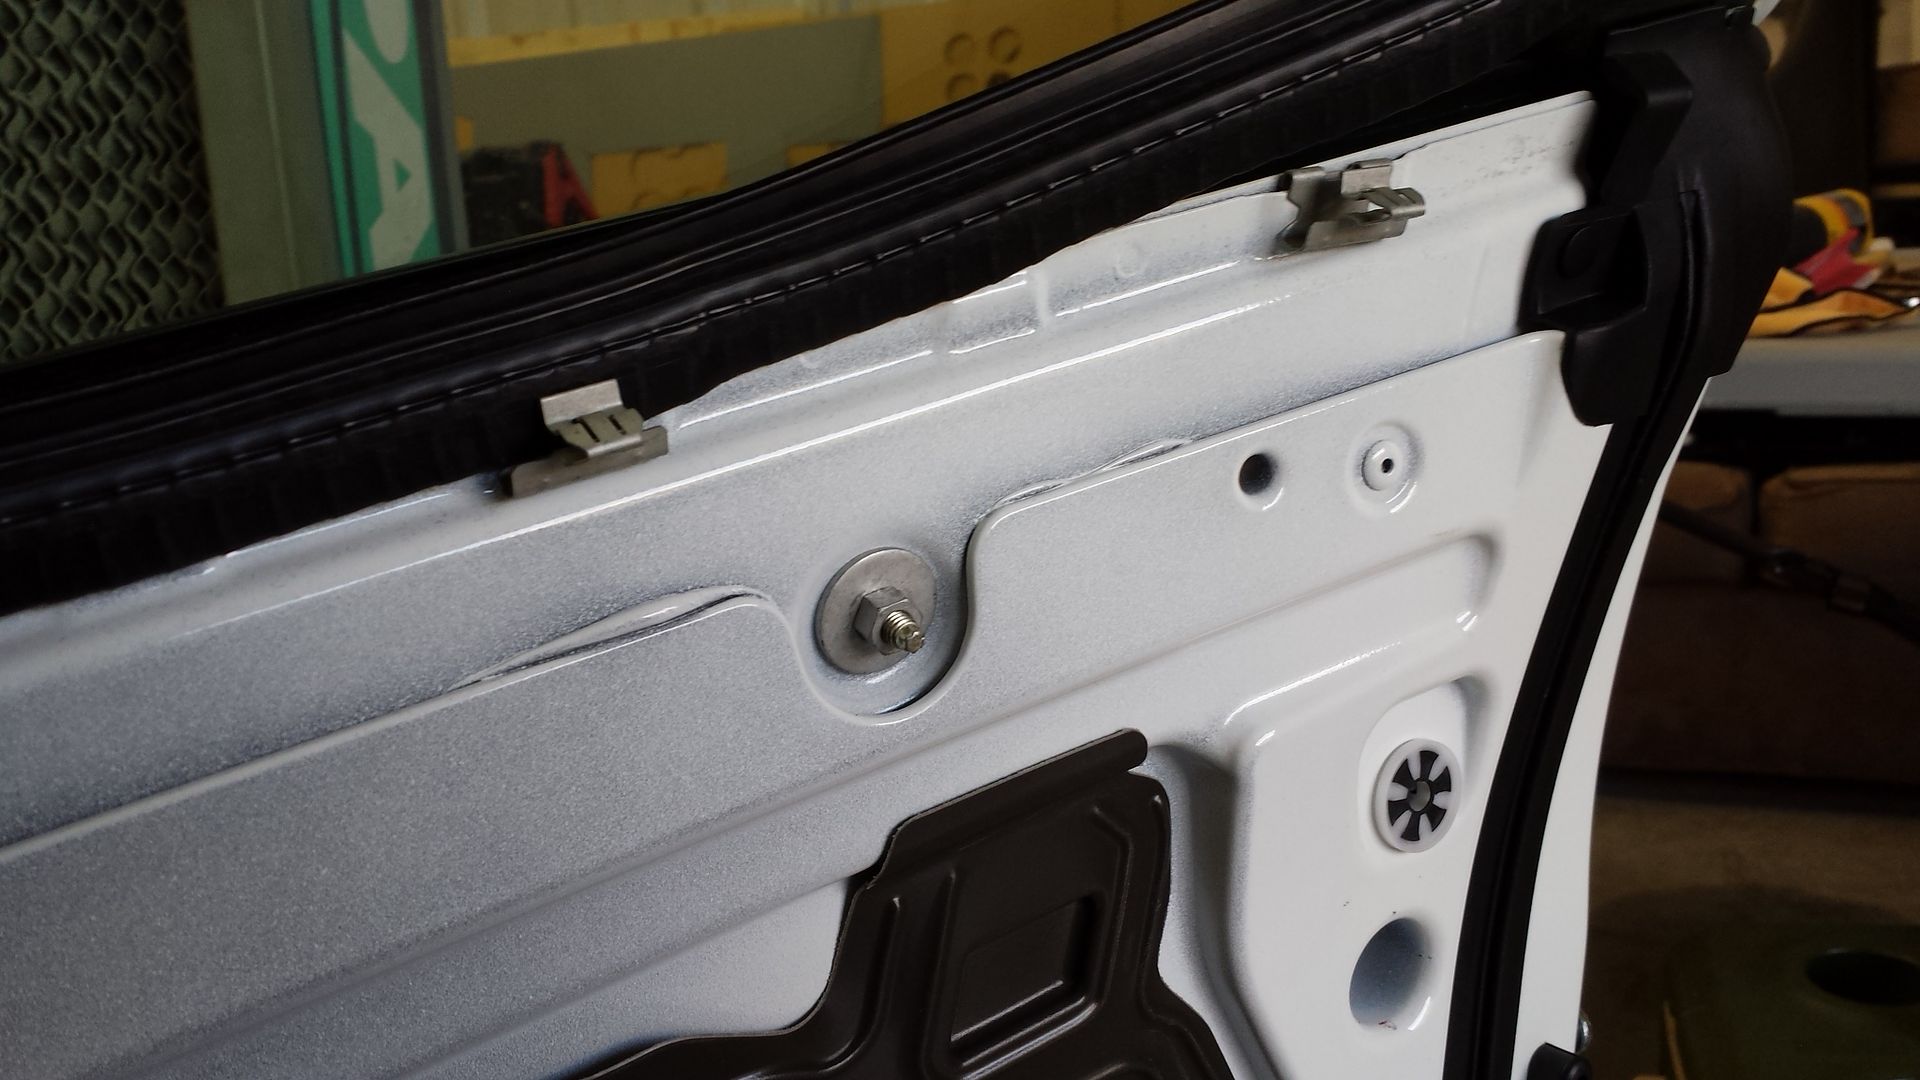
The new style door panels are slightly different at the tops than the c6. The c6 was a pain to slide into the crevis and was easy to screwup. These have push pins tied into the door and hold the weather stripping in place. (SEE PICTURE) Idealy you'll need to pull the door panel straight out but if you're having problems you can just pull up on it and reseat the push pins in there respective spots and slide the weather stripping back in place. (don't let this part frustrate you as there is always more than one way to skin a cat).
Now disconnect the harnesses holding connected to door and put the door some place nice so it doesn't get scratched up.
Now that we have the door panel off we'll need to remove the sub woofer speaker on the door. It is held in place by (4) 7mm bolts. Remove these bolts. The speaker has a bit of a glue compound on the back so you'll need to find something to pry it back a bit to break the seal. Disconnect the speaker from the Harness
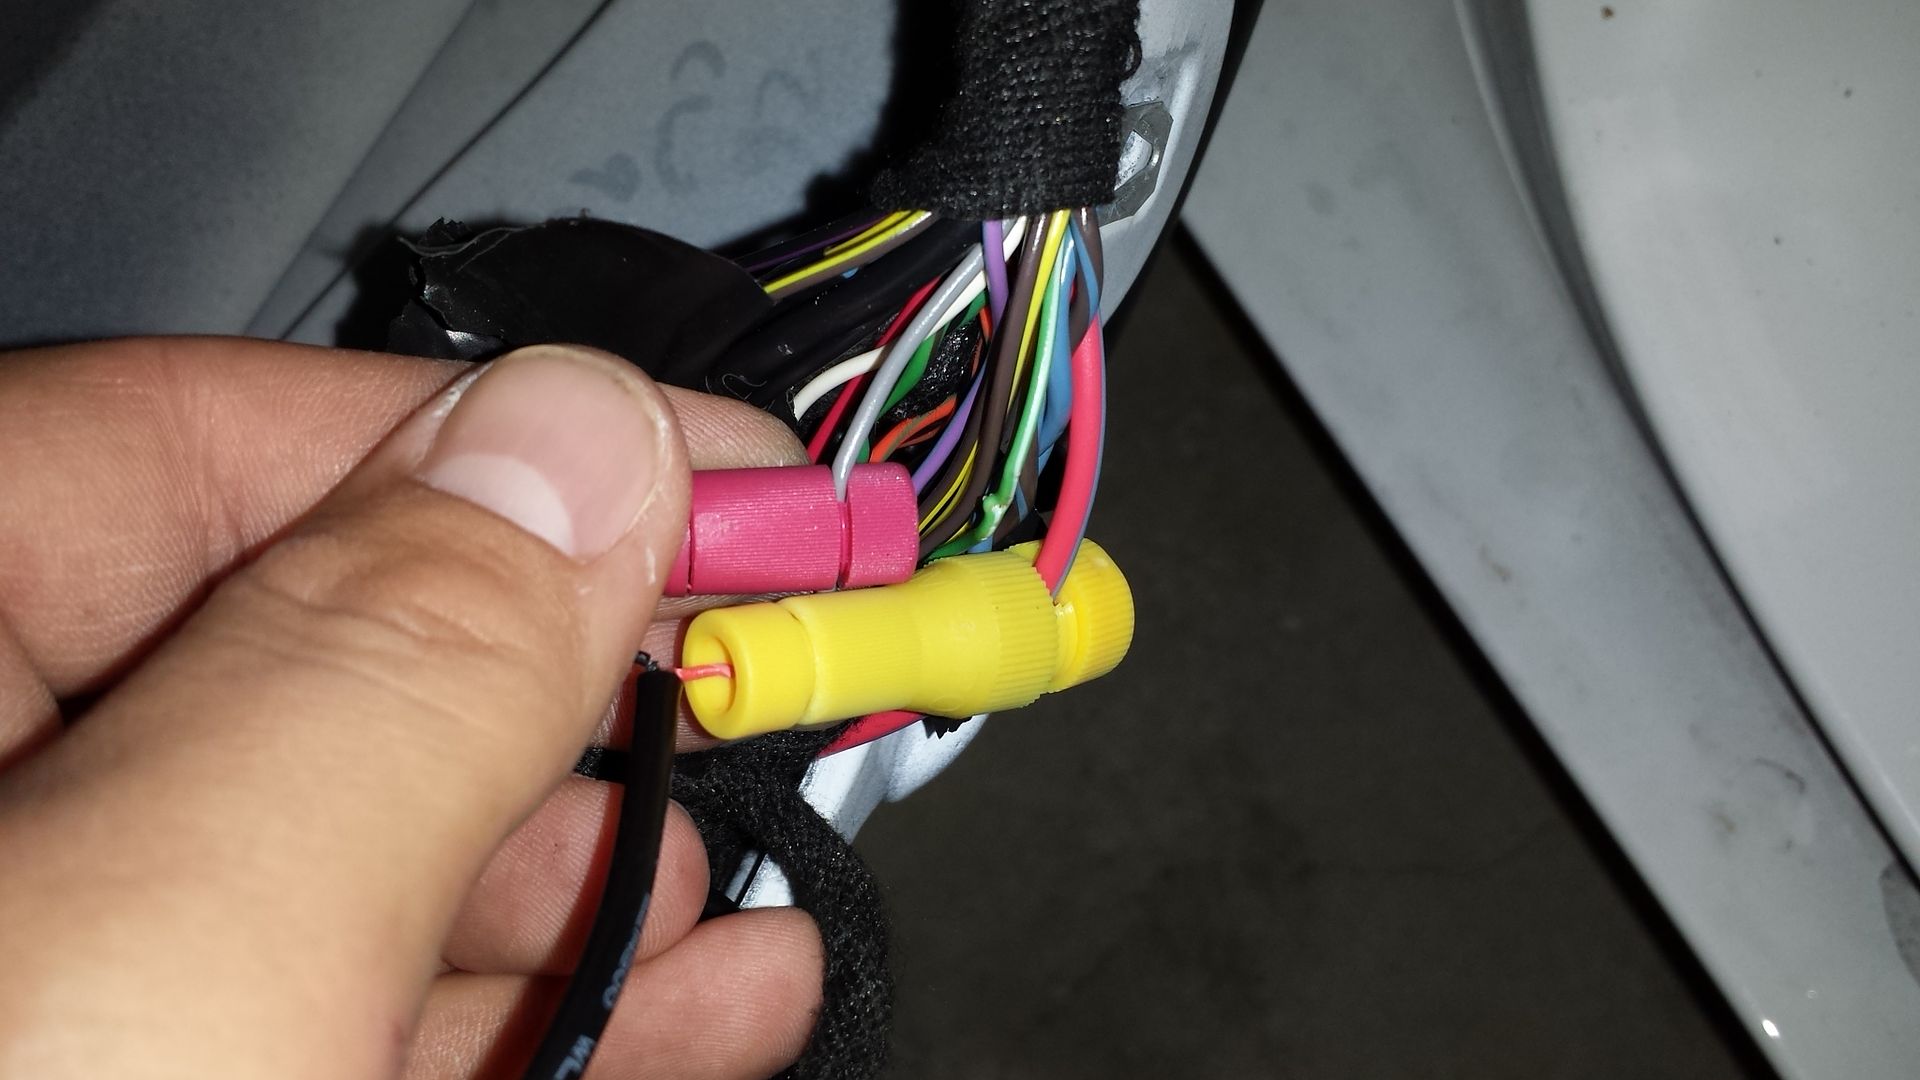
Behind the speaker you'll notice a taped bundle of wires. Use a razor knife and carefully cut a slit in the tape reveal the wires.
You'll be looking for a large Red and blue wire and a smaller grey wire. The Red and blue wire will be your Positive and smaller grey will be your ground aka Trigger wire.
Now you need to mount the image light in the door.
Look where the door moves up and down and you'll notice just towards the inside of the door (from under neath) there is a black grommet, this is where you'll need to drill your hole with the provided hole saw. (you can mount anywhere but this is where I found best.)
Once you have hole drilled mount the light in place and run wire to behind speaker and tap your power and ground (red wire goes to Red and blue) (black wire goes to grey wire)
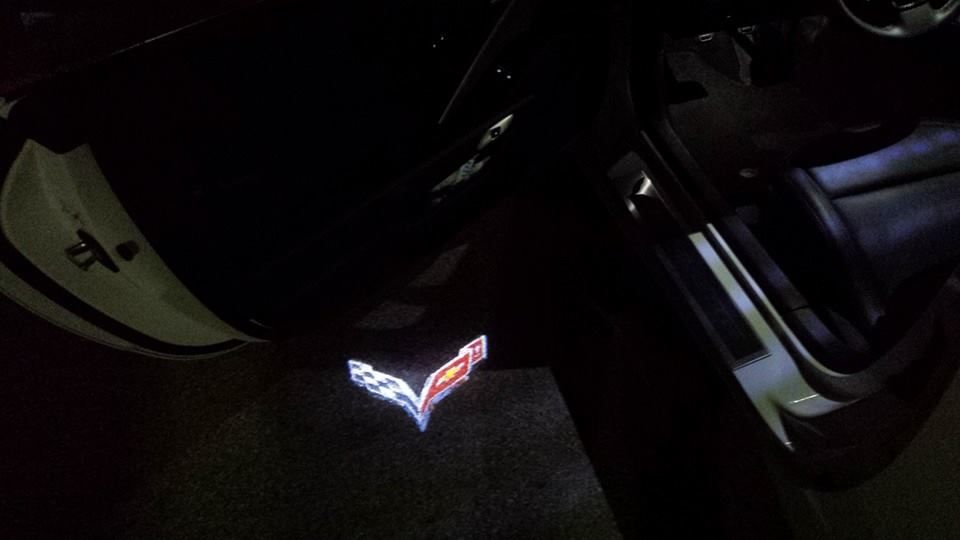
Lastly put everything back together and show it off and drink a beer (of your choice of course, but make sure its a good beer )
)
If you have questions feel free to contact us.
Andrew
TheDoubleAA.com
(832) 457 9253
http://thedoubleaa.com/cart/index.ph...roducts_id=201
Tools Needed:
T-30
7mm socket and ratchet
10mm socket and ratchet
wire taps
Good beer
To remove the door panels you'll need to remove the (2) T-30 screws on the bottom of the door. (see Picture)

Next you'll need to pry back the door button release (both doors) to reveal the 10MM bolt. Remove bolt.
On Drivers side there is a panel that hides the 10 MM bolt (pop it off and remove 10 MM bolt)
On passenger door the bolts are behind the door release button and underneath the door pull you can feel for a small hole. the hole hides the 10mm bolt


This is all that holds the door panel in via bolts. The rest is Push pins. On the bottom of the doors towards the rear T-30 bolt there is a small indention in the door use you fingers or pry tool to slide in and pry back the door panel. NOTE: Remember you're not doing it right unless it sounds like something is breaking.
Once you start to hear an almost cracking sound that is the sound of the push pins popping out. You'll need to go all around and pull out on the door panel to make sure that you have them all pulled out. Now the tricky part.
The new style door panels are slightly different at the tops than the c6. The c6 was a pain to slide into the crevis and was easy to screwup. These have push pins tied into the door and hold the weather stripping in place. (SEE PICTURE) Idealy you'll need to pull the door panel straight out but if you're having problems you can just pull up on it and reseat the push pins in there respective spots and slide the weather stripping back in place. (don't let this part frustrate you as there is always more than one way to skin a cat).

Now disconnect the harnesses holding connected to door and put the door some place nice so it doesn't get scratched up.
Now that we have the door panel off we'll need to remove the sub woofer speaker on the door. It is held in place by (4) 7mm bolts. Remove these bolts. The speaker has a bit of a glue compound on the back so you'll need to find something to pry it back a bit to break the seal. Disconnect the speaker from the Harness
Behind the speaker you'll notice a taped bundle of wires. Use a razor knife and carefully cut a slit in the tape reveal the wires.
You'll be looking for a large Red and blue wire and a smaller grey wire. The Red and blue wire will be your Positive and smaller grey will be your ground aka Trigger wire.

Now you need to mount the image light in the door.
Look where the door moves up and down and you'll notice just towards the inside of the door (from under neath) there is a black grommet, this is where you'll need to drill your hole with the provided hole saw. (you can mount anywhere but this is where I found best.)
Once you have hole drilled mount the light in place and run wire to behind speaker and tap your power and ground (red wire goes to Red and blue) (black wire goes to grey wire)
Lastly put everything back together and show it off and drink a beer (of your choice of course, but make sure its a good beer
)If you have questions feel free to contact us.
Andrew
TheDoubleAA.com
(832) 457 9253


Burning Brakes


Joined: Mar 2013
Posts: 814
Likes: 93
From: South Lousiana (Cajun Boys with Bad ASS Toys)
Installed my flag/corvette puddle lights yesterday. I have a problem, it works & looks great & we tighen the locking ring TIGHT, but after opening & closing the door the image wants to turn(phsyics of closing the door)....
Le Mans Master

Joined: Jul 2015
Posts: 6,223
Likes: 1,700
From: Northern California
St. Jude Donor '15
I don't understand why it would turn? The light is mounted inside the door with the wires run to that harness you tapped into right? Opening and closing the door shouldn't have any affect on the light at all.
Burning Brakes
Joined: Mar 2013
Posts: 814
Likes: 93
From: South Lousiana (Cajun Boys with Bad ASS Toys)
I hear ya, BUT , it does , image turns, it doesnt stay in spot as it was installed. Now im kind of bummed that i will have to re pull door panels once i figure out what i want to do
Thread Starter
Former Vendor
Joined: Jan 2009
Posts: 12,288
Likes: 23
From: League City Texas
Houston Events Coordinator
St. Jude Donor '11-'12, '14
I believe in the Beer Fairy
sorry for late response, once you actually tighten it, there should be screw that you tighten on it so it doesn't move as well.
Burning Brakes
Joined: Mar 2013
Posts: 814
Likes: 93
From: South Lousiana (Cajun Boys with Bad ASS Toys)
Problem was resolved, it was the part; it was a newer housing they swapped to. They took care of it & reverted back to there previous used housing. Once we re installed the part they sent me using the older housing, No more image turning troubles. And they been on for about 9 months now.

Racer
Joined: Feb 2017
Posts: 425
Likes: 36
NOTE: This is on a 1lt 2014 Corvette with parts ordered from TheDoubleAA.com see link below to order yours.
http://thedoubleaa.com/cart/index.ph...roducts_id=201
Tools Needed:
T-30
7mm socket and ratchet
10mm socket and ratchet
wire taps
Good beer
To remove the door panels you'll need to remove the (2) T-30 screws on the bottom of the door. (see Picture)
Next you'll need to pry back the door button release (both doors) to reveal the 10MM bolt. Remove bolt.
On Drivers side there is a panel that hides the 10 MM bolt (pop it off and remove 10 MM bolt)
On passenger door the bolts are behind the door release button and underneath the door pull you can feel for a small hole. the hole hides the 10mm bolt
This is all that holds the door panel in via bolts. The rest is Push pins. On the bottom of the doors towards the rear T-30 bolt there is a small indention in the door use you fingers or pry tool to slide in and pry back the door panel. NOTE: Remember you're not doing it right unless it sounds like something is breaking.
Once you start to hear an almost cracking sound that is the sound of the push pins popping out. You'll need to go all around and pull out on the door panel to make sure that you have them all pulled out. Now the tricky part.
The new style door panels are slightly different at the tops than the c6. The c6 was a pain to slide into the crevis and was easy to screwup. These have push pins tied into the door and hold the weather stripping in place. (SEE PICTURE) Idealy you'll need to pull the door panel straight out but if you're having problems you can just pull up on it and reseat the push pins in there respective spots and slide the weather stripping back in place. (don't let this part frustrate you as there is always more than one way to skin a cat).
Now disconnect the harnesses holding connected to door and put the door some place nice so it doesn't get scratched up.
Now that we have the door panel off we'll need to remove the sub woofer speaker on the door. It is held in place by (4) 7mm bolts. Remove these bolts. The speaker has a bit of a glue compound on the back so you'll need to find something to pry it back a bit to break the seal. Disconnect the speaker from the Harness
Behind the speaker you'll notice a taped bundle of wires. Use a razor knife and carefully cut a slit in the tape reveal the wires.
You'll be looking for a large Red and blue wire and a smaller grey wire. The Red and blue wire will be your Positive and smaller grey will be your ground aka Trigger wire.
Now you need to mount the image light in the door.
Look where the door moves up and down and you'll notice just towards the inside of the door (from under neath) there is a black grommet, this is where you'll need to drill your hole with the provided hole saw. (you can mount anywhere but this is where I found best.)
Once you have hole drilled mount the light in place and run wire to behind speaker and tap your power and ground (red wire goes to Red and blue) (black wire goes to grey wire)
Lastly put everything back together and show it off and drink a beer (of your choice of course, but make sure its a good beer)
If you have questions feel free to contact us.
Andrew
TheDoubleAA.com
(832) 457 9253
http://thedoubleaa.com/cart/index.ph...roducts_id=201
Tools Needed:
T-30
7mm socket and ratchet
10mm socket and ratchet
wire taps
Good beer
To remove the door panels you'll need to remove the (2) T-30 screws on the bottom of the door. (see Picture)
Next you'll need to pry back the door button release (both doors) to reveal the 10MM bolt. Remove bolt.
On Drivers side there is a panel that hides the 10 MM bolt (pop it off and remove 10 MM bolt)
On passenger door the bolts are behind the door release button and underneath the door pull you can feel for a small hole. the hole hides the 10mm bolt
This is all that holds the door panel in via bolts. The rest is Push pins. On the bottom of the doors towards the rear T-30 bolt there is a small indention in the door use you fingers or pry tool to slide in and pry back the door panel. NOTE: Remember you're not doing it right unless it sounds like something is breaking.
Once you start to hear an almost cracking sound that is the sound of the push pins popping out. You'll need to go all around and pull out on the door panel to make sure that you have them all pulled out. Now the tricky part.
The new style door panels are slightly different at the tops than the c6. The c6 was a pain to slide into the crevis and was easy to screwup. These have push pins tied into the door and hold the weather stripping in place. (SEE PICTURE) Idealy you'll need to pull the door panel straight out but if you're having problems you can just pull up on it and reseat the push pins in there respective spots and slide the weather stripping back in place. (don't let this part frustrate you as there is always more than one way to skin a cat).
Now disconnect the harnesses holding connected to door and put the door some place nice so it doesn't get scratched up.
Now that we have the door panel off we'll need to remove the sub woofer speaker on the door. It is held in place by (4) 7mm bolts. Remove these bolts. The speaker has a bit of a glue compound on the back so you'll need to find something to pry it back a bit to break the seal. Disconnect the speaker from the Harness
Behind the speaker you'll notice a taped bundle of wires. Use a razor knife and carefully cut a slit in the tape reveal the wires.
You'll be looking for a large Red and blue wire and a smaller grey wire. The Red and blue wire will be your Positive and smaller grey will be your ground aka Trigger wire.
Now you need to mount the image light in the door.
Look where the door moves up and down and you'll notice just towards the inside of the door (from under neath) there is a black grommet, this is where you'll need to drill your hole with the provided hole saw. (you can mount anywhere but this is where I found best.)
Once you have hole drilled mount the light in place and run wire to behind speaker and tap your power and ground (red wire goes to Red and blue) (black wire goes to grey wire)
Lastly put everything back together and show it off and drink a beer (of your choice of course, but make sure its a good beer
)If you have questions feel free to contact us.
Andrew
TheDoubleAA.com
(832) 457 9253
I cannot find the 10mm bolt under the door push button
Corvette Stories
The Best of Corvette for Corvette Enthusiasts

10 Reasons the C6 Z06 is Still A Performance Benchmark After 20 Years
Joe Kucinski
How Much Horsepower Every Corvette Engine "LOST" in 1972
Joe Kucinski
Top 10 DOs and DON'Ts for Protecting Your Convertible Top!
Michael S. Palmer
Top 10 Most Explosive Corvettes Ever Made: Power-to-Weight Ratio Ranked!
Joe Kucinski
150 hp to 1,250 hp: Every Corvette Generation Compared by the Specs That Matter
Joe Kucinski
8 Coolest Corvette Pace Cars (and Replicas) of All Time
Verdad Gallardo
Top 10 Corvette Engines RANKED by Peak Torque (70+ Years of Muscle!)
Joe Kucinski
Corvette ZR1X Will Be Pacing the Indy 500, And Could Probably Race, Too!
Verdad Gallardo
Top 10 Corvettes Coming to Mecum Indy 2026!
Brett Foote
Thread Starter
Former Vendor
Joined: Jan 2009
Posts: 12,288
Likes: 23
From: League City Texas
Houston Events Coordinator
St. Jude Donor '11-'12, '14
I believe in the Beer Fairy

Melting Slicks

Joined: Sep 2016
Posts: 3,076
Likes: 1,204
From: Northville Michigan
C7 of the Year - Unmodified Finalist 2021
So how do you get additional film images and what is the cost if i bought this and wanted one additional set of images? Also, would you need to remove the panels each time you want to swap out images? Lastly, how long is this DIY job?
Thread Starter
Former Vendor
Joined: Jan 2009
Posts: 12,288
Likes: 23
From: League City Texas
Houston Events Coordinator
St. Jude Donor '11-'12, '14
I believe in the Beer Fairy
when you order just ask for what films you want. and yes you'd need to remove panels each time to get to the slot to change out films.
Thread Starter
Former Vendor
Joined: Jan 2009
Posts: 12,288
Likes: 23
From: League City Texas
Houston Events Coordinator
St. Jude Donor '11-'12, '14
I believe in the Beer Fairy
His email is AndersonEtching@gmail.com and number is 2817015007 Andy

Safety Car


Joined: Sep 2000
Posts: 4,015
Likes: 12
From: Bellmore New York New york
St. Jude Donor '07-'08-'09-'17
I don't get much time off so father runs everything for me now.
His email is AndersonEtching@gmail.com and number is 2817015007 Andy
His email is AndersonEtching@gmail.com and number is 2817015007 Andy



Instructor
Joined: Dec 2001
Posts: 218
Likes: 1
From: Columbia SC
NOTE: This is on a 1lt 2014 Corvette with parts ordered from TheDoubleAA.com see link below to order yours.
http://thedoubleaa.com/cart/index.ph...roducts_id=201
Tools Needed:
T-30
7mm socket and ratchet
10mm socket and ratchet
wire taps
Good beer
To remove the door panels you'll need to remove the (2) T-30 screws on the bottom of the door. (see Picture)
Next you'll need to pry back the door button release (both doors) to reveal the 10MM bolt. Remove bolt.
On Drivers side there is a panel that hides the 10 MM bolt (pop it off and remove 10 MM bolt)
On passenger door the bolts are behind the door release button and underneath the door pull you can feel for a small hole. the hole hides the 10mm bolt
This is all that holds the door panel in via bolts. The rest is Push pins. On the bottom of the doors towards the rear T-30 bolt there is a small indention in the door use you fingers or pry tool to slide in and pry back the door panel. NOTE: Remember you're not doing it right unless it sounds like something is breaking.
Once you start to hear an almost cracking sound that is the sound of the push pins popping out. You'll need to go all around and pull out on the door panel to make sure that you have them all pulled out. Now the tricky part.
The new style door panels are slightly different at the tops than the c6. The c6 was a pain to slide into the crevis and was easy to screwup. These have push pins tied into the door and hold the weather stripping in place. (SEE PICTURE) Idealy you'll need to pull the door panel straight out but if you're having problems you can just pull up on it and reseat the push pins in there respective spots and slide the weather stripping back in place. (don't let this part frustrate you as there is always more than one way to skin a cat).
Now disconnect the harnesses holding connected to door and put the door some place nice so it doesn't get scratched up.
Now that we have the door panel off we'll need to remove the sub woofer speaker on the door. It is held in place by (4) 7mm bolts. Remove these bolts. The speaker has a bit of a glue compound on the back so you'll need to find something to pry it back a bit to break the seal. Disconnect the speaker from the Harness
Behind the speaker you'll notice a taped bundle of wires. Use a razor knife and carefully cut a slit in the tape reveal the wires.
You'll be looking for a large Red and blue wire and a smaller grey wire. The Red and blue wire will be your Positive and smaller grey will be your ground aka Trigger wire.
Now you need to mount the image light in the door.
Look where the door moves up and down and you'll notice just towards the inside of the door (from under neath) there is a black grommet, this is where you'll need to drill your hole with the provided hole saw. (you can mount anywhere but this is where I found best.)
Once you have hole drilled mount the light in place and run wire to behind speaker and tap your power and ground (red wire goes to Red and blue) (black wire goes to grey wire)
Lastly put everything back together and show it off and drink a beer (of your choice of course, but make sure its a good beer)
If you have questions feel free to contact us.
Andrew
TheDoubleAA.com
(832) 457 9253
http://thedoubleaa.com/cart/index.ph...roducts_id=201
Tools Needed:
T-30
7mm socket and ratchet
10mm socket and ratchet
wire taps
Good beer
To remove the door panels you'll need to remove the (2) T-30 screws on the bottom of the door. (see Picture)
Next you'll need to pry back the door button release (both doors) to reveal the 10MM bolt. Remove bolt.
On Drivers side there is a panel that hides the 10 MM bolt (pop it off and remove 10 MM bolt)
On passenger door the bolts are behind the door release button and underneath the door pull you can feel for a small hole. the hole hides the 10mm bolt
This is all that holds the door panel in via bolts. The rest is Push pins. On the bottom of the doors towards the rear T-30 bolt there is a small indention in the door use you fingers or pry tool to slide in and pry back the door panel. NOTE: Remember you're not doing it right unless it sounds like something is breaking.
Once you start to hear an almost cracking sound that is the sound of the push pins popping out. You'll need to go all around and pull out on the door panel to make sure that you have them all pulled out. Now the tricky part.
The new style door panels are slightly different at the tops than the c6. The c6 was a pain to slide into the crevis and was easy to screwup. These have push pins tied into the door and hold the weather stripping in place. (SEE PICTURE) Idealy you'll need to pull the door panel straight out but if you're having problems you can just pull up on it and reseat the push pins in there respective spots and slide the weather stripping back in place. (don't let this part frustrate you as there is always more than one way to skin a cat).
Now disconnect the harnesses holding connected to door and put the door some place nice so it doesn't get scratched up.
Now that we have the door panel off we'll need to remove the sub woofer speaker on the door. It is held in place by (4) 7mm bolts. Remove these bolts. The speaker has a bit of a glue compound on the back so you'll need to find something to pry it back a bit to break the seal. Disconnect the speaker from the Harness
Behind the speaker you'll notice a taped bundle of wires. Use a razor knife and carefully cut a slit in the tape reveal the wires.
You'll be looking for a large Red and blue wire and a smaller grey wire. The Red and blue wire will be your Positive and smaller grey will be your ground aka Trigger wire.
Now you need to mount the image light in the door.
Look where the door moves up and down and you'll notice just towards the inside of the door (from under neath) there is a black grommet, this is where you'll need to drill your hole with the provided hole saw. (you can mount anywhere but this is where I found best.)
Once you have hole drilled mount the light in place and run wire to behind speaker and tap your power and ground (red wire goes to Red and blue) (black wire goes to grey wire)
Lastly put everything back together and show it off and drink a beer (of your choice of course, but make sure its a good beer
)If you have questions feel free to contact us.
Andrew
TheDoubleAA.com
(832) 457 9253

Racer

Joined: Jan 2011
Posts: 374
Likes: 63
From: Cypress TX
Melting Slicks
Joined: Sep 2016
Posts: 3,076
Likes: 1,204
From: Northville Michigan
C7 of the Year - Unmodified Finalist 2021
I think that this company is no longer in business. The website no longer exist.... Www.TheDoubleAA.com