
quick swirl cutting question


Thread Starter
Pro


Joined: Aug 2001
Posts: 627
Likes: 0
From: MD
I recently heard about Junkman's videos and after watching the process, realized that I haven't been detailing my cars quite right for the last few years :o
I tried his "slow cut" technique and it worked fairly well in most places. It *did* get rid of the circular swirl marks that are so common on cars. However, there are still a number of random swirl marks in the paint.
My question is, how aggressive should I be as I continue to apply coats of swirl cutter? It seems like using my PC on a setting of 4 or 5 with light to medium pressure is a pretty safe and effective way, is this what you guys would do until more of the marks are gone?
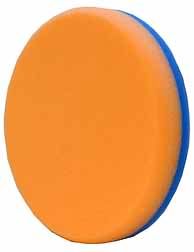
By the way, I'm using a Tropi-care (showroomfx) orange pad with Meguiars Cleaner Wax.
Thanks
I tried his "slow cut" technique and it worked fairly well in most places. It *did* get rid of the circular swirl marks that are so common on cars. However, there are still a number of random swirl marks in the paint.
My question is, how aggressive should I be as I continue to apply coats of swirl cutter? It seems like using my PC on a setting of 4 or 5 with light to medium pressure is a pretty safe and effective way, is this what you guys would do until more of the marks are gone?
By the way, I'm using a Tropi-care (showroomfx) orange pad with Meguiars Cleaner Wax.
Thanks
Former Vendor
Joined: Apr 2005
Posts: 14,104
Likes: 244
From: South Florida
A cleaner wax is more of an AIO type product. For best results, you should move to a dedicated polish (Menz SIP and Nano / Megs 105 and 205) and once done a pure sealant or wax to protect. Consider it specializing in each area of detailing.
I have seen PC's and other Random Orbitals do some correction work, and then need some care and patience. Alot of time, some pressure (not enough to stop natural movt of buffer), and highest speeds on PC and PC-XP specifically. As with any polishing you should use the least abrasive pad and least abrasive polish and only go more aggressive as needed. Finding good washing and drying techniques will help too, as you wont need to keep correcting those paint defects.
You will find more and more detailers now using paint measuring devices to measure the amount of clearcoat and paint available.
http://www.autogeek.net/detailingtips.html
If we can help, please consider calling or ordering online. We even offer a forum discount on most items by simply typing CORVETTEFORUM into couponcode during checkout.
Thread Starter
Pro
Joined: Aug 2001
Posts: 627
Likes: 0
From: MD
Thanks.. I'll pick up a bottle.
One thing that really frustrates me about this whole process (care care).. there are THOUSANDS of slightly different products, all with different names but claim to do very similar things. Meguiars is one of the worst at it.. I can't tell all their different product lines apart for the life of me
But yea, thanks.. I'll keep trying.

Former Vendor
Joined: Nov 2009
Posts: 1,167
Likes: 0
From: Tampa Bay Florida
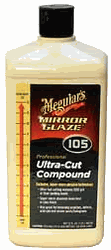
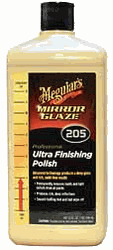
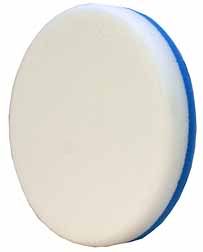
When it comes to using polishes such as Meguiar�s M105 Ultra Cut Compound and Meguiar�s M205 Ultra Finishing Polish, regardless of the machine you choose to use, ProperAutoCare.com recommends starting with the least aggressive method possible. This would be Meguiar's M205 with either a Lake Country Flat 6.5 inch Black Finessing Pad or Meguiar's Soft Buff 2.0 Black Finishing Pad.
If this combination does not provide the results necessary, increase the aggressiveness of the technique (longer working time, more pressure, more power) or increase the cut of the product and switch to a medium polishing pad. The next step up would be Meguiar�s M205 Ultra Finishing Polish used with a Lake Country Flat 6.5 inch White Polishing Pad or Meguiar's Soft Buff 2.0 Yellow Polishing Pad.
If this combination does not provide the desired results, increase the aggressiveness of the technique or product selection. The next step would be Meguiar's M105 Ultra Cut Compound on a Lake Country Flat 6.5 inch White Polishing Pad or Meguiar's Soft Buff 2.0 Yellow Polishing Pad. Note that polishing with M105 will often require a second, follow-up polishing step with M205 to achieve the highest gloss and clearest, swirl free finish. Never mix polishes on the same pad. Switch to a clean, fresh pad included in the kit. If this combination is still not garnering the results you are looking for, increase the aggressiveness of the technique or the product.
Meguiar's M105 Ultra Cut Compound used with a Lake Country Flat 6.5 inch Orange Power Pad or Meguiar's Soft Buff 2.0 Burgundy Cutting Pad is an aggressive combination and is capable of �leveling out� most paint defects in one or two applications. If using Meguiar�s M105 Ultra Cut Compound is necessary, follow up with Meguiar�s M205 Ultra Finishing Polish to remove any light polishing haze and restore full clarity and a swirl free finish to the paint. Always test your combination on a test spot, and inspect in good lighting before proceeding to copy that combination over the entire vehicle.
Least to most aggressive:
M205 used with a �Finishing Pad�: Will remove very light defects and result in a high gloss, swirl free finish.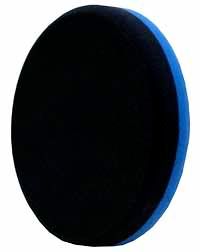
M205 used with a �Polishing Pad�: Will remove moderate to light defects and compounding marks, and results in a high gloss, swirl free finish on most paints.
M105 used with a �Polishing Pad�: Will remove moderate to heavy defects and will often require follow up polishing with M205.
M105 used with a �Power� or �Cutting Pad�: Will remove moderate to heavy defects on most paints and will often require follow up polishing with M205.
Pad Priming: The new micro non-diminishing abrasives from Meguiar's require that the pores of the pad are evenly primed with product for fastest cutting and highest gloss. It is recommended to "prime" a fresh, dry pad one of three ways:
The Kevin Brown Method (KBM): Apply a liberal amount of polish on the surface of the pad and massage the product into the pores with your fingers until the surface is covered in a fine film of polish. Remove excess polish from the pad, so that it feels slightly damp, by lightly pressing a cotton terry or microfiber cloth against the pad while it spins.
Meguiar's M34: Meguiar's recommends misting the dry pad with M34 Final Inspection, then drawing two lines of product, in an X fashion, across the diameter of the pad. M34 will help the polish spread across the pad during the initial polishing application.
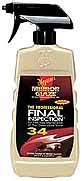
Hybrid: ProperAutoCare.com recommends using a hybrid pad priming system to save on material costs and increase ease of use. Mist the dry pad with M34 Final Inspection then draw an X across the pad. Quickly massage the polishing with your fingers into the pad and cover as much surface as possible.
Regardless of the priming method you choose, once the pad has been primed, apply a small amount of polish to the pad between sections. Three �dime sized� amounts, applied to the outer 1/3 of the pad are sufficient.
Polish one small section at a time, two feet by two feet, per application. Start by placing the pad on the paint and spreading the polish out, then turn the polisher on. Using firm pressure and overlapping left to right, right to left strokes cover the area to be polished.
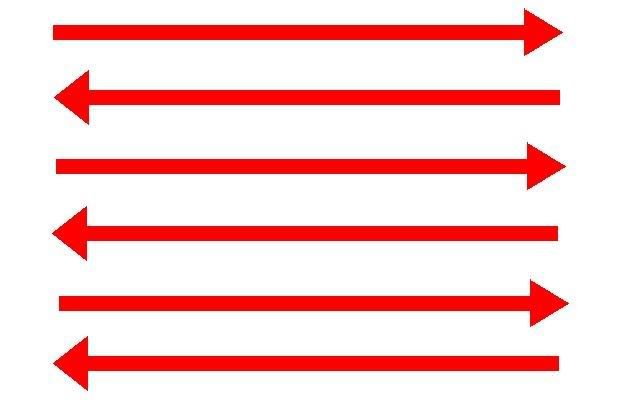
Polish first going left to right.
Make a second pass over the working area using overlapping �up to down, down to up� strokes. M105 and M205 do not require a typical �buffing cycle� to break down the abrasives. Repeat this cross hatch pattern until the defects are removed or the polish begins to dry. Then reduce pressure and make a few more passes over the area to ensure a high gloss finish.
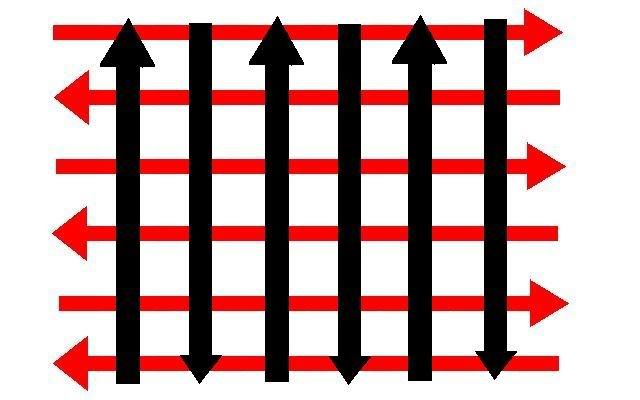
Create cross-hatch pattern going up & down.
Machine speed has much to do with your confidence level as you learn to use these polishes. We recommend using speed 5 on the PC 7424 or Meguiar�s G-110 and a speed of 3.5-4 on the Flex XC3401VRG Dual-Action Polisher. Overlap your strokes, using a �slow arm speed� while applying firm pressure. We have found success moving the polisher one to three inches per second allows the polish to correct most blemishes.
The amount of �work� or �cut� accomplished with a non-diminishing abrasive is dependent on the pressure applied to the polisher. For maximum cutting action with the Flex XC3401VRG Dual-Action Polisher, apply 15-20 pounds of pressure on the face of the machine. When using the Porter Cable 7424 or Meguiar�s G110 random orbital polishers, use enough pressure to slow, but not stall the rotation of the pad. On your final passes over the work area, reduce the pressure and lightly move the machine over the surface to allow the abrasives to jewel away any micro marring left from your polishing.
After polishing a section, remove residue immediately with a high quality microfiber cloth such as our Dragon Fiber Perfect Shine Buffing Cloth.
Because Meguiar's M105 Ultra Cut Compound and Meguiar's M205 Ultra Finishing Polishes' abrasives do not breakdown in the traditional sense, the polishes can be sensitive to contamination. During the polishing process, a trace amount of paint is removed, this can cause the non-diminishing abrasives to �clump� together with the spent paint particles. This can increase the polishing haze left on the paint from heavy polishing, effecting the finish left behind.
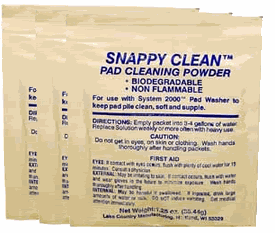
ProperAutoCare.com recommends cleaning your pads often by pressing a cotton terry or microfiber cloth against the pad while it spins on the machine. To completely wash the pads use Snappy Clean Pad Cleaning Powder.
Angelo
www.ProperAutoCare.com
Always Toll Free 800-628-7596
If this combination does not provide the results necessary, increase the aggressiveness of the technique (longer working time, more pressure, more power) or increase the cut of the product and switch to a medium polishing pad. The next step up would be Meguiar�s M205 Ultra Finishing Polish used with a Lake Country Flat 6.5 inch White Polishing Pad or Meguiar's Soft Buff 2.0 Yellow Polishing Pad.
If this combination does not provide the desired results, increase the aggressiveness of the technique or product selection. The next step would be Meguiar's M105 Ultra Cut Compound on a Lake Country Flat 6.5 inch White Polishing Pad or Meguiar's Soft Buff 2.0 Yellow Polishing Pad. Note that polishing with M105 will often require a second, follow-up polishing step with M205 to achieve the highest gloss and clearest, swirl free finish. Never mix polishes on the same pad. Switch to a clean, fresh pad included in the kit. If this combination is still not garnering the results you are looking for, increase the aggressiveness of the technique or the product.
Meguiar's M105 Ultra Cut Compound used with a Lake Country Flat 6.5 inch Orange Power Pad or Meguiar's Soft Buff 2.0 Burgundy Cutting Pad is an aggressive combination and is capable of �leveling out� most paint defects in one or two applications. If using Meguiar�s M105 Ultra Cut Compound is necessary, follow up with Meguiar�s M205 Ultra Finishing Polish to remove any light polishing haze and restore full clarity and a swirl free finish to the paint. Always test your combination on a test spot, and inspect in good lighting before proceeding to copy that combination over the entire vehicle.
Least to most aggressive:
M205 used with a �Finishing Pad�: Will remove very light defects and result in a high gloss, swirl free finish.
M205 used with a �Polishing Pad�: Will remove moderate to light defects and compounding marks, and results in a high gloss, swirl free finish on most paints.
M105 used with a �Polishing Pad�: Will remove moderate to heavy defects and will often require follow up polishing with M205.
M105 used with a �Power� or �Cutting Pad�: Will remove moderate to heavy defects on most paints and will often require follow up polishing with M205.
Pad Priming: The new micro non-diminishing abrasives from Meguiar's require that the pores of the pad are evenly primed with product for fastest cutting and highest gloss. It is recommended to "prime" a fresh, dry pad one of three ways:
The Kevin Brown Method (KBM): Apply a liberal amount of polish on the surface of the pad and massage the product into the pores with your fingers until the surface is covered in a fine film of polish. Remove excess polish from the pad, so that it feels slightly damp, by lightly pressing a cotton terry or microfiber cloth against the pad while it spins.
Meguiar's M34: Meguiar's recommends misting the dry pad with M34 Final Inspection, then drawing two lines of product, in an X fashion, across the diameter of the pad. M34 will help the polish spread across the pad during the initial polishing application.
Hybrid: ProperAutoCare.com recommends using a hybrid pad priming system to save on material costs and increase ease of use. Mist the dry pad with M34 Final Inspection then draw an X across the pad. Quickly massage the polishing with your fingers into the pad and cover as much surface as possible.
Regardless of the priming method you choose, once the pad has been primed, apply a small amount of polish to the pad between sections. Three �dime sized� amounts, applied to the outer 1/3 of the pad are sufficient.
Polish one small section at a time, two feet by two feet, per application. Start by placing the pad on the paint and spreading the polish out, then turn the polisher on. Using firm pressure and overlapping left to right, right to left strokes cover the area to be polished.
Polish first going left to right.
Make a second pass over the working area using overlapping �up to down, down to up� strokes. M105 and M205 do not require a typical �buffing cycle� to break down the abrasives. Repeat this cross hatch pattern until the defects are removed or the polish begins to dry. Then reduce pressure and make a few more passes over the area to ensure a high gloss finish.
Create cross-hatch pattern going up & down.
Machine speed has much to do with your confidence level as you learn to use these polishes. We recommend using speed 5 on the PC 7424 or Meguiar�s G-110 and a speed of 3.5-4 on the Flex XC3401VRG Dual-Action Polisher. Overlap your strokes, using a �slow arm speed� while applying firm pressure. We have found success moving the polisher one to three inches per second allows the polish to correct most blemishes.
The amount of �work� or �cut� accomplished with a non-diminishing abrasive is dependent on the pressure applied to the polisher. For maximum cutting action with the Flex XC3401VRG Dual-Action Polisher, apply 15-20 pounds of pressure on the face of the machine. When using the Porter Cable 7424 or Meguiar�s G110 random orbital polishers, use enough pressure to slow, but not stall the rotation of the pad. On your final passes over the work area, reduce the pressure and lightly move the machine over the surface to allow the abrasives to jewel away any micro marring left from your polishing.
After polishing a section, remove residue immediately with a high quality microfiber cloth such as our Dragon Fiber Perfect Shine Buffing Cloth.
Because Meguiar's M105 Ultra Cut Compound and Meguiar's M205 Ultra Finishing Polishes' abrasives do not breakdown in the traditional sense, the polishes can be sensitive to contamination. During the polishing process, a trace amount of paint is removed, this can cause the non-diminishing abrasives to �clump� together with the spent paint particles. This can increase the polishing haze left on the paint from heavy polishing, effecting the finish left behind.
ProperAutoCare.com recommends cleaning your pads often by pressing a cotton terry or microfiber cloth against the pad while it spins on the machine. To completely wash the pads use Snappy Clean Pad Cleaning Powder.
Angelo
www.ProperAutoCare.com
Always Toll Free 800-628-7596
Melting Slicks

Joined: Jan 2004
Posts: 2,909
Likes: 4
From: Ponte Vedra Beach / London State: Dazed and confused
[My question is, how aggressive should I be as I continue to apply coats of swirl cutter? It seems like using my PC on a setting of 4 or 5 with light to medium pressure is a pretty safe and effective way, is this what you guys would do until more of the marks are gone?
By the way, I'm using a Tropi-care (showroomfx) orange pad with Meguiars Cleaner Wax.]
Meguiars Cleaner Wax 2/12 (Abrasive rating)
Meguiars 105 12/12 (Abrasive rating)
Most polishes for swirl removal are a 7-8 /12 (Abrasive rating)
By the way, I'm using a Tropi-care (showroomfx) orange pad with Meguiars Cleaner Wax.]
Meguiars Cleaner Wax 2/12 (Abrasive rating)
Meguiars 105 12/12 (Abrasive rating)
Most polishes for swirl removal are a 7-8 /12 (Abrasive rating)
Le Mans Master


Joined: Jan 2005
Posts: 5,479
Likes: 13
From: Dallas/Grand Prairie Texas
I agree, use a more aggressive polish and try turning up the speed to like 6 on a DA machine.
If you're getting results with a cleaner wax, more then likely you're just covering up the swirls and not actually removing them.
Josh
If you're getting results with a cleaner wax, more then likely you're just covering up the swirls and not actually removing them.
Josh
Former Vendor
Joined: Apr 2005
Posts: 14,104
Likes: 244
From: South Florida
Thanks.. I'll pick up a bottle.
One thing that really frustrates me about this whole process (care care).. there are THOUSANDS of slightly different products, all with different names but claim to do very similar things. Meguiars is one of the worst at it.. I can't tell all their different product lines apart for the life of me
But yea, thanks.. I'll keep trying.
One thing that really frustrates me about this whole process (care care).. there are THOUSANDS of slightly different products, all with different names but claim to do very similar things. Meguiars is one of the worst at it.. I can't tell all their different product lines apart for the life of me
But yea, thanks.. I'll keep trying.


