


Learning to Compose, Part One


Thread Starter
Parrothead


Joined: May 2002
Posts: 48,231
Likes: 289
From: Margaritaville Embassy
St. Jude Donor '08-'09,'13, '14
 Learning to Compose, Part One
Full disclosure, This article is from another board, full credit and link follows;This is the first part of a series on Learning to Compose.
These are:
Clearly, we don’t have the ability to move lights around, rearrange scenery, and ask models to pose in a different way. If you’re photographing birds in a nest, or a deer in a forest, you typically get one go at the really perfect image. Then the birds have moved, the deer has gone, the light has changed.
People often tell me that it’s all about patience. Quite often, when a nature image of mine gets traction, someone will post “and how long did you have to wait to get that image, Martin?” They seem to want me to teach other photographers a lesson. But the self-same images they think were arrived at by waiting were most often, quite literally, snapshots. The scene was there. There was a moment in time to focus, frame and shoot. Then it was gone.
Patience does not, of itself, bring you better pictures. You can wait all day for something interesting to come along, but when it does, you have to move rapidly. You can fix the exposure, to an extent, afterwards in post-processing. You can even change the position within the frame by subsequent cropping. But you can’t expand the frame, and you can’t, with a DSLR taking a single shot, refocus it.
My answer is that the key is observation. Observe, observe, observe. See the details.
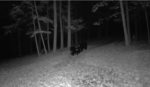
The image below was captured in this way. I was in a forest. The light was absolutely perfect, I was staring into it to see what exact way I could capture the light streaming from above, and the leaves below. And then I saw it: a deer. I had seem the same deer on the path a few minutes before, but it had bounded away among the trees. It was only as my eyes adjusted that I could see it.

Click for an enlargement
I was able to get off three shots, before it went away again. Now, if you’re a pixel peeper, you are probably saying “but the deer isn’t sharp.” Exactly right. It’s an image, complete in itself, not a picture of a deer.
The funny thing was, I was struggling with the autofocus on that lens, and had switched it off. This shot was taken on manual focus.
And that is the technique I want to share. If you want to learn to become a picture composer, spend a week, or a month, with autofocus switched off. I believe (if you haven’t done this already) that it will transform your photography.
There are three reasons for this, and they work better with your most difficult lenses. They also work better with a modern camera that doesn’t have a split-prism focusing screen. I’ll explain why.
Here’s a picture of a heron, shot with a Nikon 500mm Reflex (mirror) lens. These can’t be autofocussed anyway, because the mirror technology interferes with the autofocus technology. If you’ve ever had one of these lenses, you know they are a pig to focus. The depth of field is about a centimetre when you shoot five metres away. The almost non-existent qualities of modern focussing screens offer no help at all.

Now, that probably looks fairly sharp to you, but it’s the internet, so you can’t really tell.
So here it is cropped:

How do you get that level of sharpness on that particular lens? This is something that bugged me for years. I had a whole host of pictures which were sharpish, but never really sharp. Even the bokeh is unhelpful, because a mirror lens creates a ring bokeh which is easily mistakable for a sharp object.
Because of Covid-19, I went out photographing with this lens a lot, and it dawned on me: you focus this lens by observing details. The thing which disappears when a lens is out of focus is detail. So looking carefully, fiddling the ring backwards and forwards, and looking at what observes is the key. Once you’ve done this for a few days, it becomes second nature.
But while you’re observing, your also observing the whole image. Instead of letting autofocus do the work, I’m forced to observe. I’m not focusing and reframing, I’m just focusing. So I frame first, and focus. The more I observe, the more, imperceptibly, I am reframing the camera for the best overall image. Don’t be fooled by the sharpness of this image zoomed in. This image works because it captures the shape of the heron against a background which is sufficiently different to make it pop.
Focusing by observation always pushes you to see what makes the image work, rather than what merely makes it sharp. A beautiful image which is not sharp is preferable to a sharp image which is not beautiful, in purely photographic terms. Obviously that doesn’t apply if you’re documenting a crime scene, but for art, it’s the art that counts.
I want to share one more image, and then we’ll sum up.

This was shot in near darkness underground at Dover Castle, UK. There was so little light that autofocus couldn’t find anything. The image is not sharp. And yet, somehow, it gives an impression of sharpness. This is the JPEG straight from the camera, unprocessed. Of course, we can capture more light and shadows by reprocessing in raw. But we shouldn’t. Softening the highlights and boosting the shadows will produce an image which is more like other images. But it would lose this particular images’s intensity. This is a ribbon of ragged light revealing the three dimensionality of a face (it’s my wife, as it happens).
I wish you all success, and hope to see the images this produces.
NOTE: All the images in this article are ’straight from the camera’, except that the first has been cropped to be more vertical.
Author : Martin Turner
https://www.nikonians.org/reviews/le...se-observation
Learning to Compose
In a previous series, I shared 21 principles of composition. I thought of revisiting and expanding on them in this series, but I feel it’s been said. What I want to focus on in this series is about how to become the kind of photographer who composes perfectly, without having to think about it. Memorising the principles, of course, is part of it. But memorised principles often don’t help in a real life situation. So I am going to offer five practices.These are:
- Observation
- Review
- Reimagining
- Reframing
- Recreation
Part 1: Observation
We talked in the previous series mainly about studio images. In a studio shot, you can compose however you want. But, for most of us, the true joy of photography is about going out there and capturing what we see as compelling images. But how is it that one person can go out with the same camera and lens and capture something which is nice enough to share on Facebook, and someone else can capture something on the same day in the same place that burns its way into the soul?Clearly, we don’t have the ability to move lights around, rearrange scenery, and ask models to pose in a different way. If you’re photographing birds in a nest, or a deer in a forest, you typically get one go at the really perfect image. Then the birds have moved, the deer has gone, the light has changed.
People often tell me that it’s all about patience. Quite often, when a nature image of mine gets traction, someone will post “and how long did you have to wait to get that image, Martin?” They seem to want me to teach other photographers a lesson. But the self-same images they think were arrived at by waiting were most often, quite literally, snapshots. The scene was there. There was a moment in time to focus, frame and shoot. Then it was gone.
Patience does not, of itself, bring you better pictures. You can wait all day for something interesting to come along, but when it does, you have to move rapidly. You can fix the exposure, to an extent, afterwards in post-processing. You can even change the position within the frame by subsequent cropping. But you can’t expand the frame, and you can’t, with a DSLR taking a single shot, refocus it.
My answer is that the key is observation. Observe, observe, observe. See the details.
The image below was captured in this way. I was in a forest. The light was absolutely perfect, I was staring into it to see what exact way I could capture the light streaming from above, and the leaves below. And then I saw it: a deer. I had seem the same deer on the path a few minutes before, but it had bounded away among the trees. It was only as my eyes adjusted that I could see it.

Click for an enlargement
I was able to get off three shots, before it went away again. Now, if you’re a pixel peeper, you are probably saying “but the deer isn’t sharp.” Exactly right. It’s an image, complete in itself, not a picture of a deer.
The funny thing was, I was struggling with the autofocus on that lens, and had switched it off. This shot was taken on manual focus.
And that is the technique I want to share. If you want to learn to become a picture composer, spend a week, or a month, with autofocus switched off. I believe (if you haven’t done this already) that it will transform your photography.
There are three reasons for this, and they work better with your most difficult lenses. They also work better with a modern camera that doesn’t have a split-prism focusing screen. I’ll explain why.
- First, switching off auto-focus removes the temptation to focus and reframe, or else to leave the subject hanging in the middle of the frame, which is probably not where it should be compositionally. The D2X was better than the D3, D4 etc in this regard: the auto-focus points went wider into the frame. But even with that, there was always a tendency to focus and then make only minimal movements. What’s more, if you’re in a hurry, you don’t observe what suddenly came into the corner of your image when you reframed.
- Second, switching off auto-focus ensures that the camera is focused where you tell it to focus, not on something else. We’ve all seen the beginner’s mistake of a blurry person in front of a razor-sharp geometrical wall. Auto-focus likes somethings, and doesn’t like others.
- Third, and by far the most important, without a split-prism focussing screen, the only way to get really sharp focus is by observing.
Here’s a picture of a heron, shot with a Nikon 500mm Reflex (mirror) lens. These can’t be autofocussed anyway, because the mirror technology interferes with the autofocus technology. If you’ve ever had one of these lenses, you know they are a pig to focus. The depth of field is about a centimetre when you shoot five metres away. The almost non-existent qualities of modern focussing screens offer no help at all.
Now, that probably looks fairly sharp to you, but it’s the internet, so you can’t really tell.
So here it is cropped:
How do you get that level of sharpness on that particular lens? This is something that bugged me for years. I had a whole host of pictures which were sharpish, but never really sharp. Even the bokeh is unhelpful, because a mirror lens creates a ring bokeh which is easily mistakable for a sharp object.
Because of Covid-19, I went out photographing with this lens a lot, and it dawned on me: you focus this lens by observing details. The thing which disappears when a lens is out of focus is detail. So looking carefully, fiddling the ring backwards and forwards, and looking at what observes is the key. Once you’ve done this for a few days, it becomes second nature.
But while you’re observing, your also observing the whole image. Instead of letting autofocus do the work, I’m forced to observe. I’m not focusing and reframing, I’m just focusing. So I frame first, and focus. The more I observe, the more, imperceptibly, I am reframing the camera for the best overall image. Don’t be fooled by the sharpness of this image zoomed in. This image works because it captures the shape of the heron against a background which is sufficiently different to make it pop.
Focusing by observation always pushes you to see what makes the image work, rather than what merely makes it sharp. A beautiful image which is not sharp is preferable to a sharp image which is not beautiful, in purely photographic terms. Obviously that doesn’t apply if you’re documenting a crime scene, but for art, it’s the art that counts.
I want to share one more image, and then we’ll sum up.
This was shot in near darkness underground at Dover Castle, UK. There was so little light that autofocus couldn’t find anything. The image is not sharp. And yet, somehow, it gives an impression of sharpness. This is the JPEG straight from the camera, unprocessed. Of course, we can capture more light and shadows by reprocessing in raw. But we shouldn’t. Softening the highlights and boosting the shadows will produce an image which is more like other images. But it would lose this particular images’s intensity. This is a ribbon of ragged light revealing the three dimensionality of a face (it’s my wife, as it happens).
Summary
Switching off autofocus as a way to learn to compose does not mean we should ditch autofocus permanently. It’s a means to an end. Use your eyes to observe more and more detail at what the focal point should be, and already have that focal point in the right place in the frame before you start to focus. In many cases, you’ll find it’s quicker to do this than to autofocus and reframe, and much quicker than moving the autofocus light around the screen until it’s in the best place. Autofocus has its place, and its very useful. But as a technique to learn how to compose instinctively, automatically, on every shot, try a couple of weeks without it.I wish you all success, and hope to see the images this produces.
NOTE: All the images in this article are ’straight from the camera’, except that the first has been cropped to be more vertical.
Author : Martin Turner
https://www.nikonians.org/reviews/le...se-observation






Moderator


Joined: Jan 2001
Posts: 17,124
Likes: 3,759
From: Charlotte NC
Cruise-In IV Veteran
Cruise-In V Veteran
St. Jude Donor '08-'25










