
C3 horn button
 03-05-2018, 04:59 PM
#1
Drifting

Thread Starter

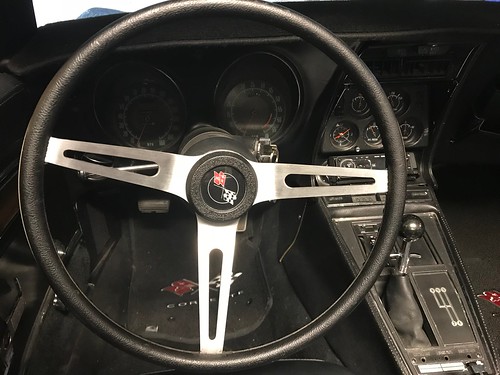
Replaced the aftermarket steering wheel and have a question: how do you put the button back on and get the flag orientation correct? If I just pop it on, the horn will not work.
If I rotate it a quarter turn, push it on and rotate a little, the horn works but flags are offset to the side.
Could the mount be off? I've only had the car a couple months and just replaced the steering wheel, but it was like that before with the old wheel.
The horn works as it is now but does not seem right to me...
]
 03-05-2018, 05:07 PM
#2
Intermediate


Replaced the aftermarket steering wheel and have a question: how do you put the button back on and get the flag orientation correct? If I just pop it on, the horn will not work.
If I rotate it a quarter turn, push it on and rotate a little, the horn works but flags are offset to the side.
Could the mount be off? I've only had the car a couple months and just replaced the steering wheel, but it was like that before with the old wheel.
The horn works as it is now but does not seem right to me...
]
If I rotate it a quarter turn, push it on and rotate a little, the horn works but flags are offset to the side.
Could the mount be off? I've only had the car a couple months and just replaced the steering wheel, but it was like that before with the old wheel.
The horn works as it is now but does not seem right to me...
]

 03-05-2018, 09:28 PM
#5
Former Vendor
Member Since: Aug 2006
Location: Jeffersonville Indiana 812-288-7103
Posts: 76,656
Received 1,813 Likes
on
1,458 Posts
St. Jude Donor '08-'09-'10-'11-'12-'13-'14-'15

It shouldn't matter how you install the horn button on the upper contact, the issue might be the upper contact. The upper contact will only install one way because of the lower contact in relation to the stand on the upper contact making contact with the lower.
It could also be an issue with the button shims... There are shims that go below the upper contact the help move the button away from the tilt tele lever or the upper column.
So... you might want to take the upper contact apart and clean it. It's held together with three plastic rivets that you can drive the center of out of. Once you do this you clean the upper and lower sections, and then re-assemble it.
The new upper contacts being sold are junk... I find myself constantly using the new contacts to remove parts and repair the old original contacts with..
So here are some pictures..
Horn contact rivets that you can drive out to repair.

Lower contact

How the lower contact installs.

It could also be an issue with the button shims... There are shims that go below the upper contact the help move the button away from the tilt tele lever or the upper column.
So... you might want to take the upper contact apart and clean it. It's held together with three plastic rivets that you can drive the center of out of. Once you do this you clean the upper and lower sections, and then re-assemble it.
The new upper contacts being sold are junk... I find myself constantly using the new contacts to remove parts and repair the old original contacts with..
So here are some pictures..
Horn contact rivets that you can drive out to repair.
Lower contact
How the lower contact installs.
03-06-2018, 09:09 AM
#7
Former Vendor
Member Since: Aug 2006
Location: Jeffersonville Indiana 812-288-7103
Posts: 76,656
Received 1,813 Likes
on
1,458 Posts
St. Jude Donor '08-'09-'10-'11-'12-'13-'14-'15

And they will only go together one way, the rivets have a stagger to them. Another thing is that when you un-rivet them they are next to impossible to re-rivet them back together so epoxy is needed.
Like I said above, we had fits with the aftermarket china made upper contacts... and in our shop we mainly use them as a repair part re-using the upper retainer portion from the original contact.
Willcox
03-06-2018, 09:32 AM
#8
Drifting
Thread Starter
It shouldn't matter how you install the horn button on the upper contact, the issue might be the upper contact. The upper contact will only install one way because of the lower contact in relation to the stand on the upper contact making contact with the lower.
It could also be an issue with the button shims... There are shims that go below the upper contact the help move the button away from the tilt tele lever or the upper column.
So... you might want to take the upper contact apart and clean it. It's held together with three plastic rivets that you can drive the center of out of. Once you do this you clean the upper and lower sections, and then re-assemble it.
The new upper contacts being sold are junk... I find myself constantly using the new contacts to remove parts and repair the old original contacts with..
So here are some pictures..
Horn contact rivets that you can drive out to repair.
Lower contact
How the lower contact installs.
03-06-2018, 09:30 PM
#9
Former Vendor
Member Since: Aug 2006
Location: Jeffersonville Indiana 812-288-7103
Posts: 76,656
Received 1,813 Likes
on
1,458 Posts
St. Jude Donor '08-'09-'10-'11-'12-'13-'14-'15
Take a look.. post back.. you can't have a horn issue I've not crossed 100 times.

Willcox
Willcox
03-17-2018, 09:59 PM
#10
Instructor


I wouldn't remove the rivets on the horn button. Difficult to reuse without epoxy and sometimes that won't work.
My 68 has a plastic insert that fits in the column under the top steering hub, and has a cut out for the turn signal screw and a hole that the horn stem or rod and spring fits into to ground out the horn once the button is pushed. . then the horn rod and spring if they are not already attached are inserted into this plastic hole, then the spring of the steering column shaft fits into this plastic center. Then you put the steering hub back on and align the hole in the column with the horn rod. then place the large washer and a lock washer and nut to hold it in place. Then you have a metal piece ( I don't know what all the pieces are called, but I am well familiar with them.) This piece has a L shaped arm that extends underneath it and sits on top of the horn rod, and the top of this piece aligns with the horn button assembly. To get things aligned correctly and to have your horn button flags correct you need to make sure this piece is correctly over the horn rod. Then you can press the horn assembly on and everything should fit correctly.
Another way is to buy a universal horn spring rod from Summit and this has a wire from the horn rod to the L shaped assembly that ground your horn differently but works well if for some reason you cannot align the L shape bracket with the horn rod.
All this is very confusing unless you have done it over and over again, I spent two days trying to figure what it takes to make the horn honk and to align correctly without the horn going off all the time or not at all.
My 68 has a plastic insert that fits in the column under the top steering hub, and has a cut out for the turn signal screw and a hole that the horn stem or rod and spring fits into to ground out the horn once the button is pushed. . then the horn rod and spring if they are not already attached are inserted into this plastic hole, then the spring of the steering column shaft
fits into this plastic center. Then you put the steering hub back on and align the hole in the column with the horn rod. then place the large washer and a lock washer and nut to hold it in place. Then you have a metal piece ( I don't know what all the pieces are called, but I am well familiar with them.) This piece has a L shaped arm that extends underneath it and sits on top of the horn rod, and the top of this piece aligns with the horn button assembly. To get things aligned correctly and to have your horn button flags correct you need to make sure this piece is correctly over the horn rod. Then you can press the horn assembly on and everything should fit correctly. Another way is to buy a universal horn spring rod from Summit and this has a wire from the horn rod to the L shaped assembly that ground your horn differently but works well if for some reason you cannot align the L shape bracket with the horn rod.
All this is very confusing unless you have done it over and over again, I spent two days trying to figure what it takes to make the horn honk and to align correctly without the horn going off all the time or not at all.
03-19-2018, 06:28 PM
#11
Drifting
Thread Starter
Thanks for the replies guys. I just played with it a bit and got it to work with the flags orientation correct.
However, it does not seem as secure and may pop off when driving? I'm going to give it a shot as is and if it does pop off, may try some silicone to keep it attached.
Thanks again
However, it does not seem as secure and may pop off when driving? I'm going to give it a shot as is and if it does pop off, may try some silicone to keep it attached.
Thanks again