When you click on links to various merchants on this site and make a purchase, this can result in this site earning a commission. Affiliate programs and affiliations include, but are not limited to, the eBay Partner Network.
I decided to remove the stainless to fix a couple of dings and make it fit better around the windshield post.
I now have it on the bench and I am trying to remove it from the u channel.
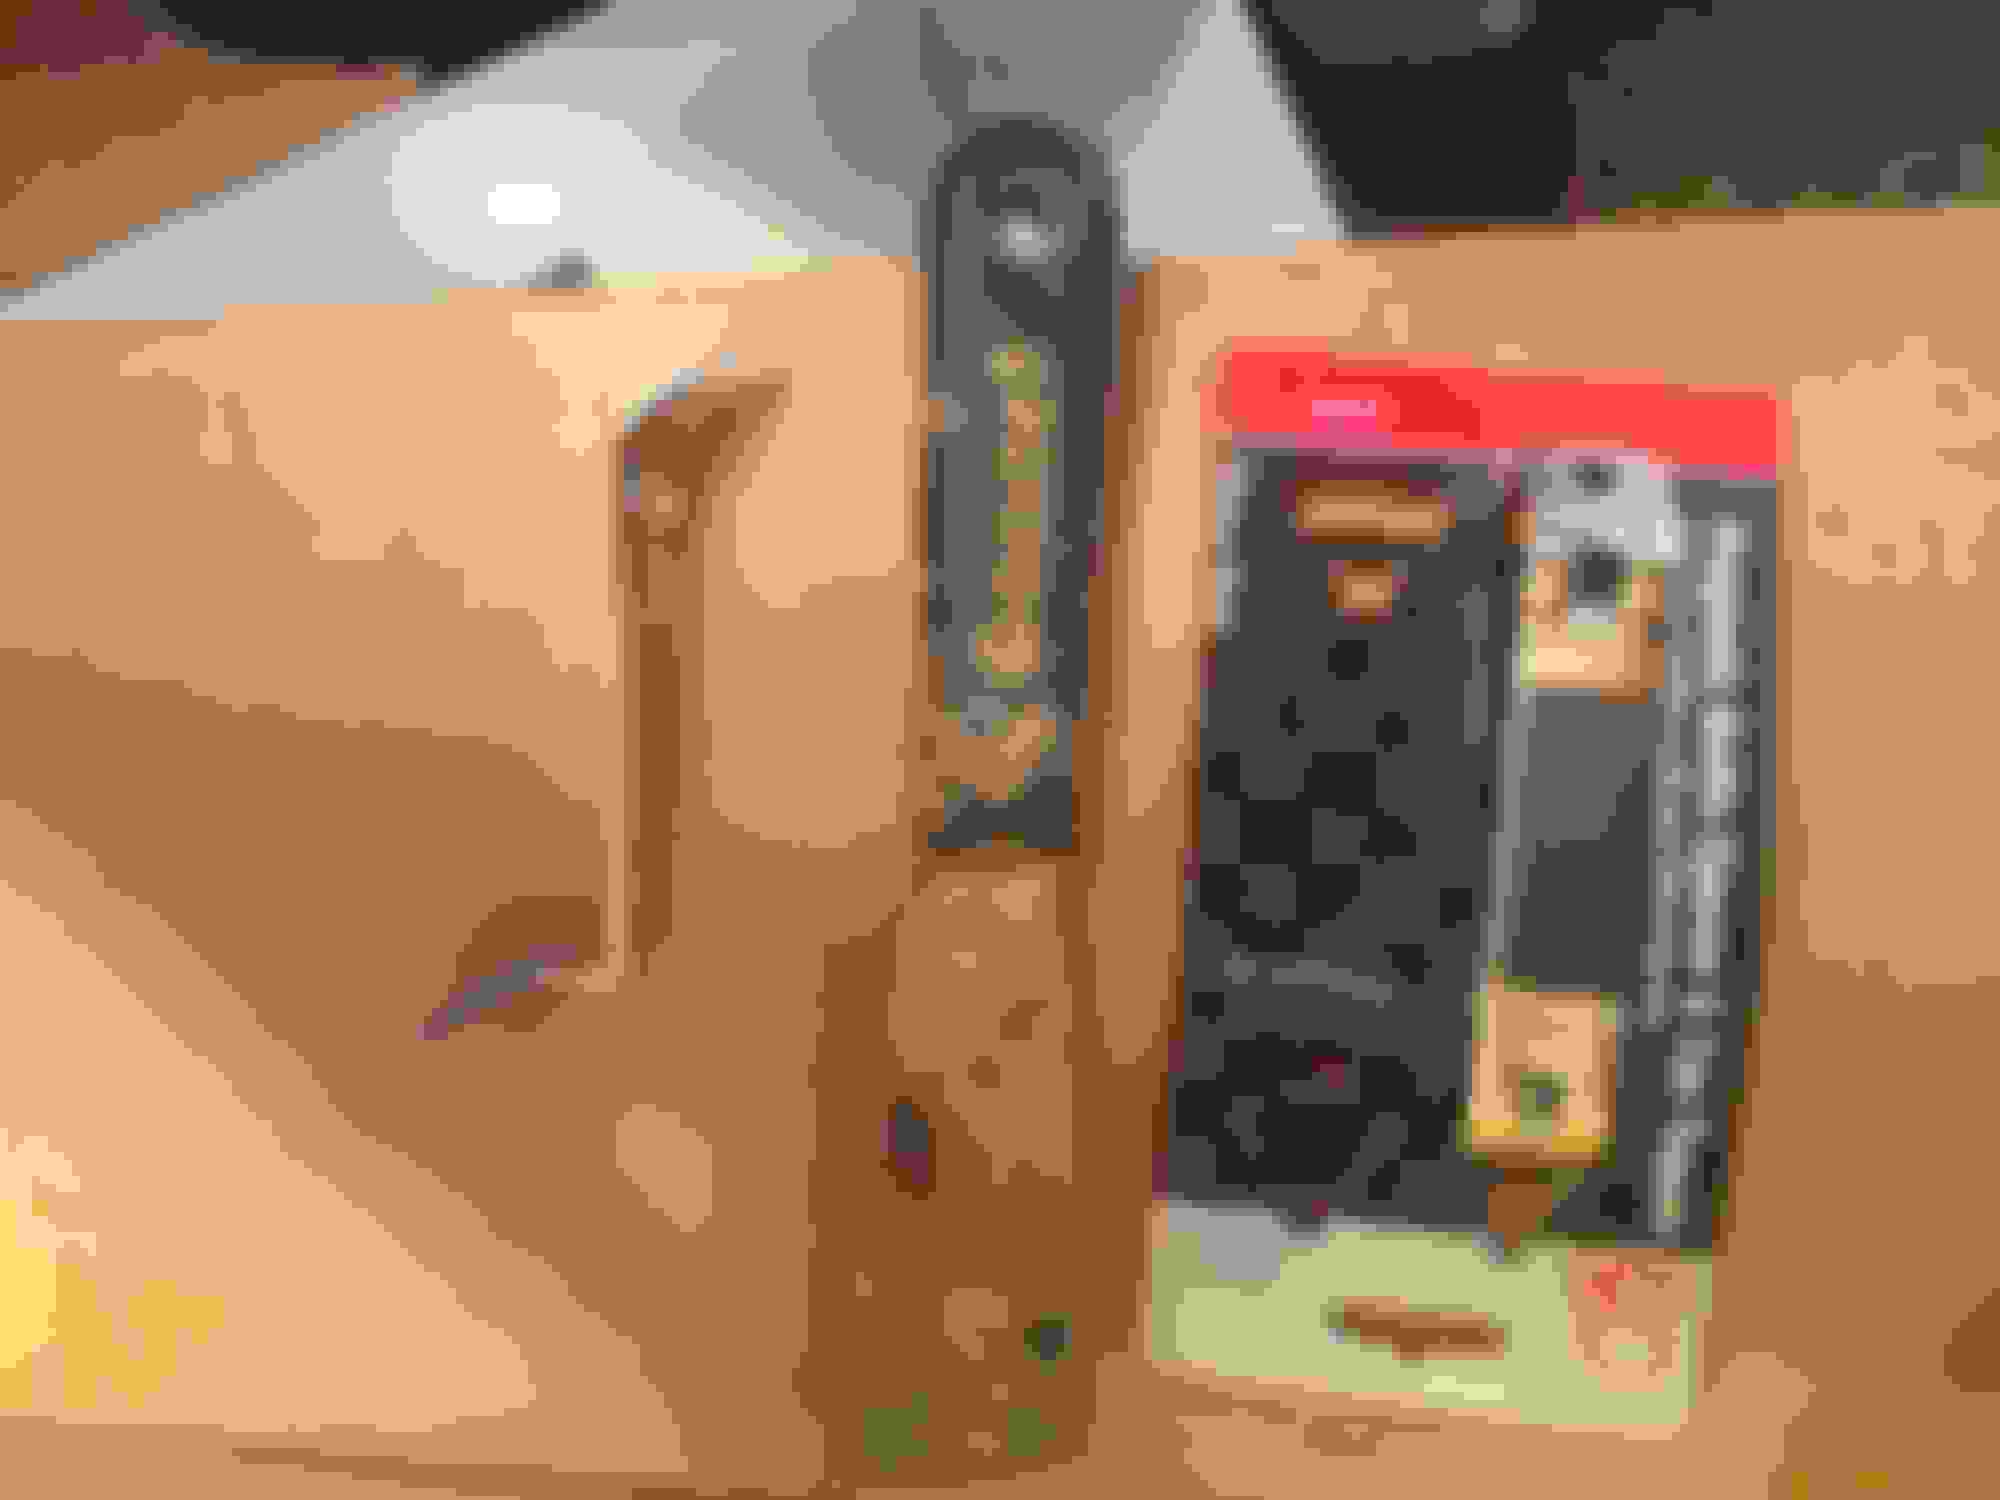
I did a search and looked at Rich5962's post and PDF document. I can not see how to get this over the channel, red arrow. I can barely move it to get the putty knives under it, and when I do they stop at the place were it gets larger.
Any ideas? It looks like someone was in here before me.
Joe
Try this special tool. I used it to remove all the stainless steal moulding on my hard top. I restored my hard top myself and it took me maybe ten minutes to remove all the mouding including the header using this tool.
Just hook the lip of the moulding and gently pull back to allow the spatula to be inserted. When you get the hang of it works like a charm It has to be this particular brand and model as it has the correct shape.
If you look at my stainless which was off a 58, it looks like someone peened it over the channel. The lip of the stainless where the arrow seems to be too long to be able to get it away from the channel.
Anybody have a picture of what the underneath should look like?
Thanks,
Joe
The stainless should not be "over" the steel channel. Chuck one end of the steel channel in a vise, and push the stainless all the way on. The putty knives go between the stainless edge "where it's bent", and the steel channel. You have to put several in (as in Richs' instructions}. Work from one end, and about halfway, it will pop off. I've taken dozens of these apart. You don't need any special tools.
The stainless should not be "over" the steel channel. Chuck one end of the steel channel in a vise, and push the stainless all the way on. The putty knives go between the stainless edge "where it's bent", and the steel channel. You have to put several in (as in Richs' instructions}. Work from one end, and about halfway, it will pop off. I've taken dozens of these apart. You don't need any special tools.
Thanks Mike, but it appears that someone put the inner stainless 'lip' over the channel and tried to crimp it. I can not get it off the channel to put the putty knives under it.
I took more photos.
I think I will have to look for a better one.
Joe
Impossible. Make sure that you have the screws out of the top of the stainless. You cannot do this in your lap. Put one end of the steel channel in a vise, and clamp it tight. ON THE VERY END, take your hand and clasp the stainless to the steel channel, to twist the end of the stainless, and push the steel channel down into the header. Take a small putty knife, or a butter knife, and work it in. I see where the ends were cut, but that won't hurt anything. you want to try and get the knife between the stainless and the steel. The stainless will stretch. Do this from one end. Don't try to start further up the channel. Just for information, the way that that stainless is installed, is in the st-12. You lay it over the top of the finished windshield assembly, and "whack" it with your hand. No crimping possible. The outside of that header would be beat to hell if someone was trying to squeeze it together with pliers, or was trying to "beat" it closed with chisel.
Start on one end. PUSH or SQUEEZE the header TIGHT to the channel to make sure it's bottomed out on the stainless. Don't try to remove it without putting it in a vise. I know that it looks like the channel is under the lip, and impossible to remove. Trust me, it will come off. Once you get some knives started, you'll see what I mean. Good luck.
Last edited by mike coletta; 05-24-2019 at 05:00 AM.
 05-19-2019, 06:17 PM