Tech Tuesday: C6 Interior
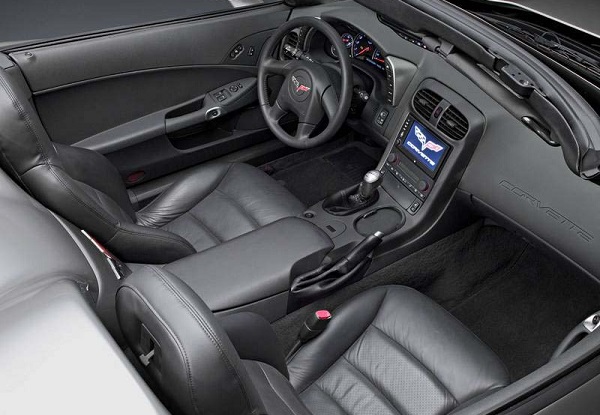
Interior
Why Mod?
While there really aren’t any performance benefits from modifying the interior (unless you strip it to reduce weight) it’s a great way to customize the car and make it truly yours. The only drawbacks are the time and money you might spend. Oh and you might ruin your car, so please keep it tasteful. Anyhow, below are a few more common mods to get you started…
Center Console
There are retailers which sell padded center consoles as many people find them to be too hard. Another option, is going the DIY route with a stitched cover, padding (like a used yoga mat or memory foam material) and adhesive. Check out this link for more details, thanks Valleybacker!
Carpet
People seem to dislike the finish on the carpets and trunk mat in the C6. One common remedy is Lloyd Mats. You get quality floor mats ranging from thick to thin to rubber, just pick and they custom make ’em and ship them out.
Dash
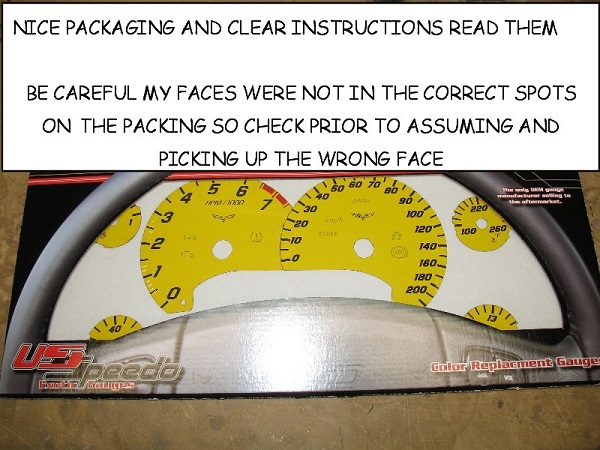
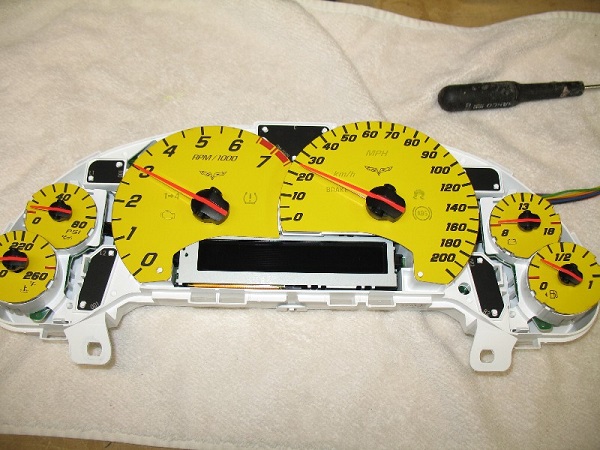
Thanks to CF member Pipedreams for the following gauge face install.
In total it took about 30 minutes, but I have removed the pod surround before so that was simple. I will take some pics on the car later. Extend the steering wheel all the way out and drop it to give you maximum space. Looking in the dark garage I had minimal glow but what I did have I liked. These are not cheap vinyl overlays that some have had bad experiences with. They are the same fit and finish as the oem faces.
Before taking on this project you need to understand it requires some abilities and patience, there is always the risk that things can go wrong or damage can occur. In the end if it all works out, you will be a happy camper.
The gauge company’s instructions are here.
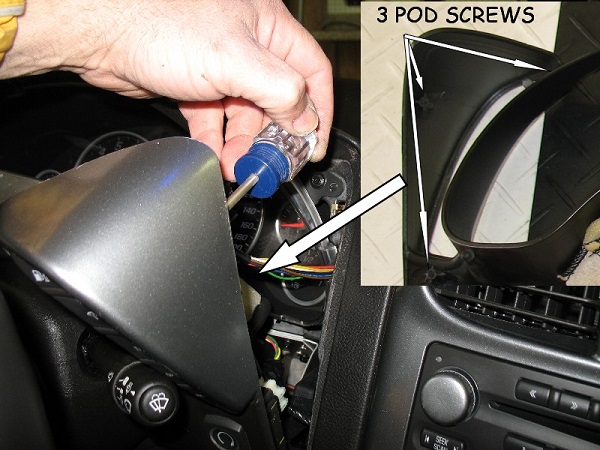
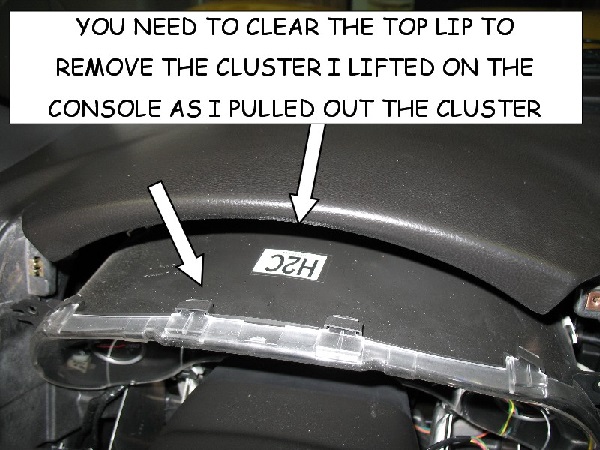
Using a pry tool or a butter knife you need to release the bottom of the pod surround.
My trick to remove the three screws holding the pod using a stubby Phillips. I think this is much easier than trying to unclip the pod connector (the release is under the connector). Once the pod is in your hand it’s simple to unclip the connector. Reinstall the pods in the surround and on reinstall it’s simple to plug back in the connectors.
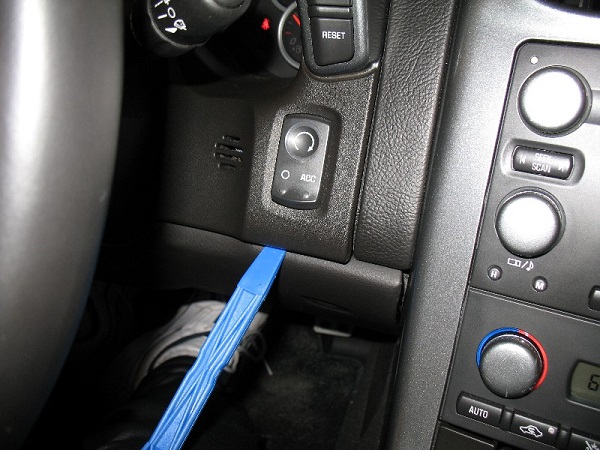
Release the ignition switch either by unplugging it (green arrow) or releasing the side tabs (red arrows)
you will also need to remove the sensor located below it to the left, it just pops off.
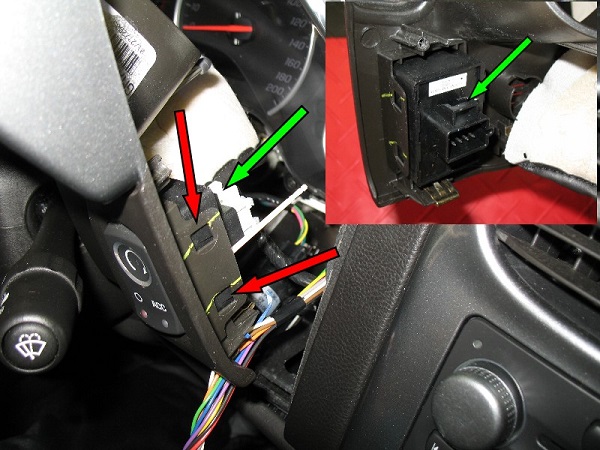
You also need to remove or unplug the dimmer control, you can see the release points in this picture.

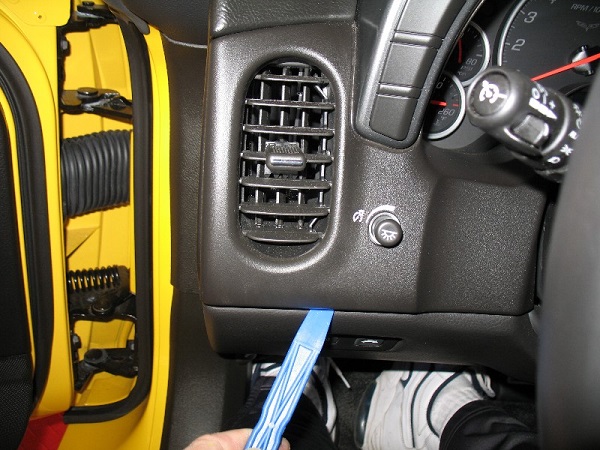
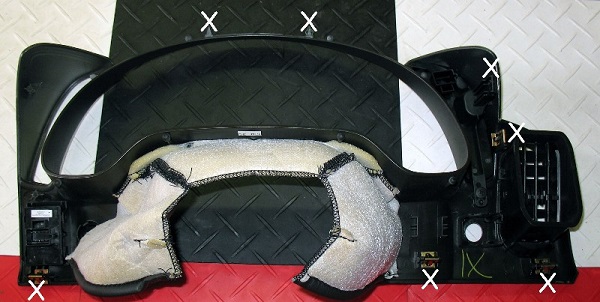
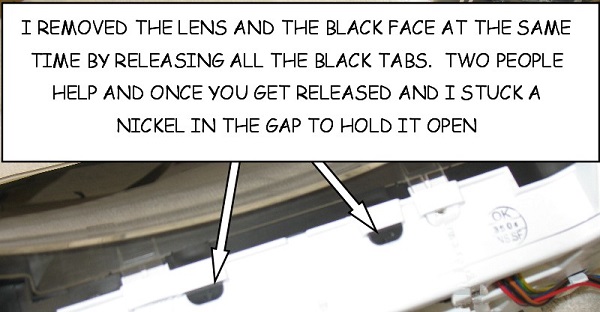
Once the surround is off you can see all the mounting clips (the right pod has been removed). Make sure they did not get left in the dash, if so re-install them on the surround.
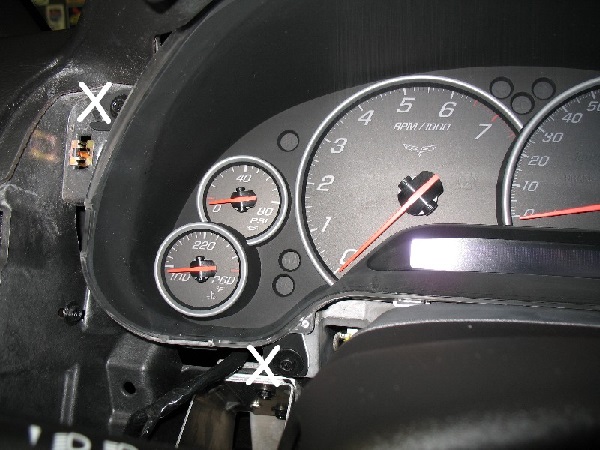
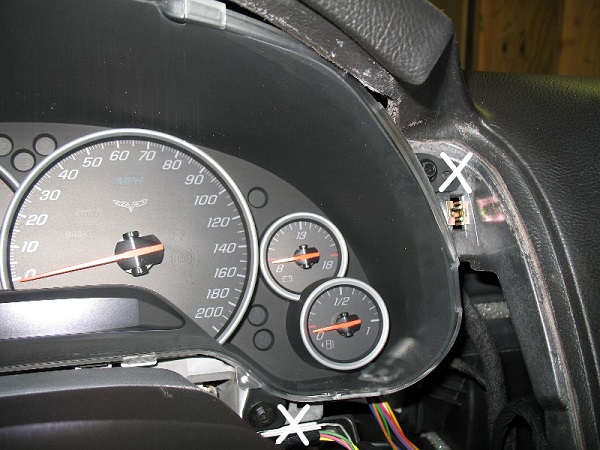
Remove the cluster, the white X marks the 4 screws.

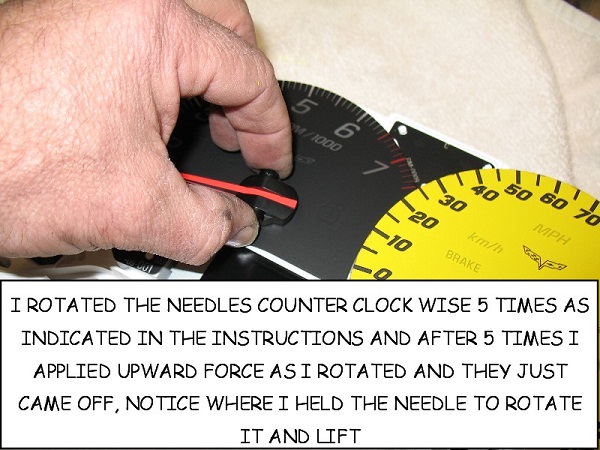
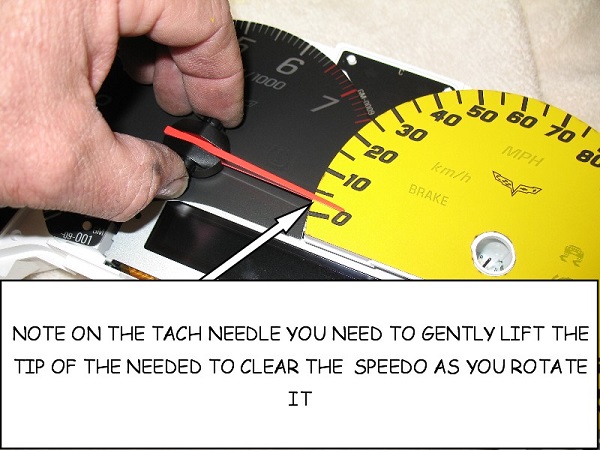
Follow the instruction included on setting the gauges and the final needle height (look at the handle end of the tool, the correct height is the little step).
Now reverse the disassembly and put it back together!

Seats
Want to install street/race seats? This is a good place to start, thanks CF member Dreamin! If you do install race/aftermarket seats please make sure to address the airbag connect/disconnect issue. This is another seat install that might be useful especially if you’re tall, thanks to Memphomanic!