
Fixed my flopping outside mirrors today (Pics)
 12-07-2008, 07:54 PM
#1
Le Mans Master

Thread Starter
A lot of Vettes have this problem. I used another forum members pdf step by step instructions I had printed out (sorry, can't remember who). Worked like a charm. Very easy and costs about a buck in gas and JB Weld.
First soaked in some gas in a plastic dish pan lined with foil for 24 hrs outside & covered, enough gas to cover the mirror part to loosen the silicon holding the mirror in place. The mirror was off when when I removed the cover.
Next, washed really well several times to remove the gas so the JB Weld will hold.
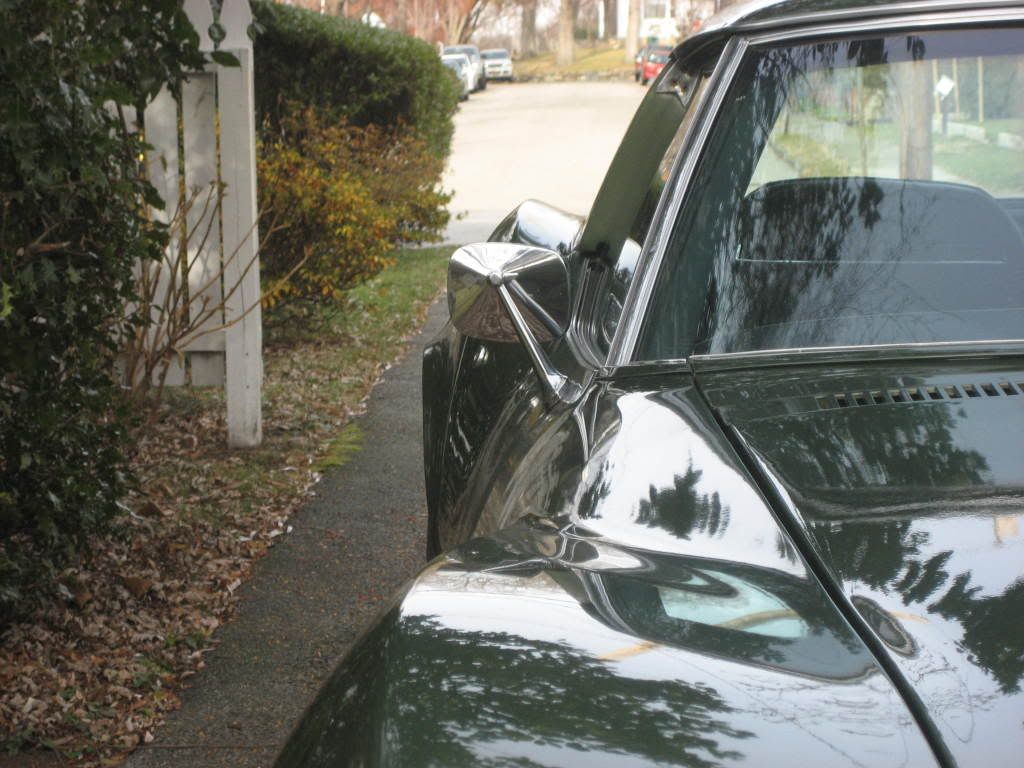
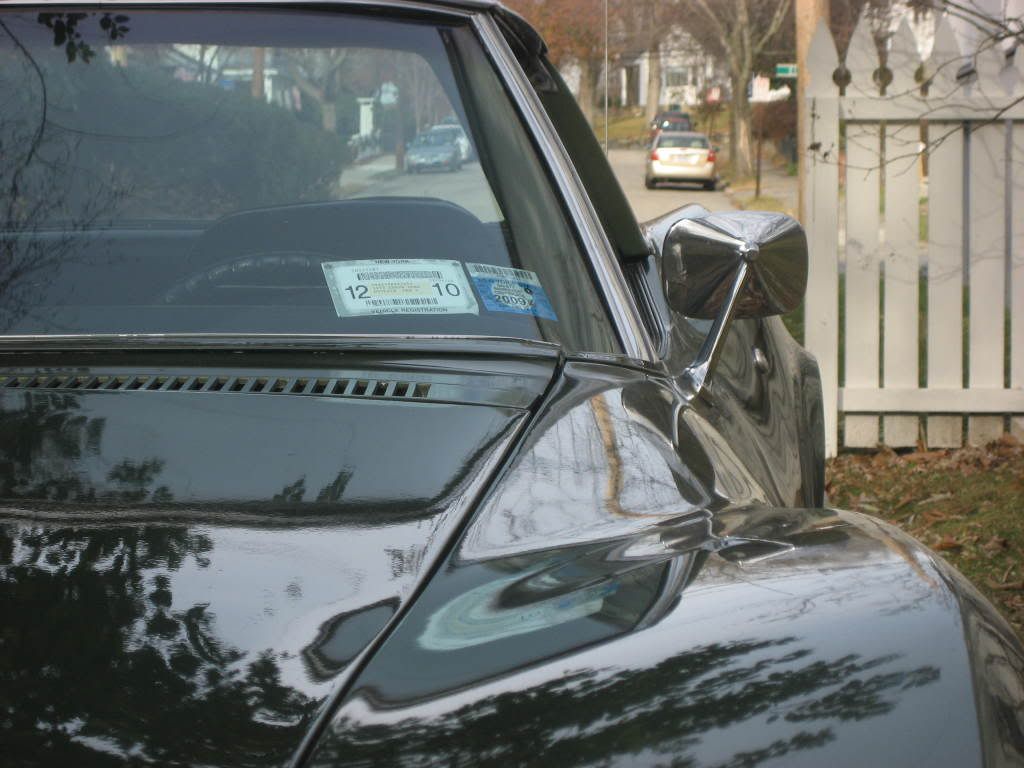
Here's some pics when still on the Vette. I had to keep them upside down so the wind at highway speed wouldn't blow them facing the ground. In this position you can see how low they are and rear view over the rear fenders isn't very good.

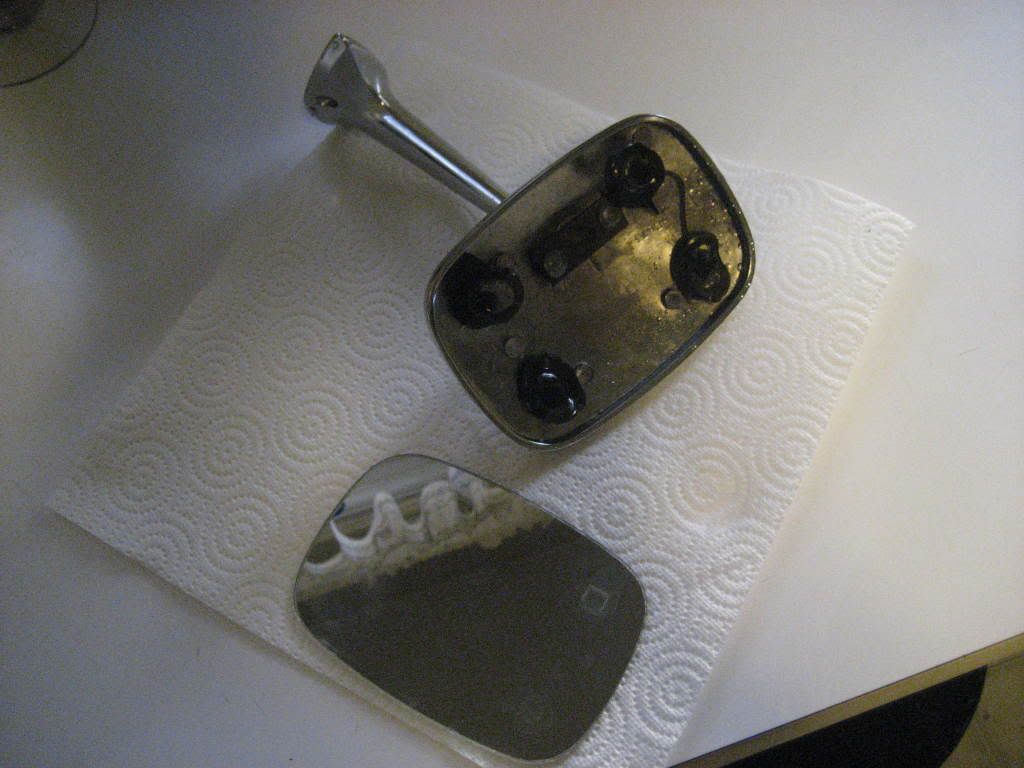
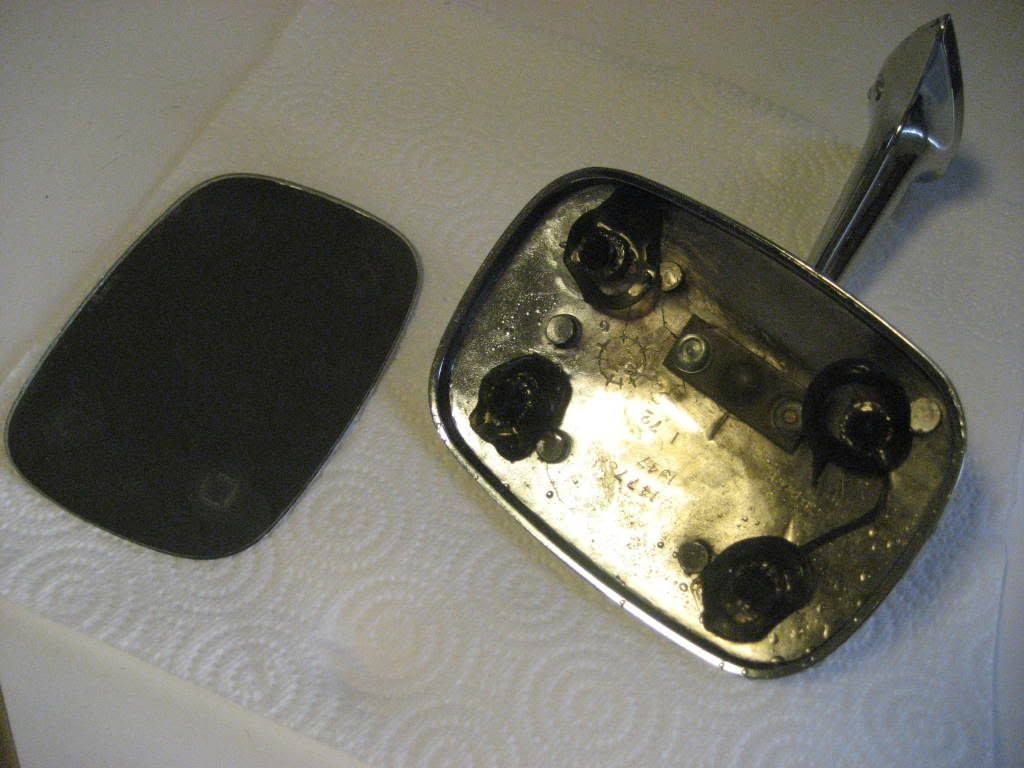
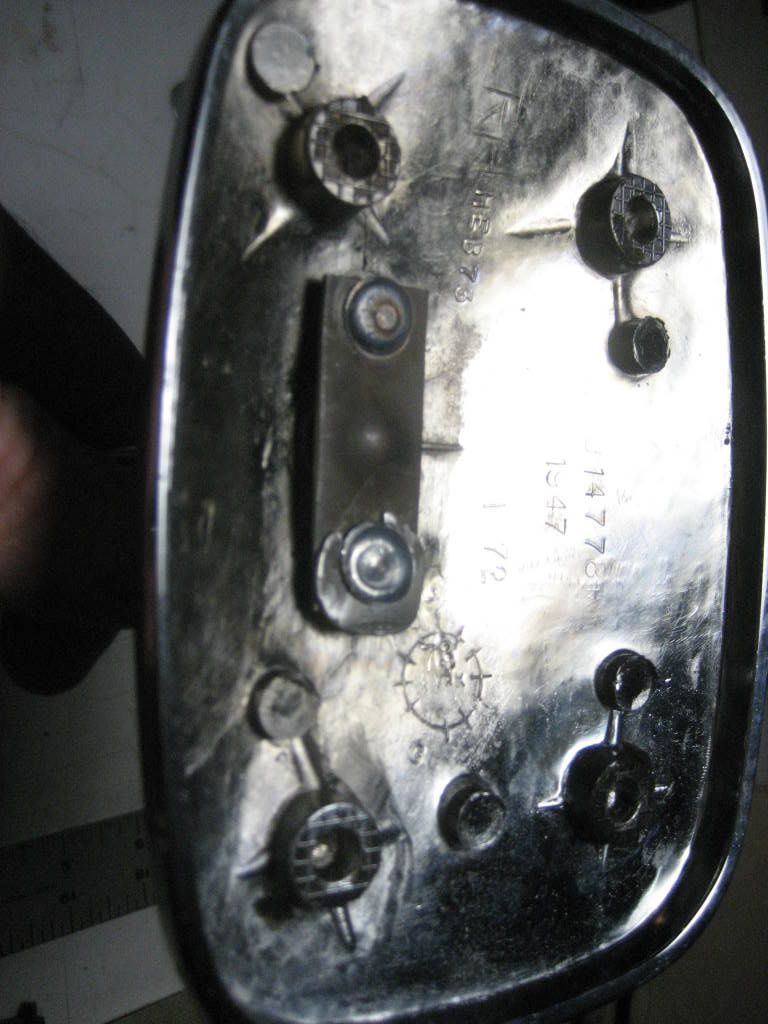
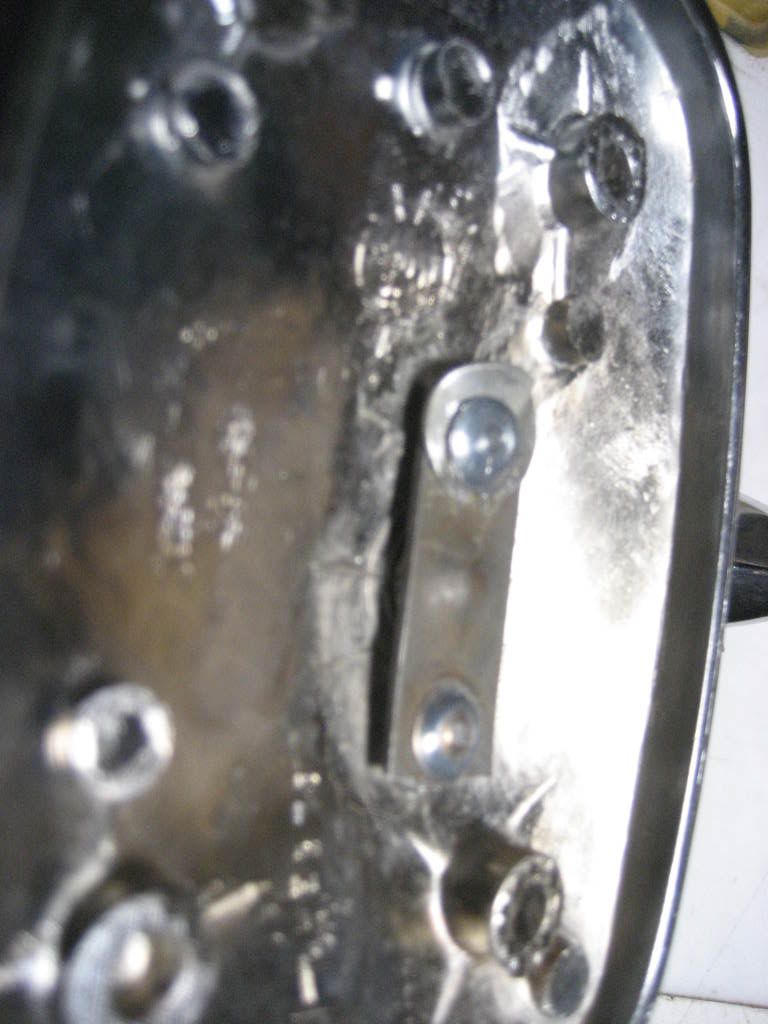
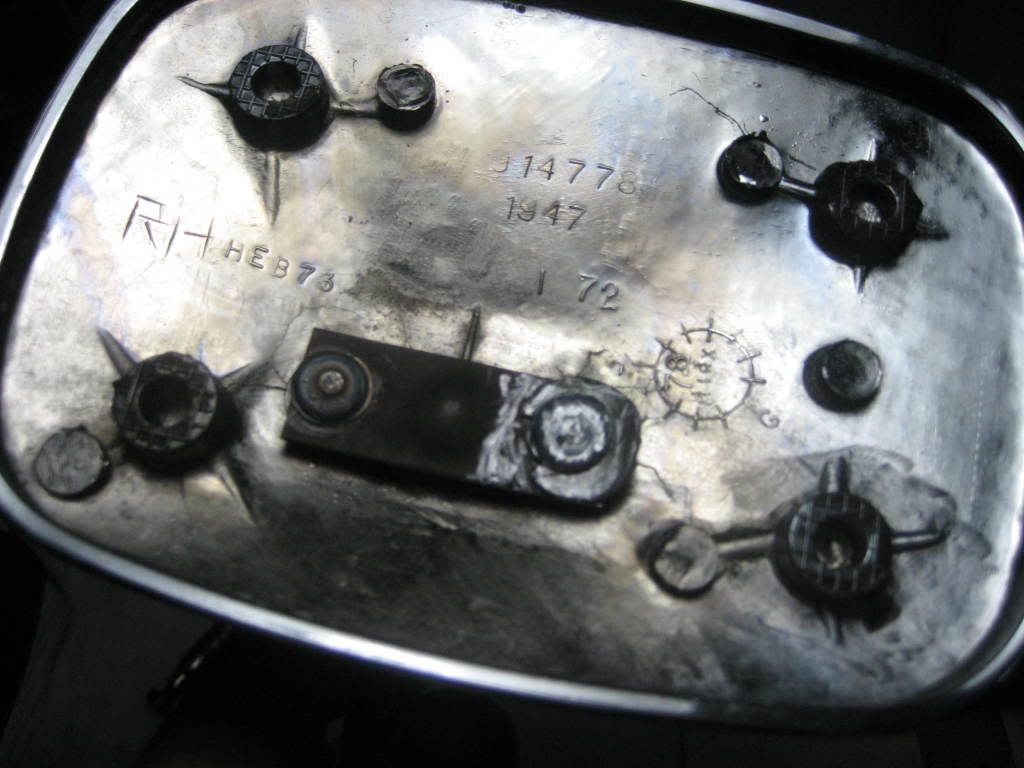
Here's the inside with the mirror removed. You'll need to remove any remaining silicone for reinstalling the mirror later.
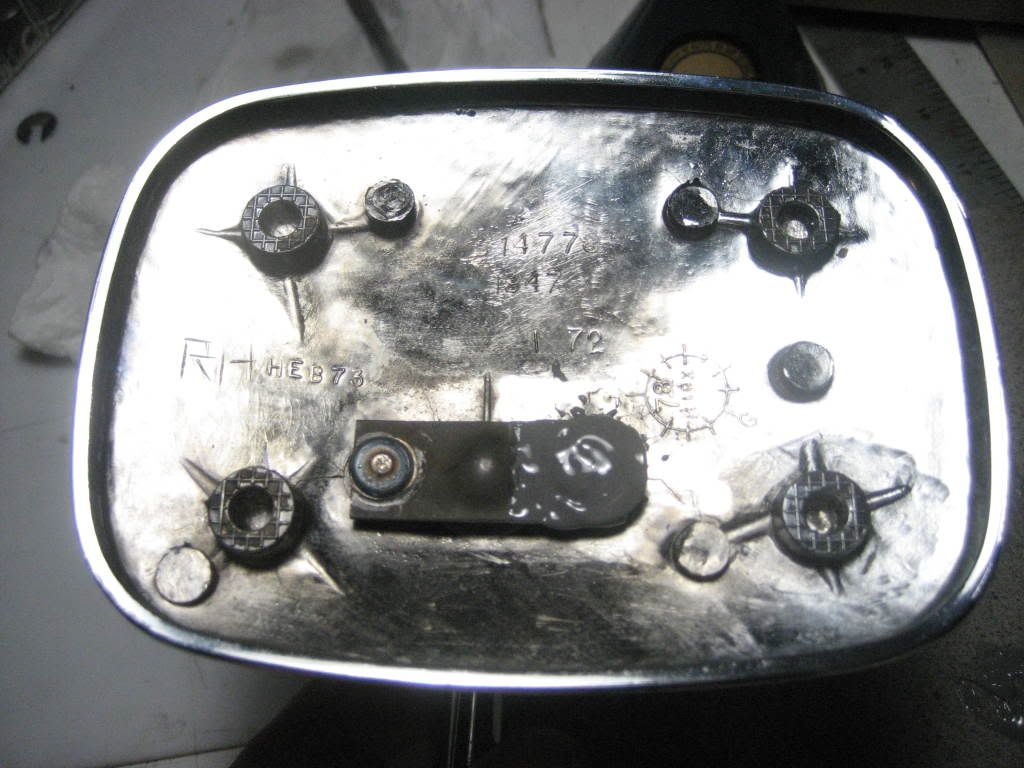
Next I used a 1/64th thick washer and cut out a space with a Dremel and a cutting wheel to be able to fit around the rivet. You can also use some scrap metal you may have laying around as was used in the original instructions to cut the hole & slot.
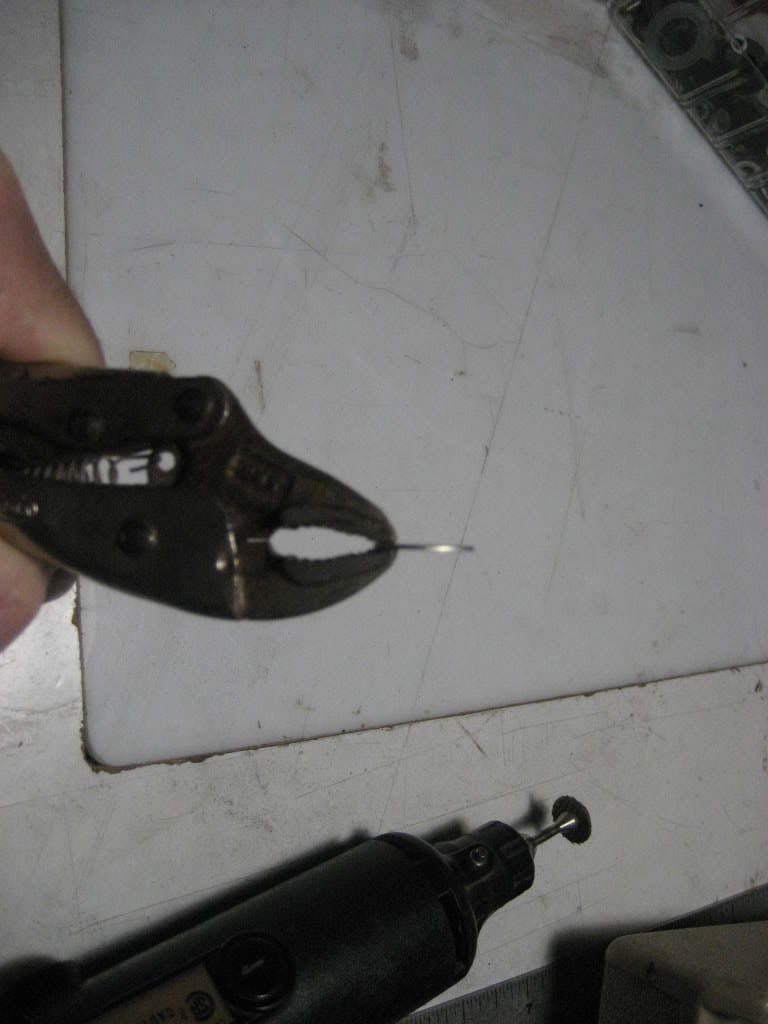
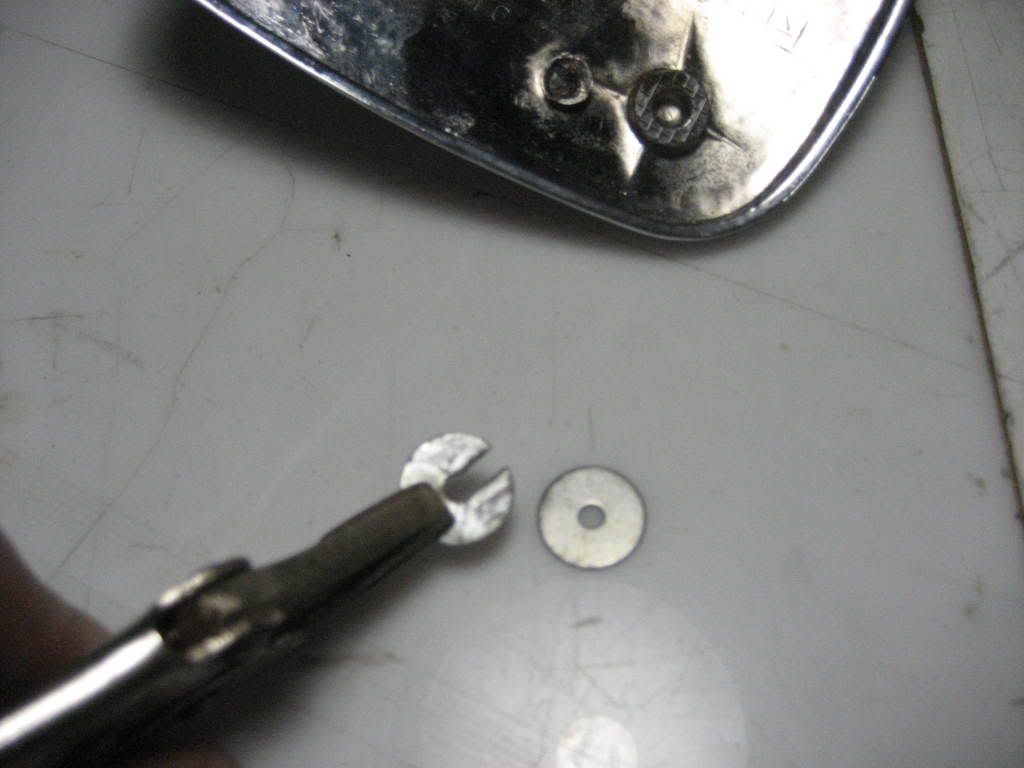
I used small vice grips to hold & push the washer under the rivet, was a very tight fit, but there is a bit of give in the metal plate. Once in place it was like brand new and very snug and firm to move the mirror housing.
I then used the Dremel to rough up the rivet & washer surface so the JB Weld can bite the surface for a good bond.
b
Next apply the JB Weld generously.
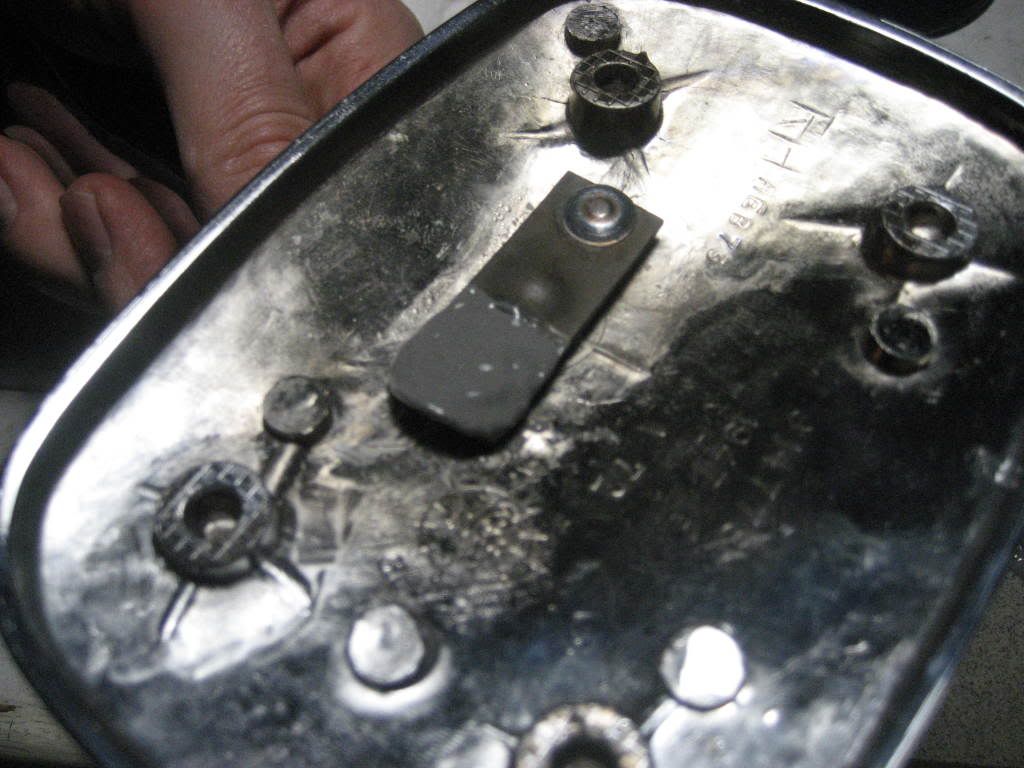
I'll let the JB Weld cure for 48 hrs and the I"ll use RTV silicone to re-mount the mirror and it's done. Can't wait to "See" how much better and safer the rear view will be. Hope this helps anyone else out there with floppy mirrors.
Glenn
First soaked in some gas in a plastic dish pan lined with foil for 24 hrs outside & covered, enough gas to cover the mirror part to loosen the silicon holding the mirror in place. The mirror was off when when I removed the cover.
Next, washed really well several times to remove the gas so the JB Weld will hold.
Here's some pics when still on the Vette. I had to keep them upside down so the wind at highway speed wouldn't blow them facing the ground. In this position you can see how low they are and rear view over the rear fenders isn't very good.
Here's the inside with the mirror removed. You'll need to remove any remaining silicone for reinstalling the mirror later.
Next I used a 1/64th thick washer and cut out a space with a Dremel and a cutting wheel to be able to fit around the rivet. You can also use some scrap metal you may have laying around as was used in the original instructions to cut the hole & slot.
I used small vice grips to hold & push the washer under the rivet, was a very tight fit, but there is a bit of give in the metal plate. Once in place it was like brand new and very snug and firm to move the mirror housing.
I then used the Dremel to rough up the rivet & washer surface so the JB Weld can bite the surface for a good bond.
b
Next apply the JB Weld generously.
I'll let the JB Weld cure for 48 hrs and the I"ll use RTV silicone to re-mount the mirror and it's done. Can't wait to "See" how much better and safer the rear view will be. Hope this helps anyone else out there with floppy mirrors.
Glenn
 12-07-2008, 09:32 PM
#2
Drifting


Excellent post! My mirror is doing the same thing, keeps flopping down everytime the door is closed. How did the finish on the back of the mirror hold up to the gasoline?
Steve
Steve
 12-07-2008, 10:23 PM
#4
Burning Brakes

Glenn,
Thanks for the step-by-step instructions w/ pics ... I like it.
I put a few drops of Permatex Threadlocker on my mirror pivot ball, and it tightened up significantly, but I don't know how long my method will last. It looks like your method will last a long time. If I have to tighten my mirror again, I'll be sure to use your method.
I have the same question as others ... did the gasoline have any affect on the silver on the back side of the mirror?
12-07-2008, 10:31 PM
#5
Le Mans Master
Thread Starter
The mirror is fine. Just washed it with lots of dish soap to get rid of the gas smell & residue. It's nice & tight now. The thing I like most is the price!
Glenn
Glenn

 12-08-2008, 07:03 AM
#7
Melting Slicks

I believe on a Corvette that IS the way the mirror is supposed to be. Compare to Nova, Camaro, etc and you will see the design is different, they are configured to be that way (either read that somewhere or pics from the period revealed it, not sure which).................
12-08-2008, 08:35 AM
#9
Le Mans Master
Thread Starter
I believe on a Corvette that IS the way the mirror is supposed to be. Compare to Nova, Camaro, etc and you will see the design is different, they are configured to be that way (either read that somewhere or pics from the period revealed it, not sure which).................
Glenn
 12-08-2008, 12:07 PM
#11
Le Mans Master
Thread Starter
 12-08-2008, 02:06 PM
#14
Team Owner


Member Since: Jul 2004
Location: Redondo Beach, California
Posts: 39,565
Received 548 Likes
on
375 Posts

There's an article in a recent NCRS Restorere magazine on the same topic. In that repair, the rivets were drilled out, tapped, and screws were used in lieu of the rivets. (the screws held in the pressure strip)
I found out that car covers can be a culprit for damaging the mirrors. When you pull the covers off and the mirrors are still in the cover mirror pockets, pulling on the car cover can put pressure on the mirror and deflect the metal pressure strip inside..making it loose and the mirrors floppy.
I found out that car covers can be a culprit for damaging the mirrors. When you pull the covers off and the mirrors are still in the cover mirror pockets, pulling on the car cover can put pressure on the mirror and deflect the metal pressure strip inside..making it loose and the mirrors floppy.
12-08-2008, 03:13 PM
#15
Le Mans Master
Thread Starter
There's an article in a recent NCRS Restorere magazine on the same topic. In that repair, the rivets were drilled out, tapped, and screws were used in lieu of the rivets. (the screws held in the pressure strip)
I found out that car covers can be a culprit for damaging the mirrors. When you pull the covers off and the mirrors are still in the cover mirror pockets, pulling on the car cover can put pressure on the mirror and deflect the metal pressure strip inside..making it loose and the mirrors floppy.
I found out that car covers can be a culprit for damaging the mirrors. When you pull the covers off and the mirrors are still in the cover mirror pockets, pulling on the car cover can put pressure on the mirror and deflect the metal pressure strip inside..making it loose and the mirrors floppy.
Glenn
12-08-2008, 05:17 PM
#16
Team Owner
Member Since: Sep 2006
Location: Westminster Maryland
Posts: 30,173
Likes: 0
Received 2,878 Likes
on
2,515 Posts
Hi Glenn,
Very nice useful pictures and description. Thanks!
Regards,
Alan
Very nice useful pictures and description. Thanks!
Regards,
Alan
12-08-2008, 05:25 PM
#17
Le Mans Master
Thread Starter
The stinkin gas was the worst part of the project. Even after I wiped it down outside, it still stunk up the house when I was washing it. The second one will be washed outside before I bring it in to do the repair. Wife wasn't too happy about it.
 Live & learn.
Glenn
12-08-2008, 05:32 PM
#18
Melting Slicks
I guess it's personal preference, pg 10 of the Vette Vues fact book clearly shows a 68 in the down position, but elsewhere it is up in the 70's models. Maybe originally intended to be down but when they realized vision was restricted, they flipped them up!?!?!?!?!?
12-08-2008, 06:22 PM
#19
Team Owner

