When you click on links to various merchants on this site and make a purchase, this can result in this site earning a commission. Affiliate programs and affiliations include, but are not limited to, the eBay Partner Network.
Also, I noticed your car doesn't have the headlamp protectors.
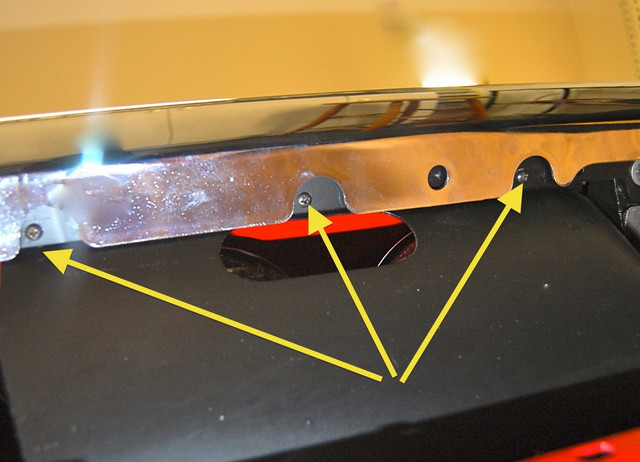
Yes, they are quite visible after I refurbed them, thanks for the link. I'm assuming they clip in somewhere?
Originally Posted by Alan 71
Hi 72,
Often people find that leaving the grill unpainted isn't an option for them because unless the grill has been re-chrome plated the appearance of the chrome plated areas that were intended to be painted isn't very good because originally they received very little preparation for the plating they received.
Because of the configuration of the grills preparing ALL the surfaces for plating is quite a job.
Regards,
Alan
Hi Alan, I did notice the rougher pitted area closer to the egg crate on mine, the previous owner had them rechromed all over, but obviously didn't wish to spend the time/money to prep which I can understand. I've been toying with the idea of prepping and getting them redone. The more I look at our 72 the more I see that is not original. things you learn as you go along I guess
Hi 72,
I really can't imagine being able to prepare the grills and then also being able to do the polishing required BETWEEN the copper, nickel, and chrome layers in such a way as to make the result COMPLETELY satisfactory without paint.
I think the paint detail on the grill not only eliminates some of that work but also makes for a more interesting looking grill.
Regards,
Alan
P. S.: Beyond that... is any specific primer required to paint a chromed surface (at least I would think so!?!)
I am by no means an expert so don't take this as gospel but from what I have read and tried:
-best option is to scuff up the chrome and use a 2k epoxy or urethane primer but they are expensive and probably not found in a rattle can so you have to have spray equipment
-next best option is to scuff up the chrome and use self-etching primer (I did this on the side grills and wasn't thrilled with the adhesion but time will tell)
-I see Duplicolor sells an adhesion promoter which says it can be used on chrome. Reviews look good but application instructions must be strictly followed (multiple coats at timed intervals) and it sounds like it goes on sticky. I'm not sure how that would work with masked areas.
-Some have mentioned that Muriatic Acid will etch the chrome but I've used that in my swimming pool and one whiff would knock you on your butt plus you would need a hazmat suit- I'm not going to try that one.
I'm going to concentrate on getting the surfaces roughed up good and then apply the etching primer, fill any pits, and then regular primer and paint.
I have never needed to "scuff" the chrome in order to get paint to adhere to the chrome surface. The surface DOES need to be cleaned of all dirt/oil/grease with a good solvent cleaner, then washed and dried thoroughly.
If the paint needs to stay for long duration, it's best to start with a self-etching primer on bare metal....THEN shoot on top color. And all paint must cure for several days, before it is durable enough to handle for re-assembly to the vehicle.
Found a bumper paint in dark gray that looks close to the original color (can't find Eastwood products locally) and will give the adhesion promoter a try. Will test this against no prep and scuffed up chrome.
So I sprayed self etching primer + paint on three areas on the back of the grills. One was bare chrome, one was scuffed up chrome and one had the adhesion promoter applied directly to the chrome. After three hours I could finger nail the paint and primer off the first two areas, but the spot primed with adhesion promoter held up very well. The best I could do with my finger nail was scrape some paint off but the primer stayed on under that. I think this stuff works as advertised and I'm going to use it on the rest of the surfaces. Wish I had found this when I was doing the side grills.
After a few hours of masking, painting, and unmasking I'm happy with the results. The color is probably a little lighter than factory but it's the closest I could find.
1/4" pinstripe centered on rib and then slit at the corners to wrap around rib
4 hours of my weekend
Masking worked very well, no bleeding or scraping after painting except for thin rib around light opening

 03-23-2017, 02:55 AM

 things you learn as you go along I guess