Is Lacquer thinner safe to use to remove original factory lacquer paint job
 03-08-2017, 03:40 PM
#21
Race Director


The right front fender is a bear.
 03-08-2017, 03:59 PM
#22
Instructor

Thread Starter

Thanks for the pic zwede. What I'm referring to is getting the original paint off. I feel like I made some progress when I get to that point on a section of the car. Then I like to upload a few.pics. I am aware that the primer needs to be removed. I am going to do that process when I get all the original paint off.
03-08-2017, 06:07 PM
#24
Race Director


As for what you are calling 'bluish color rings'...is actually a sealer
DUB
The following users liked this post:
Mullin Motorsports (03-08-2017)
03-08-2017, 08:01 PM
#26
Melting Slicks


I've used Formula A clean Stripper for years with great results but I did over look some stripper one day that I left on the nose of a 65. It stayed on there overnight. The next day it had softened the Gel-coat somewhat.
It works really well but be SURE to get all of it off after each application.
It looks good so far.
Good Luck

It works really well but be SURE to get all of it off after each application.
It looks good so far.
Good Luck
The following users liked this post:
Mullin Motorsports (03-08-2017)
03-08-2017, 08:21 PM
#27
Intermediate
There are a number of ways to strip paint from a fiberglass body. You have hit on some of them. With regard to solvent based stripping, always use good ventilation as these chemicals are carcinogenic, and they get into your blood stream through your skin and lungs. Protect your hands with high quality gloves. Change often if they get swollen with the thinner.
There was a time that we used media blasting to strip Vettes, then did our body work and put a coat of Feather Fill over the entire car, in order to block sand to perfection. Wet sanding on a Vette is not a problem.
Be aware that all imperfections that you find will be magnified by a fresh coat of shiny smooth new paint, so take the time to make all repairs to the underlying fiberglass now, including your fender and 1/4 panel seams and star cracking.
One thing that lacquer thinner is very good for is finding those imperfections. Once you start to sand on the factory gel coat, they seem to disappear. You might think that you sanded them out, but more often than not they are very deep cracks and need fiberglass repair material.
Easy fix, after loosing a crack......wet the area with lacquer thinner and watch the solvent dry. There will be residual thinner in the cracks and bad seams. Fix all of these areas first before doing any priming, using a good quality fiberglass repair material that is compatible with your type of fiberglass.
Dave
03-08-2017, 08:24 PM
#28
Intermediate
03-08-2017, 09:38 PM
#29
Instructor
Thread Starter
Thanks for all the great advice. I started working on the headlight area moving my way down. The rivet area looks smooth so far. No evidence of the front rivets popping through on the side I'm sanding. Im getting down to the primer on the passenger side headlight area. I will upload more pics soon. Thanks again!
03-10-2017, 06:10 PM
#30
Race Director
Just trying to pass long those thing that I have done that came back and severely bit me in the backside later. When I see stuff like that I literally get shivers....and NOT the good kind. Brings back some REALLY BAD memories.
Hopefully you took my comment as not being an a$$....but rather not wanting to to have a problem.
DUB
Hopefully you took my comment as not being an a$$....but rather not wanting to to have a problem.
DUB
03-10-2017, 06:11 PM
#31
Race Director
Thanks for all the great advice. I started working on the headlight area moving my way down. The rivet area looks smooth so far. No evidence of the front rivets popping through on the side I'm sanding. Im getting down to the primer on the passenger side headlight area. I will upload more pics soon. Thanks again!
 please do.
DUB
03-11-2017, 01:37 PM
#32
Instructor
Thread Starter
No offense taken dub. I appreciate all the advice. I moved up to the front of the car. I don't see any evidence of the rivets in front by the headlight s popping through. That's a relief!. Here are some more pics of my progress. And yes the shop rag has been removed. Lol.
03-11-2017, 05:27 PM
#33
Race Director
Looking good...then the fun part is getting the remaining primer, etc off of the panels....but...that usually is not that bad.
DUB
DUB
The following users liked this post:
Captainkvan (03-11-2017)
03-15-2017, 01:20 AM
#34
Intermediate
The blue rings? Could be sealer that was applied at factory. Was the yellow the original color of the car, or has it been repainted at one time? Is the blue looking stuff metallic?
Question....and maybe I'm making to big a deal about this but what type and grade/grit discs are you using on your DA to sand off your top coats?
The reason I ask is the blotchy sanding pattern you've got. It looks as if you're using a fine grit such as 320. If you use a fine grit to start, it takes longer of course, but it also lends itself to a wavy surface, witnessed by the blotchy sanding pattern.
If you were to simply sand off the top coats, without using a razor to strip it, most painters would start with 80 grit white or gold 3M paper, (or the equivalent) for the first cut. The gold paper is a more aggressive paper (and green even more), which you might use depending on how much paint is on the car. Then progressively move to finer grits using 3M white paper(150, then 220, then 320) as the paint is removed.
Think of your sand paper like a keel of a boat cutting through waves on the water. A deep V to cuts through the waves. If you have a flat bottom boat, it rides on top of the waves instead of cutting through them.
BTW sanding paper should be changed as soon as it loads up, or you won't be cutting straight, just running over waves.
Also you said that you added a soft foam pad to your DA pad. Why? The DA is designed to cut straight and true with the correct pad and paper. Too soft a pad and you're riding over the waves again.
DUB made a very good point for a beginner to be very careful with the air tools when sanding. You can do a lot of damage if you don't use them correctly. Take some time and get the feel of your specific tool. Each brand of DA has a different feel too. I prefer the original DA over the imports and other brands, because of the feel and balance, but you can get the job done using any tool. In time you'll be able to confidently straighten fiberglass repairs and bondo with just your DA.
Looks good so far. Keep up the good work.
Suggestions:
Do a lot of block sanding (wet sanding is good), to be sure there are no waves in your body work now. Use a guide (dust) coat of a contrasting color (such as flat black) over your primer to see your work as you sand.
Take those door handles out and watch for cracks around the handle opening. I recall that some small glass cracks around there because the handle is sucked in when you tighten them up.
Take off the front bumper.
Hope this helps someone out there that may not have experience yet, but wants to give it a go. Doing your own work is very fulfilling.
Dave
Last edited by Mullin Motorsports; 03-15-2017 at 01:25 AM.
03-15-2017, 06:09 PM
#35
Race Director
BY NO MEANS am I trying to write that what you are doing is wrong. It is just a different way than I know what works best for me.
***CASE IN POINT***
AS mentioned...using power sanders can do severe damage in the hands of someone who has not yet acquired the 'sense of feel' on the level as that of a bodyman with decades of experience. Also...just because the trigger on a sander can go to full throttle DOES NOT MEAN that you have to run it that way. The hotter you get your sandpaper..the faster it will clog and wear out.
Many people sand by using their EYES...and keep sanding on what they are seeing is happening...when that often time IS NOT how it is done..it is done all by feel. Because when I fell out a panel....I have my eyes closed.
I own several very good finish sanders (DA's)...and I rarely use them. I use my long boards and block the panels.
AS for you hood....and obviously you can do as you wish...but I would chemically strip the primer off that panel and get it to bare fiberglass and then begin to carefully block it to find all defects in the panel surface.
And I am going to completely contradict myself in what I wrote. I have had forum members call me and ask me why I don't grind paint off and use sanders IF I know I am going to apply gelcoat and primers that has to go on so thick anyway. WELL...I answer them like this.
I KNOW the gelcoat and primer I will apply will be quite thick when it is all said and done;...so what does it matter if I put waves in a panel that I can fill in. I say. "Doing this as long as I have...there is a part of me that just can not grasp the fact that I am actually adding to the issues in the body that I know that I already have to repair. No need in making it any harder on myself or the products I use to get a body slick as glass."
Any seasoned bodyman KNOWS how the products work that he/she has used. Sometimes...it is faster for me to 'double dip' a car than it is to get the body to feel spectacular before I gelcoat it or prime it. 'Double dip' is a term I use for when I apply a product like gelcoat or primer...or even clearcoat....then block it down ..and then re-apply it again.
The 'trick' is years of doing this stuff and knowing what 'double dipping' is okay and NOT okay....especially when dealing with undercoats such as gelcoat or primer. That is when any good bodyman will tell you you need to spend the time to do all repairs in a top quality filler so your gelcoat or primer does not have to work so hard to remove any surface irregularities.
DUB
Last edited by DUB; 05-07-2017 at 05:28 PM.
03-15-2017, 10:56 PM
#36
Instructor
Thread Starter
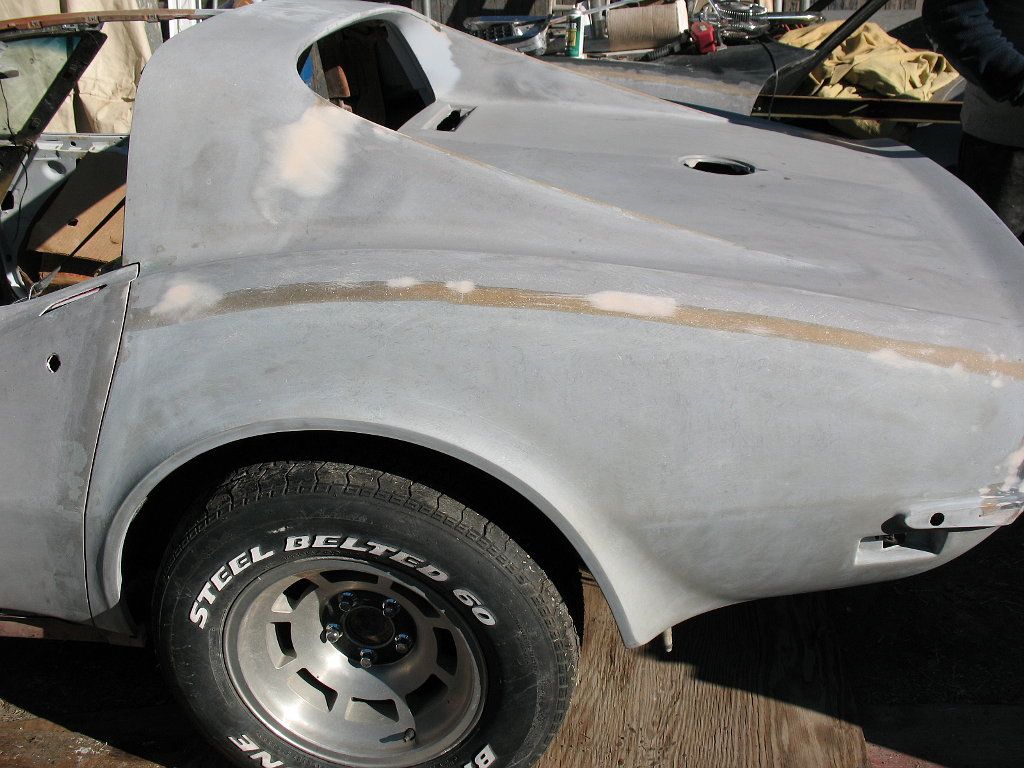
Thanks Dave and Dub for pointing me in the right direction. I went ahead and took off the rubber pad I had on my DA and gave it a try. I seems to be more effective at getting the original paint off. I am using 80 grit to start with and move up to 100 and 120. I have never used anything higher so far. My goal is to get the original Daytona yellow paint off for now and come back and scrub of the primer later. The reason I used a rubber pad is because I have never used a DA before and wanted it to be more forgiving while I get a feel for it. Don't know why it looks blotchy but there are only 2 color s on the car. A burgandy over spray paint job and the original yellow. I also block sand by hand. I sand it down and will have yellow spots that are left over. Then I scrub it with lacquer thinner and the yellow spots will dissolve. Then I'm down to the spoty oxide you see in the pictures. That's when I stop for now and move on to another section. I'm almost to that point on the driver's side rear quarter panel now. I will post more pics this weekend. My method is one step at a time in sections. Slow but effective and it keeps me focused.
Thanks again the Captain
Thanks again the Captain
03-16-2017, 06:46 PM
#37
Race Director
Thanks Dave and Dub for pointing me in the right direction. I went ahead and took off the rubber pad I had on my DA and gave it a try. I seems to be more effective at getting the original paint off. I am using 80 grit to start with and move up to 100 and 120. I have never used anything higher so far. My goal is to get the original Daytona yellow paint off for now and come back and scrub of the primer later. The reason I used a rubber pad is because I have never used a DA before and wanted it to be more forgiving while I get a feel for it. Don't know why it looks blotchy but there are only 2 color s on the car. A burgandy over spray paint job and the original yellow. I also block sand by hand. I sand it down and will have yellow spots that are left over. Then I scrub it with lacquer thinner and the yellow spots will dissolve. Then I'm down to the spoty oxide you see in the pictures. That's when I stop for now and move on to another section. I'm almost to that point on the driver's side rear quarter panel now. I will post more pics this weekend. My method is one step at a time in sections. Slow but effective and it keeps me focused.
Thanks again the Captain
Thanks again the Captain
DUB
04-03-2017, 10:57 PM
#38
Instructor
Thread Starter
Some more progress pics. Looks like the rivets above the headlight s are not popping through.
Last edited by Captainkvan; 04-03-2017 at 11:11 PM.
04-04-2017, 09:59 AM
#39
Intermediate
I wish you hadn't stripped the headlight covers to bare metal. The factory primer is a very good base and has great adhesionto the pot metal. Be sure to used an etching primer designed for use on pot metal, or your primer may flake off in time. At least that's what I remember. What type and brand fiberglass repair materials, fillers, and primers are you using?
Dave
Dave
04-04-2017, 11:05 AM
#40
Intermediate
Don't get frustrated. Keep up the good work. Just be careful to not cut all the way through the original gel coat unless you need to repair the fiberglass, or it was really wavy from the factory and you're trying to achieve a better than OEM final finish. I forget the term, but some Corvette restorations are done in a manner to bring the car back to factory level of finish and fit. Commercially acceptable is the term we used in a dealer body shop. I was never one for doing a any restoration that didn't exceed factory finish, but I guess there's a place for it on a rare model.
Some guys leave the cracks (lines) on the top of the fenders and quarter panels where they are glued to the upper body sections, because that's what happens naturally to a factory seam. The only reason that happened is because of the factory filler/adhesive lost it's bond and cracked. IMHO, that's no reason to leave the cracks. We always V ground them out and used a high quality fiberglass reinforced material to fill and straighten all the seams. Clausen, Evercoat and Bondo brand still make the stuff.
We also used LORD FUSOR products and DURAMIX. These products were introduced into the market so we could repair the C-4 fiberglass reinforced sheet molded compound body panels (FRSMC and SMC, if I remember right) was introduced, but they made adhesives and repair filler materials for the earlier polyester glass cars too. I'm not sure which product they're using today, but the FUSOR products are still available.
All very good products, but expensive and you need a special gun to use the cartridges. Maybe DUB has newer products in mind. Also he mentioned "GEL Coat" rather than Feather Fill. We used Feather Fill (or the equivalent) as gel coat on the early cars. Clausen makes one that is self etching called Z-Chrome, (with a matching body filler product). It's got zinc-chromate in it. Not sure if they even make it any more, or if you can buy it in your area.
What brand and product are you using DUB? I've been retired for decades, but I did a multitude of restoration and commercial work for over 40 years.
Good luck and keep us all up to date.
Dave
Last edited by Mullin Motorsports; 04-04-2017 at 11:08 AM.