Corvette: How to Remove/Replace Front Wheelhouse Liner
Removing the wheel liner from the Corvette is simple and useful when working on suspension or under body components. Learn how to remove the wheelhouse liner with this how-to guide.
This article applies to the C5, C6 and C7 Corvette (1997-current).
Wheel liners help enhance the Corvette's overall appearance, while keeping out rocks, dirt, salt and debris. Liners also prevent water from getting into the bay and help reduce road noise. You won't need special tools for this installation. The wheel liners for the C5, C6 and C7 Corvette might not be exactly the same, but the process is similar regardless.

Materials Needed
- Jack
- Cement blocks
- Lug wrench (socket on one end and pry bar on the other)
- Allen wrench
- Owner's manual
Step 1 – Jack up the vehicle
Park the Corvette on a flat surface. Place the jack under the frame near the tire where you need or want to replace the wheelhouse liner. Be sure the jack is in contact with the Corvette's frame. Jack up the car so that you've extended the jack, but not so much that it is supporting the weight of the car. Place cement blocks behind the two rear tires to help prevent the car from rolling backward.
Remove the tire where you will be replacing the wheelhouse liner. Start by removing the hubcap. Then, using a cross wrench, loosen the lug nuts. Jack the car further up so that the tire is completely off the ground. Remove the nuts the rest of the way, turning them counterclockwise until they are loose and can come off. Pull your tire off.
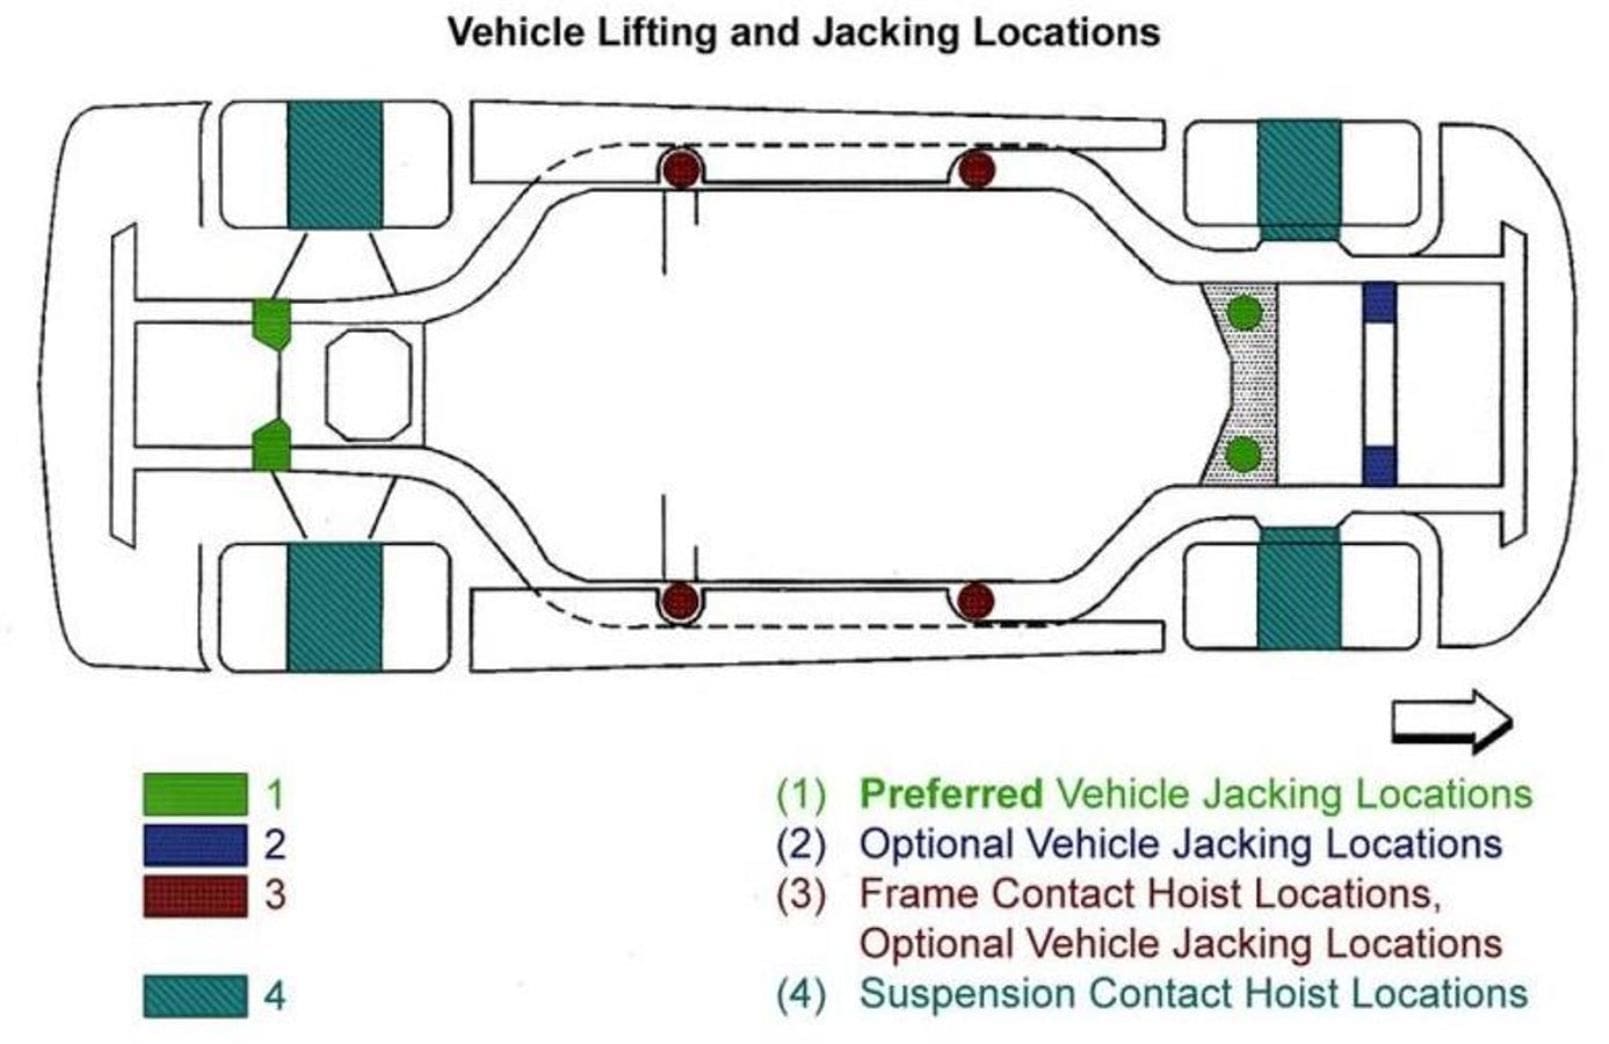
(Related Article: How to Jack Up Your Vette- CorvetteForum.com)
Step 2 – Loosen fasteners
Use a socket wrench to loosen the front wheelhouse liner fasteners from the front wheelhouse liner. Start from the bottom-front and work your way around the liner. Loosen the bolts, but don't remove them yet. Remove the front wheel opening rear molding fastener. This is located at the rear of the opening and is attached with one bolt. Use the Allen wrench to remove it.
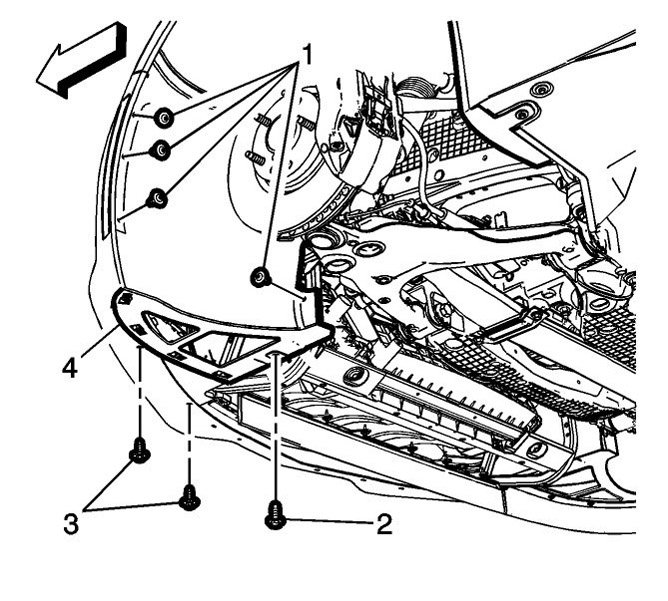
Figure 2. Start from the bottom-front. 
Figure 3. Work your way around the liner. 
Figure 4. Remove bolts securing rear moulding. 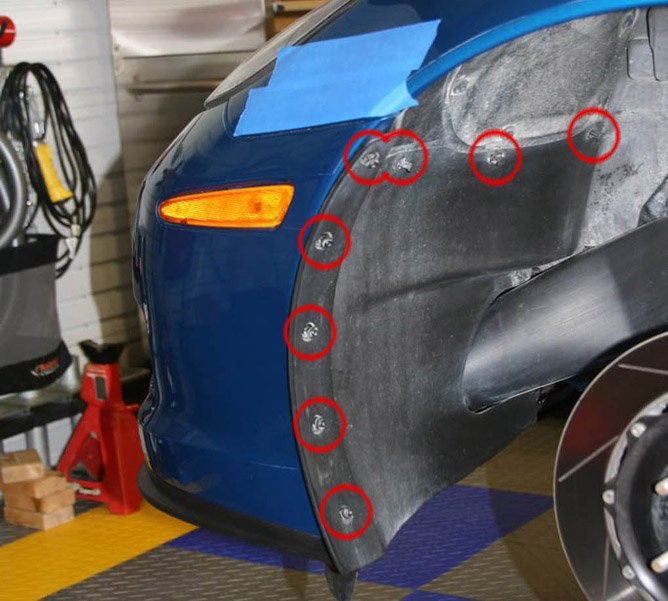
Figure 5. C6 Fender screws highlighted. 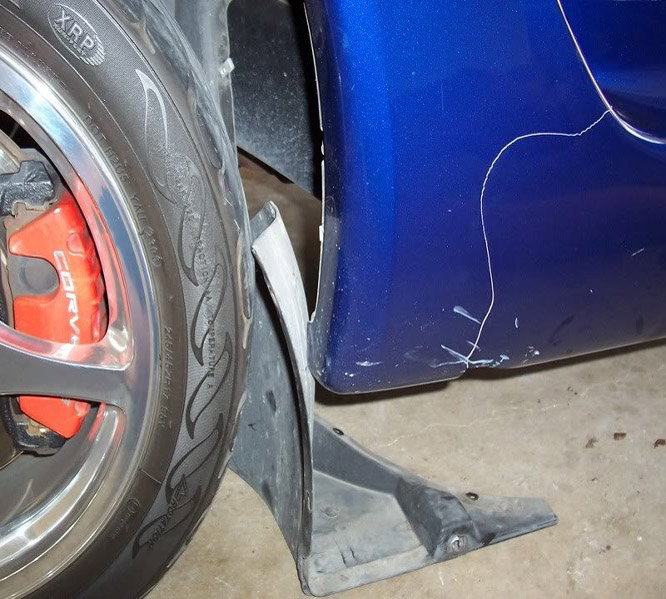
Figure 6. Rear moulding removed.
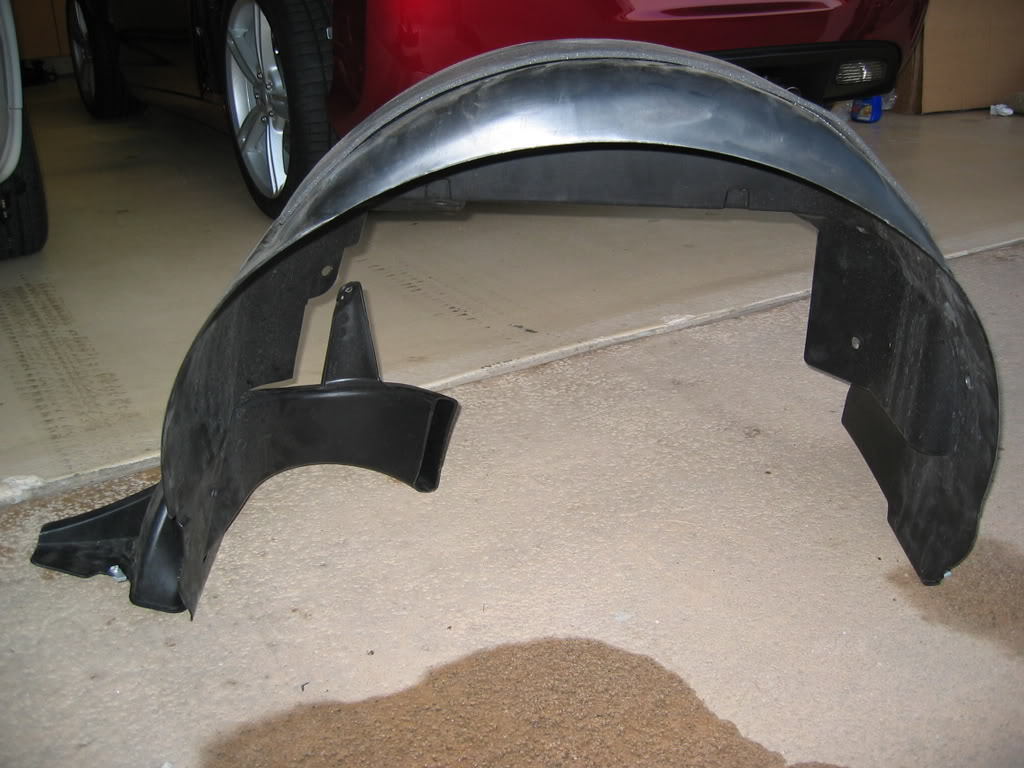
Step 3 – Remove the wheelhouse liner
With all fasteners and retainers removed, pull the liner until it separates from the wheelhouse. Pull firmly, but don't yank it out. Doing so will damage the liner if there are any fasteners that weren't removed.
Step 4 – Install new wheelhouse liner
Place and position the new wheelhouse liner where the old one was. Start re-installing by refastening the two outermost retainers first, and working back towards the middle.
Step 5 – Replace fasteners
Replace the front wheelhouse liner fasteners. Your owner's manual includes information about the order to replace the fasteners and how much to tighten them.
Step 6 – Replace tire and hubcap
Put the tire back on and re-tighten the lug nuts. Replace hubcap. Lower the car until you can remove the jack from beneath it.
Related Discussions and Site
- How to Remove/Replace Front Wheelhouse Liner - CorvetteForum.com
- Lifting and Jacking the Vehicle - CorvetteForum.com
- How to Change a Tire - WikiHow.com