
Bird Cage return Better then Original (Pictures)
 12-20-2008, 03:01 PM
#41
Race Director

Is is the most extensive restoration I have ever seen The parts look like they are cadmium plated,maybe cad over galvanized?Again,excellent job.


 12-21-2008, 10:37 AM
#44

Hi Avner,
It looks like you still know how to get down to the heart of the problem.
I'm curious about the plating on your parts. Earlier you said they were galvanized. I'm wondering about the 'gold' color... is that a dichromate wash? I always think of hardware that's been galvanized as having a flat, silver, scaly finish. Is there something over the the galvanized surface?
Thanks a lot and good luck with your long but thorough project!!!
Regards,
Alan
PS: Triple black will be NICE!!!
12-21-2008, 05:51 PM
#45
7th Gear


Member Since: Oct 2008
Location: Winnipeg Manitoba
Posts: 7
Likes: 0
Received 0 Likes
on
0 Posts
Wow I'm speechless.
I think it has been asked before but I'm not sure if you answered it; what did you have to do to ensure that everything lined up? Is there some place that has all of the measurements and angles for all the parts?
Keep up the awesome work,
Brian
I think it has been asked before but I'm not sure if you answered it; what did you have to do to ensure that everything lined up? Is there some place that has all of the measurements and angles for all the parts?
Keep up the awesome work,
Brian
 12-22-2008, 01:04 AM
#47
Burning Brakes

Thread Starter
Member Since: Nov 2006
Posts: 948
Likes: 0
Received 32 Likes
on
13 Posts
2022 C3 of the Year Finalist - Modified

II don't have any measurement or angles, what I have is a metal Expert that can do every thing with metal.
Every piece was separate, take out the "punct swwiz" electric weld & making holes to alien when put together.
You can see in this link what he doing now:
http://forums.corvetteforum.com/c3-g...o-1936-c6.html
Merry Christmas
Avner
12-22-2008, 02:01 AM
#48
Administrator
Member Since: Jul 2000
Location: About 1100 miles from where I call home. Blue lives matter.
Posts: 51,668
Received 5,403 Likes
on
2,806 Posts
 12-22-2008, 10:12 AM
#50
Burning Brakes


WOW I was planning on installing new rocker channels on my 69 but this just gave me some inspiration to go alot further.... I was trying to figure out how to do my rocker channels without lifting the body off. Absolutely beautiful job....
12-22-2008, 05:34 PM
#51
Cruising
Member Since: Dec 2008
Location: Redondo Beach California
Posts: 11
Likes: 0
Received 0 Likes
on
0 Posts
I would say "zinc plated" is a better description rather than Galvanized.... Looks great.
The yellow passivate (wash) offers additional protection over a clear (looks like a blue silver, the type you see regularly on screws etc). In a salt spray test the Yellow would last probably 3 times what the clear would last.
The clear is usually described as "BZP" or Bright Zinc plate.
Again - looks great!
02-11-2009, 04:34 PM
#53
Burning Brakes
Thread Starter
Member Since: Nov 2006
Posts: 948
Likes: 0
Received 32 Likes
on
13 Posts
2022 C3 of the Year Finalist - Modified
Hello
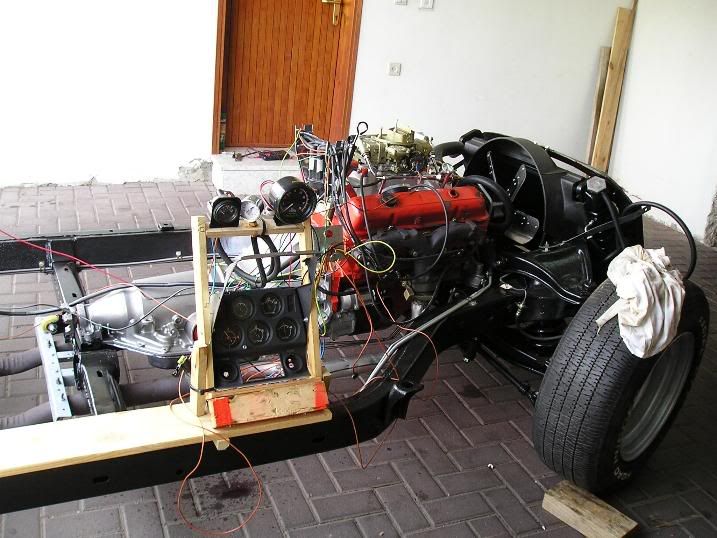
I'm having some progress in my restoration.
I rebuild the engine and put it on the frame and want to make it ready for break in, start up the first time.
Engine setup:
Dart Iron Head: DRT-10121111
Combustion Chamber Volume (cc): 64cc
Intake Runner Volume (cc): 180cc
Intake Valve Diameter (in): 2.020 in.
Exhaust Valve Diameter (in): 1.600 in.
Maximum Valve Lift (in): 0.525 in.
Engine Rebuild kit: MHP-127-311
Notes: Approximate compression ratio 9.73:1 with a 64cc head.
Camshaft + Lifters: CRN-113802
Duration at 050 inch Lift: 222 int./234 exh.
Advertised Duration: 278 int./290 exh.
Valve Lift with Factory Rocker Arm Ratio: 0.467 int./0.494 exh. lift
Lobe Separation (degrees): 114
Lifter Style: Hydraulic flat tappet
Push Rod: PRO-66891C
Rocker Arms: PRO-66933C (1.5 ratio)
Intake: WND-8150
Holley 4150:HLY-0-80783C (650cfm)
Hedman Headers: HED-68266 with side pipes 3"
I hop to get 375-400 HP&TQ
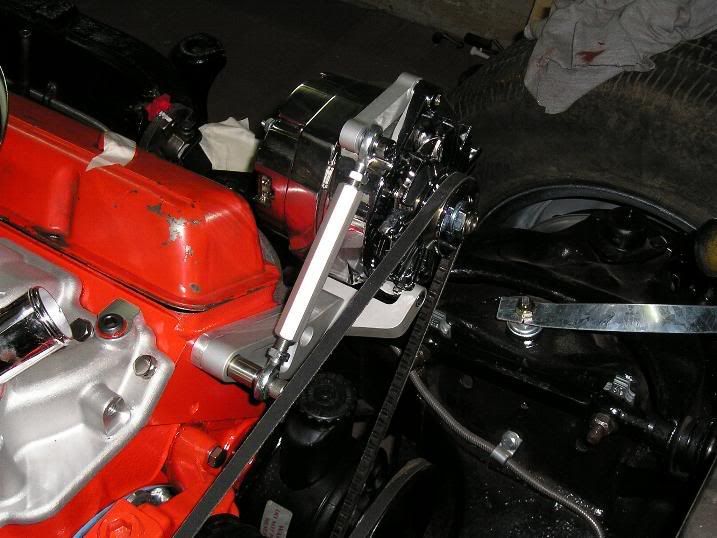
I install an after market 100A alternator with SME-2001 bracket but it didn't line up with the pulley and I need to made 3/8" spacer between the alternator bracket and the head.
I install also a Vintage Air radiator and oil radiator and make some adjustment to assemble it nice and clean.

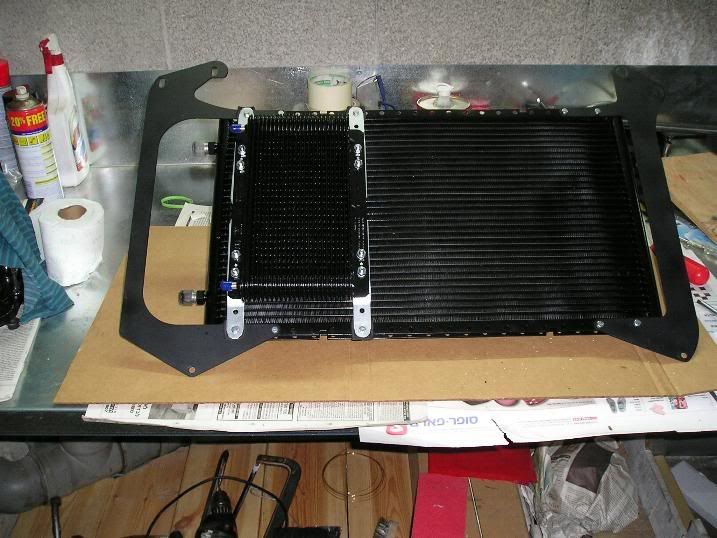
[IMG][URL=http://i264.photobucket.com/user/avnersh/media/corvette%201972/OilRadiator3.jpg.html][/IMG]

I break in the engine and every thing was worked good, few leaks but every thing was under control.
Thanks, Avner
I'm having some progress in my restoration.
I rebuild the engine and put it on the frame and want to make it ready for break in, start up the first time.
Engine setup:
Dart Iron Head: DRT-10121111
Combustion Chamber Volume (cc): 64cc
Intake Runner Volume (cc): 180cc
Intake Valve Diameter (in): 2.020 in.
Exhaust Valve Diameter (in): 1.600 in.
Maximum Valve Lift (in): 0.525 in.
Engine Rebuild kit: MHP-127-311
Notes: Approximate compression ratio 9.73:1 with a 64cc head.
Camshaft + Lifters: CRN-113802
Duration at 050 inch Lift: 222 int./234 exh.
Advertised Duration: 278 int./290 exh.
Valve Lift with Factory Rocker Arm Ratio: 0.467 int./0.494 exh. lift
Lobe Separation (degrees): 114
Lifter Style: Hydraulic flat tappet
Push Rod: PRO-66891C
Rocker Arms: PRO-66933C (1.5 ratio)
Intake: WND-8150
Holley 4150:HLY-0-80783C (650cfm)
Hedman Headers: HED-68266 with side pipes 3"
I hop to get 375-400 HP&TQ
I install an after market 100A alternator with SME-2001 bracket but it didn't line up with the pulley and I need to made 3/8" spacer between the alternator bracket and the head.
I install also a Vintage Air radiator and oil radiator and make some adjustment to assemble it nice and clean.
[IMG][URL=http://i264.photobucket.com/user/avnersh/media/corvette%201972/OilRadiator3.jpg.html][/IMG]
I break in the engine and every thing was worked good, few leaks but every thing was under control.
Thanks, Avner
Last edited by avner; 04-23-2018 at 05:14 AM.
01-25-2010, 12:32 PM
#54
Burning Brakes
Thread Starter
Member Since: Nov 2006
Posts: 948
Likes: 0
Received 32 Likes
on
13 Posts
2022 C3 of the Year Finalist - Modified
Hey everyone
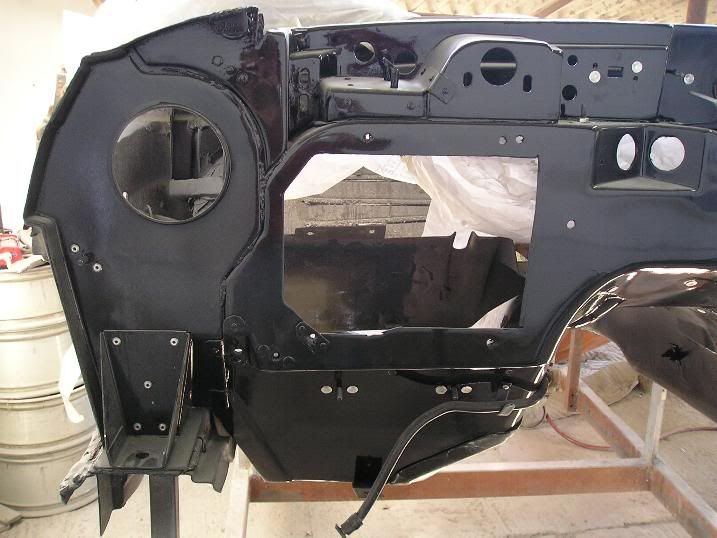
Some progress at the body shop
We finish putting all the brackets & clips on the body and prepare to put it back on the frame.
Also we made ready the door to assemble all the parts and to put back the skein.
Avner
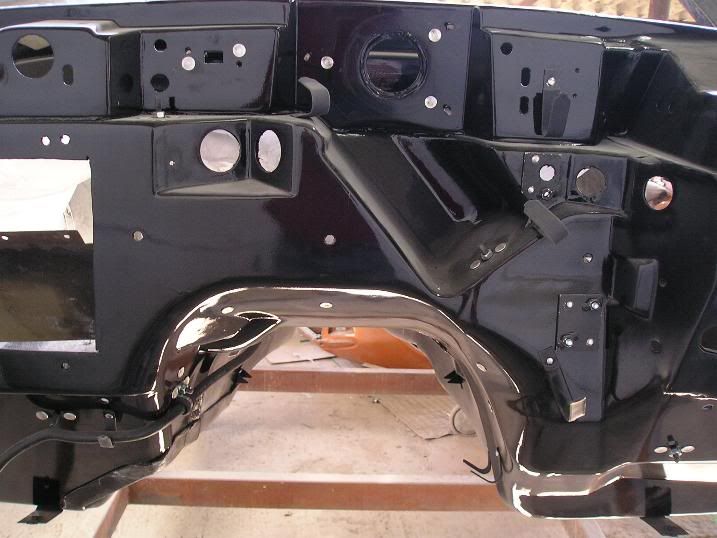

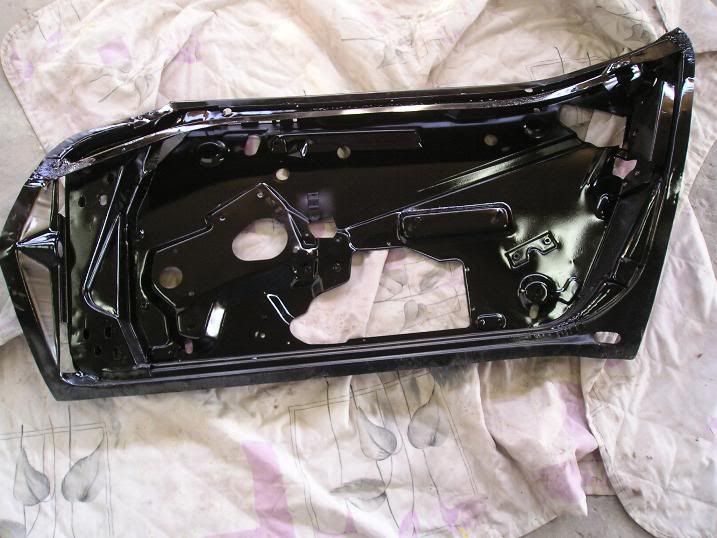
Enjoy
Some progress at the body shop
We finish putting all the brackets & clips on the body and prepare to put it back on the frame.
Also we made ready the door to assemble all the parts and to put back the skein.
Avner
Enjoy
Last edited by avner; 04-23-2018 at 05:16 AM.
01-25-2010, 04:55 PM
#55
Team Owner

Member Since: Sep 2006
Location: Westminster Maryland
Posts: 30,173
Likes: 0
Received 2,878 Likes
on
2,515 Posts
Hi Avner,
You'e still doing beautiful work. Thanks very much for the newest pictures!
Regards,
Alan
You'e still doing beautiful work. Thanks very much for the newest pictures!
Regards,
Alan
 01-25-2010, 05:58 PM
#57
Race Director
Beautiful
This galvanizing thing had me intrigued since it obviously looks like yellow dichromate and that isn't all that great for rust proofing. Since there is a lot of galvanizing down here with salt water boat trailers, I asked a guy that knows a lot about it.
Learned something new.
Galvanizing is a process that progressively turns the outer layers of steel gradually into zinc and then at the outermost layer it is completely zinc. Very rustproof.
The problem is that galvanized steel cannot be painted with an oil based coating because of the formation of "white rust" from the zinc that will eventually cause the paint to flake off. This I have seen before.
The acceptable way to paint galvanized steel is to let it weather for a year and then use water based paints, that should not fail.
The process Avner has is a new one for me. After the steel is electro galvanized, it is then dipped into another electro bath of yellow dichromate, giving the finish in Avner's pics.
This yellow dichromate finish acts as a primer for painting, is non porous and I assume would also be benefical for gluing and bonding so you won't have the failures as would have occured with just the galvanizing zinc.
Next time I see him, I'll ask whether this process can be applied to hot dipped galvanizing too. Forgot about that.
Thanks for planting the seed, Avner, learned something new and usefull.
01-25-2010, 06:34 PM
#58
Terrorizing Orange Cones


 01-25-2010, 10:41 PM
#60
Safety Car
