


Bird cage pics

Thread Starter
Burning Brakes


Joined: Oct 2002
Posts: 1,196
Likes: 47
From: Scarborough Maine Fredericksburg VA
 Bird cage pics
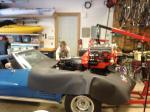
Thought I would share some before and after pics of my bird cage fix. As you can see we ended up just cutting away the body to expose the cage and then replaced the fiberglass after the fix and several coats of epoxy. Frame is almost ready to bolt the body back on and then I can start preparing the engine compartment and putting the car back together. I know I have a long way to go but at least it is moving forward and the car will be completly done over.







Thread Starter
Burning Brakes
Joined: Oct 2002
Posts: 1,196
Likes: 47
From: Scarborough Maine Fredericksburg VA
Thanks for your comments. I should have mentioned that we also insterted all new sill pieces that fit into the original that the pics don't show.
That is what sort of started this as we didn't want to just fit in new pieces without getting a 360 degree view of the existing sills. Once we had the existing sills cleaned and encapsled in por 15 we put in the new inserts and epoxyed the whole piece. I am looking forward to getting it back on the frame and looking like a car again.
That is what sort of started this as we didn't want to just fit in new pieces without getting a 360 degree view of the existing sills. Once we had the existing sills cleaned and encapsled in por 15 we put in the new inserts and epoxyed the whole piece. I am looking forward to getting it back on the frame and looking like a car again.



