
Brandshatch Green 71 - Barn Find???
 09-07-2009, 07:12 AM
#41
Senior Member


Thread Starter
Member Since: Jan 2008
Location: Easton, PA
Posts: 12,154
Received 2,031 Likes
on
1,103 Posts
St. Jude Donor '10

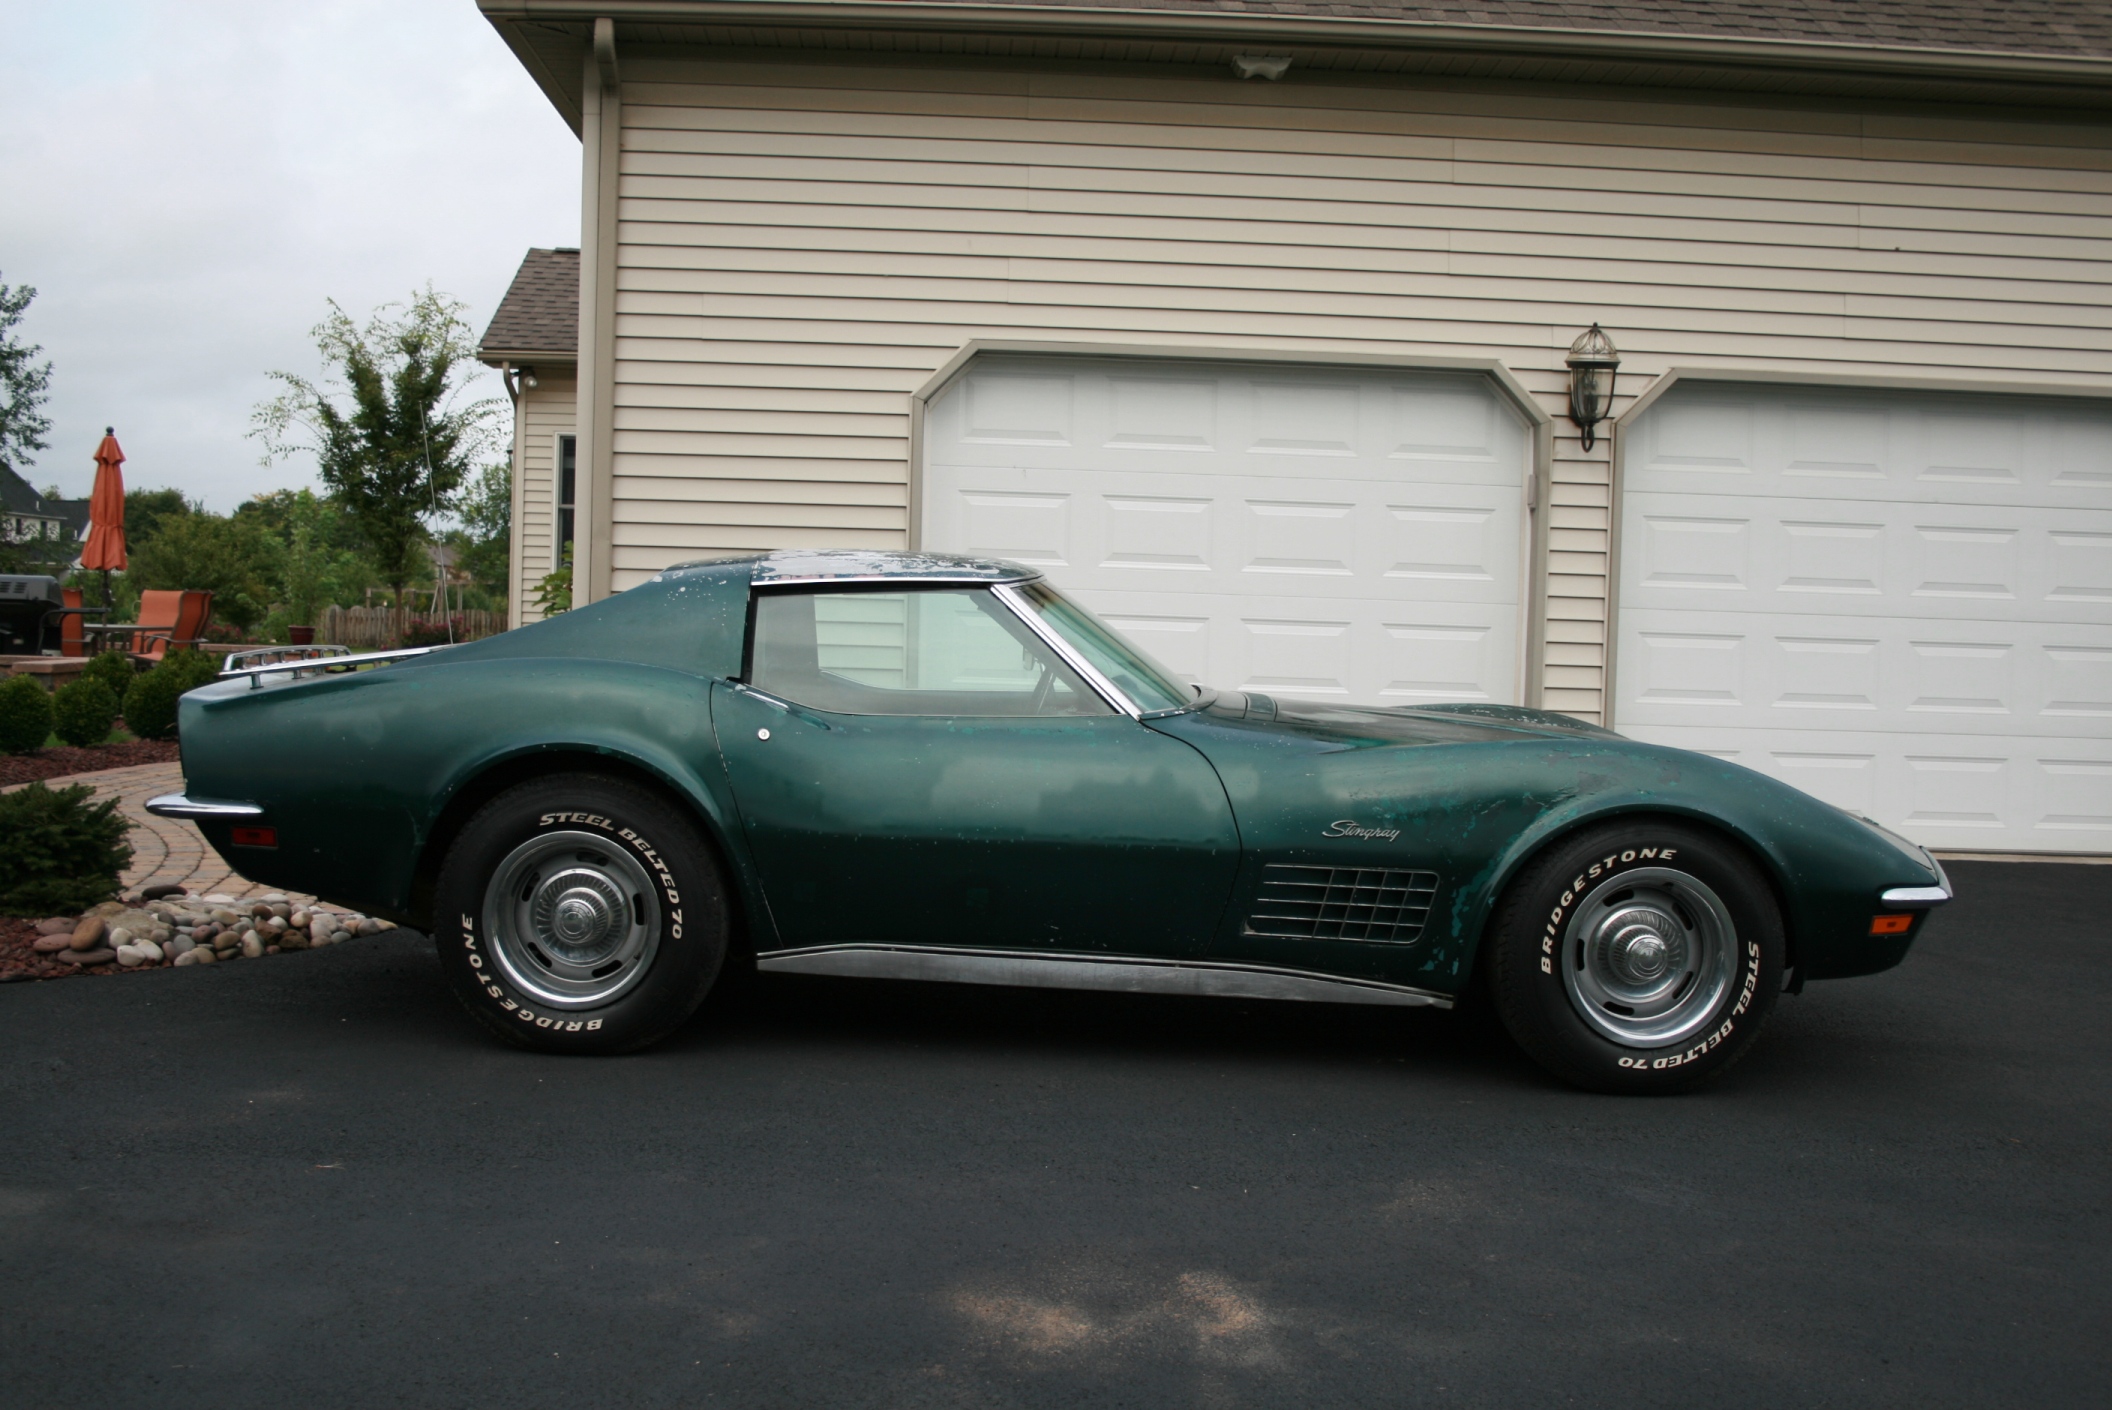
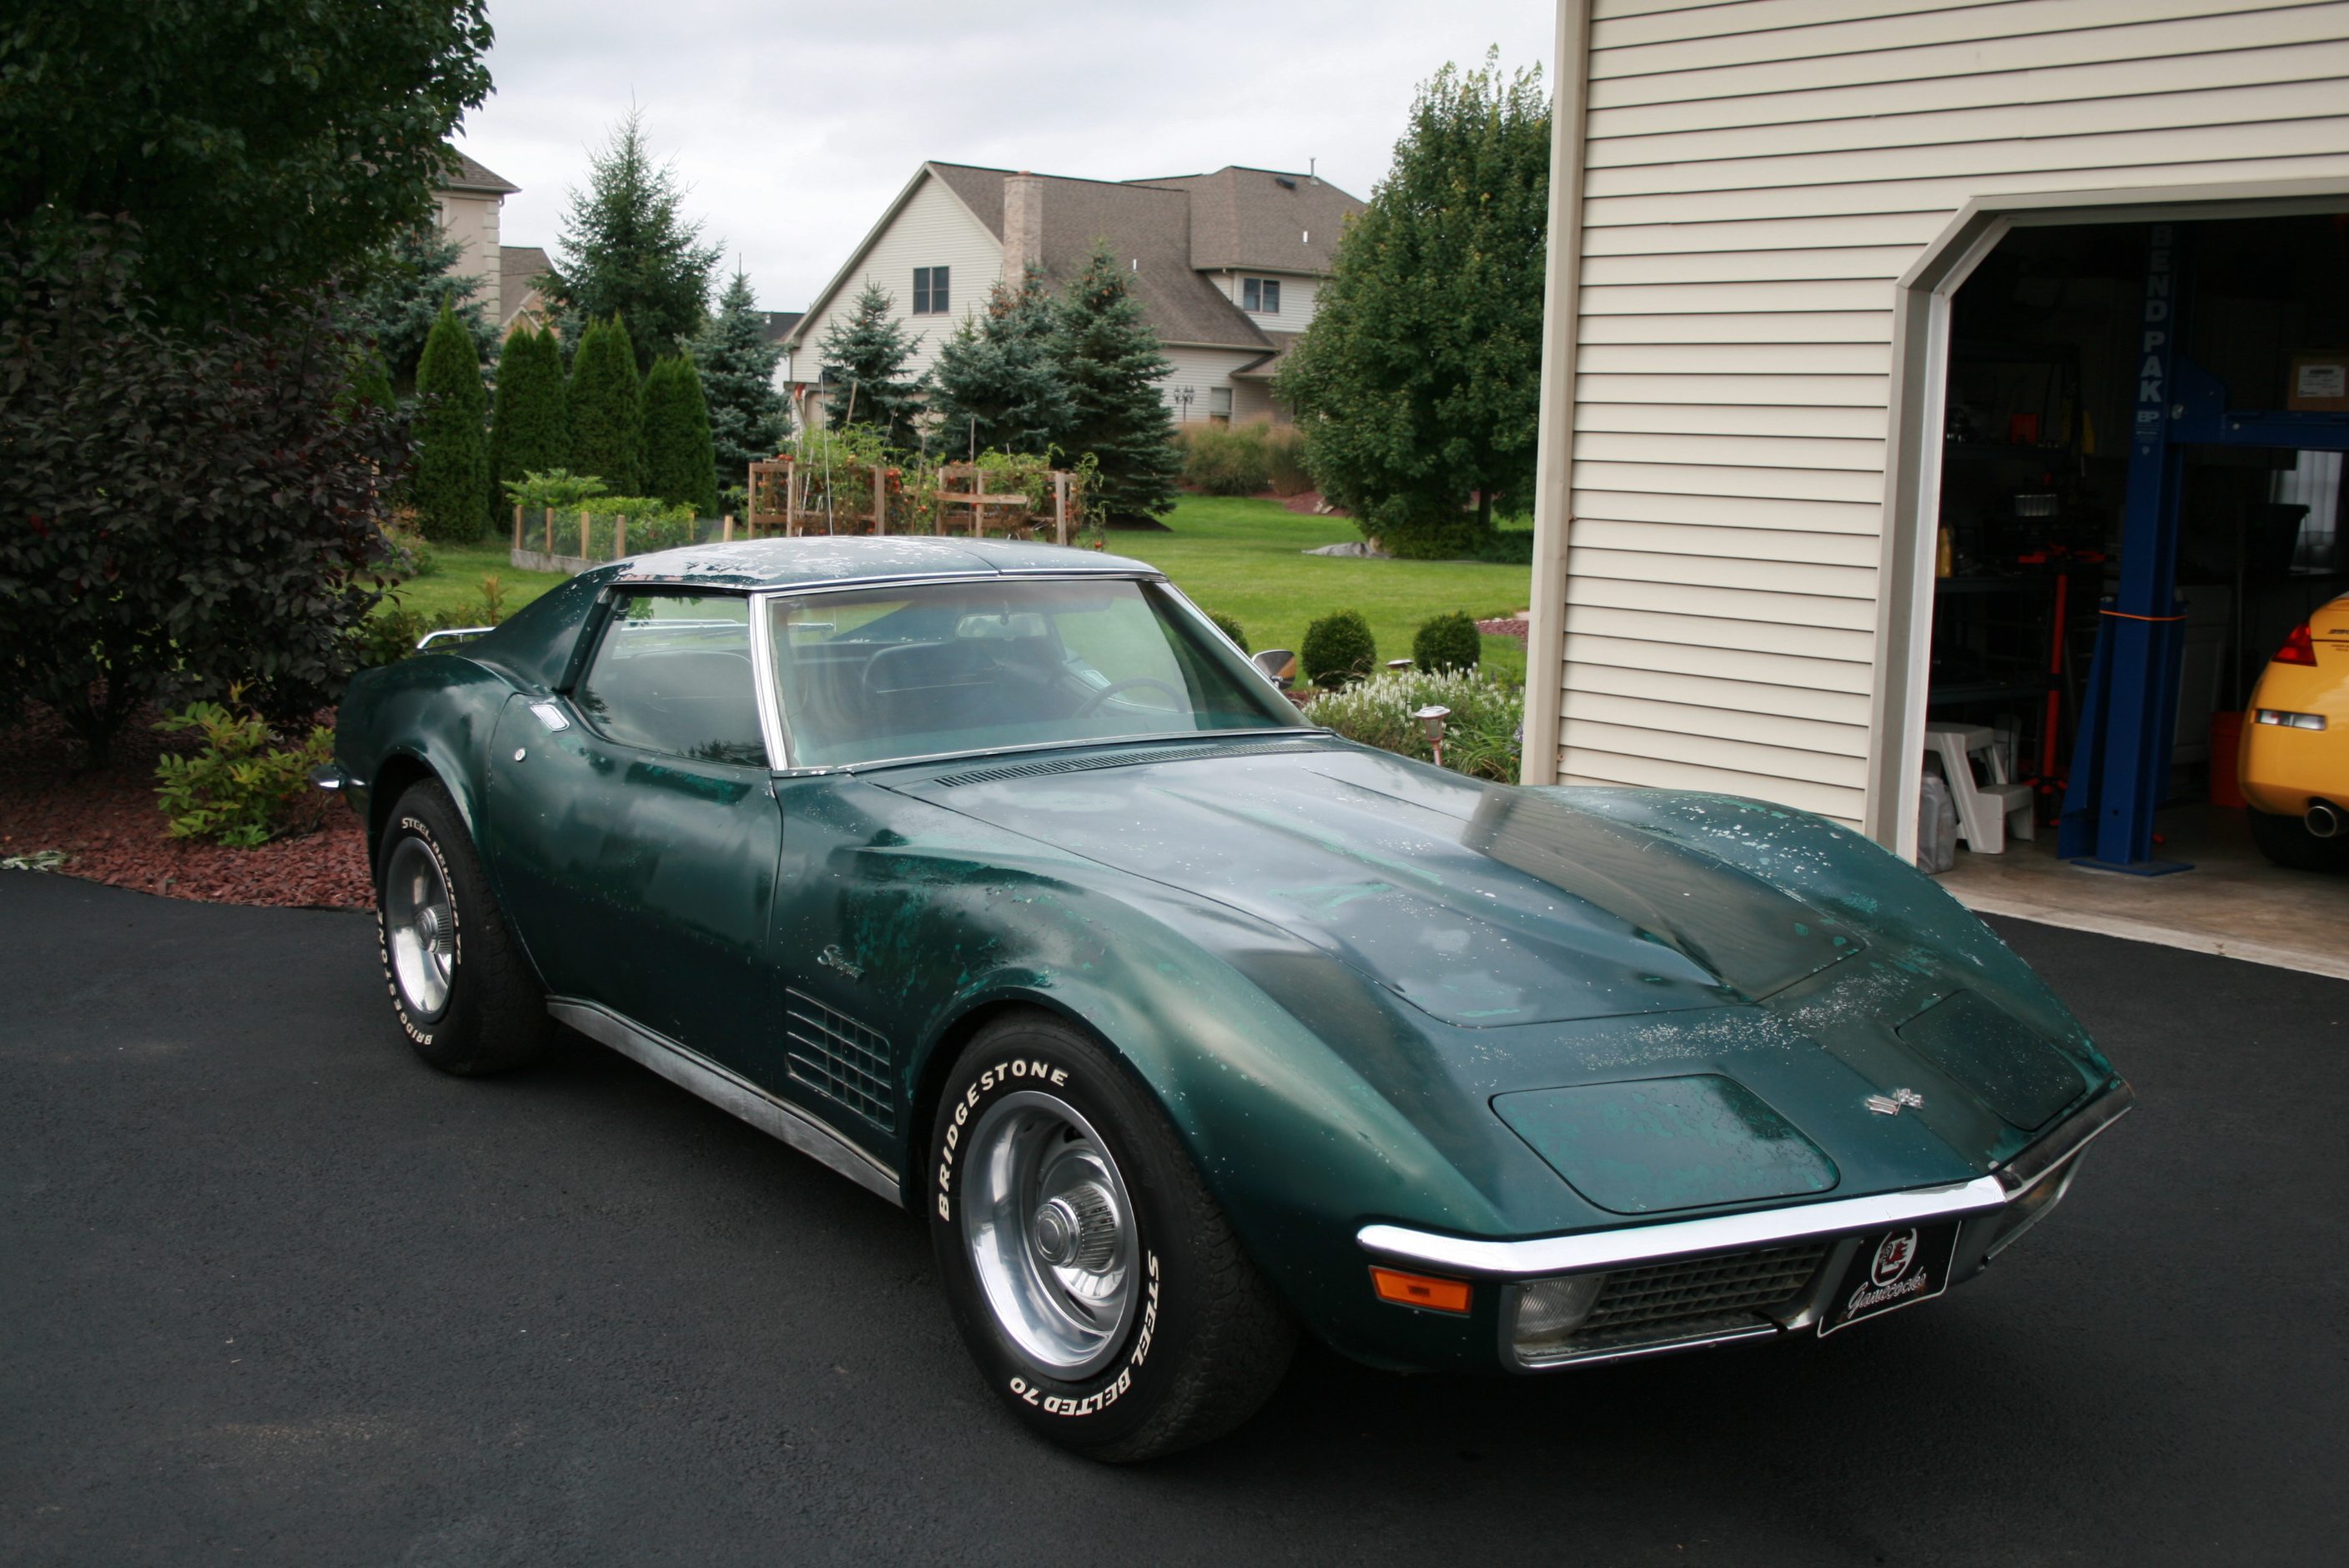
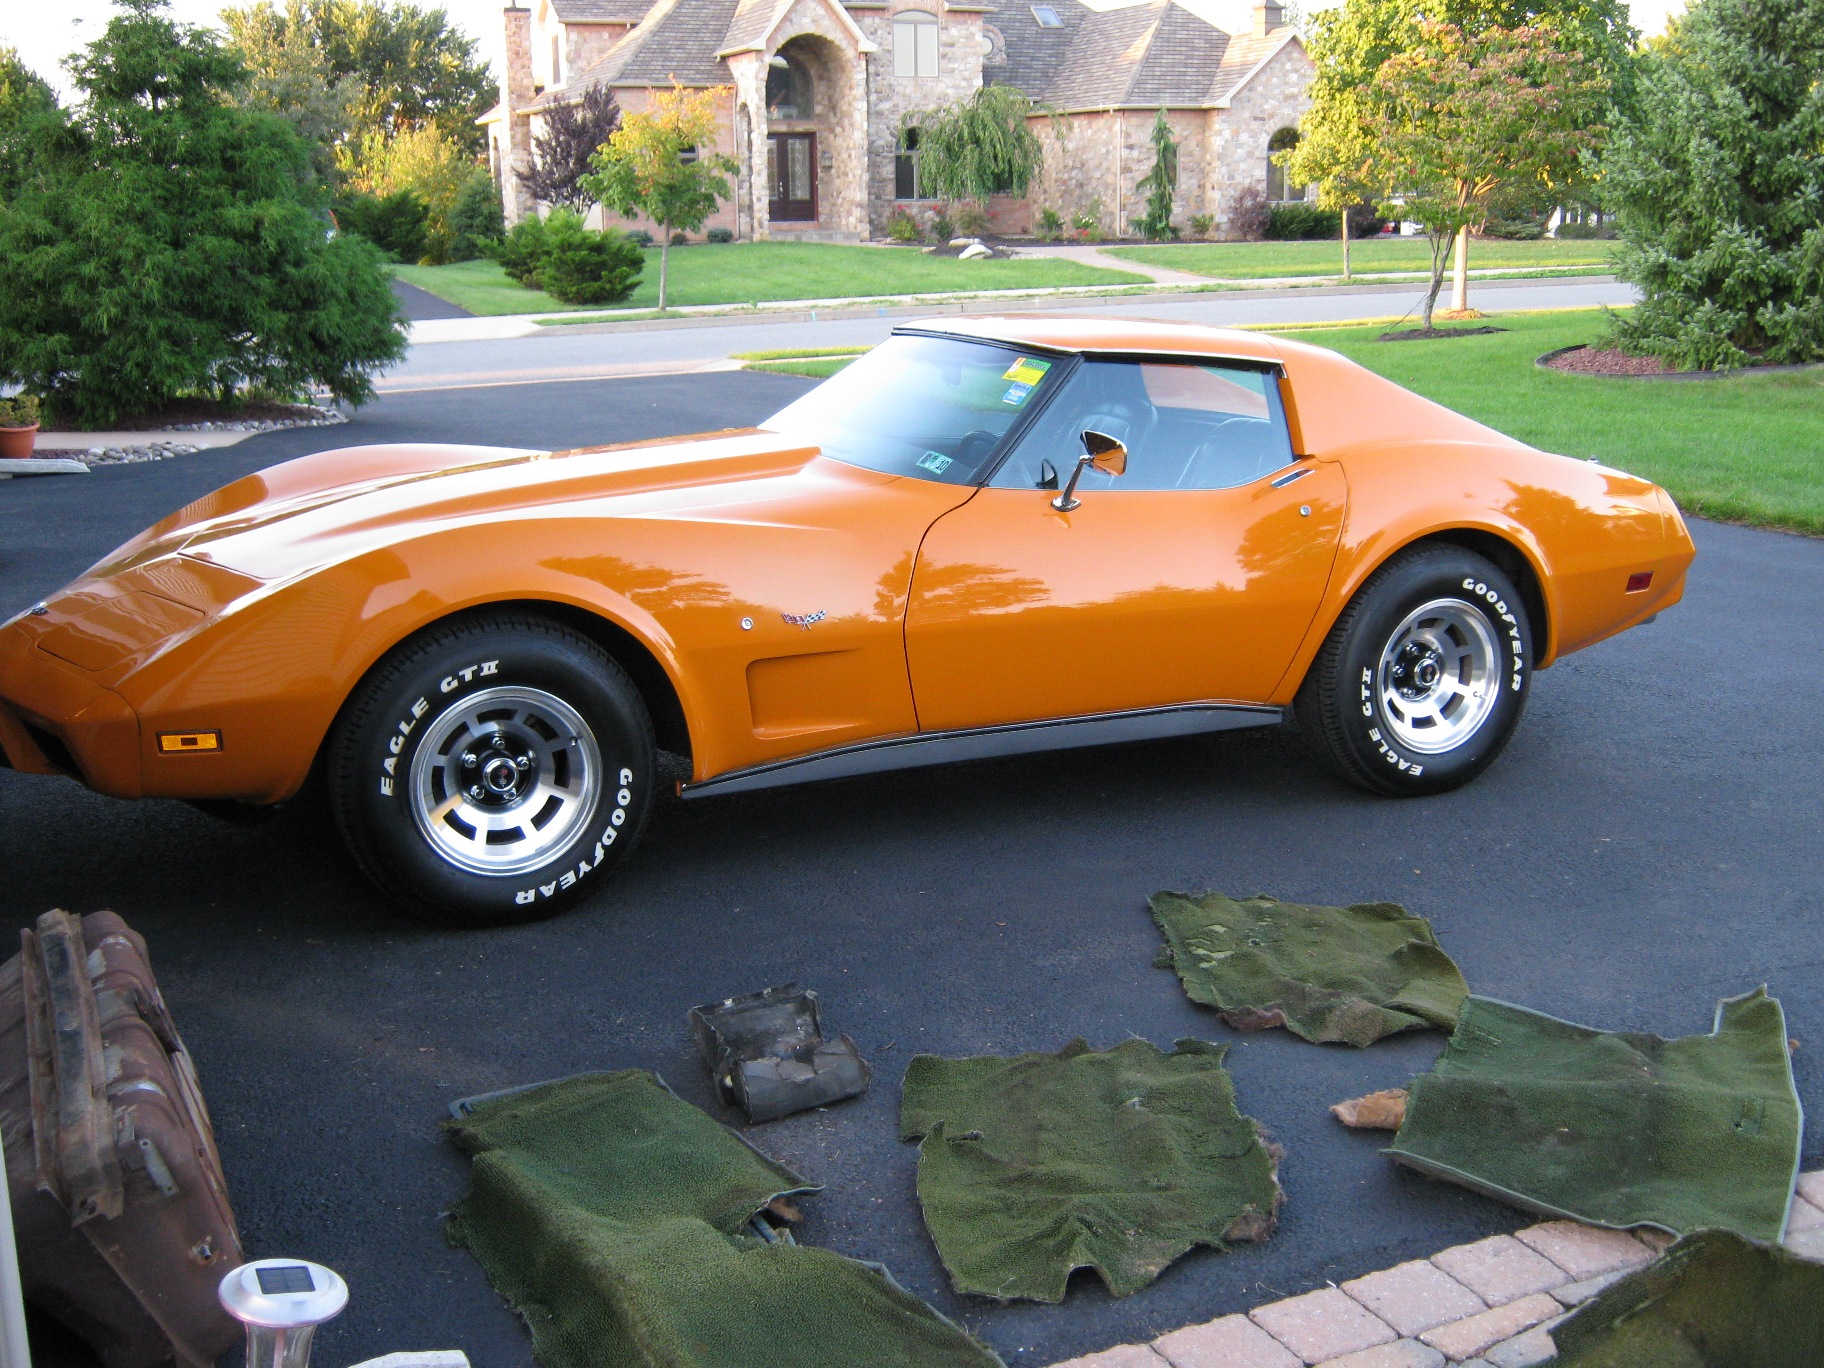
Yesterday the 71 Green Coupe made it's way home here to Easton, PA. It is rough and has some left front panel damage. Paint is not something that can be salvaged, it is blistering, peeling, checking and just downright shot. Today I will begin to photograph the car completely and document everything I see that will need attention. It will be a long list for sure.
First up today is getting the brown gas out of the tank and out of the car. It fired yesterday but will not sustain running with that gas. Fresh oil and filter will also go in the car. When I get her to fire and run I will see what leaks from where.
To see the beauty of this car one will have to look to the future of what it can be, and not what it appears to be now. More soon.
Thanks for your support.
David Howard
 09-07-2009, 08:40 AM
#42
Melting Slicks

The car was kept in the dark with a collection of Rolls Royces so no UV rays got to any part of it

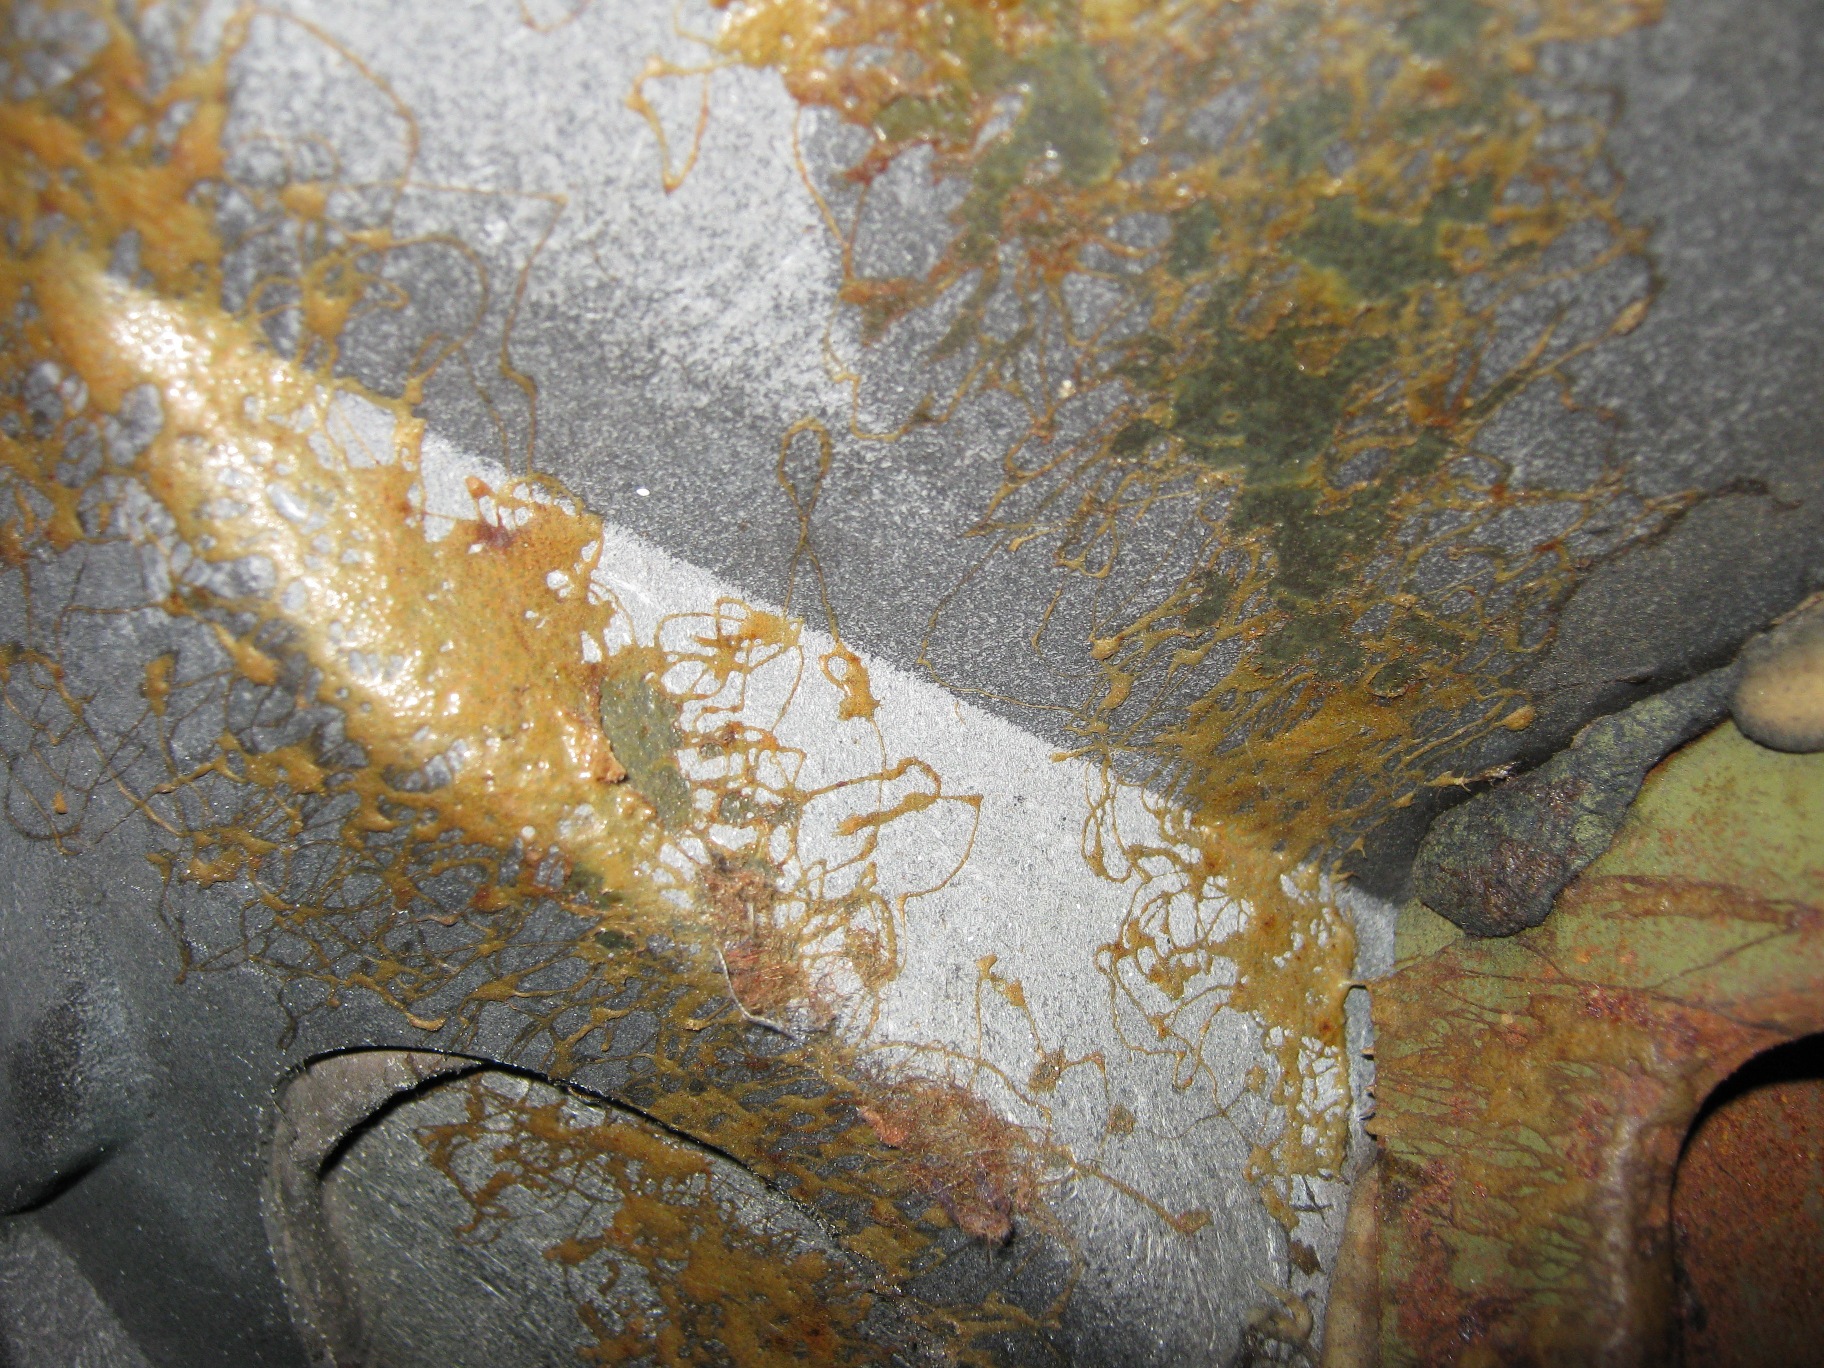
The paint is original but cracking and has some deep scratches. Moisture got into the poll barn that she lived in for the past 37 years and there was alott of rust. The body is off and i'm in the process of complete restoration, there are a couple of threads on the forum.
Dean
09-07-2009, 12:37 PM
#43
Senior Member
Thread Starter
Member Since: Jan 2008
Location: Easton, PA
Posts: 12,154
Received 2,031 Likes
on
1,103 Posts
St. Jude Donor '10
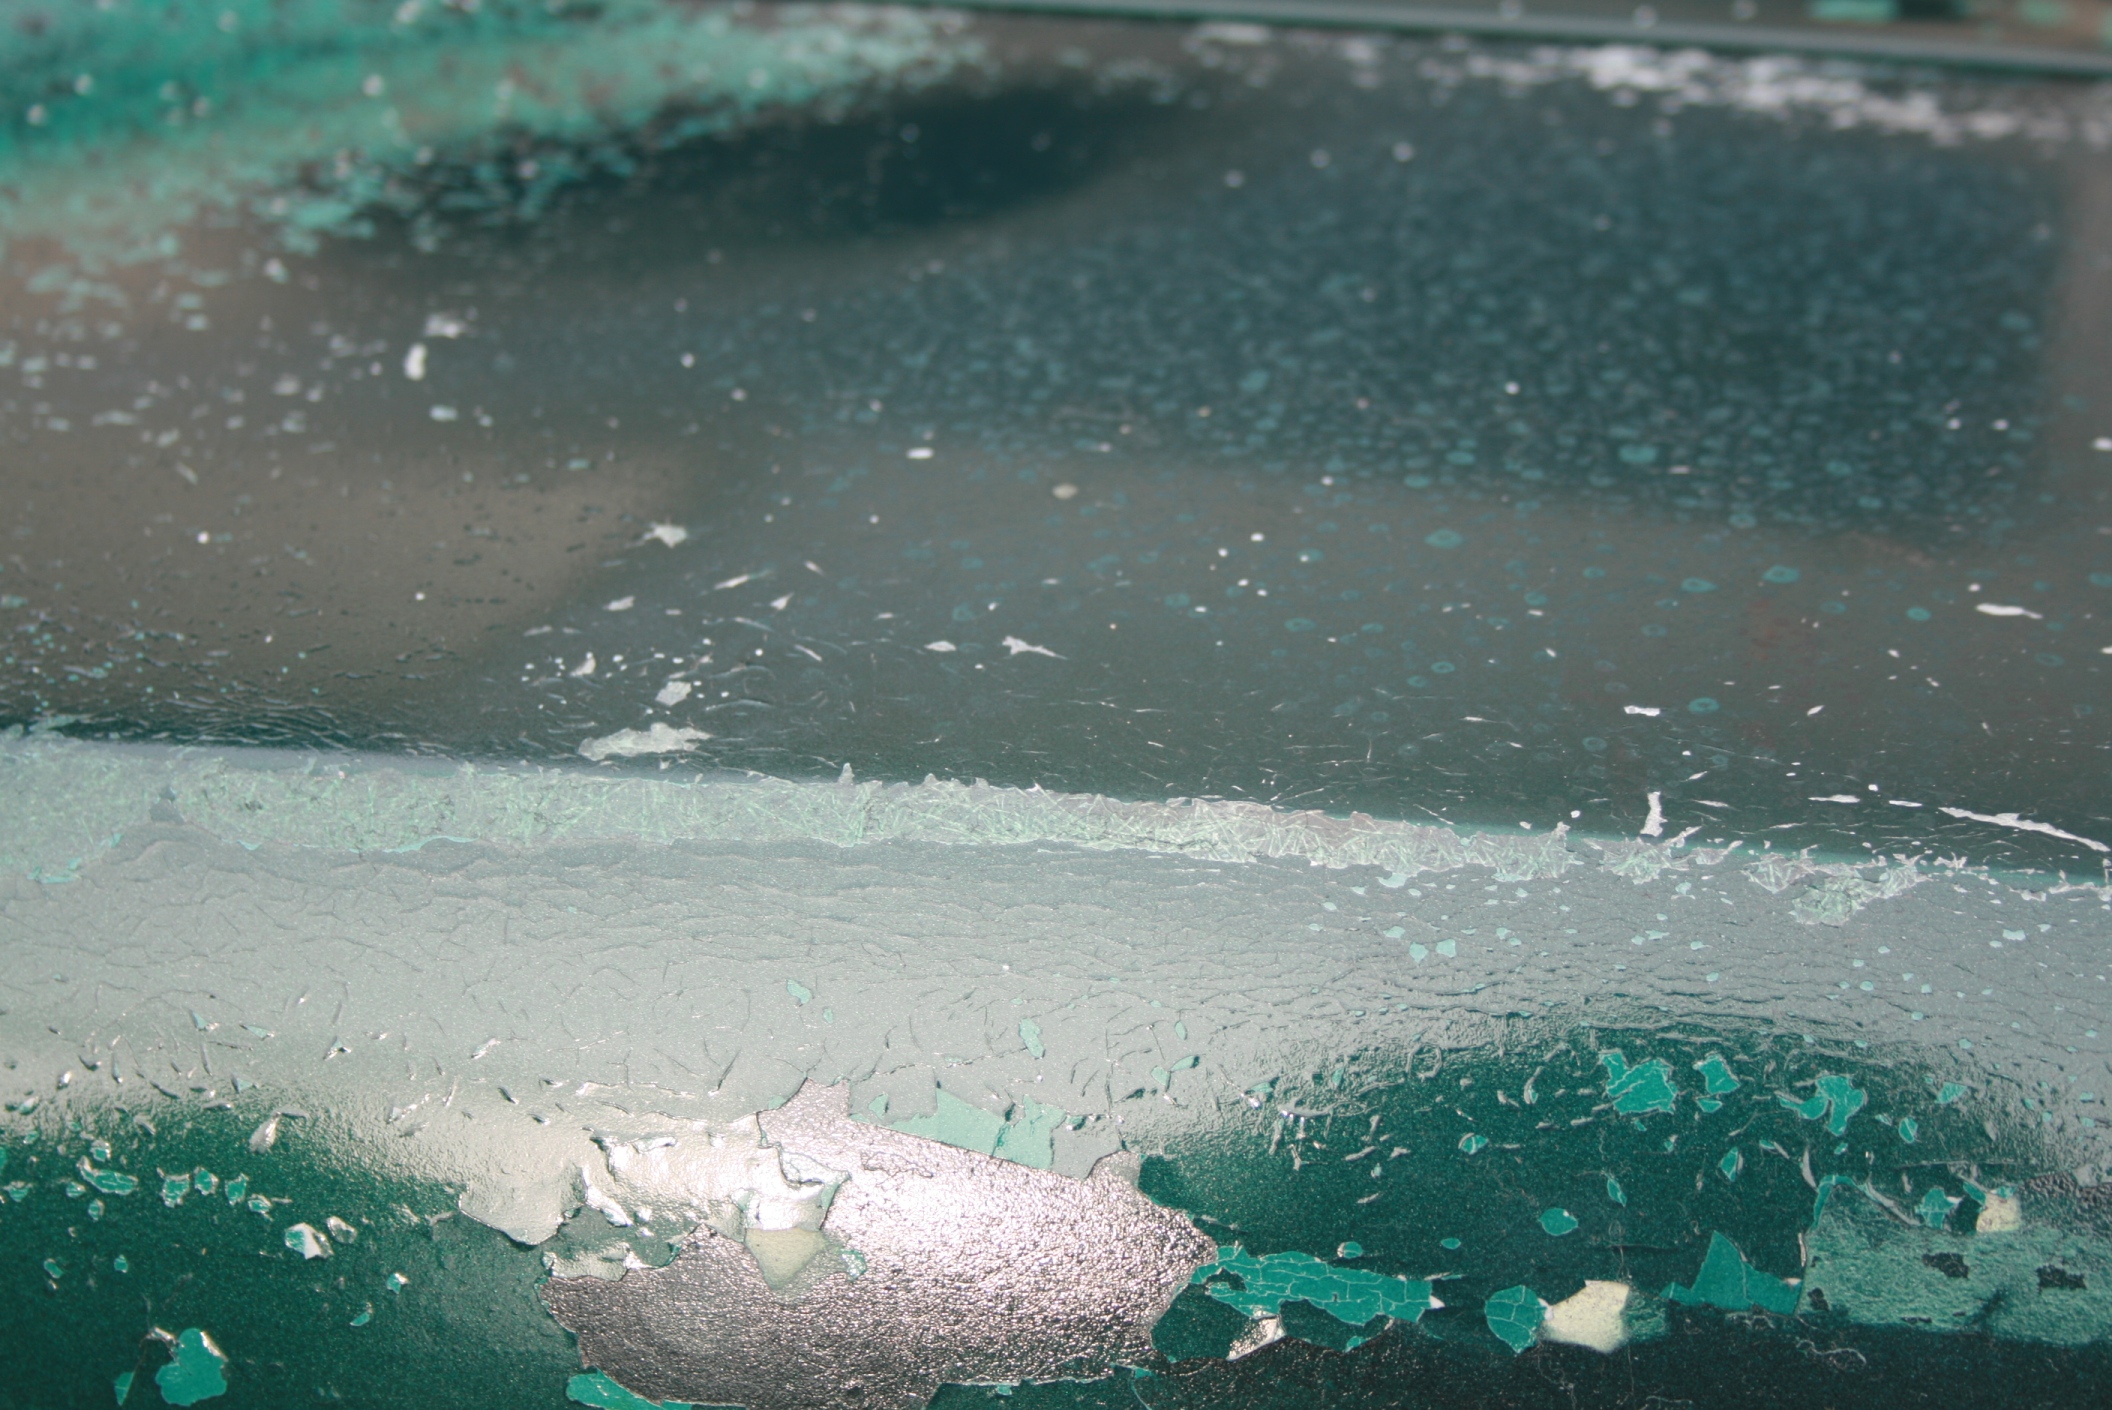
Not terrible at 10 feet
Looking rougher at 5 feet
3 feet begins to make me wonder what we got

2 feet confirms we have a mess
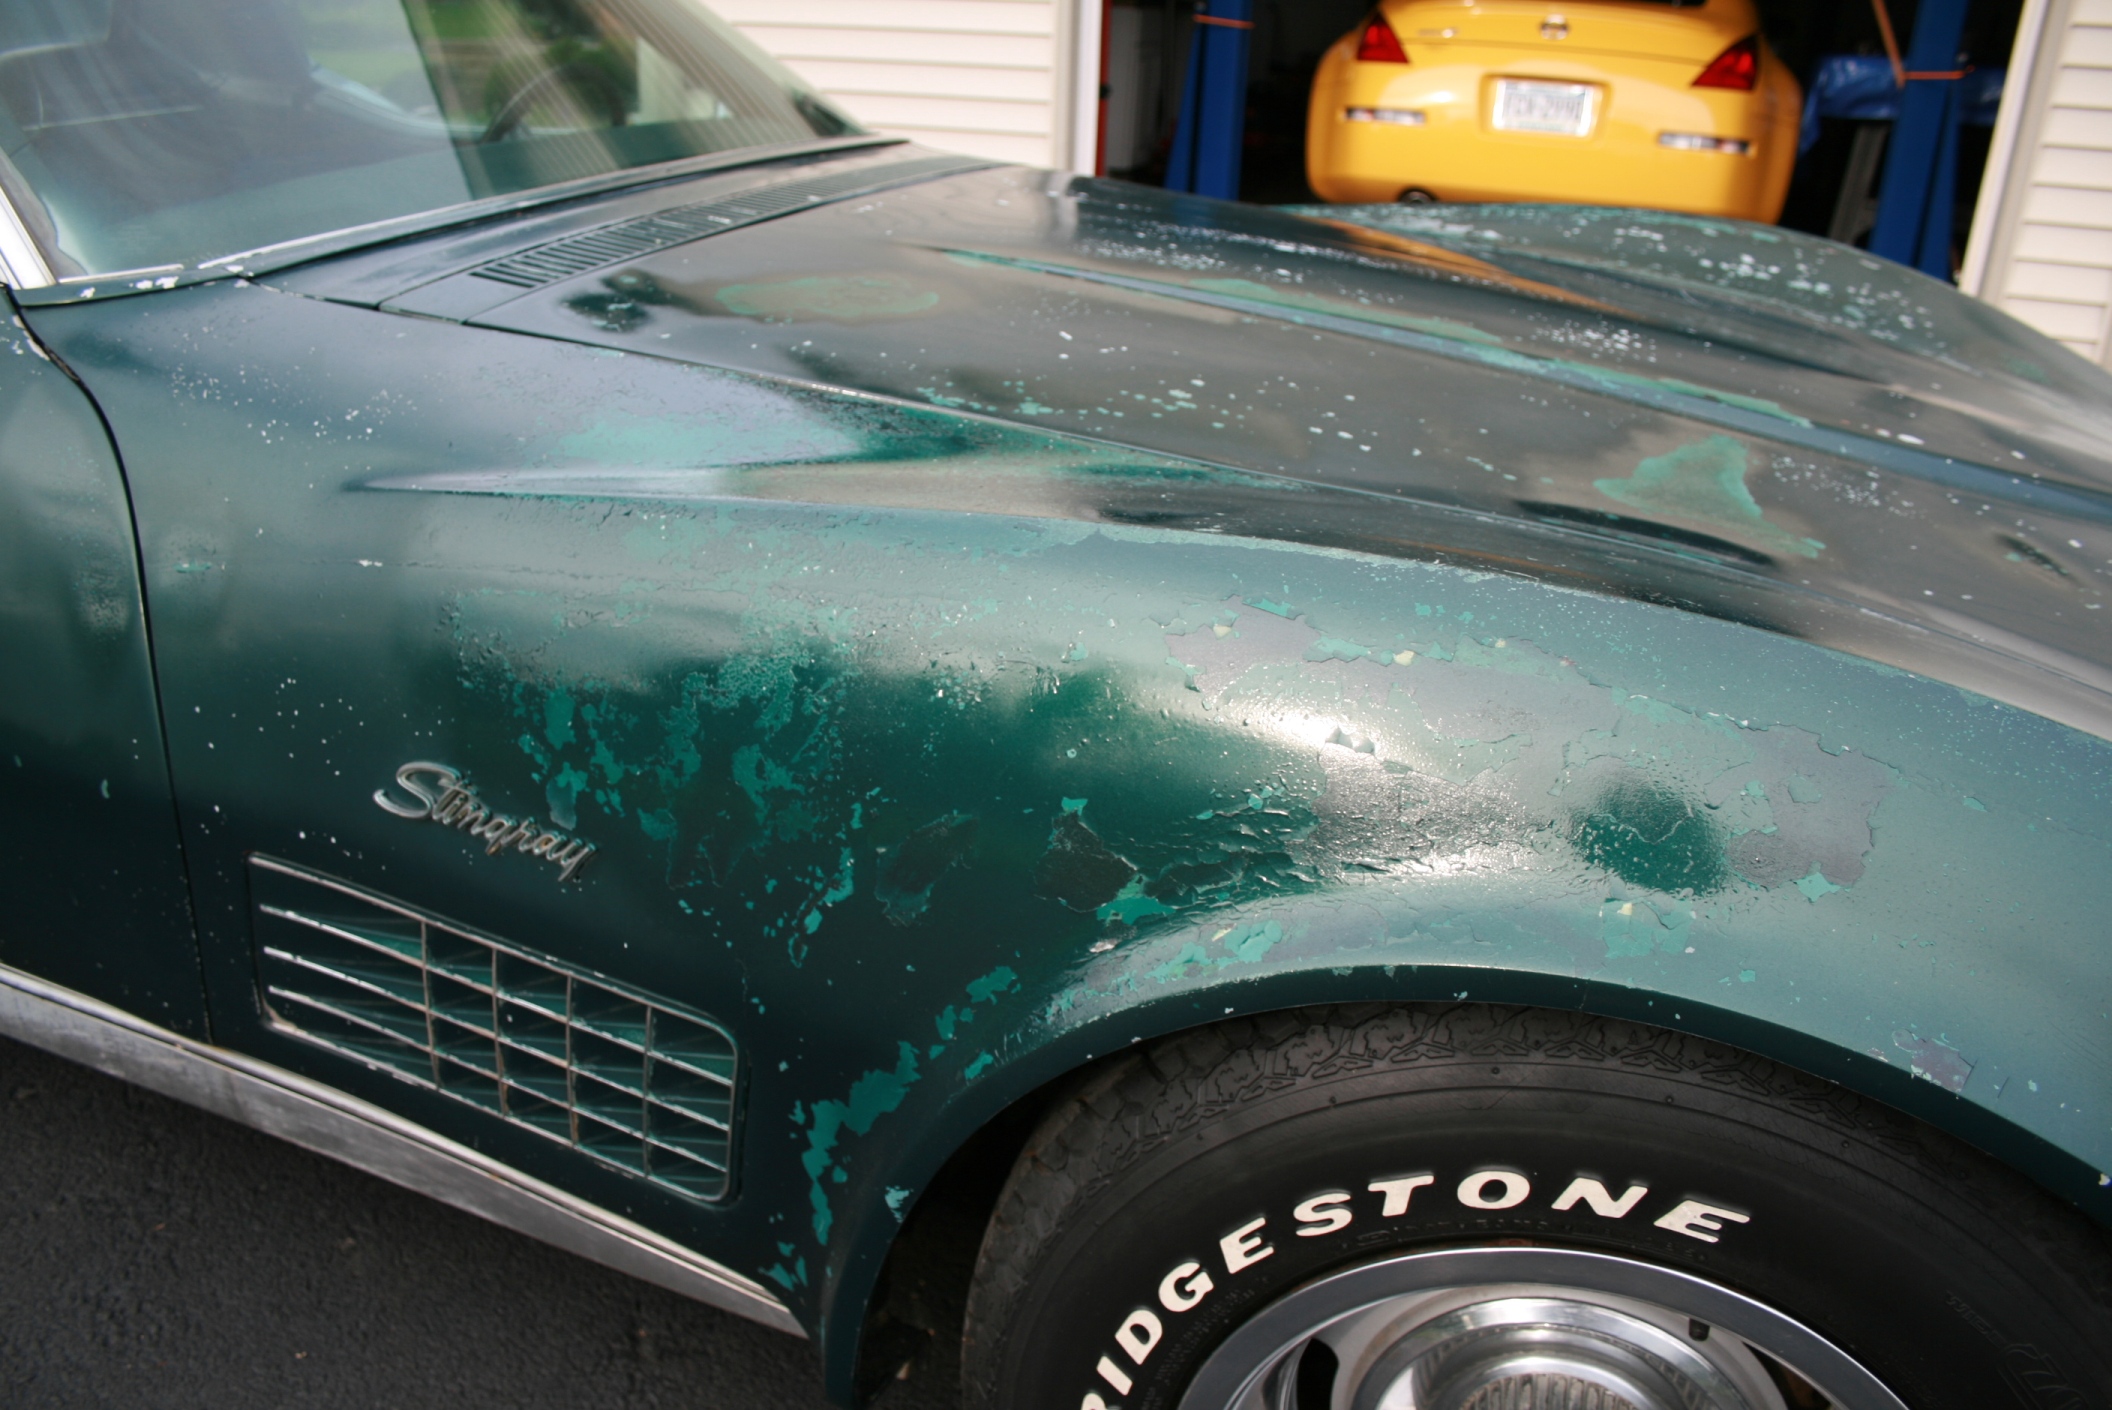
1 foot confirms we have a bigger mess
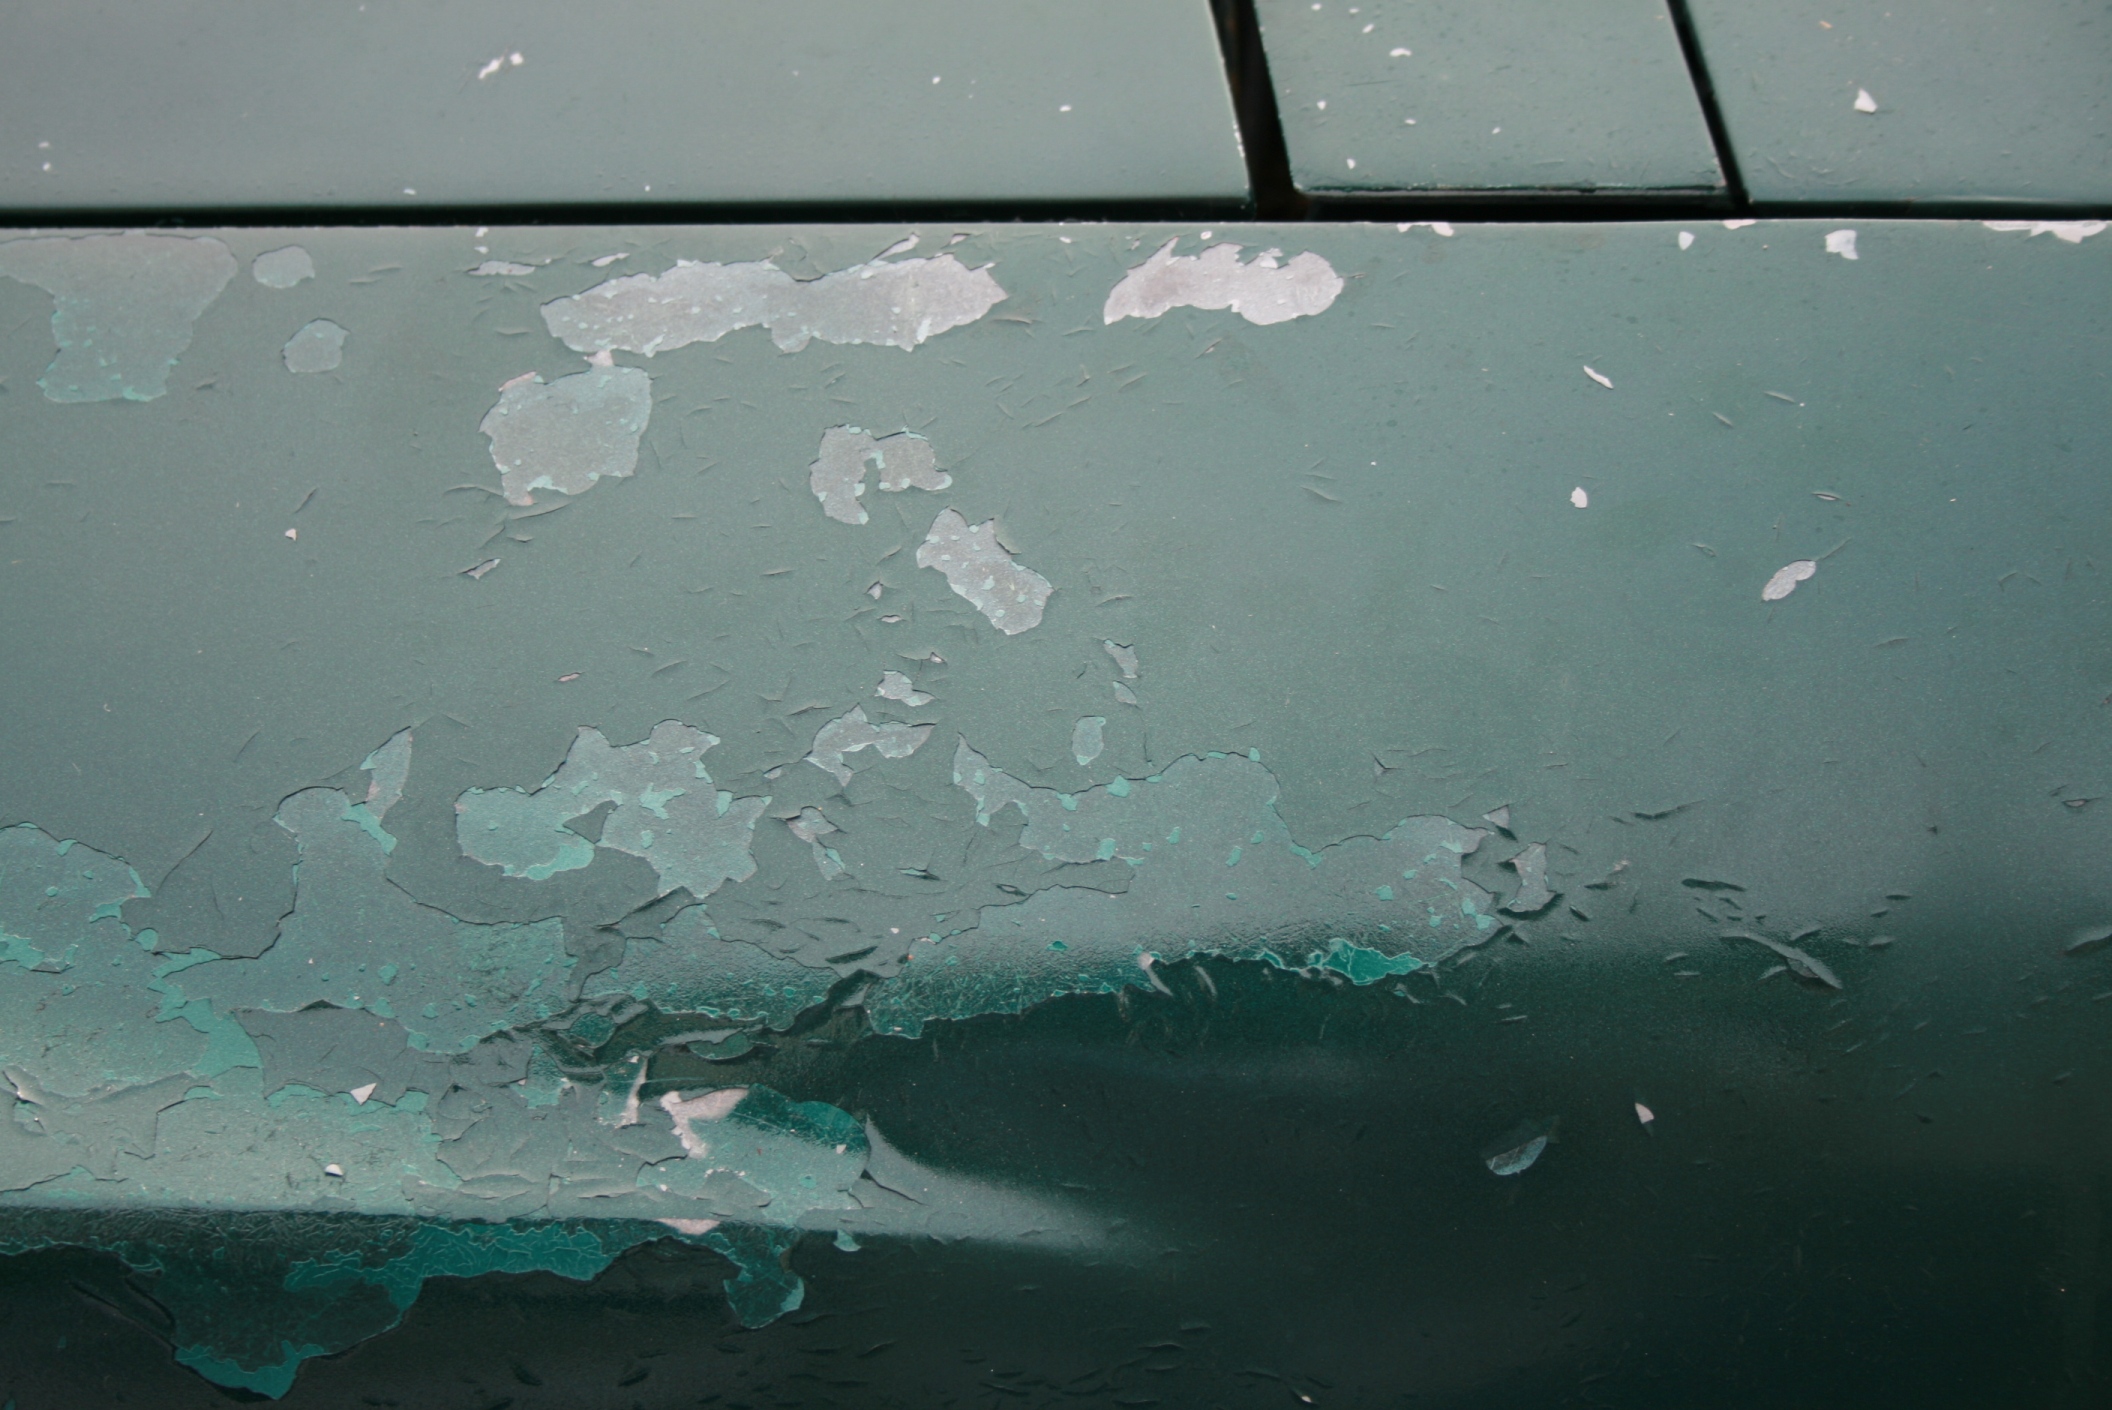
Inside one foot and you realize buffing is out, stripping is in.
Looking rougher at 5 feet
3 feet begins to make me wonder what we got
2 feet confirms we have a mess
1 foot confirms we have a bigger mess
Inside one foot and you realize buffing is out, stripping is in.
 09-07-2009, 08:25 PM
#45
Senior Member
Thread Starter
Member Since: Jan 2008
Location: Easton, PA
Posts: 12,154
Received 2,031 Likes
on
1,103 Posts
St. Jude Donor '10

 09-11-2009, 09:01 AM
#47
Senior Member
Thread Starter
Member Since: Jan 2008
Location: Easton, PA
Posts: 12,154
Received 2,031 Likes
on
1,103 Posts
St. Jude Donor '10
I had posted a few days ago asking for comments and I received many. Here is that posting link for any and all that want to follow this barn find.
http://forums.corvetteforum.com/c3-g...long-post.html
Yesterday I found nuts and twigs and nests, how fun. Sorry I took away the critters home.
David
http://forums.corvetteforum.com/c3-g...long-post.html
Yesterday I found nuts and twigs and nests, how fun. Sorry I took away the critters home.
David
09-12-2009, 07:13 PM
#48
Senior Member
Thread Starter
Member Since: Jan 2008
Location: Easton, PA
Posts: 12,154
Received 2,031 Likes
on
1,103 Posts
St. Jude Donor '10
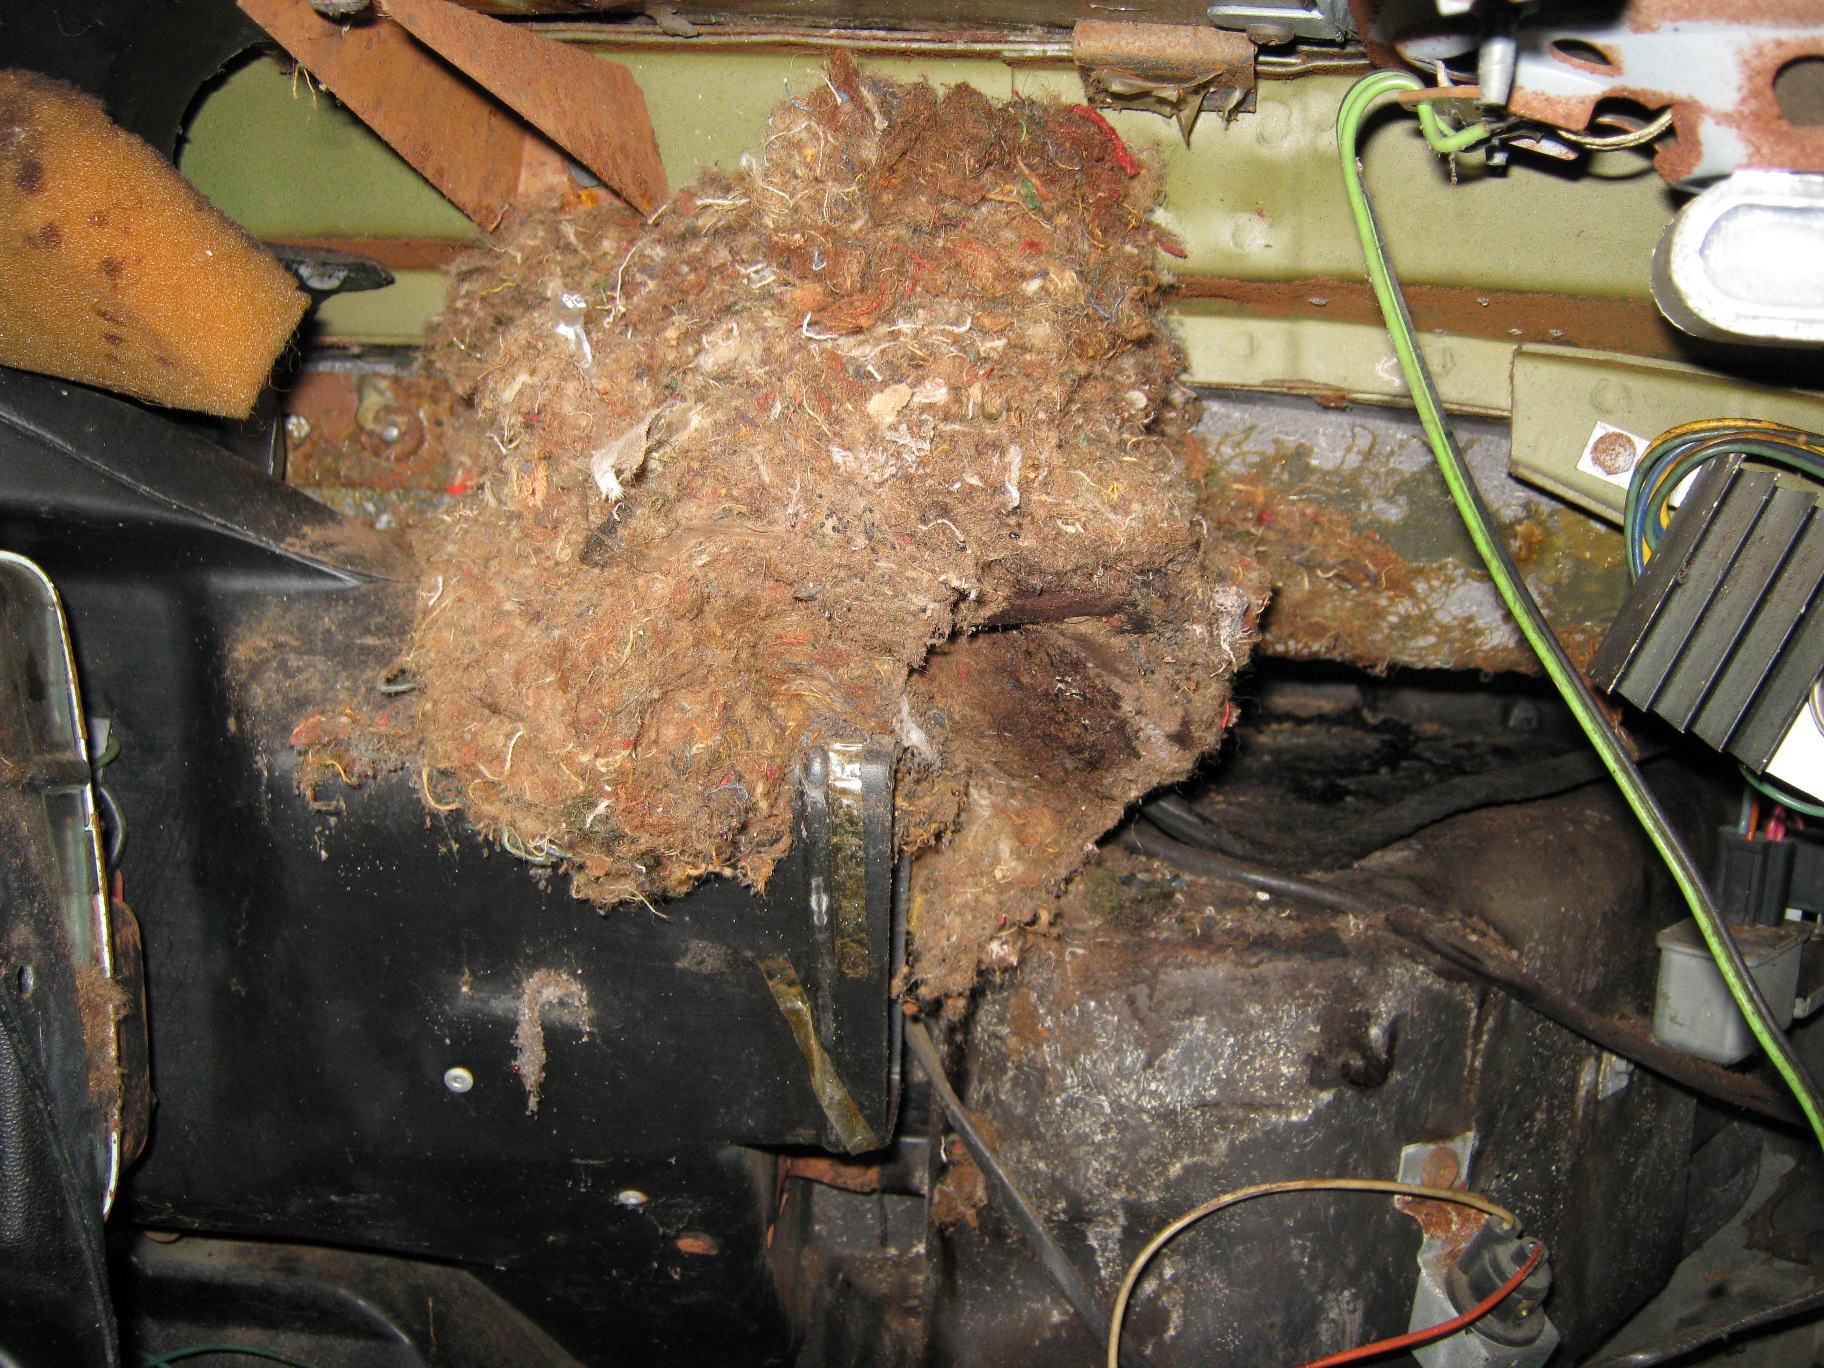
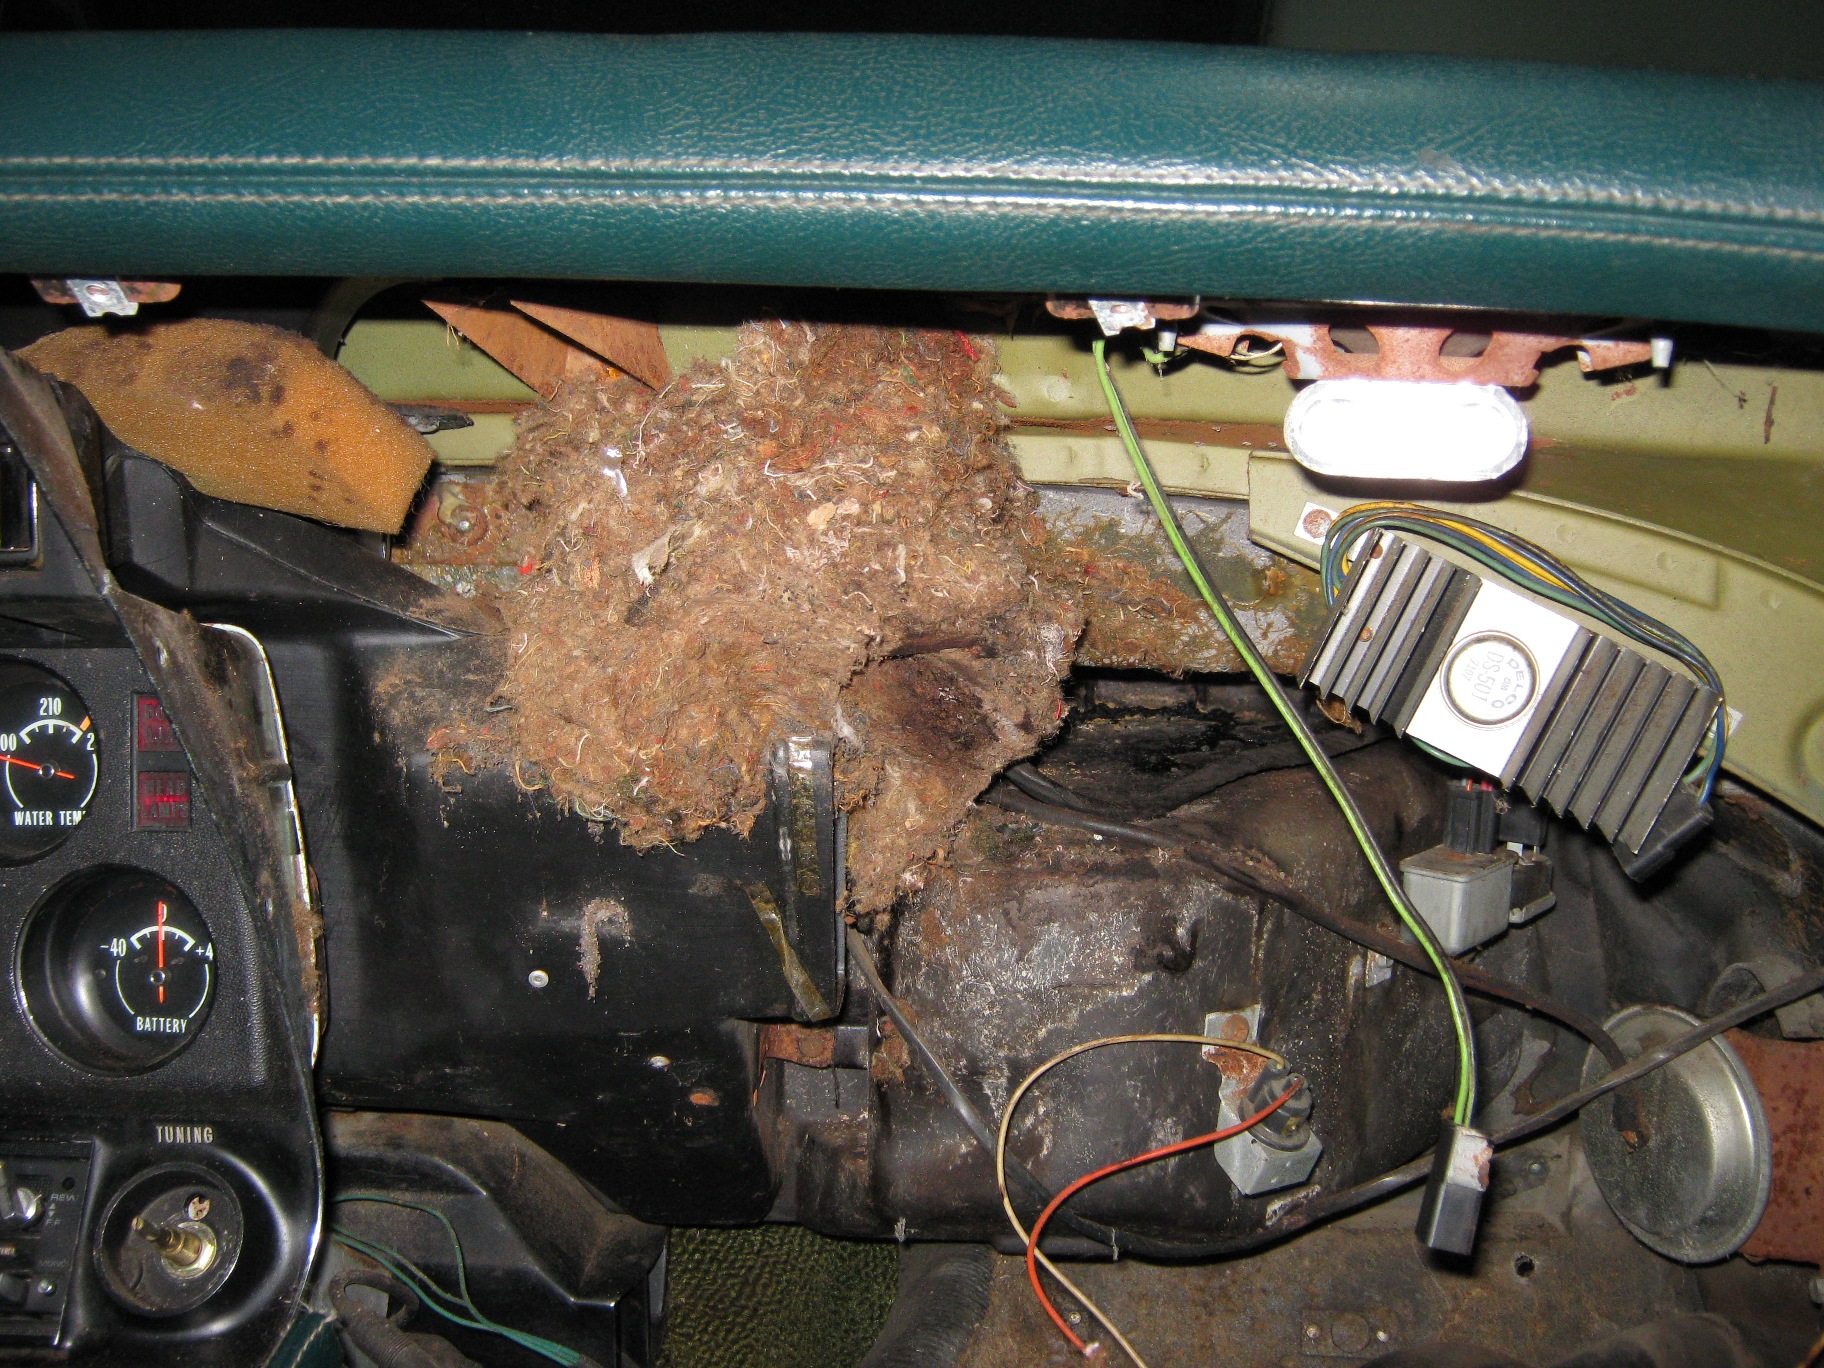
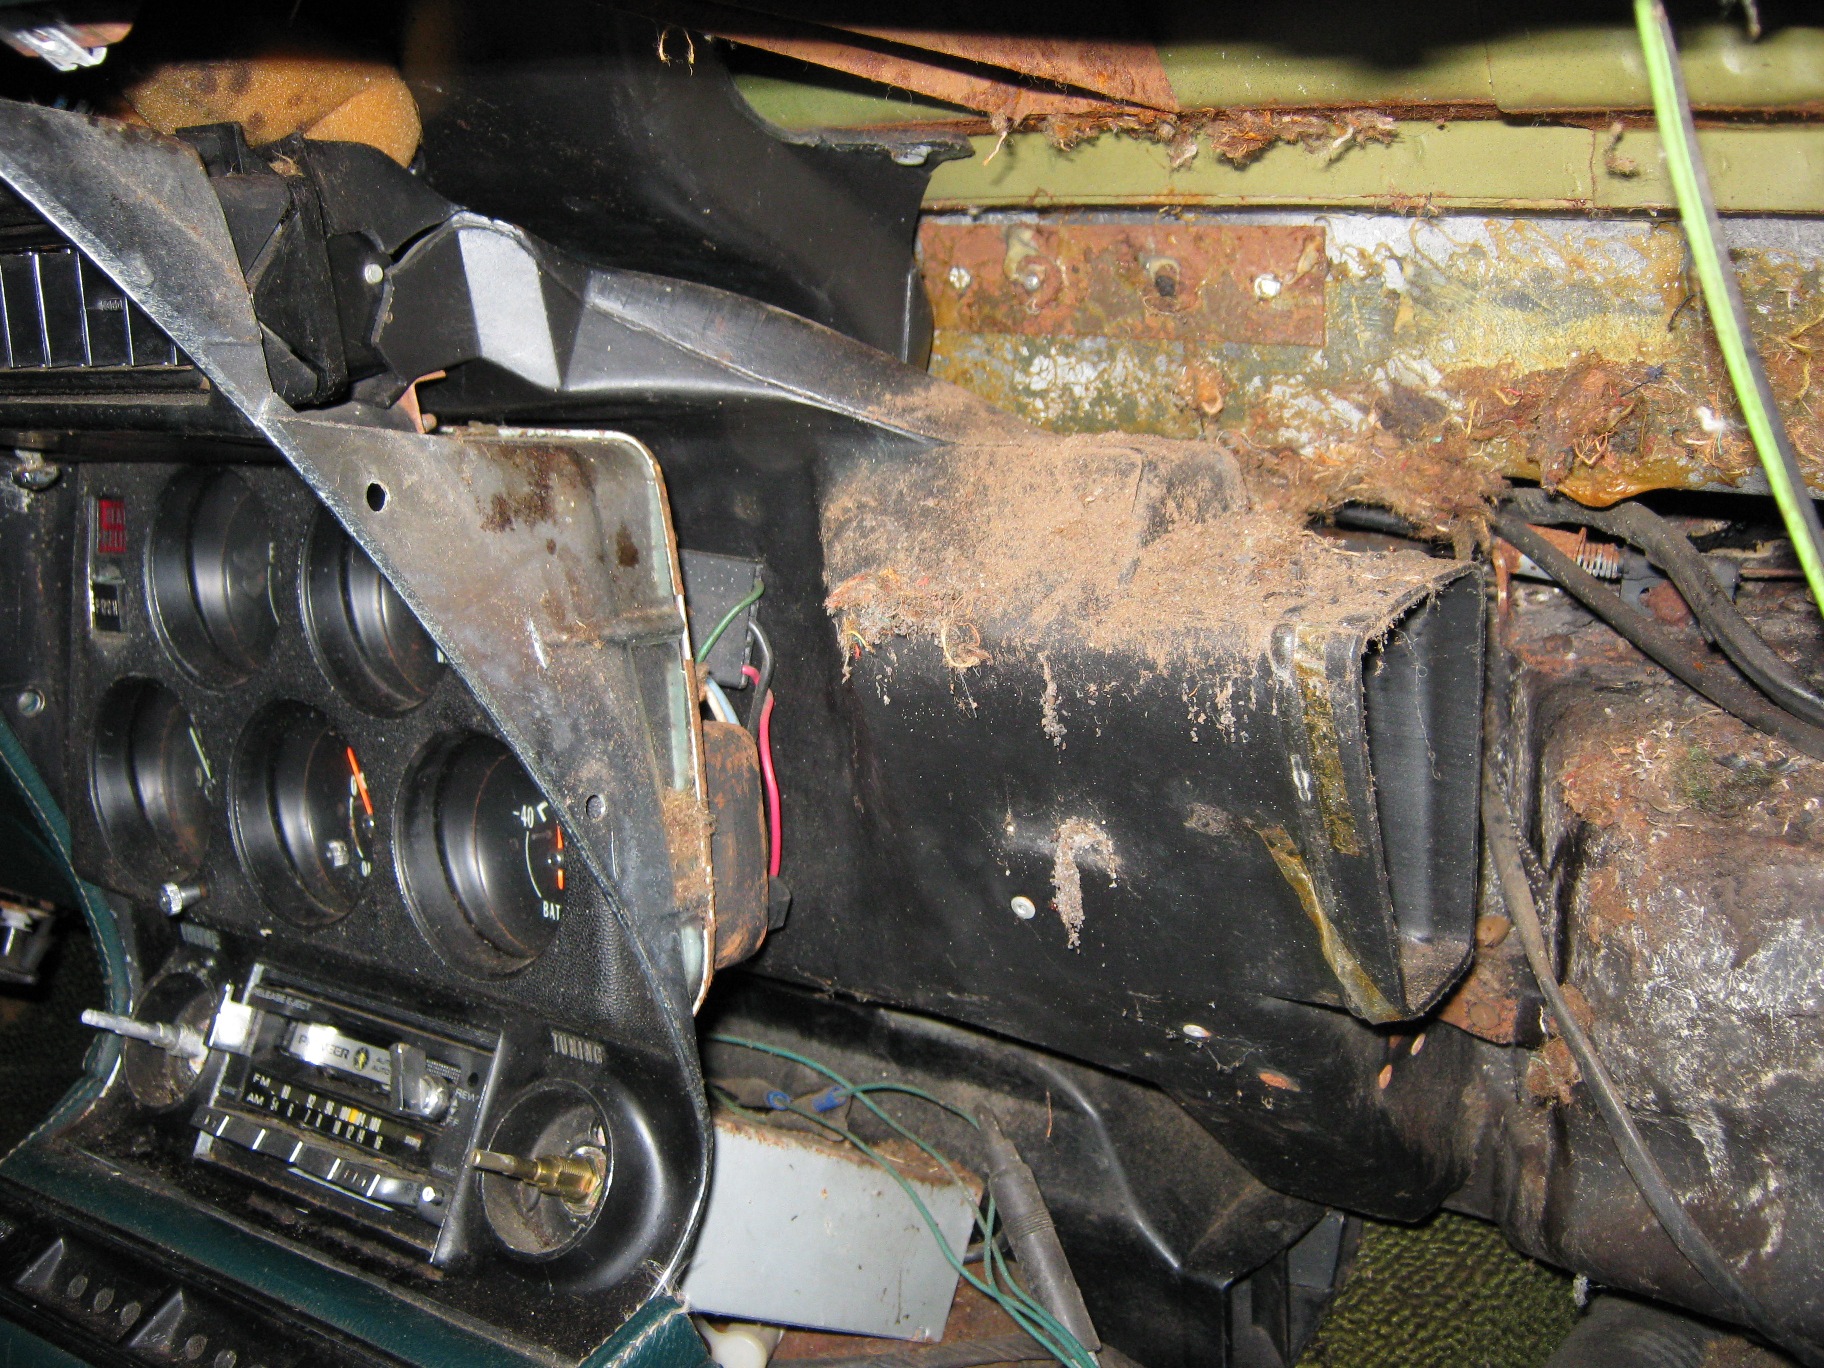
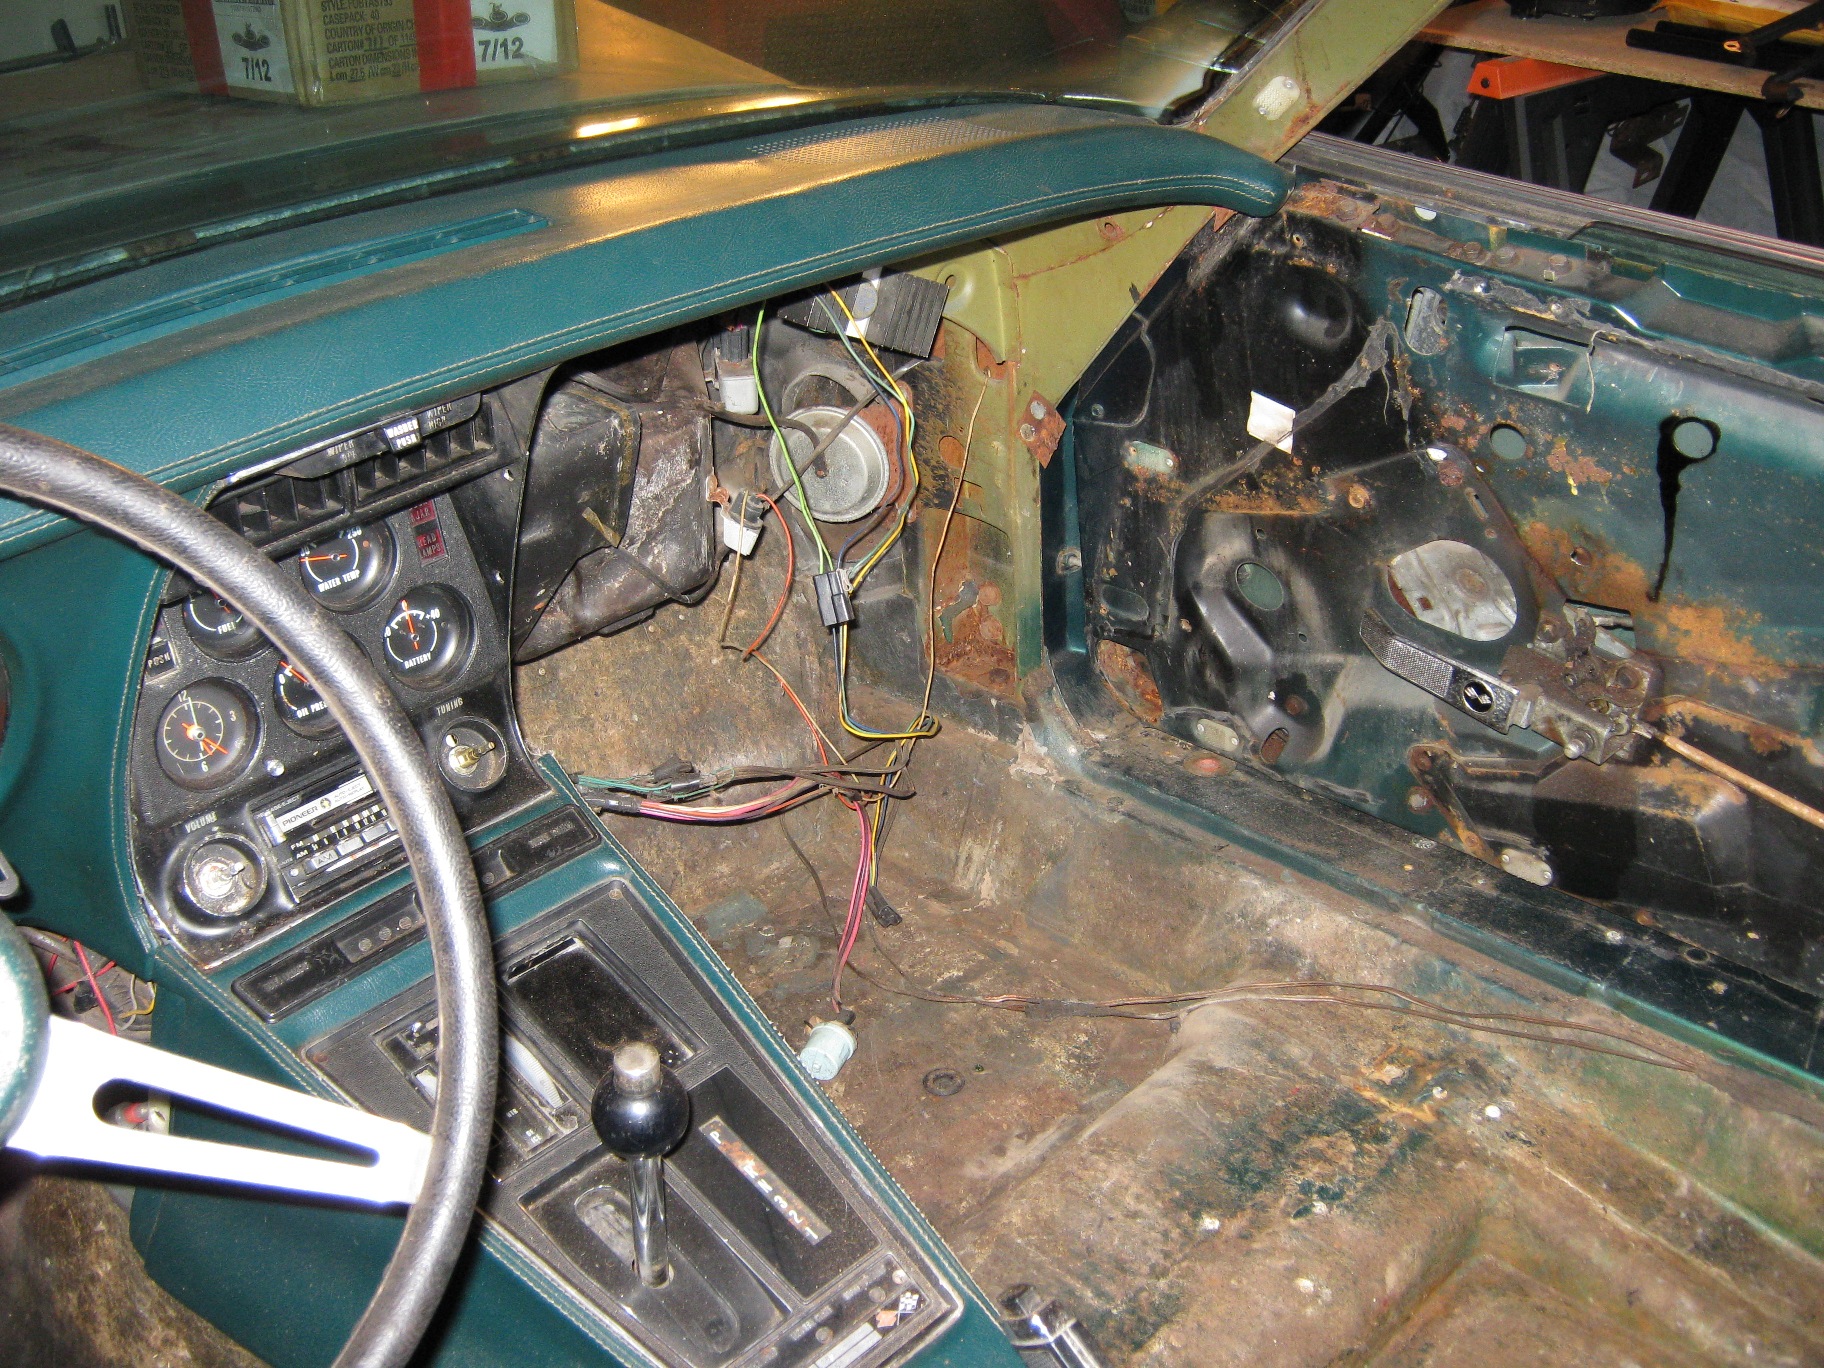
Today I removed the right lower dash pad on the 71 Coupe and look what I found!!!! This will have to be a frame off restoration if I intend to find all the little places the critters called their home. I have found nuts everywhere too. Funny.
09-12-2009, 07:20 PM
#49
Senior Member
Thread Starter
Member Since: Jan 2008
Location: Easton, PA
Posts: 12,154
Received 2,031 Likes
on
1,103 Posts
St. Jude Donor '10
I found the mouse nest, but not yet located the rust bird cage. Here is what I found when I got the lower right dash pad and kick panel off the car. 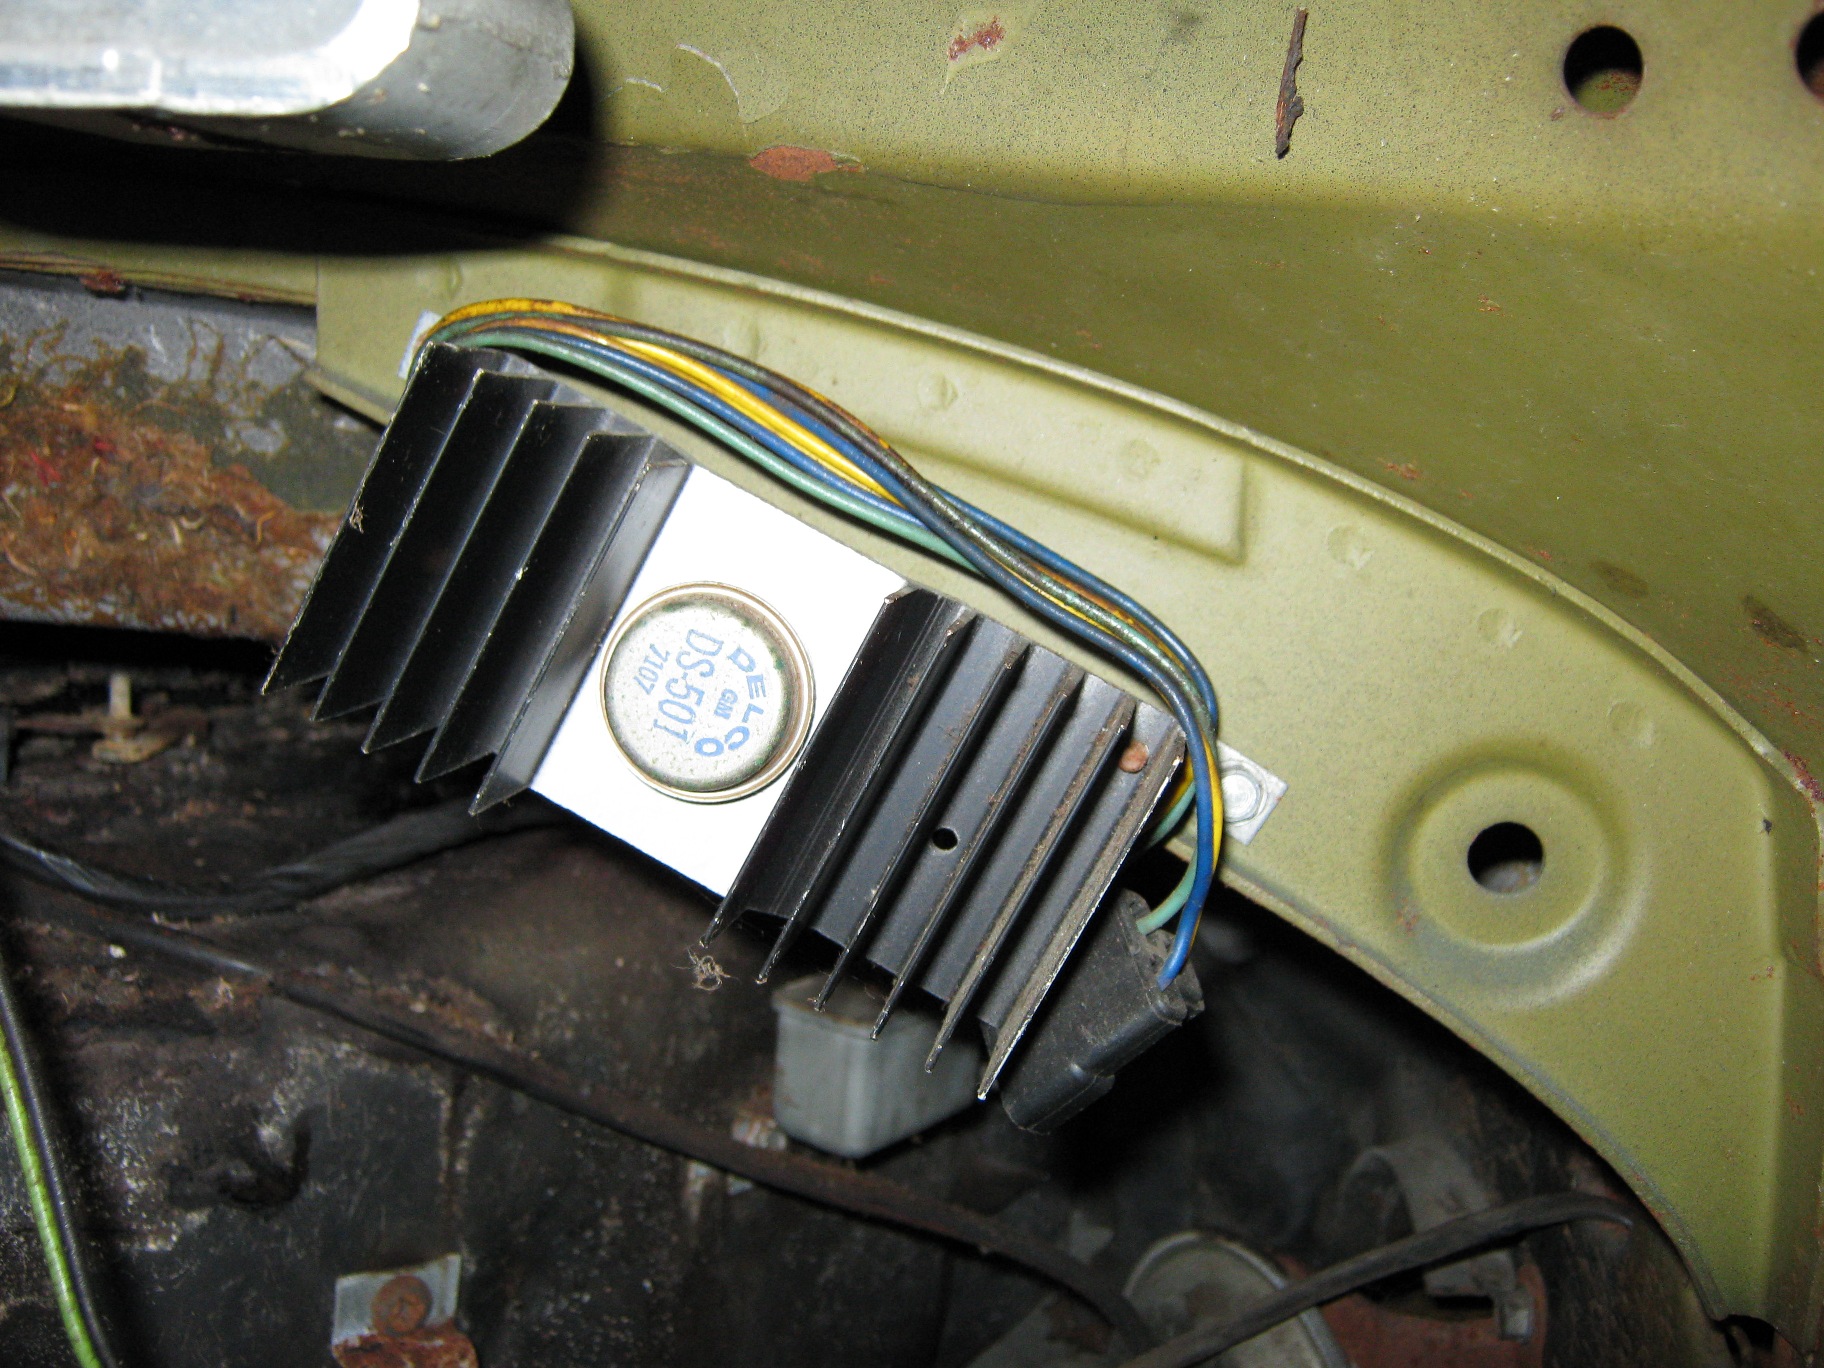
Not sure what this is but it is disconnected and cool.
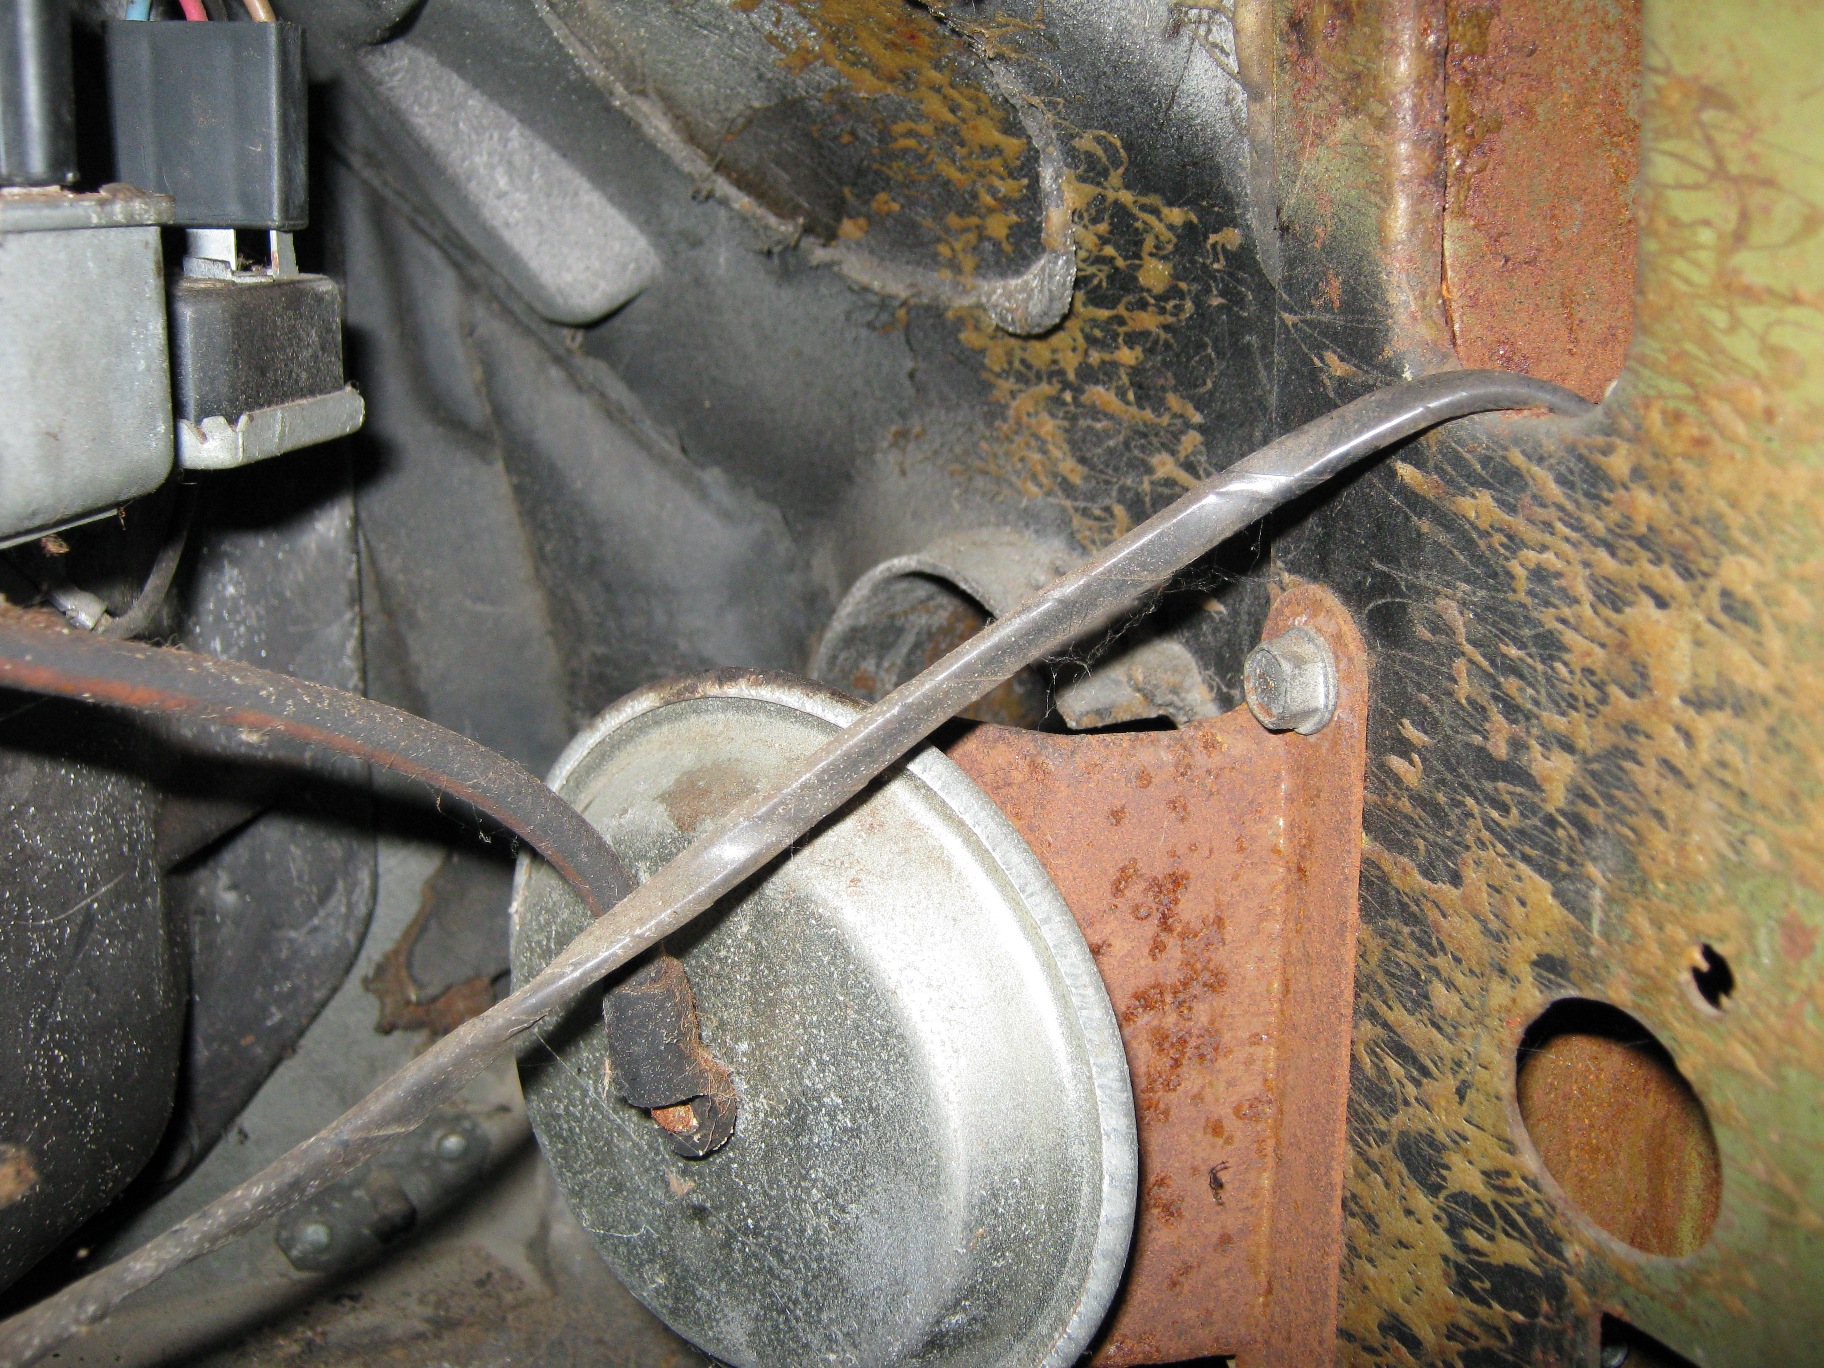
Speaker is there but disconnected as well.
All interior trim parts have been labeled and place into a single corrugated container. I cannot get two screws off the windsheild frame so I PB blasted them and will have to let it wait until I get back from my travels.
Have a good week everyone.
David
09-12-2009, 07:48 PM
#50
Race Director


David, I stand corrected on this. I expected to see a lot worse than what I am seeing. You still have to check around the windshield area but so far it is looking good. The little I can see of the birdcage, where the door bolts up to still looks very solid. You need to get the trim off the windshield and get it out to see what is behind there.
You took someones home away from them when you bought it. Hopefully he moved out long ago.
You took someones home away from them when you bought it. Hopefully he moved out long ago.
09-12-2009, 08:00 PM
#51
Senior Member
Thread Starter
Member Since: Jan 2008
Location: Easton, PA
Posts: 12,154
Received 2,031 Likes
on
1,103 Posts
St. Jude Donor '10
[QUOTE=Gordonm;1571473438]David, I stand corrected on this. I expected to see a lot worse than what I am seeing. You still have to check around the windshield area but so far it is looking good. The little I can see of the birdcage, where the door bolts up to still looks very solid. You need to get the trim off the windshield and get it out to see what is behind there.
 I didn't have a lot of time to get the right trim off today and two of the screws will have to be coaxed before they will come out. I will get them when I get back home Gordon but we may have something I can work with and if so I say I count myself lucky. I know I am not out of the woods yet, but feeling a bit better about it now.
We will know a lot more when I can finally get that trim off.
Thanks Gordon.
David
I didn't have a lot of time to get the right trim off today and two of the screws will have to be coaxed before they will come out. I will get them when I get back home Gordon but we may have something I can work with and if so I say I count myself lucky. I know I am not out of the woods yet, but feeling a bit better about it now. We will know a lot more when I can finally get that trim off.
Thanks Gordon.
David
09-12-2009, 09:23 PM
#52
 I found the mouse nest, but not yet located the rust bird cage. Here is what I found when I got the lower right dash pad and kick panel off the car.
 Attachment 47642629
Not sure what this is but it is disconnected and cool.
09-12-2009, 09:50 PM
#53
Senior Member
Thread Starter
Member Since: Jan 2008
Location: Easton, PA
Posts: 12,154
Received 2,031 Likes
on
1,103 Posts
St. Jude Donor '10
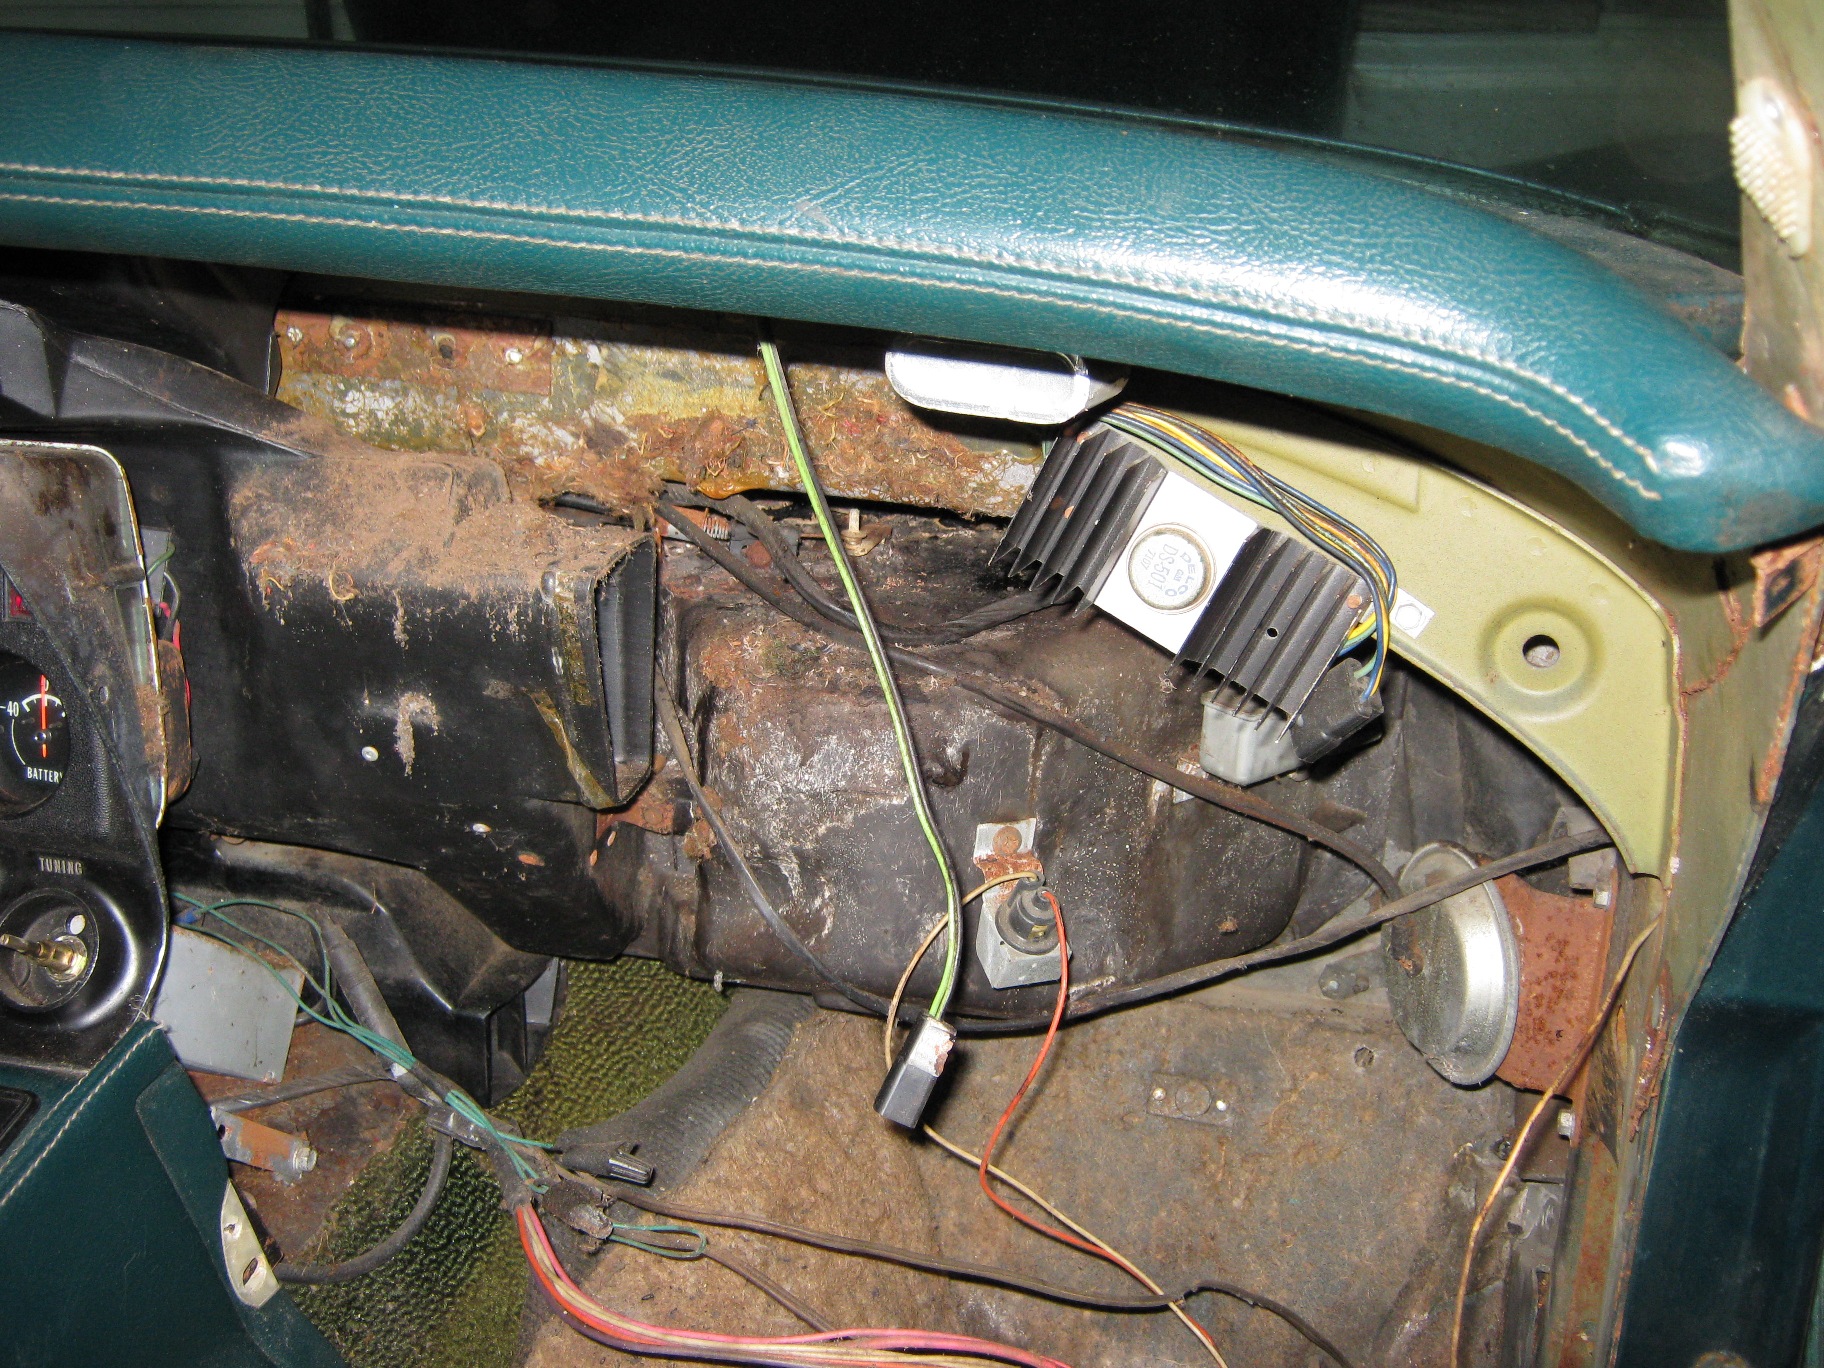
Thank you Larry. Now if I can just locate the radio it was attached to.
 Won't be long before I go after the interior and take that radio out with the removal of the center console. Not sure if I will look for an original or not yet, time will tell.
Hope this finds you well.
David
Won't be long before I go after the interior and take that radio out with the removal of the center console. Not sure if I will look for an original or not yet, time will tell.Hope this finds you well.
David
09-13-2009, 12:31 AM
#55
Team Owner

The 'convector' that you show in the photo is for a standard AM/FM radio...not a stereo model. But, at least you have one to hook to a non-stereo head unit if you locate one. If you want a stereo radio, it will have a convector with 2 power transistors on it. You'll need that too (and you'll need to decide on what speakers you want and where you want them. Just some 'stuff' you can add to the TO DO list. 
09-14-2009, 08:51 PM
#56
Senior Member
Thread Starter
Member Since: Jan 2008
Location: Easton, PA
Posts: 12,154
Received 2,031 Likes
on
1,103 Posts
St. Jude Donor '10
Today I began lovingly removing the interior of the 71 project car

It was glued down firm and took a lot of pulling to get her free.
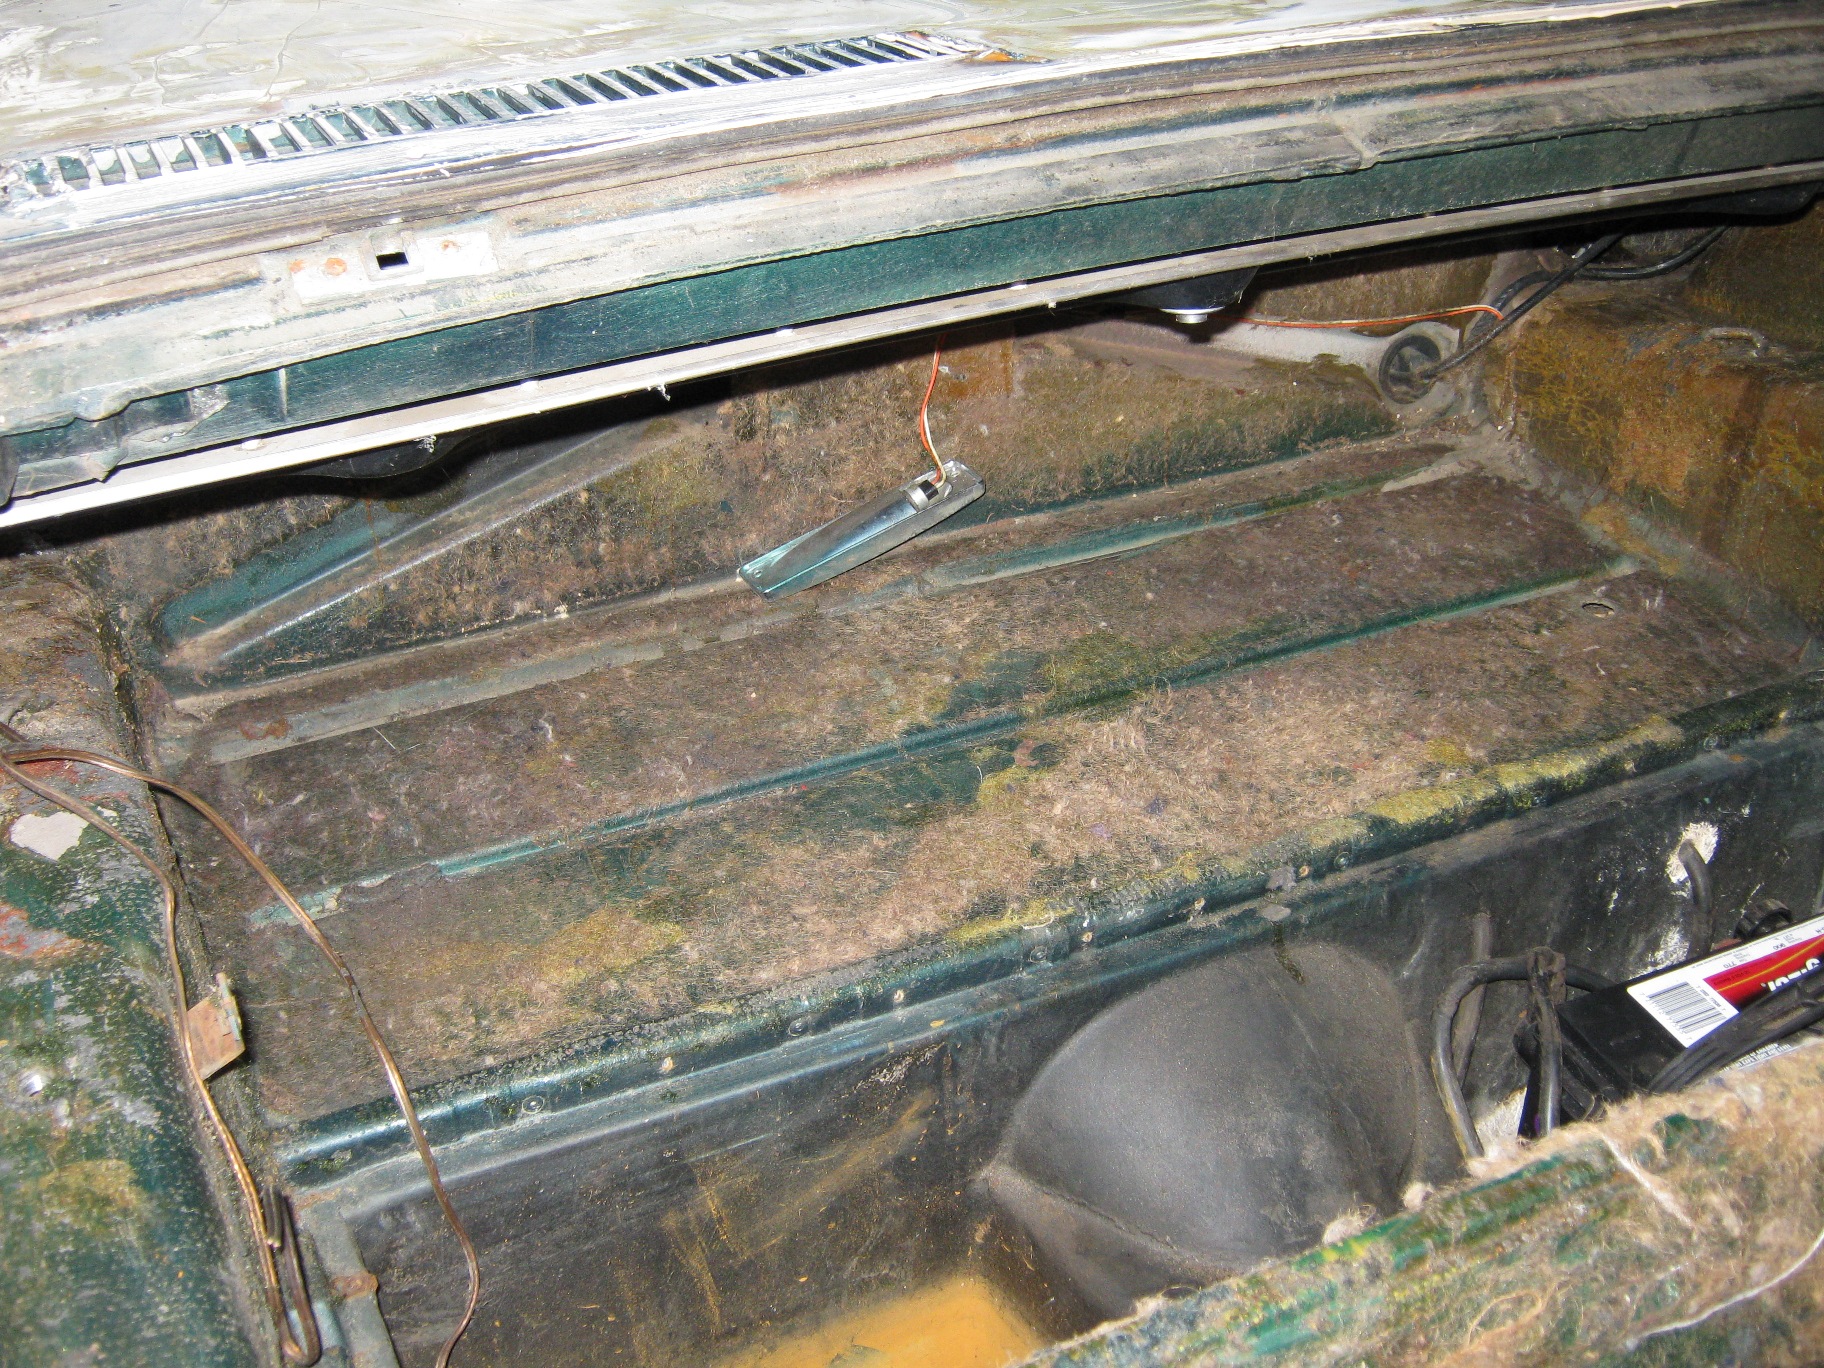
I'll have to remove the glue and remaining fuzz before I can start with the interior rebuild, but for now it is clean and free of nuts and other critter nests. Found four total, they had been busy.
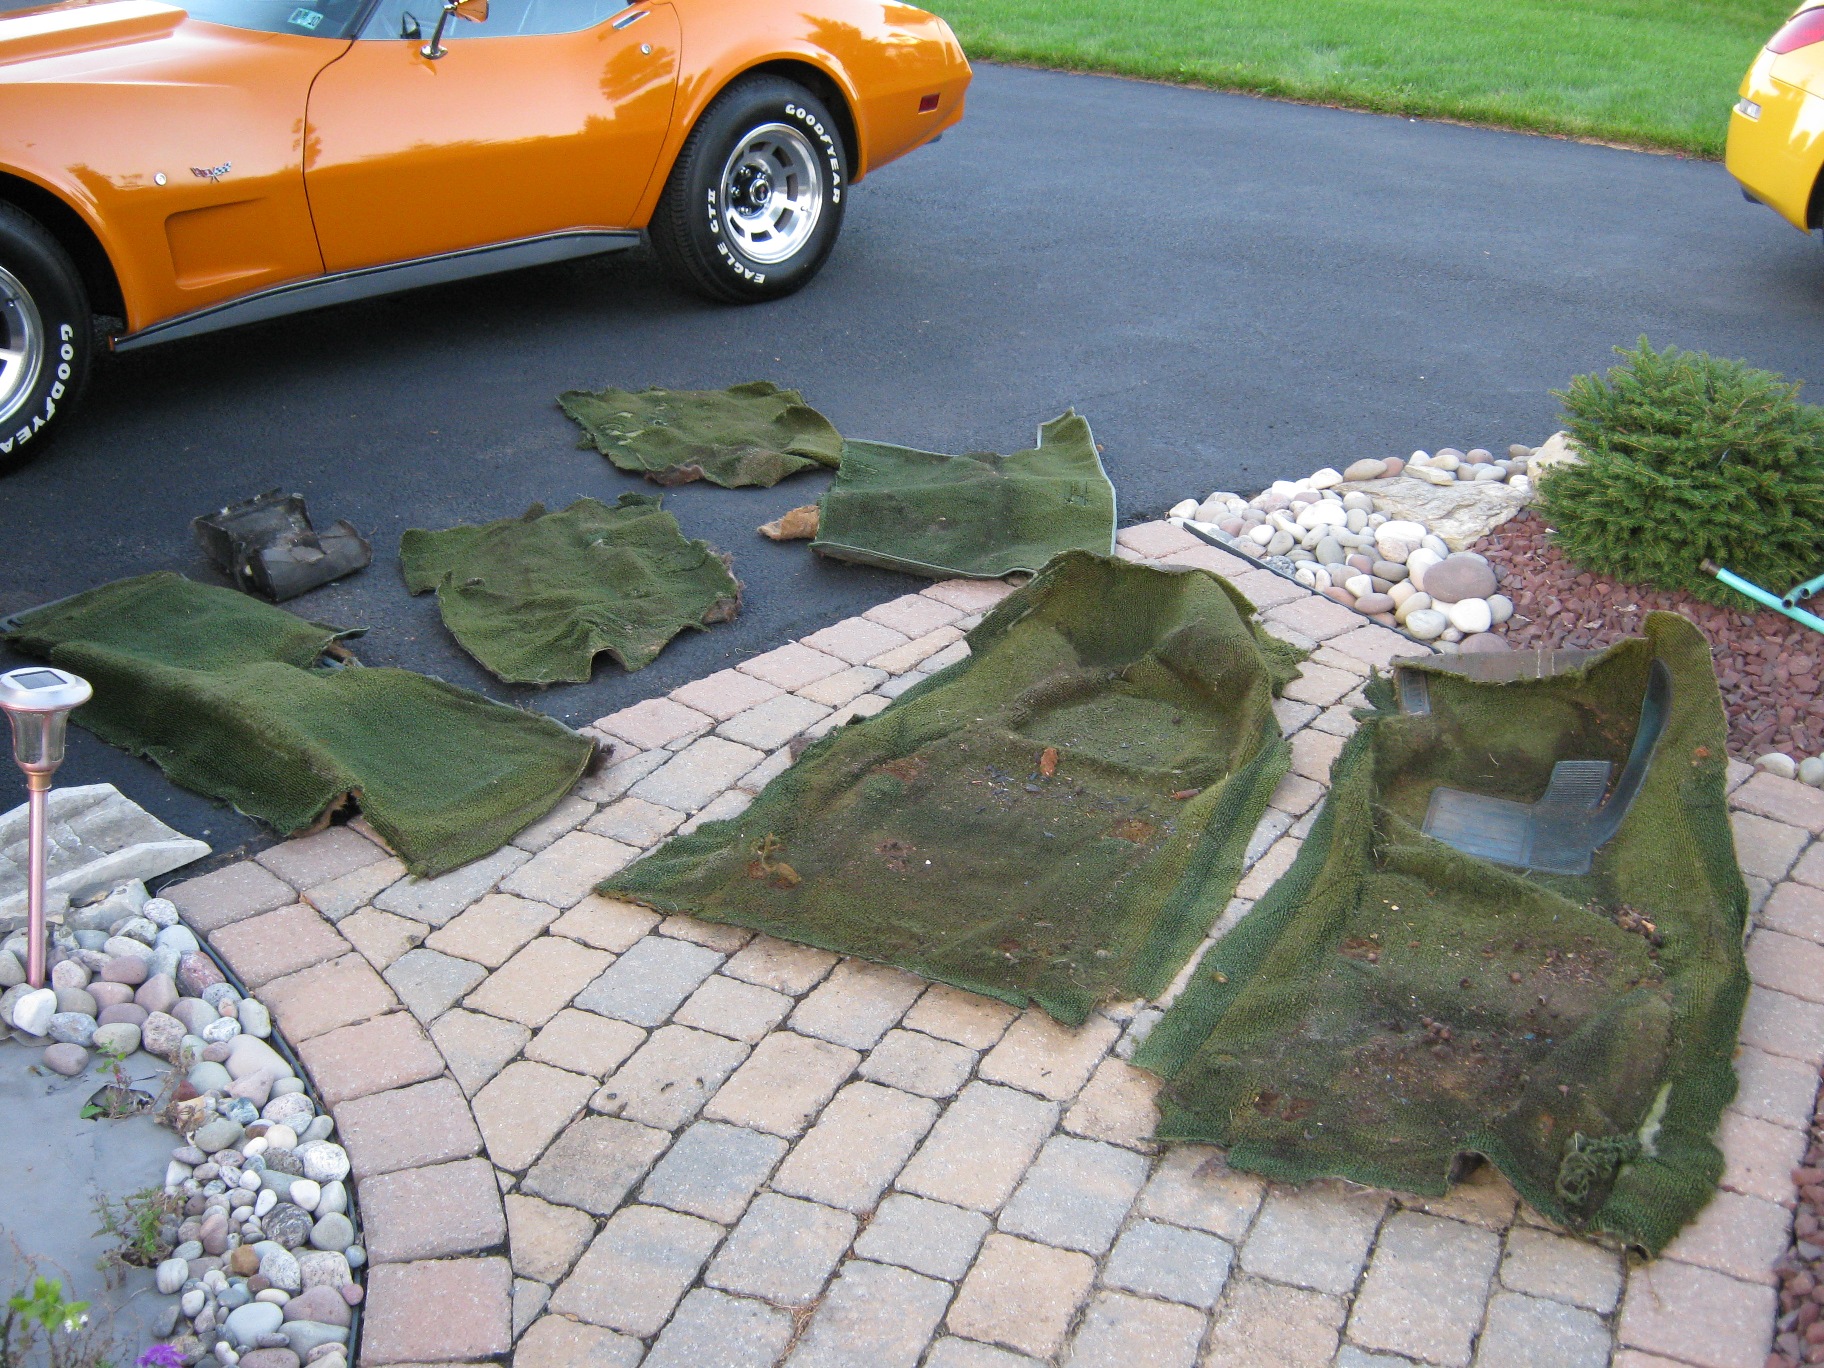
This is the carpet boneyard. I will save these peices for measurement when I get ready to install the new carpet. I did it in the 77 and I believe I can do it in the 71 as well.
Here my 77 looked over my work and offered encouragement from time to time. Nice when you have one car to remind you of what the end can look like. Keeps you going.
It was glued down firm and took a lot of pulling to get her free.
I'll have to remove the glue and remaining fuzz before I can start with the interior rebuild, but for now it is clean and free of nuts and other critter nests. Found four total, they had been busy.
This is the carpet boneyard. I will save these peices for measurement when I get ready to install the new carpet. I did it in the 77 and I believe I can do it in the 71 as well.
Here my 77 looked over my work and offered encouragement from time to time. Nice when you have one car to remind you of what the end can look like. Keeps you going.
09-14-2009, 08:54 PM
#57
Senior Member
Thread Starter
Member Since: Jan 2008
Location: Easton, PA
Posts: 12,154
Received 2,031 Likes
on
1,103 Posts
St. Jude Donor '10
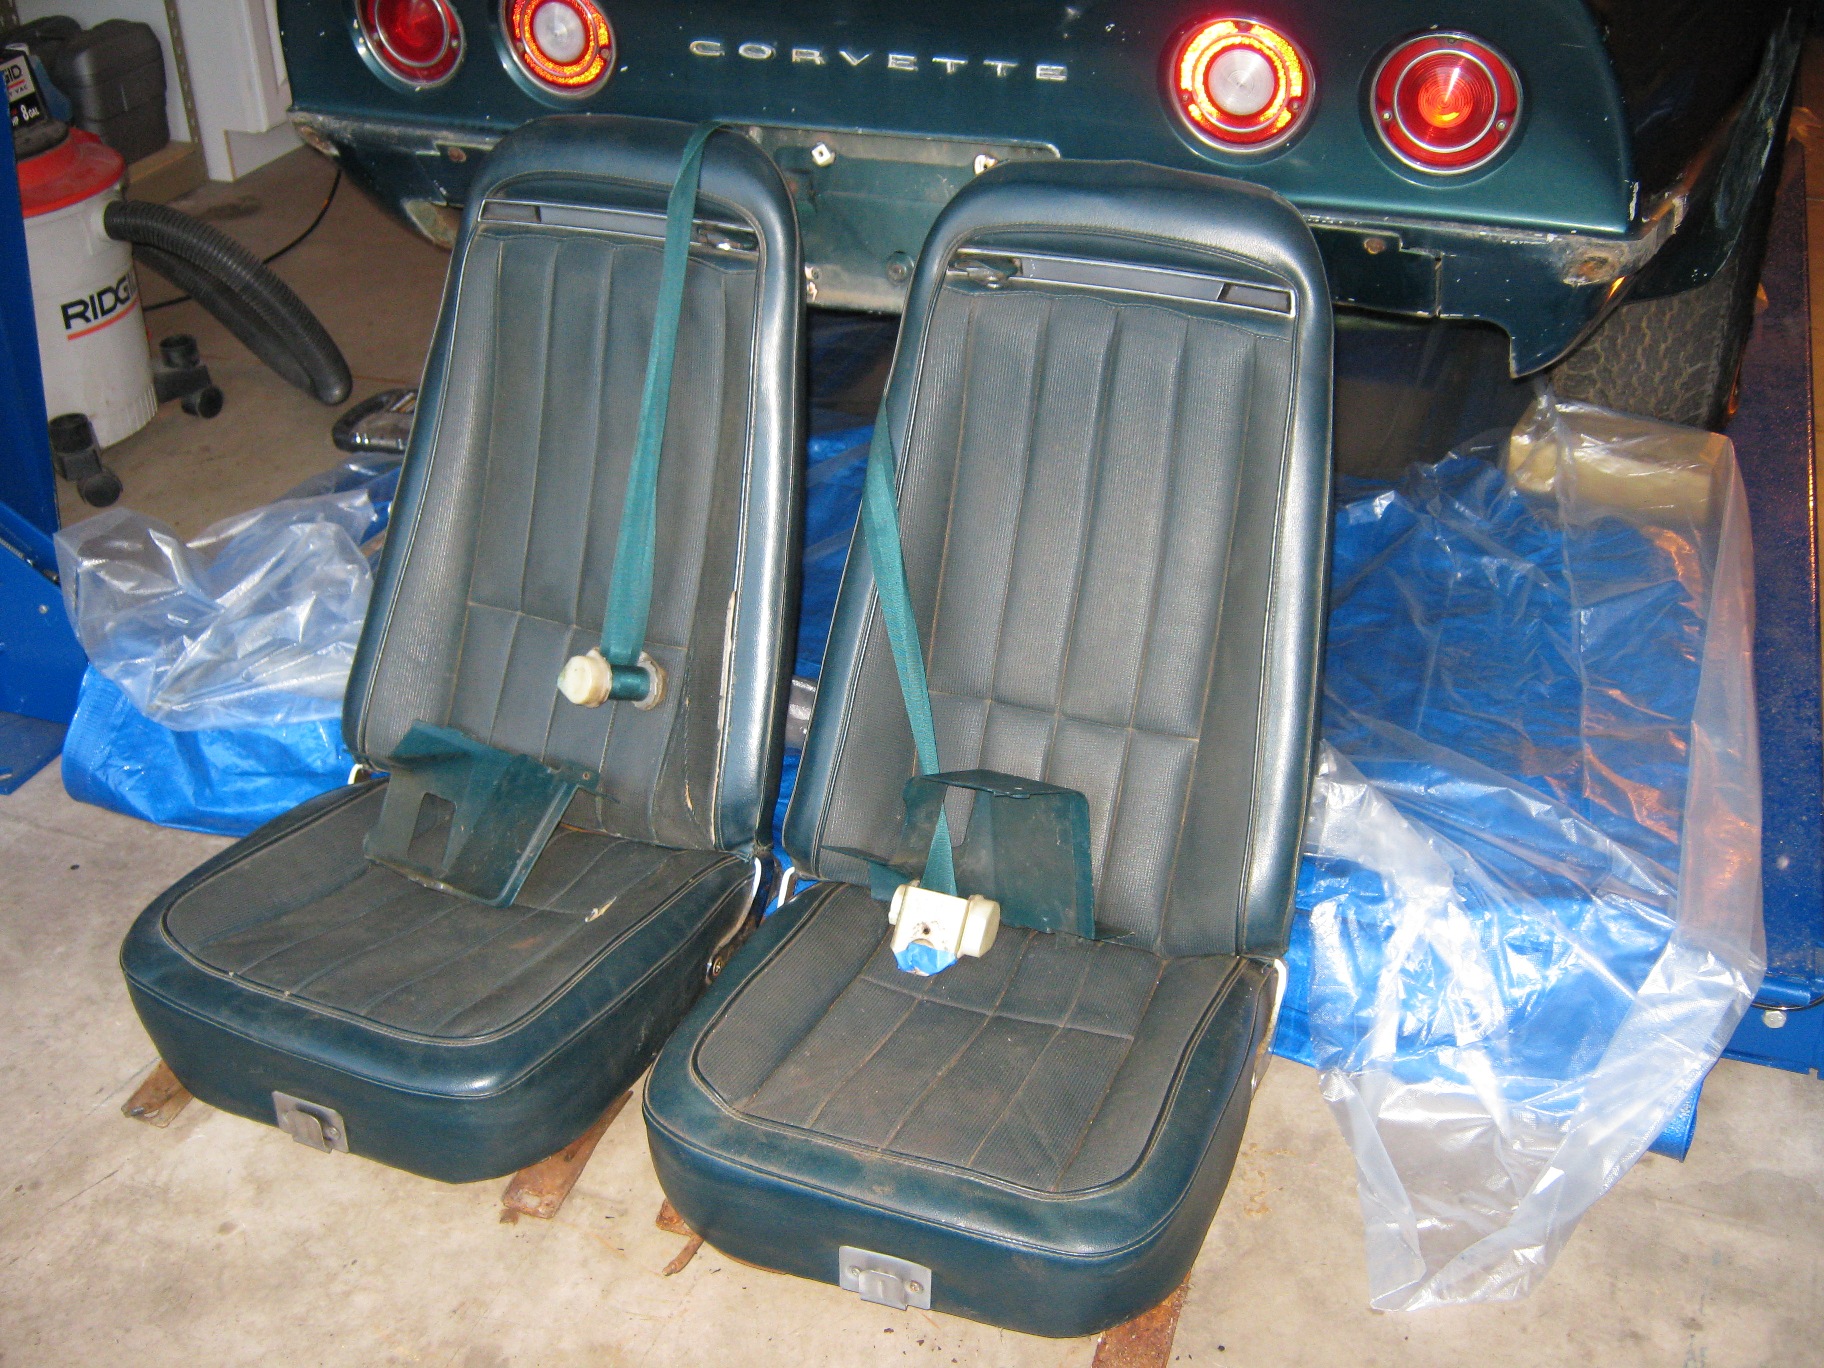
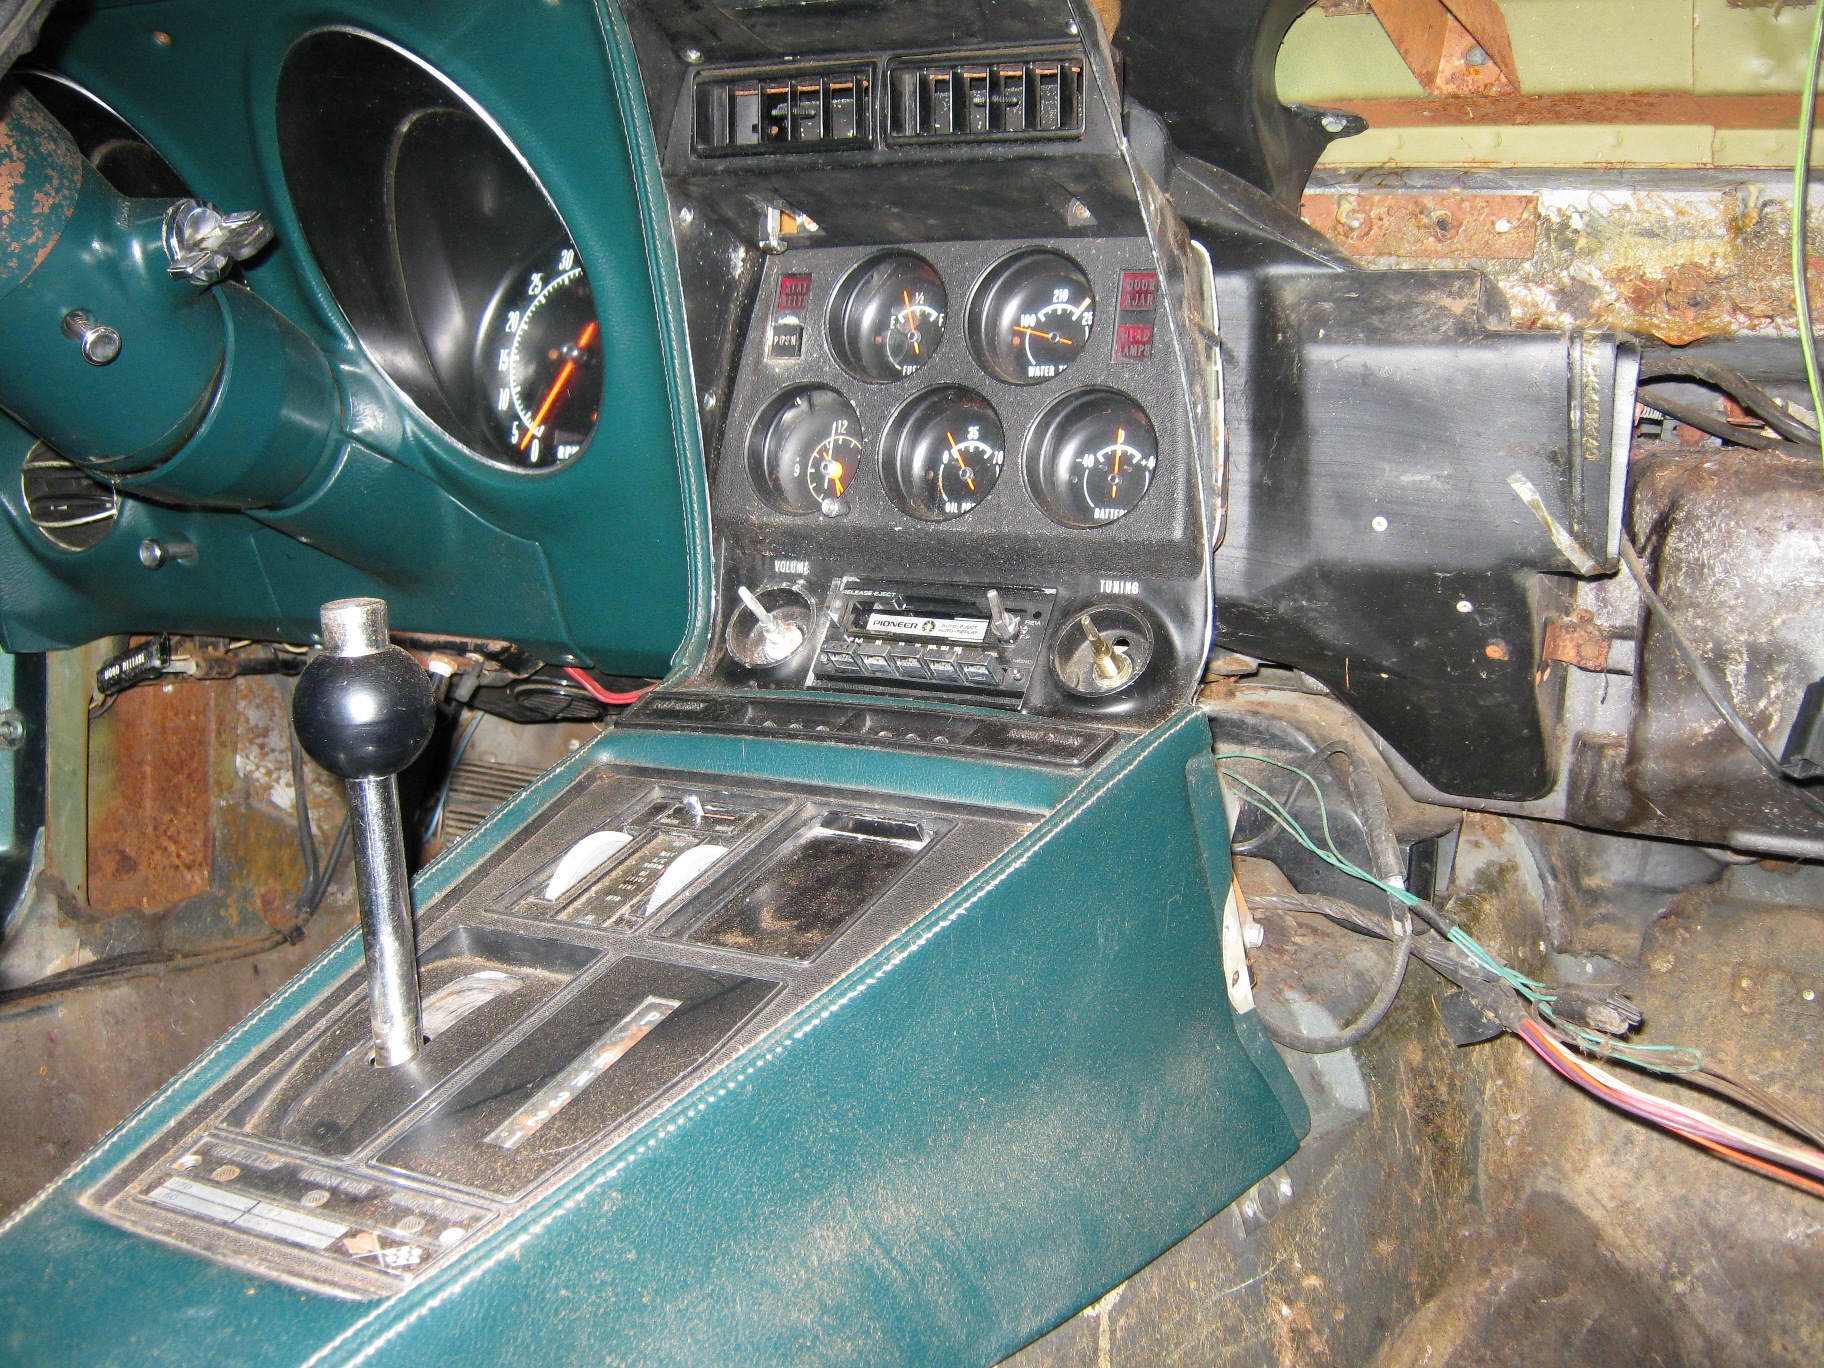
The seats came out easily as did the seat belts.
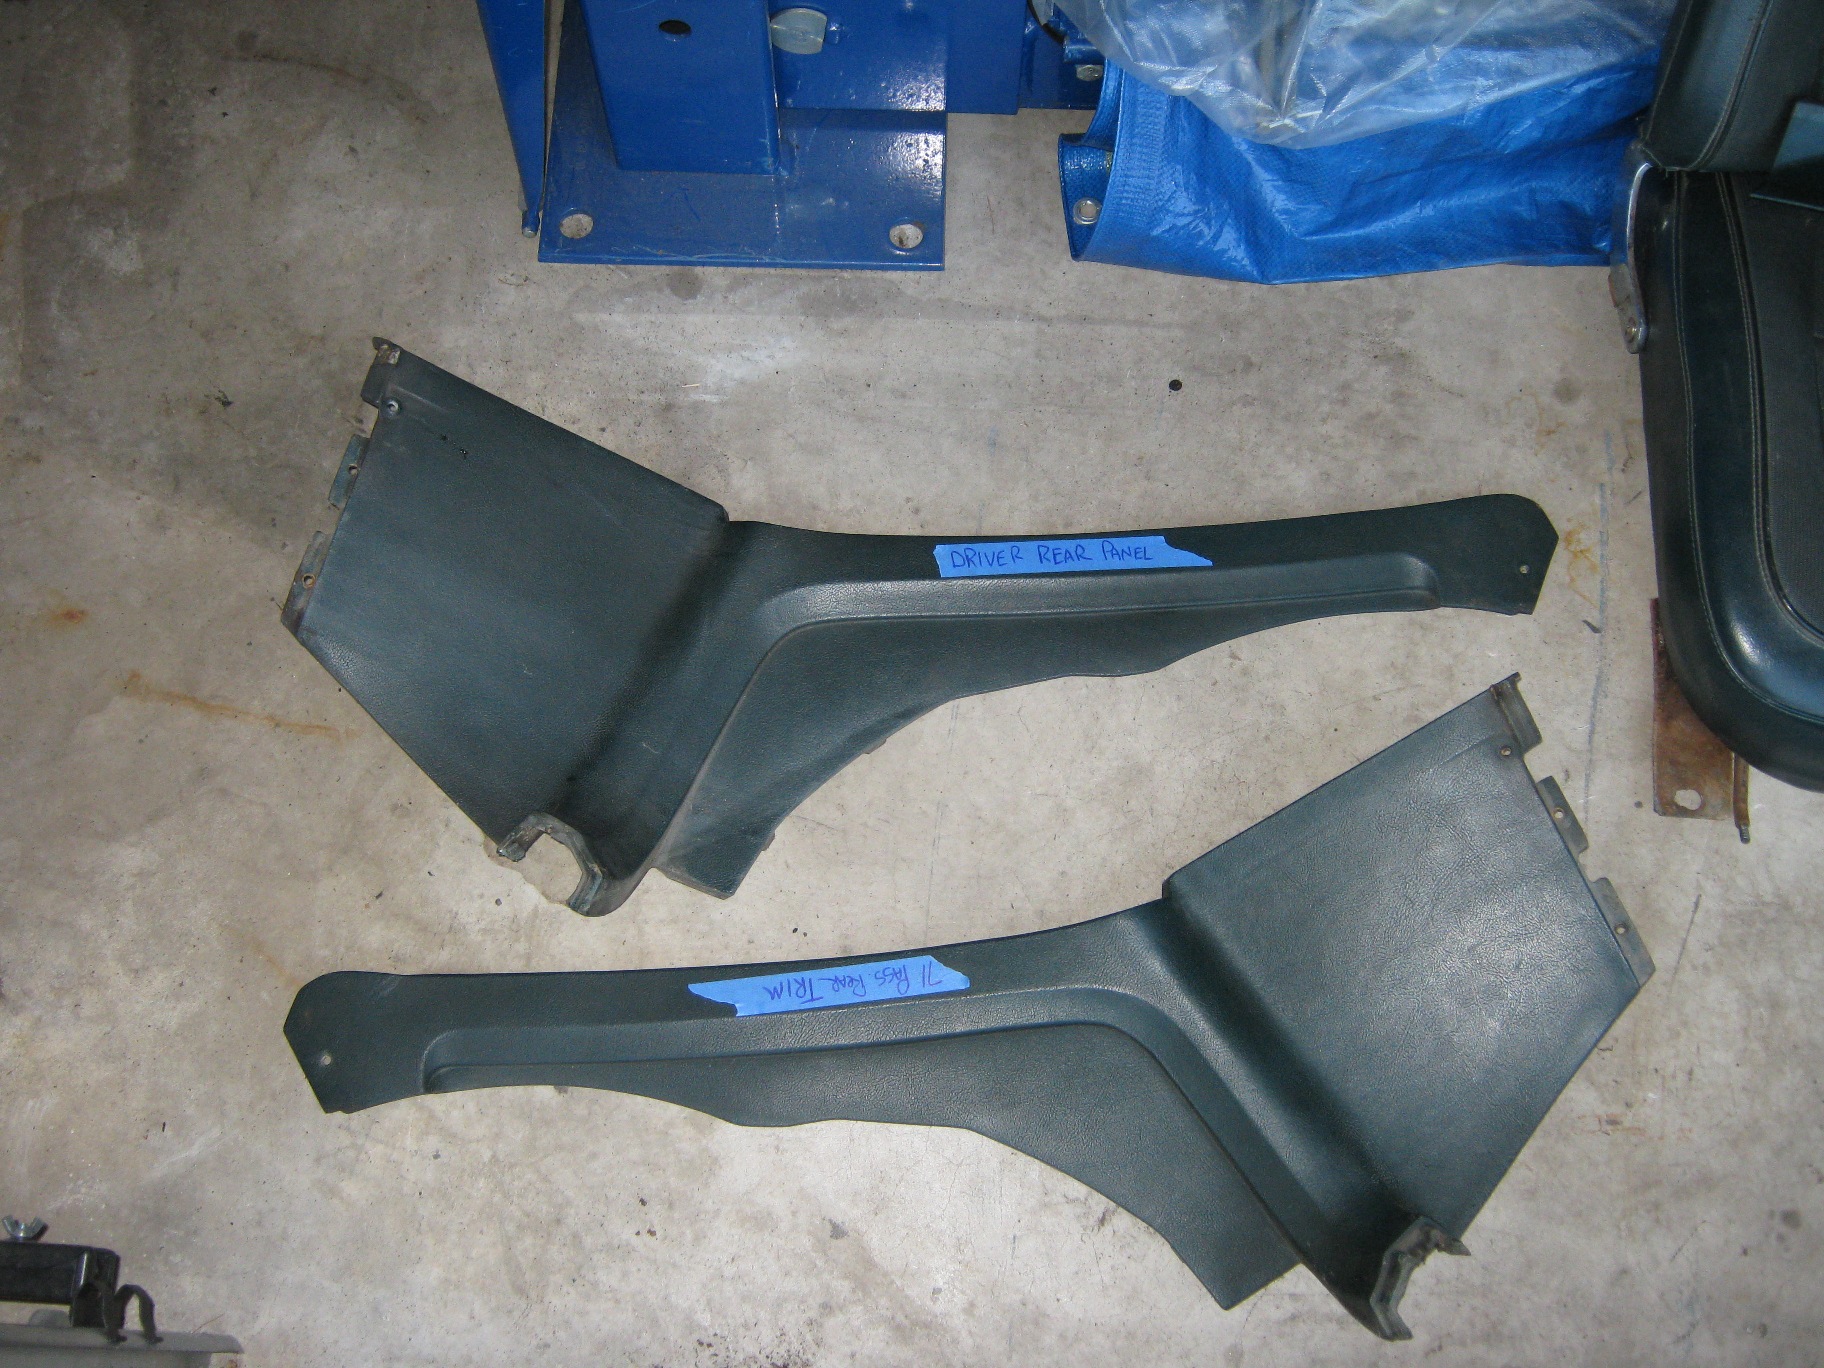
Rear trim came out with only minor injury to one of them, it can be repaired.
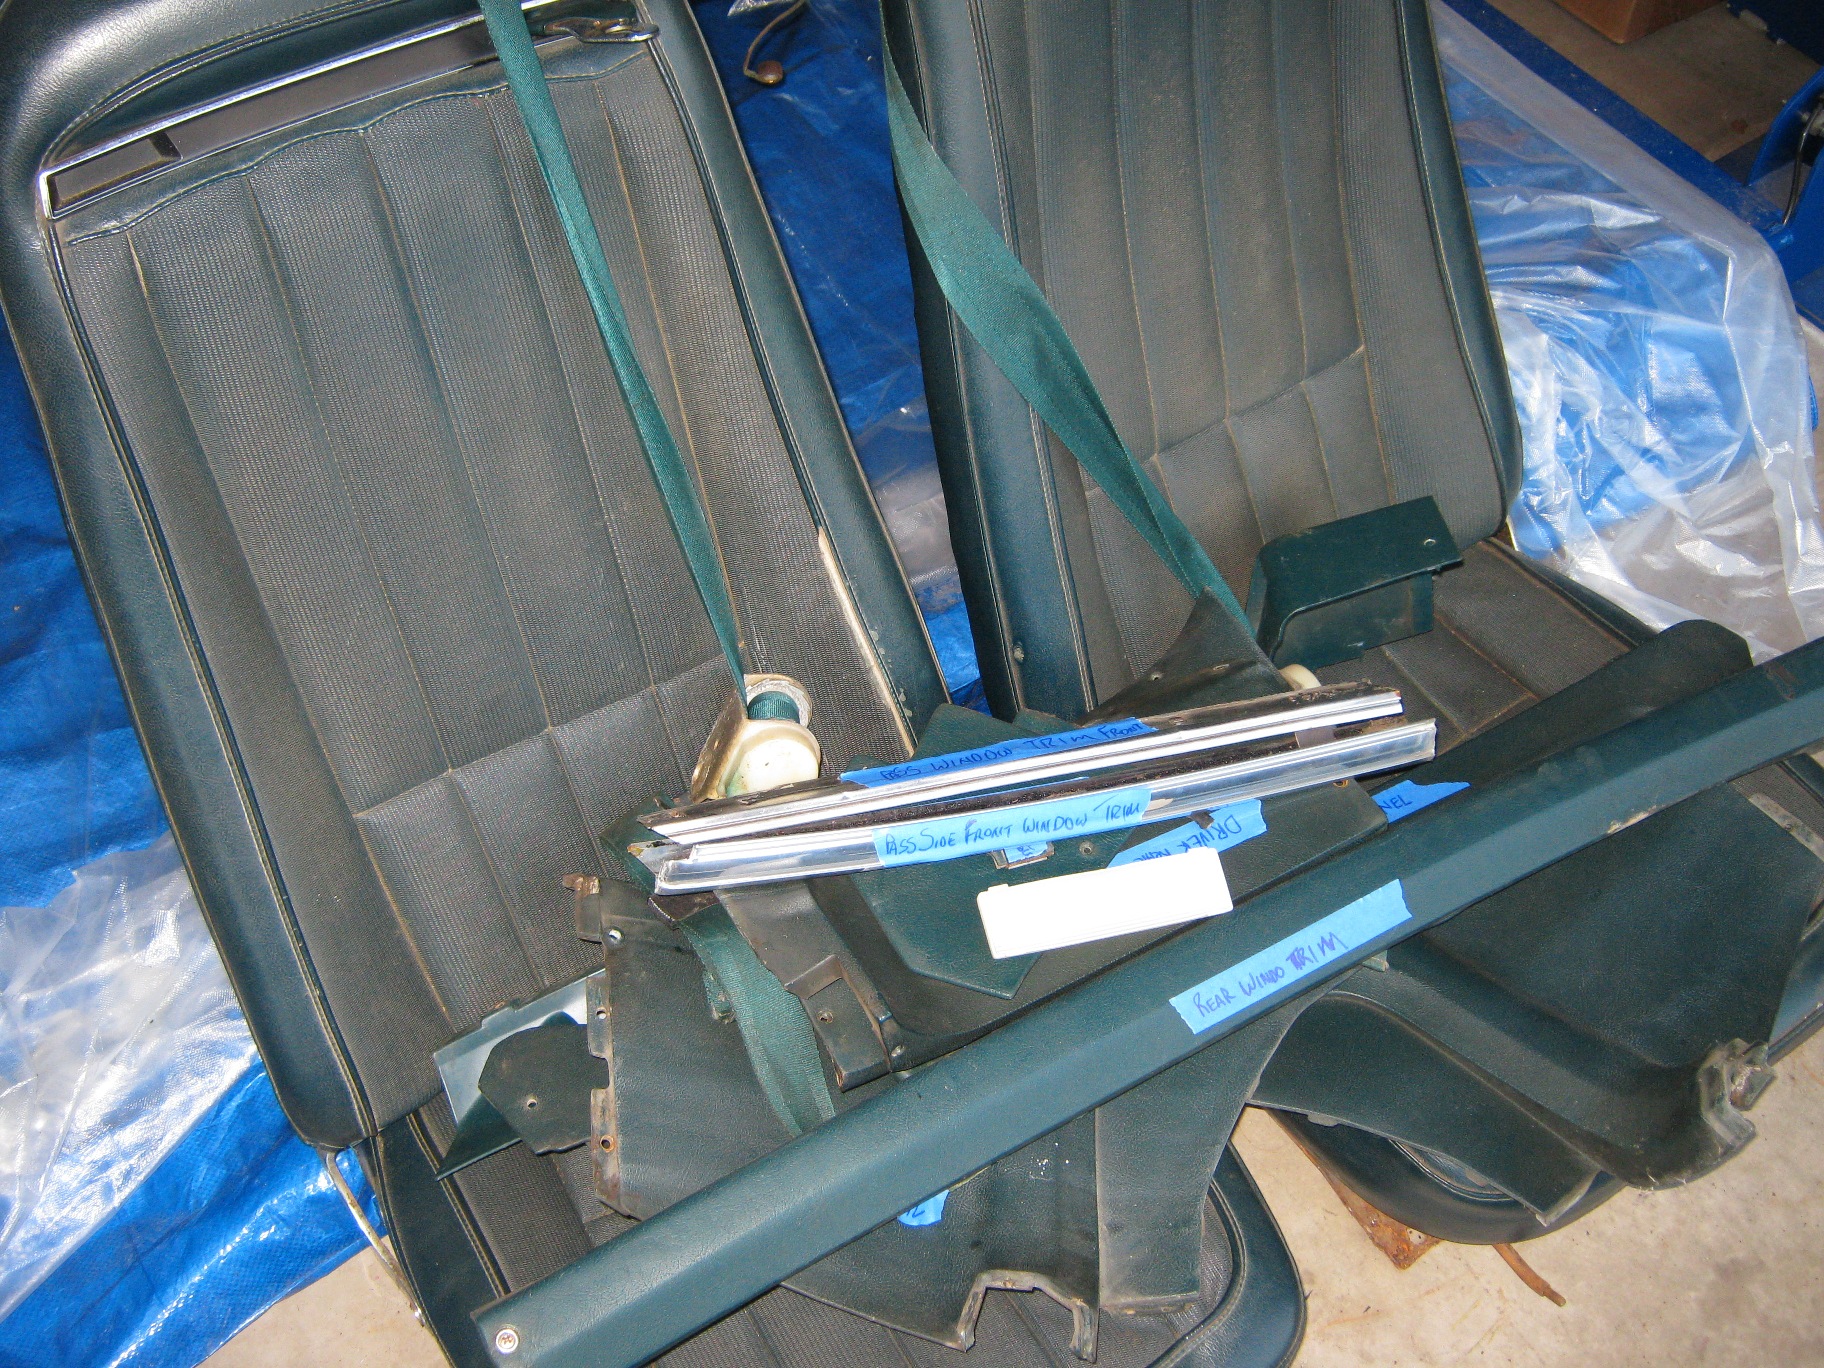
All the parts removed today were photographed, cleaned, and then stored and documented.
Off to a good start...stay tuned, birdcage pictures tonight.
David
09-14-2009, 08:58 PM
#58
Senior Member
Thread Starter
Member Since: Jan 2008
Location: Easton, PA
Posts: 12,154
Received 2,031 Likes
on
1,103 Posts
St. Jude Donor '10
I got the trim off the back deck of the car and removed the astro ventilation vents, then plugged the holes and began stripping. Not done yet but good progress tonight. Here she is now. I'll finish the rear deck tomorrow and start on the rear working my way forward.
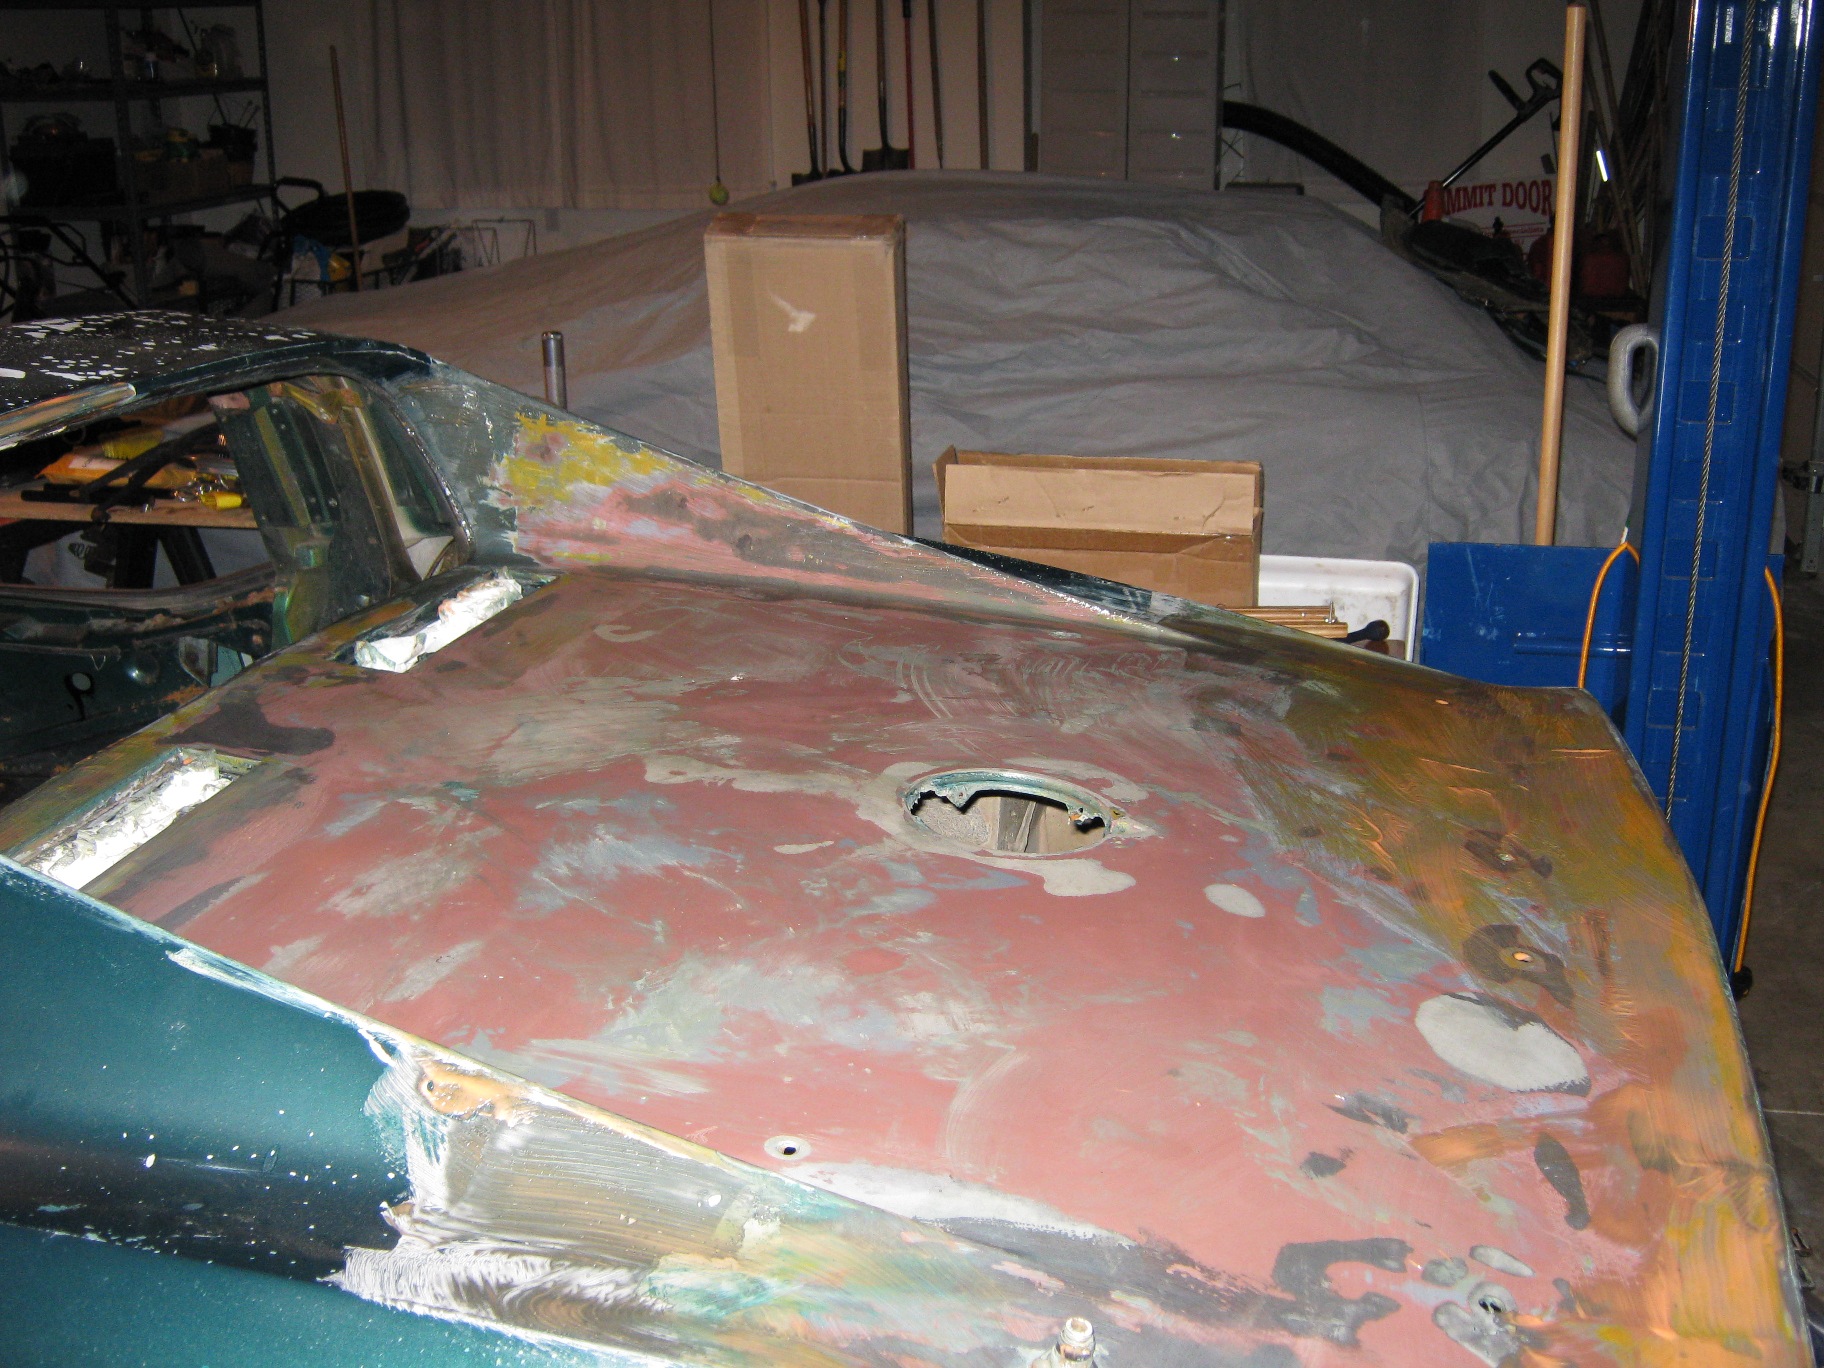
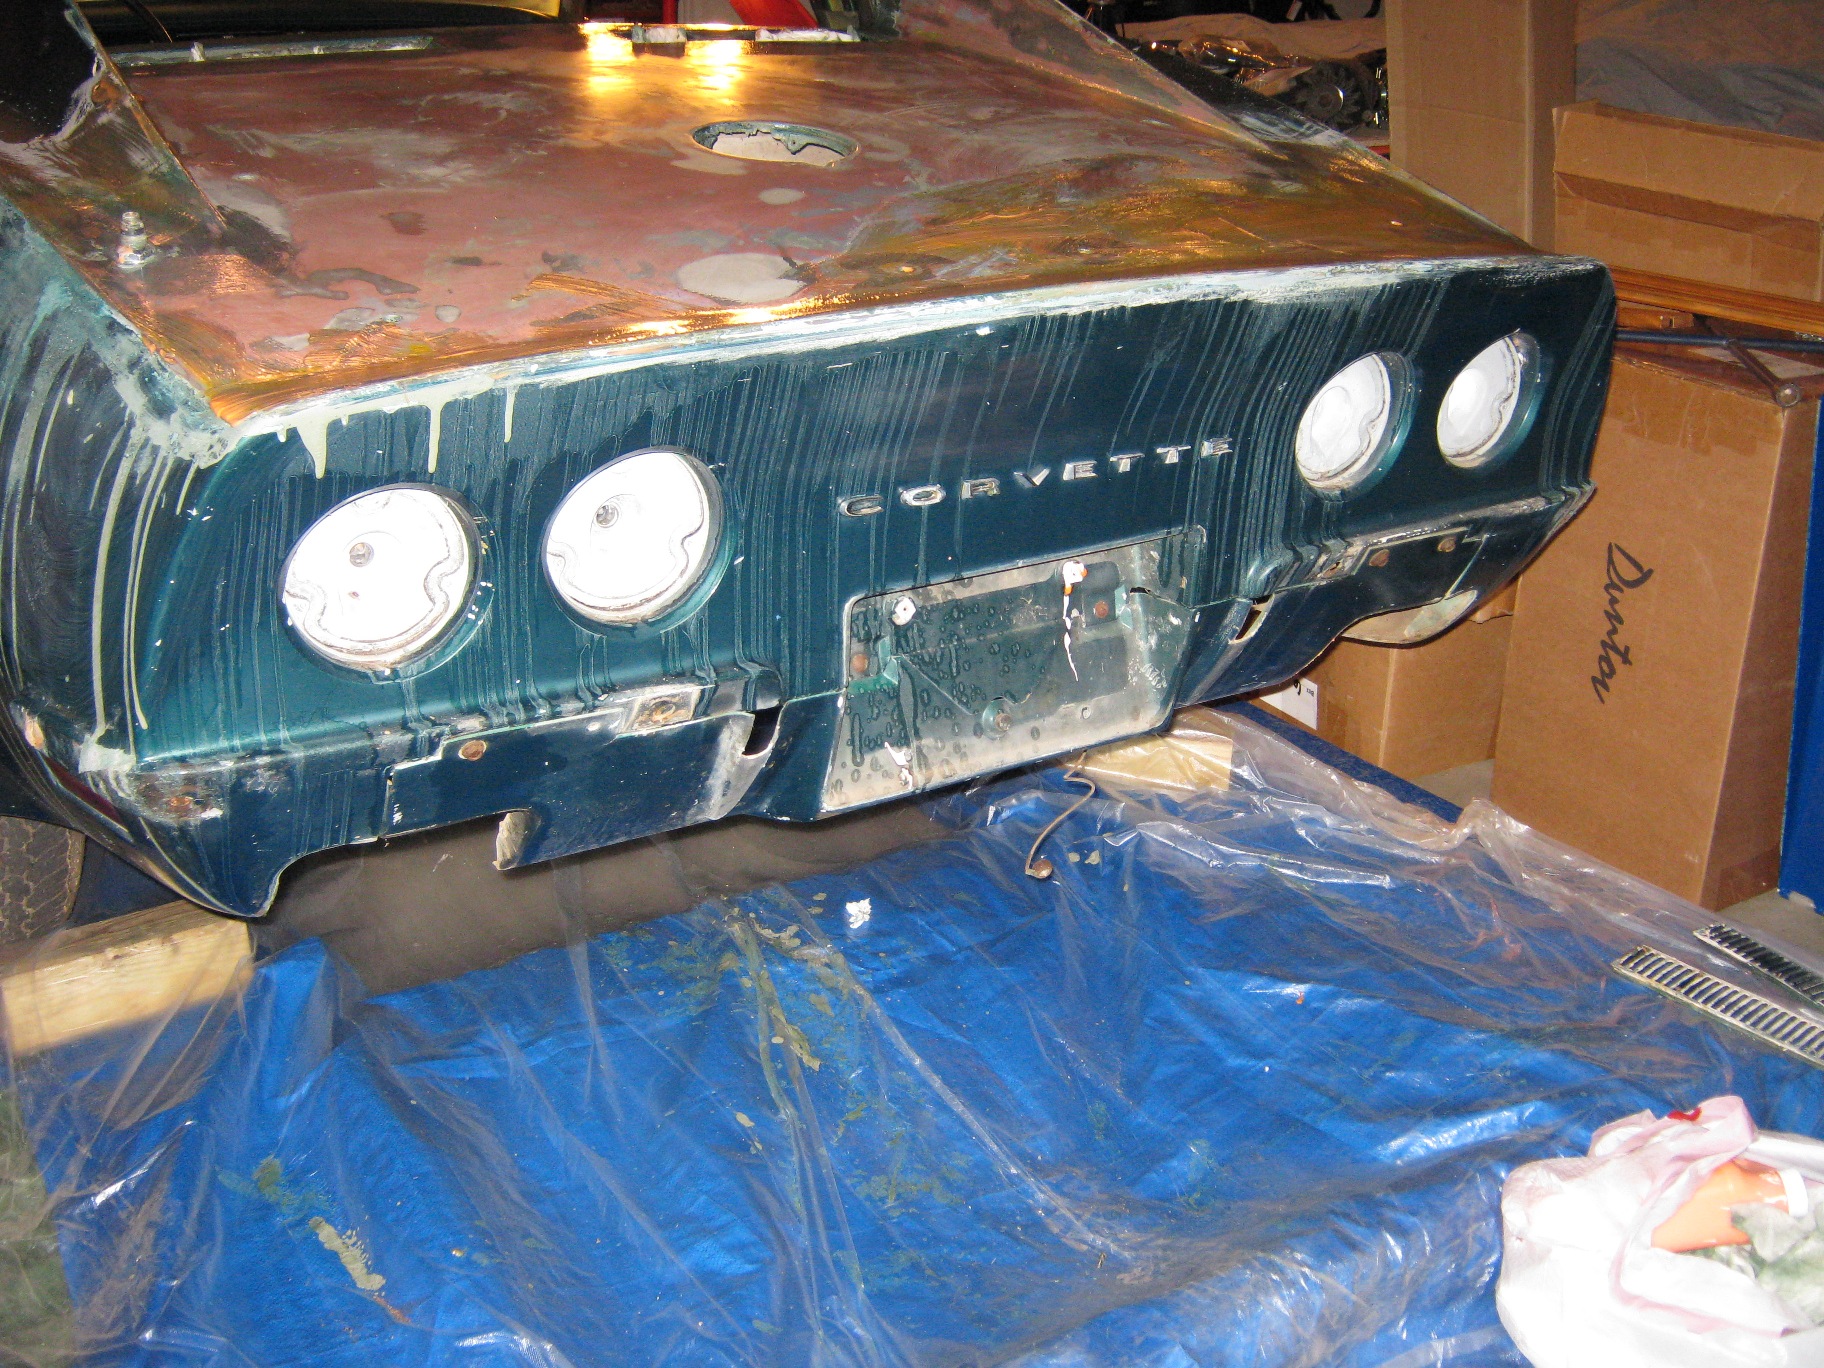
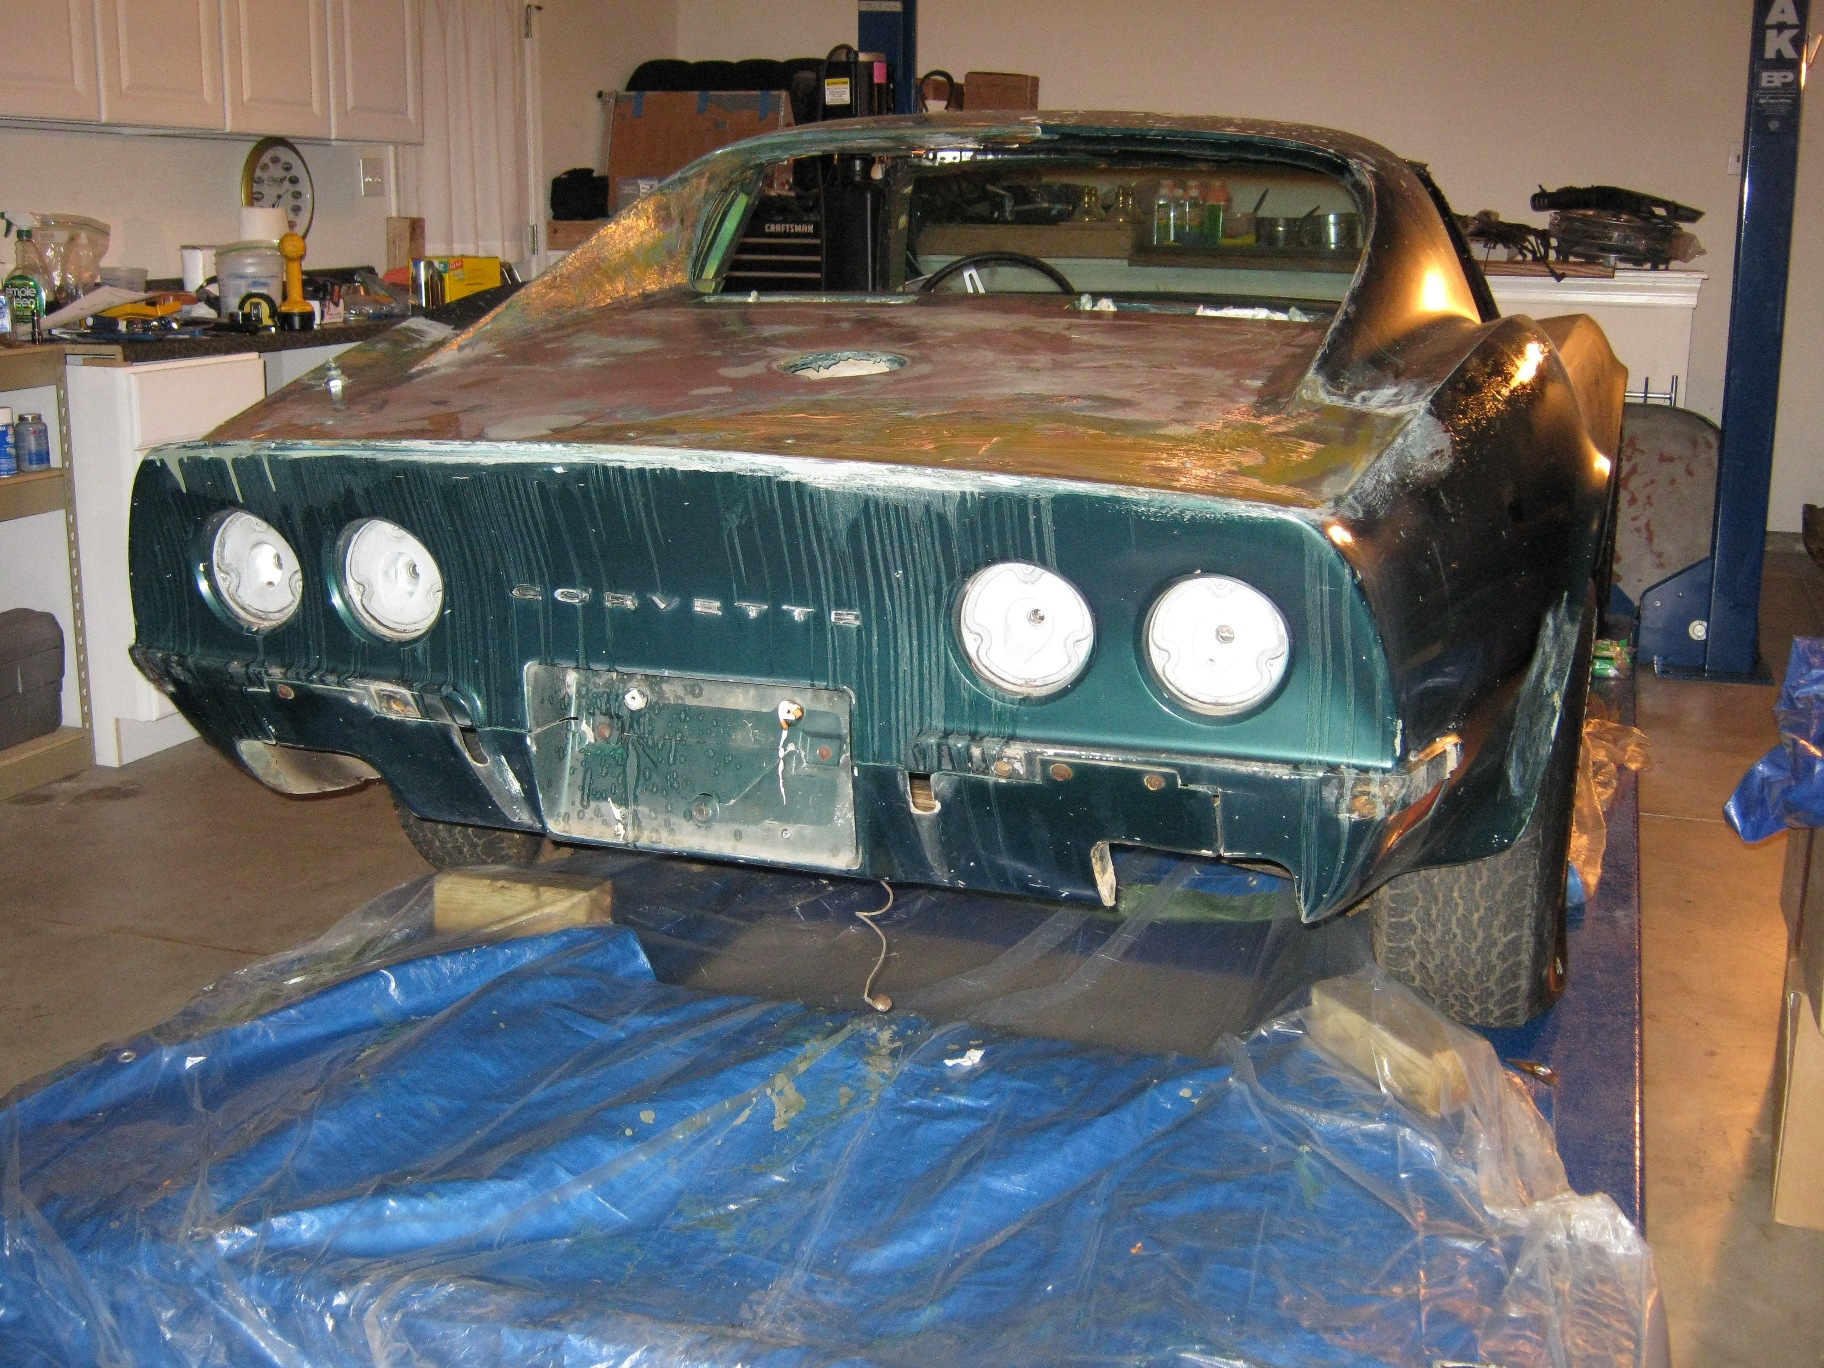
The Citristrip works really well, especially if you do a single area at one time and use the after wash to clean up the residue. More soon.
Best regards,
David
The Citristrip works really well, especially if you do a single area at one time and use the after wash to clean up the residue. More soon.
Best regards,
David
09-14-2009, 09:05 PM
#59
Senior Member
Thread Starter
Member Since: Jan 2008
Location: Easton, PA
Posts: 12,154
Received 2,031 Likes
on
1,103 Posts
St. Jude Donor '10
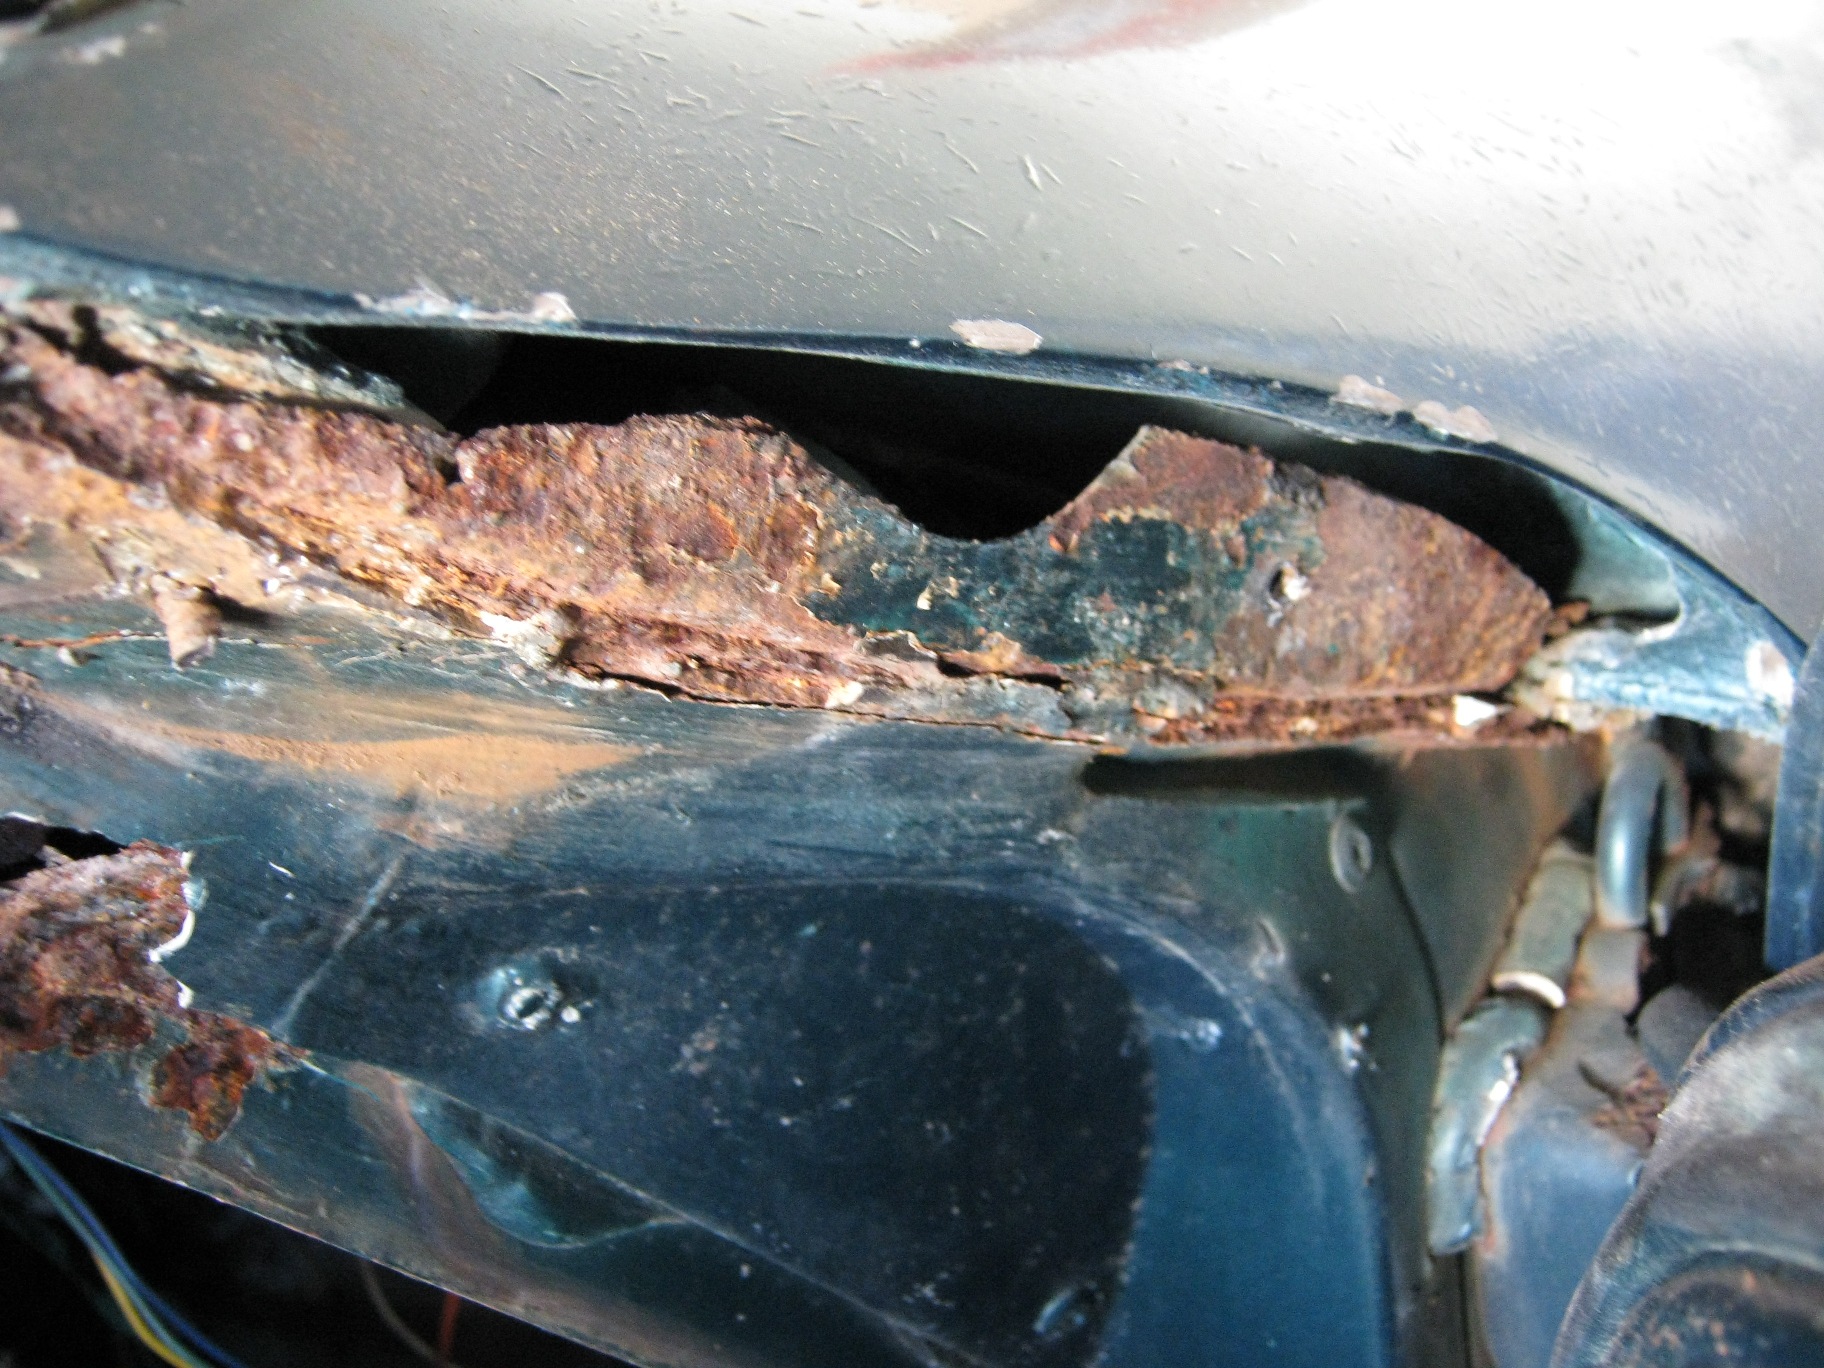
It took some real effort but I got the outer and inner trim removed from the passenger pillar post today and I broke the already broken windshield getting in there. There is rust as suspected but I think we can work with it as there are no spots through and it appears to be holding firm. Clean up and some repair will be in order, but not quite as bad as I was expecting. Here are the pictures from tonight.
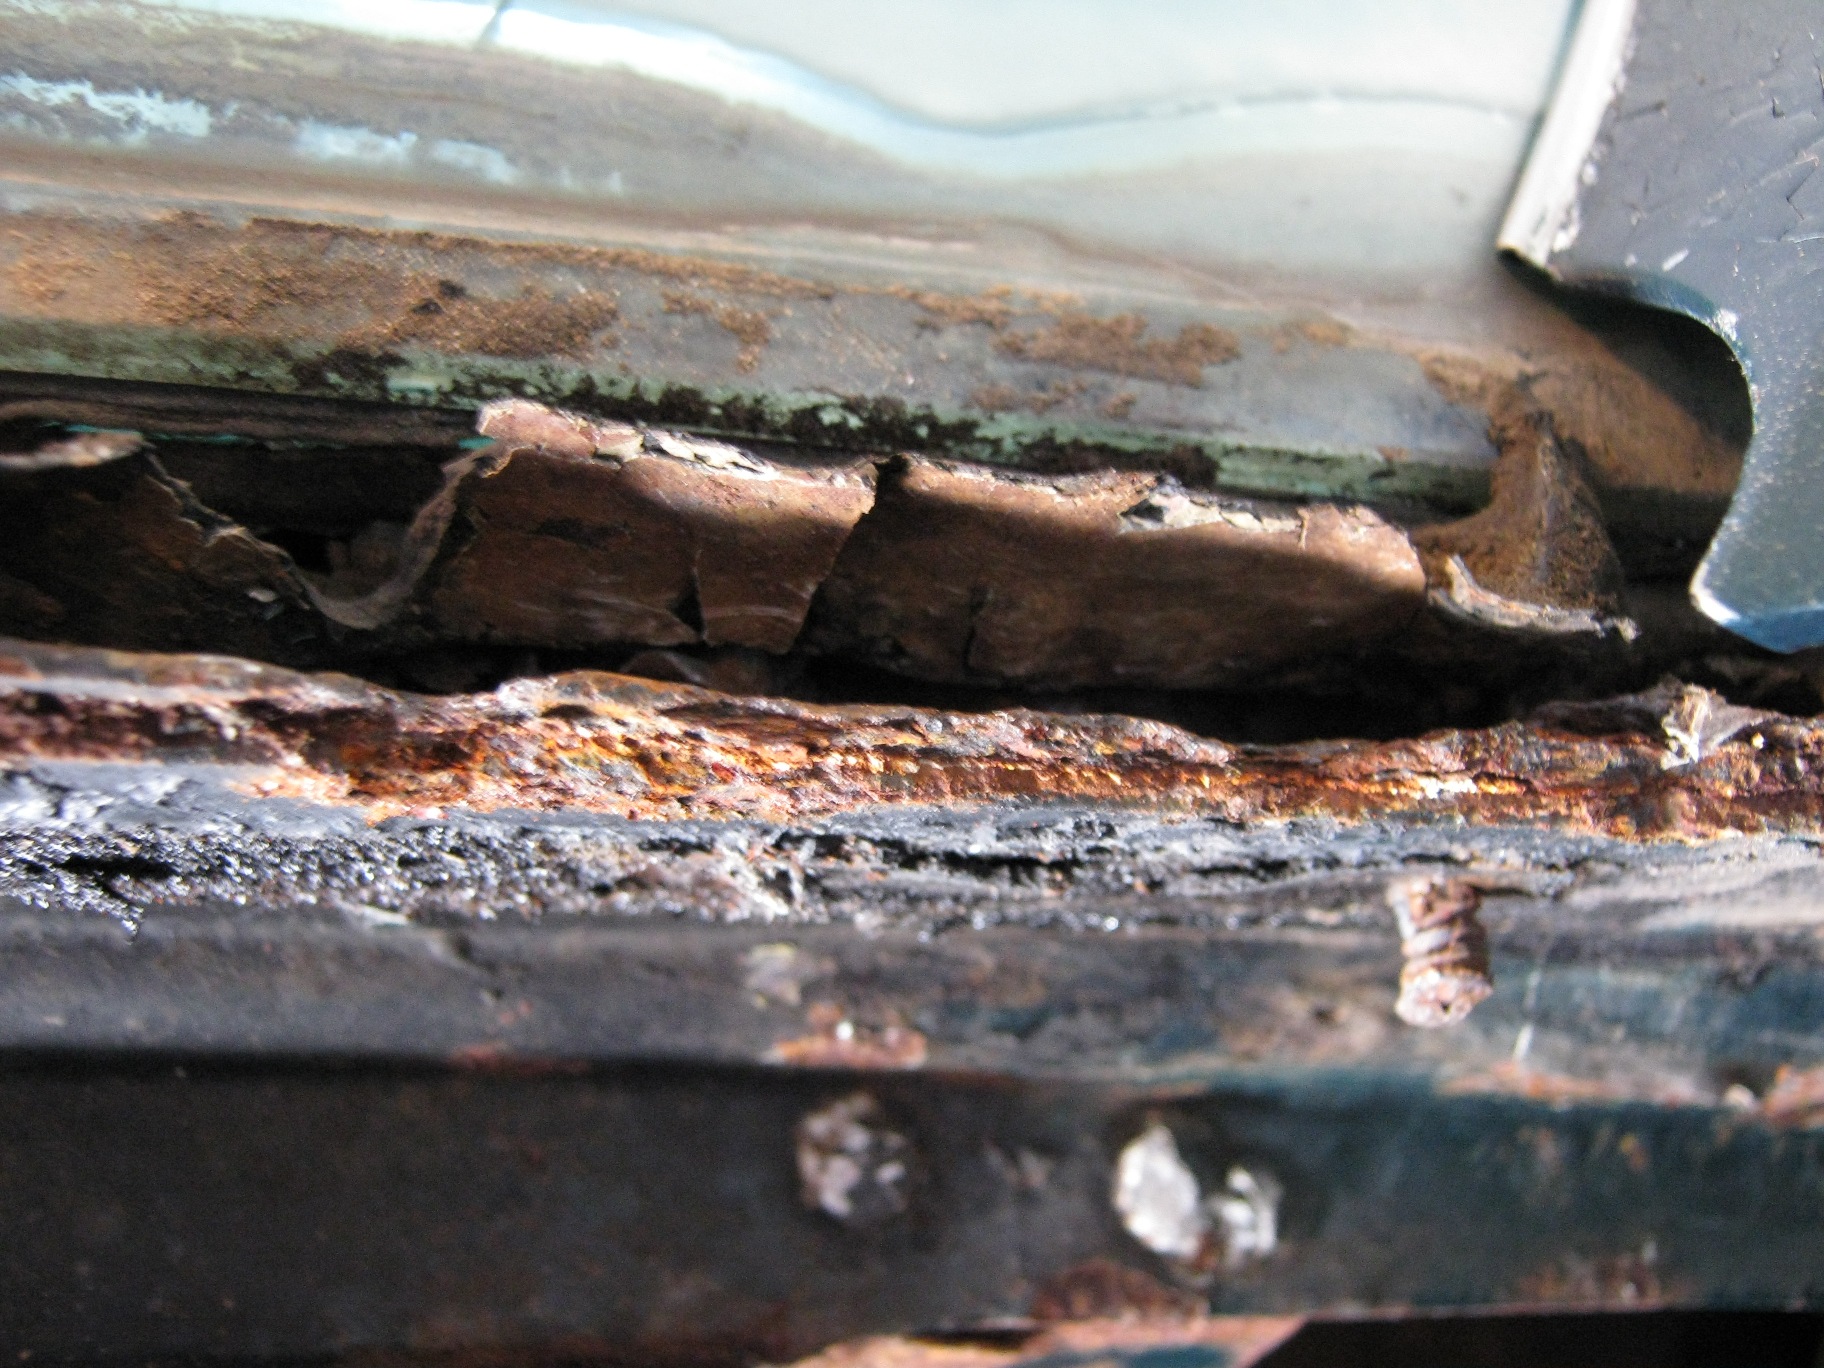
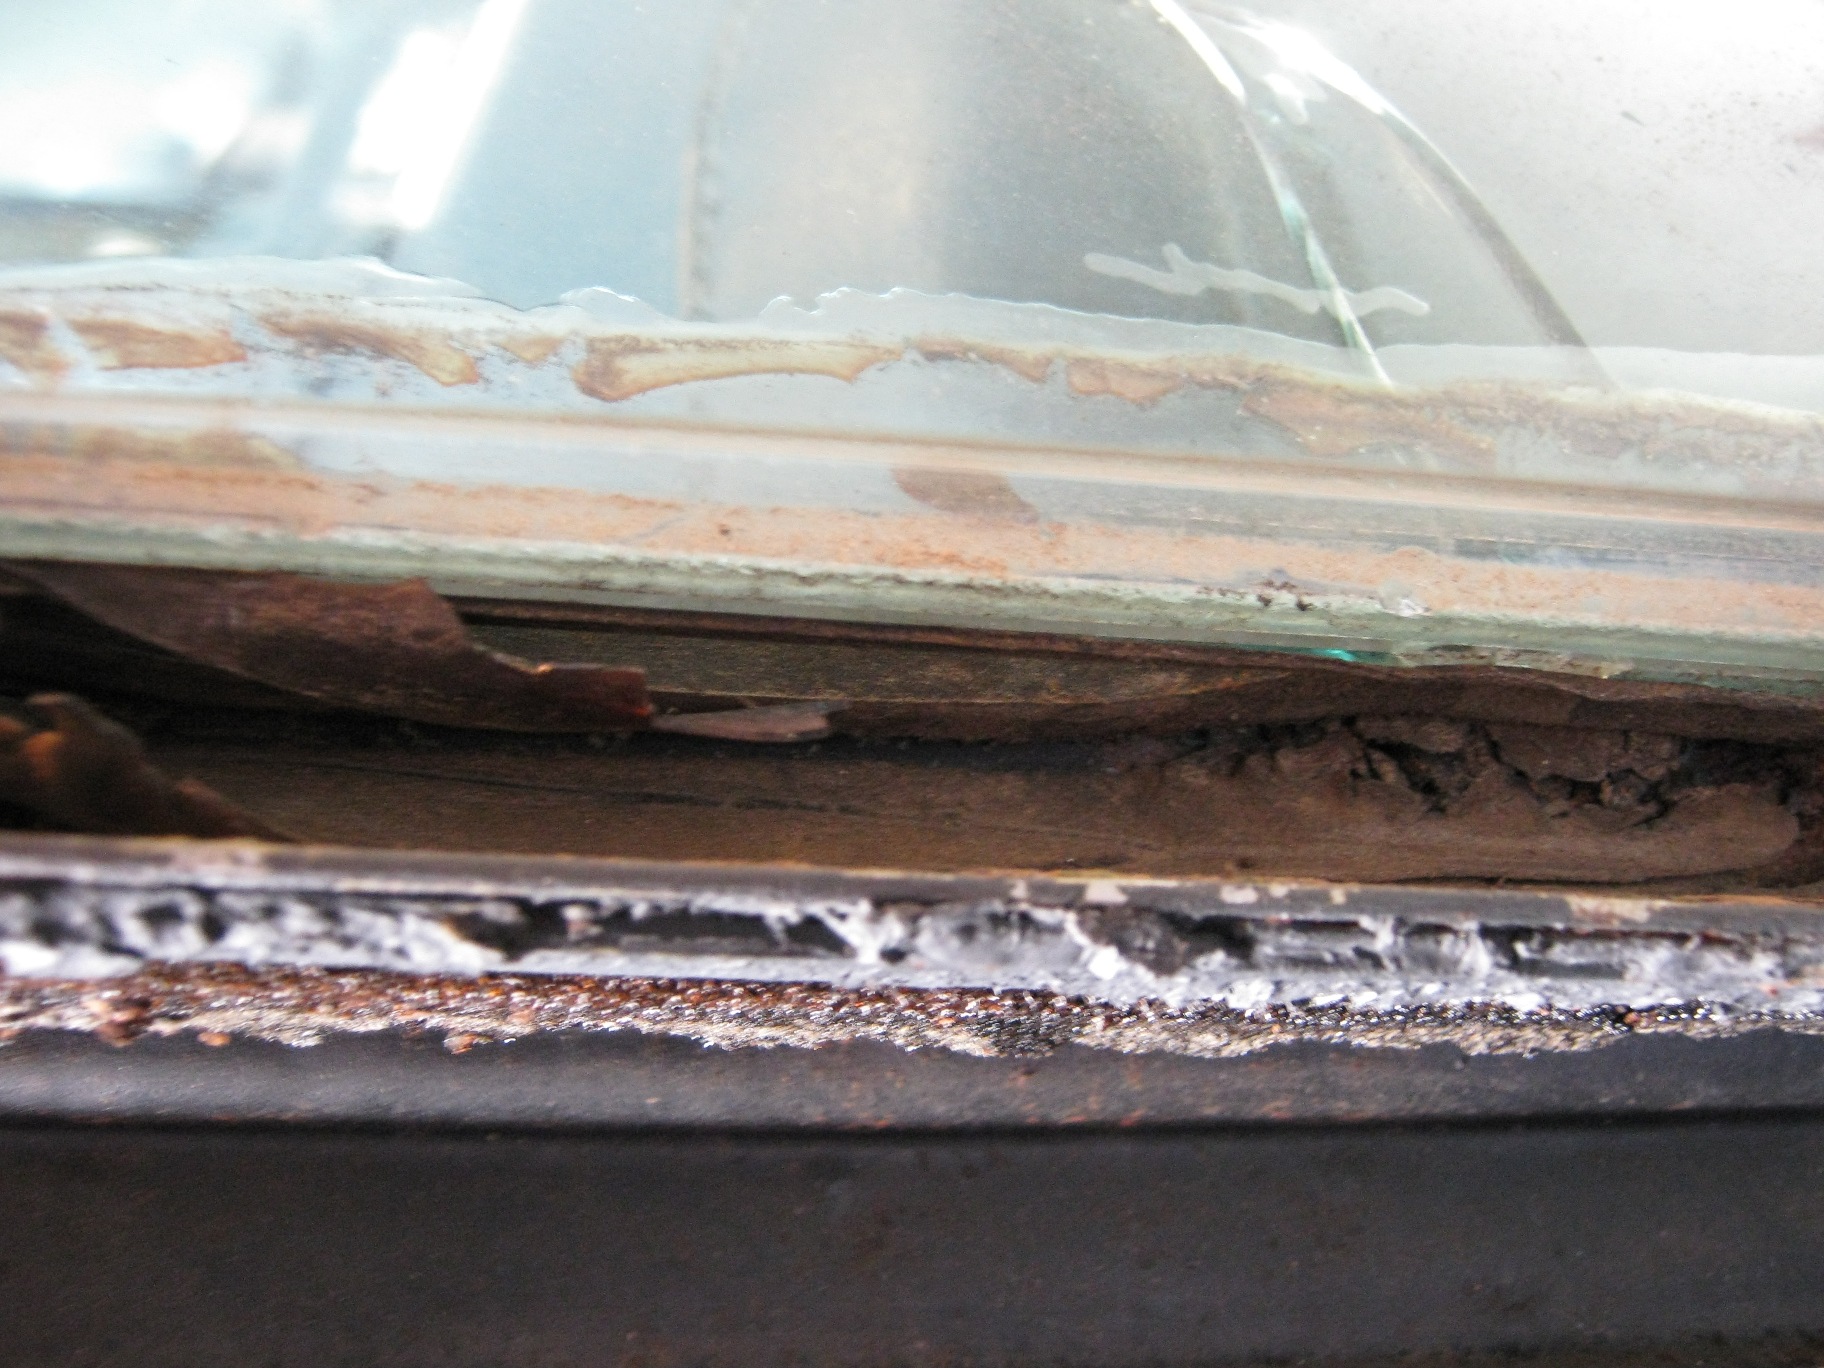
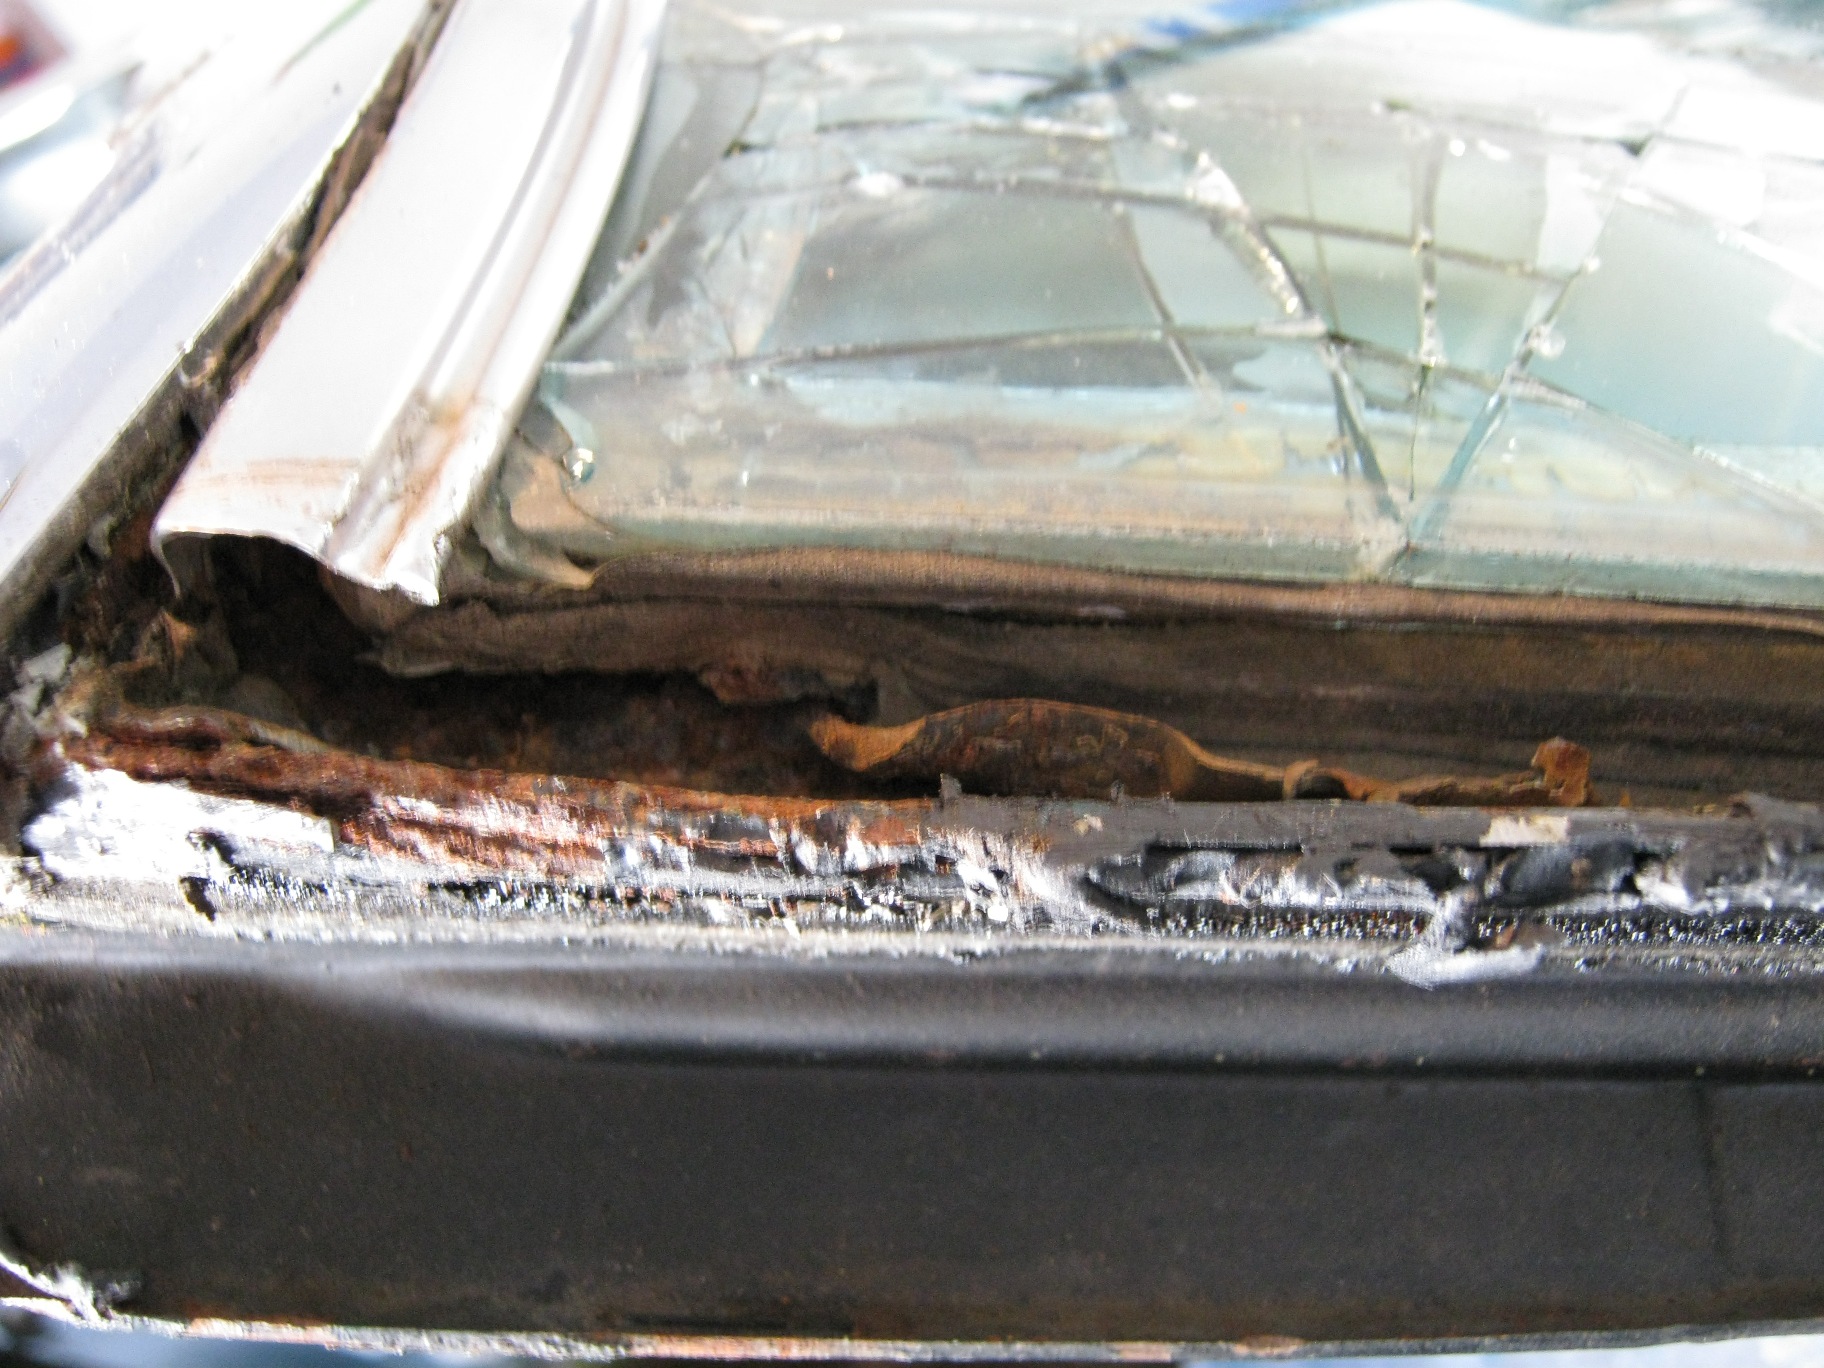
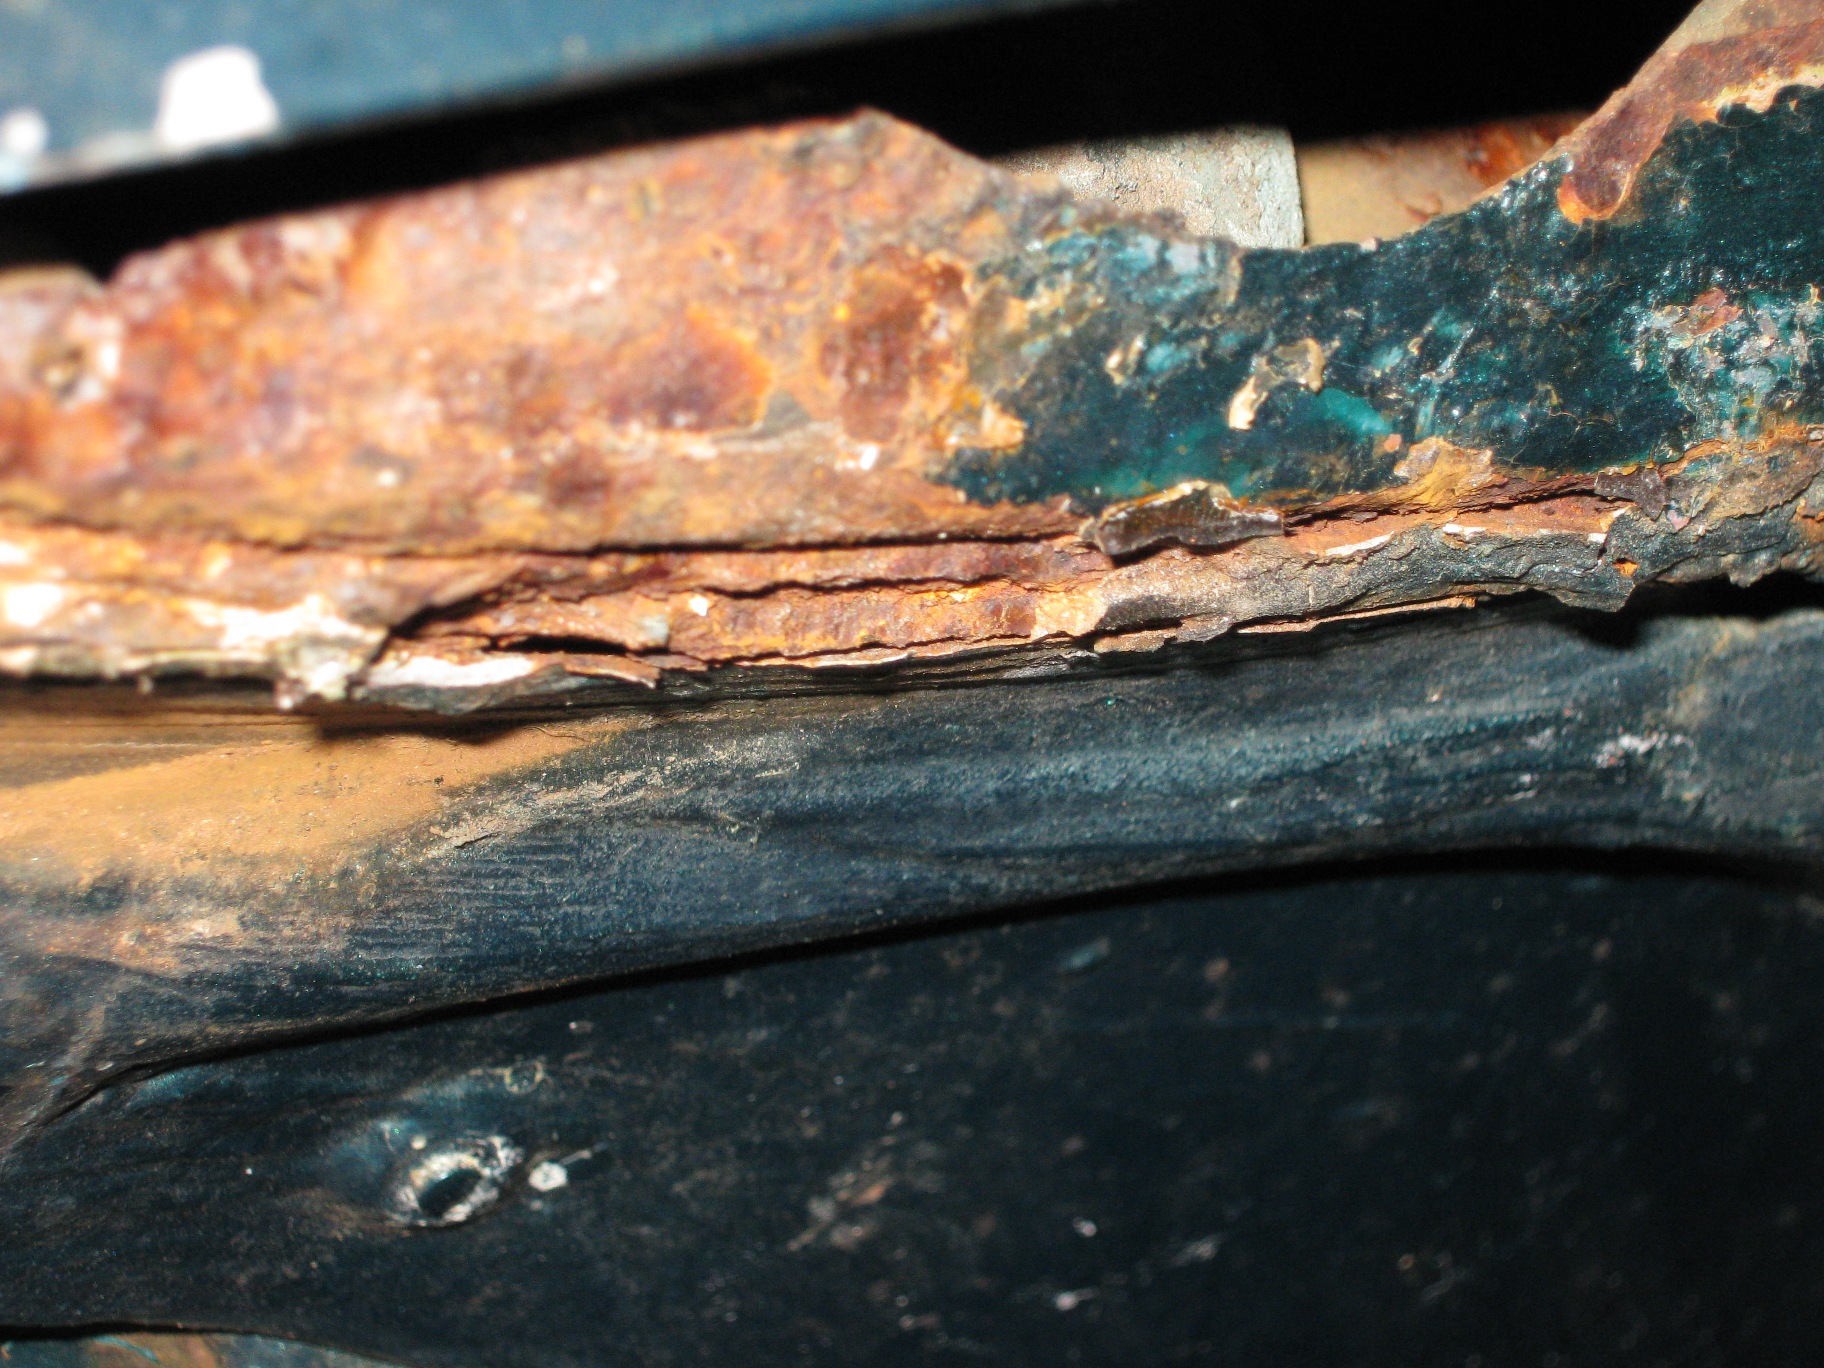
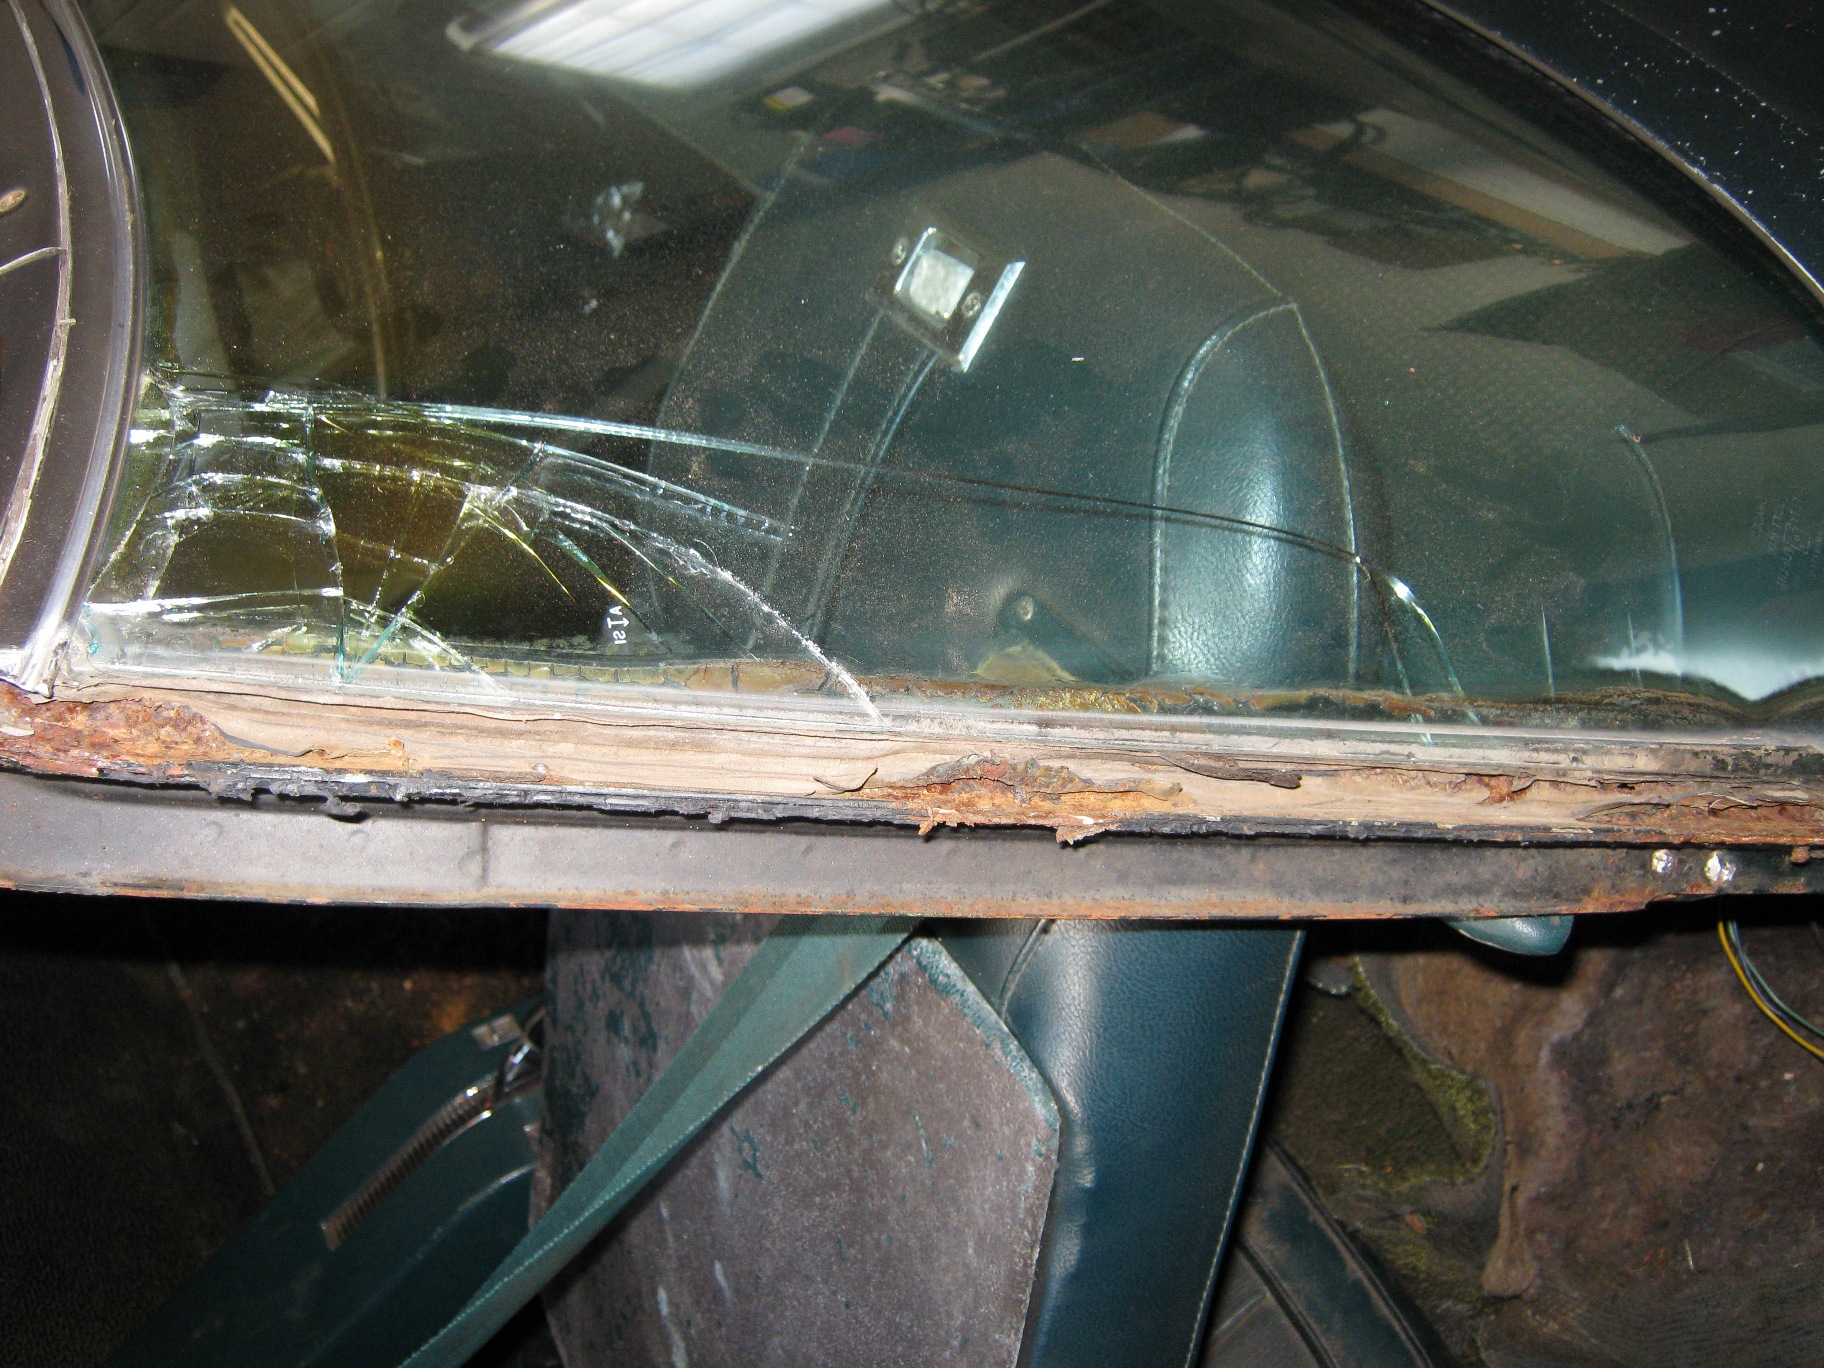
I will make it a priority to remove the dash panels next weekend and then get that windshield and front windheild door out of the way. I am moving carefully so as to catalogue, document, and photograph all my work on this car so that slows me down. More soon.
Best regards,
David
I will make it a priority to remove the dash panels next weekend and then get that windshield and front windheild door out of the way. I am moving carefully so as to catalogue, document, and photograph all my work on this car so that slows me down. More soon.
Best regards,
David
09-14-2009, 09:06 PM
#60
Team Owner
From what I'm seeing, you are in great shape! All the pieces are there, the gauges are not damaged nor is the shift console. A clean up and re-dye of interior parts (that are not severely damaged) will save you a bunch of buck$. Those seats even look like they can be saved. The [correct] ComfortWeave material is impossible to find and those seatcovers can be saved, if you want to save them. I can provide you a process to re-stuff the channels in the covers, if you want to try that. Just let me know if you do.