


Weatherstrip replacement started-PICs, observations, a question.
Thread Starter
Le Mans Master


Joined: Jan 2007
Posts: 5,485
Likes: 7
From: Peekskill NY
Excellent! I'll also get out to the garage to continue with this and give you all an update.
When I thought about it, I have never seen this issue mentioned in any of the interior restoration threads. This must be an unusual issue.
Glenn
When I thought about it, I have never seen this issue mentioned in any of the interior restoration threads. This must be an unusual issue.
Glenn
Thread Starter
Le Mans Master
Joined: Jan 2007
Posts: 5,485
Likes: 7
From: Peekskill NY
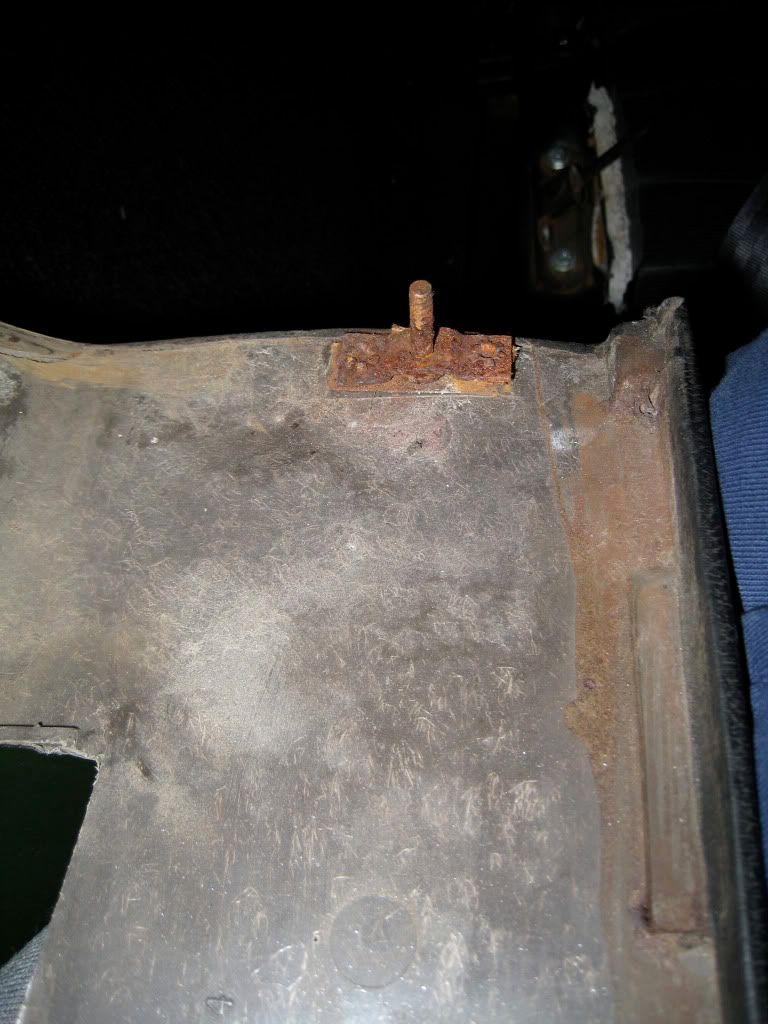
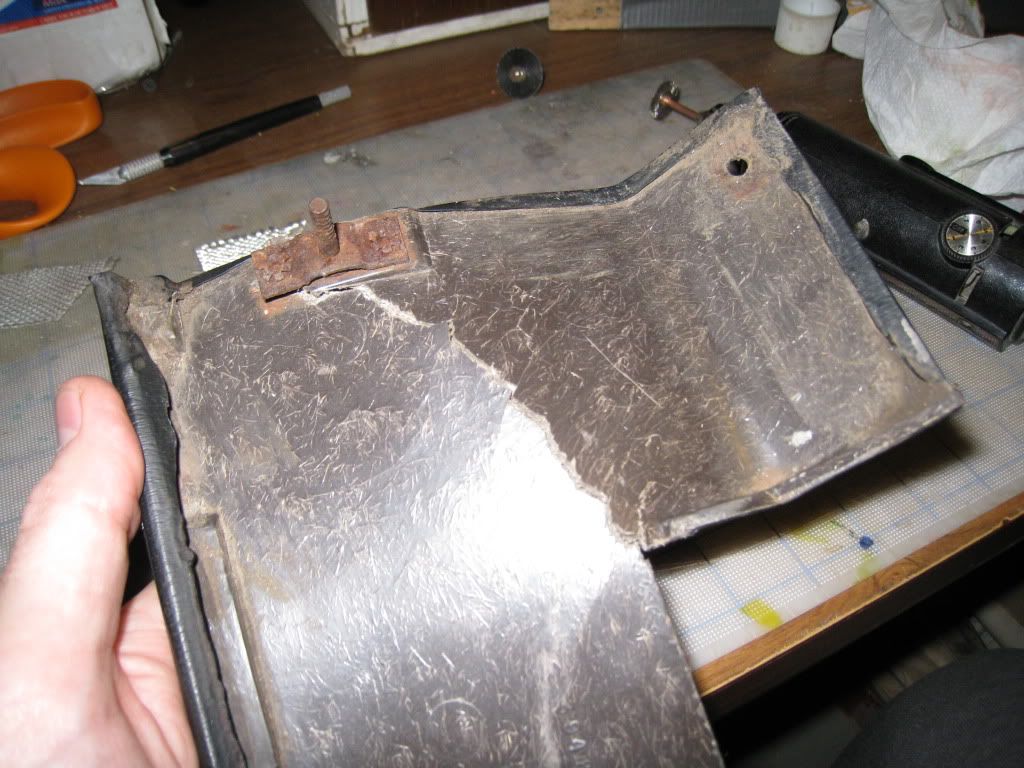
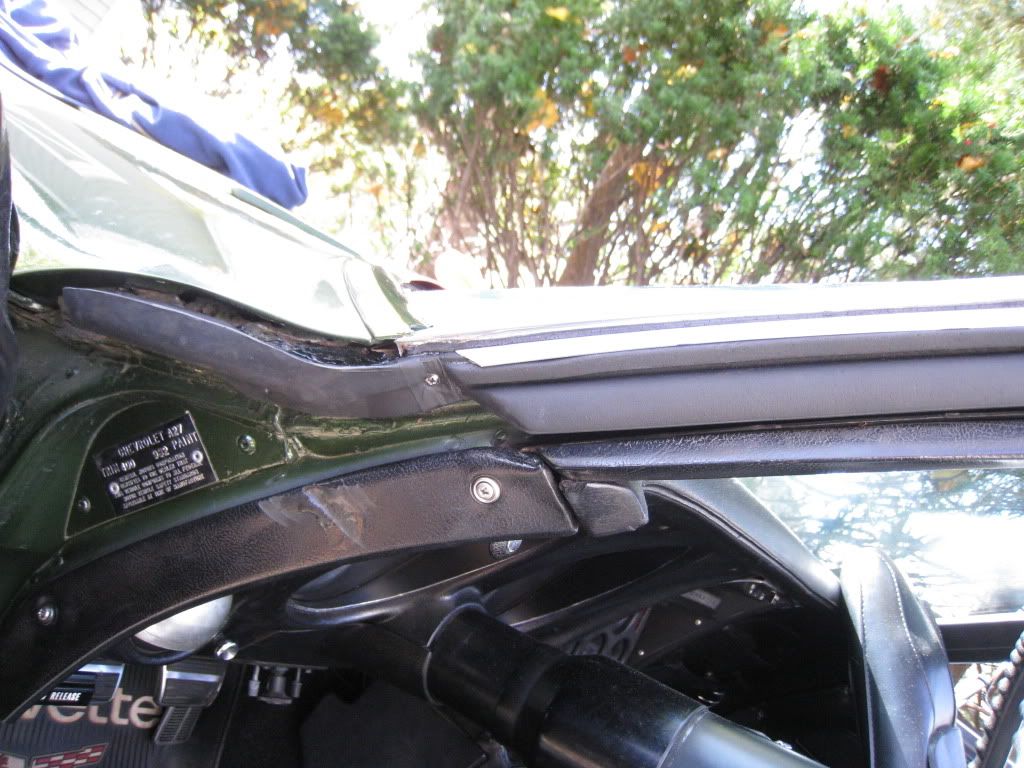
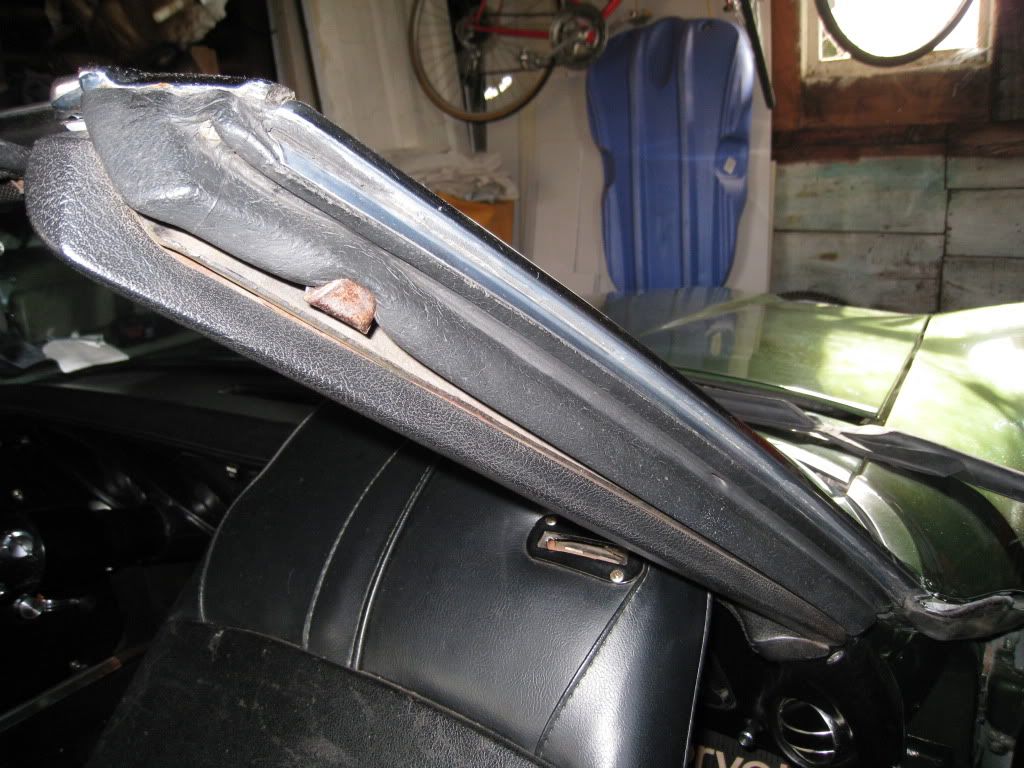
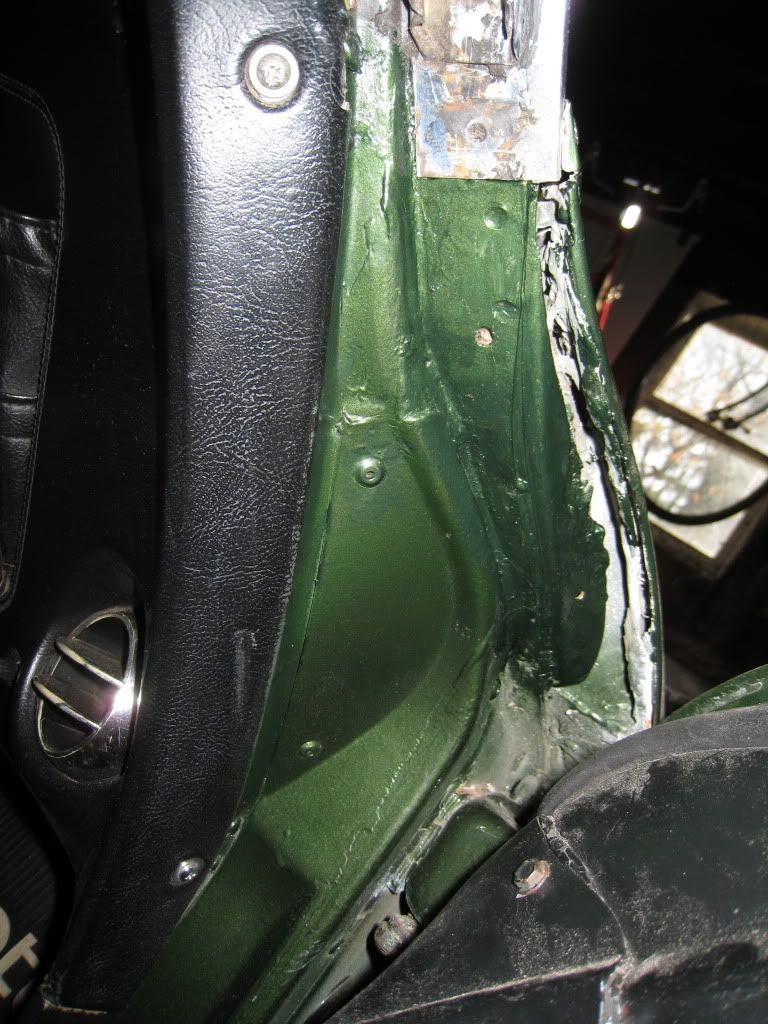
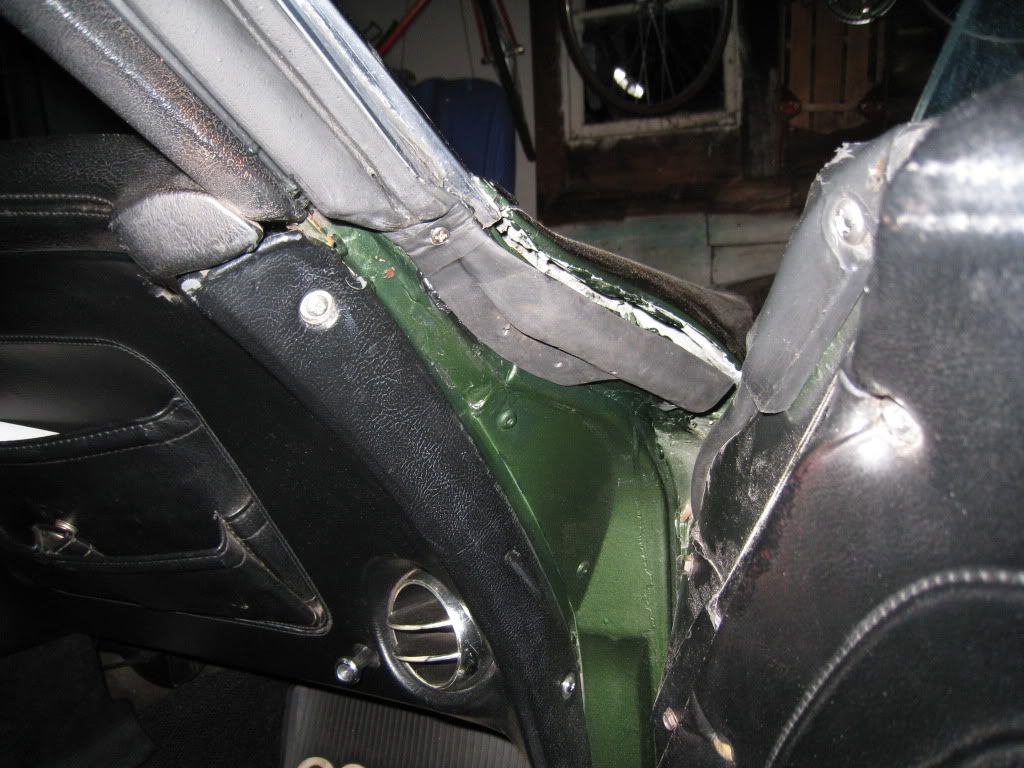
Here's the Halo trim piece with the toothed stud. It goes into a hole with teeth to grab it. There are only 3 screws to hold the part in place. I'm going to leave it as is as it may droop at the front and there is no provision for a screw for this area. IMPORTANT-It pops out using a long flat blade screw driver. Don't try to pull it as it will crack! The left side part is cracked all the way across, so I'll need to epoxy & glass it.
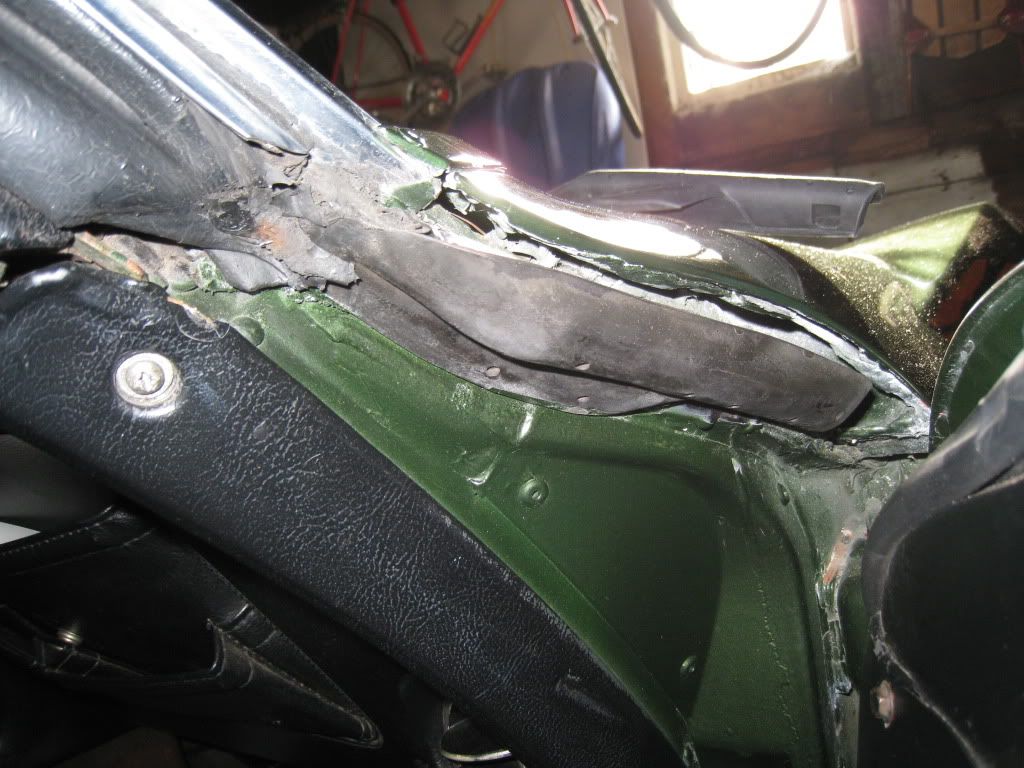
I finished both rear side ws and moved on to the left front WS which was a mess. Bubba spliced a replacement section as the pics show, but left the top. I got it all removed except for the lower extension. I'll post more pics as I proceed.
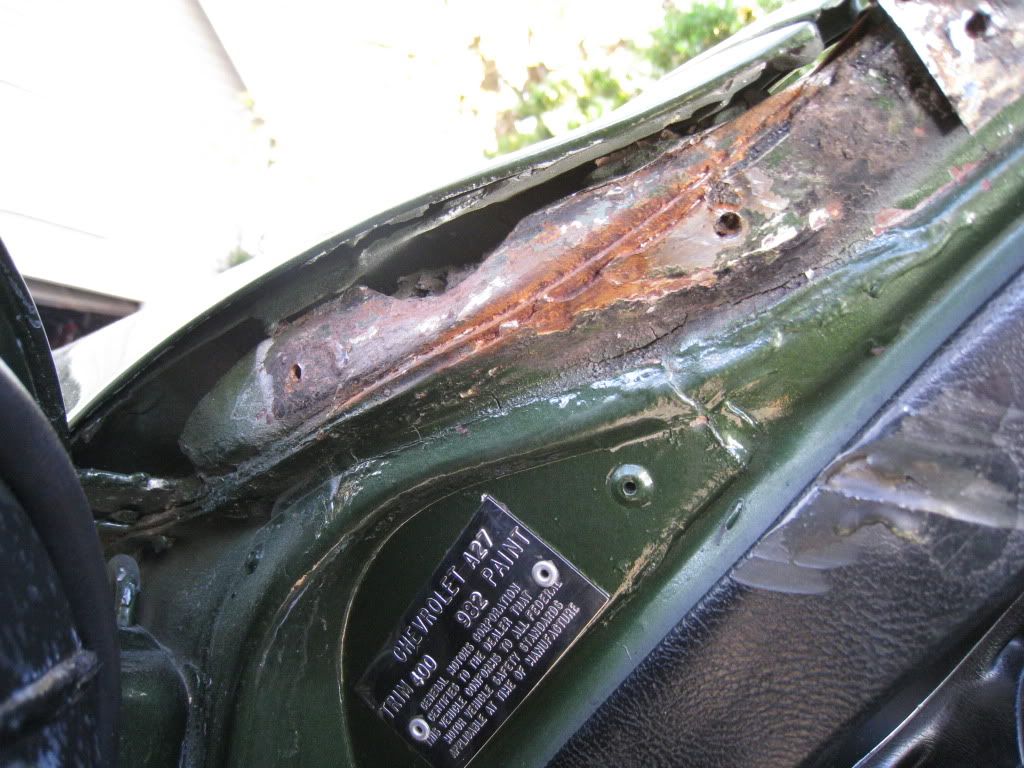
Halo & receptor hole in the bird cage.
Front WS
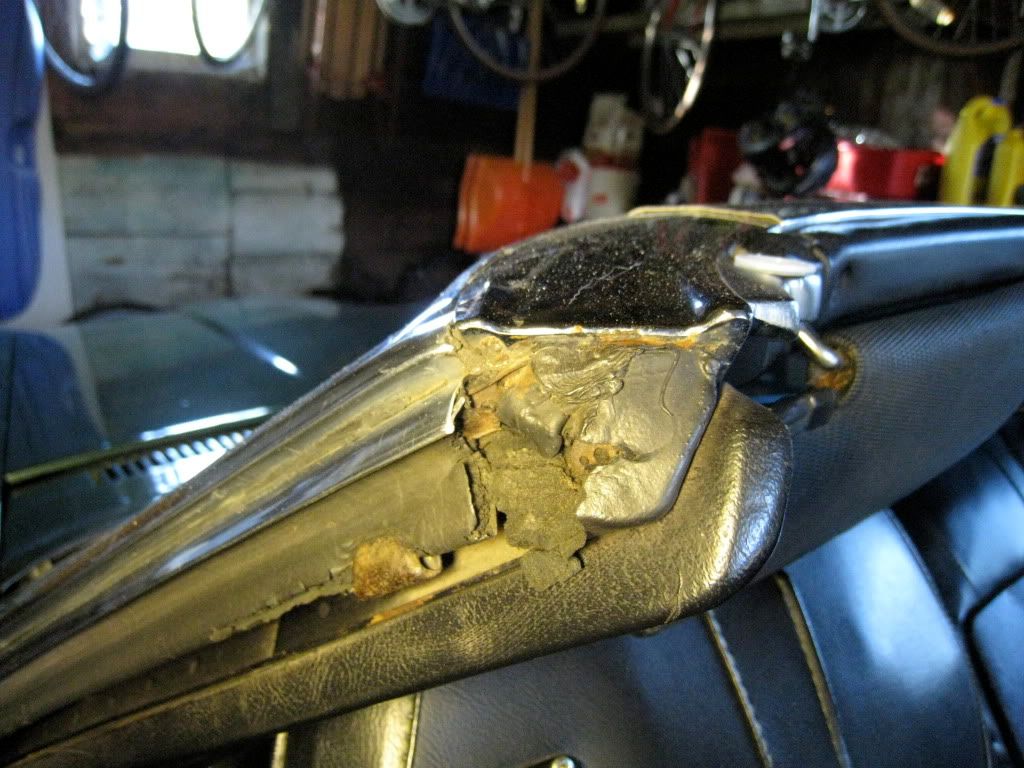

Glenn
I finished both rear side ws and moved on to the left front WS which was a mess. Bubba spliced a replacement section as the pics show, but left the top. I got it all removed except for the lower extension. I'll post more pics as I proceed.
Halo & receptor hole in the bird cage.
Front WS
Glenn
Melting Slicks


Joined: Feb 2006
Posts: 2,092
Likes: 5
From: Fayetteville Arkansas
Glenn,
I am so glad you are posting this stuff! I am just about to start this project ... gotta remove the old before the new paint job is started then will put the new stuff from Willcox on... keep the great pics coming!
Sully
I am so glad you are posting this stuff! I am just about to start this project ... gotta remove the old before the new paint job is started then will put the new stuff from Willcox on... keep the great pics coming!
Sully
Thread Starter
Le Mans Master
Joined: Jan 2007
Posts: 5,485
Likes: 7
From: Peekskill NY
Starting clean after the paint will make it easy to apply the WS's. The 3M ws glue starts to skin over within seconds of applying it to the part surface, so pre fit everything so you know how it fits and can move quickly when you start gluing.
Glenn

Team Owner

Joined: Aug 1999
Posts: 30,995
Likes: 99
From: Ontario
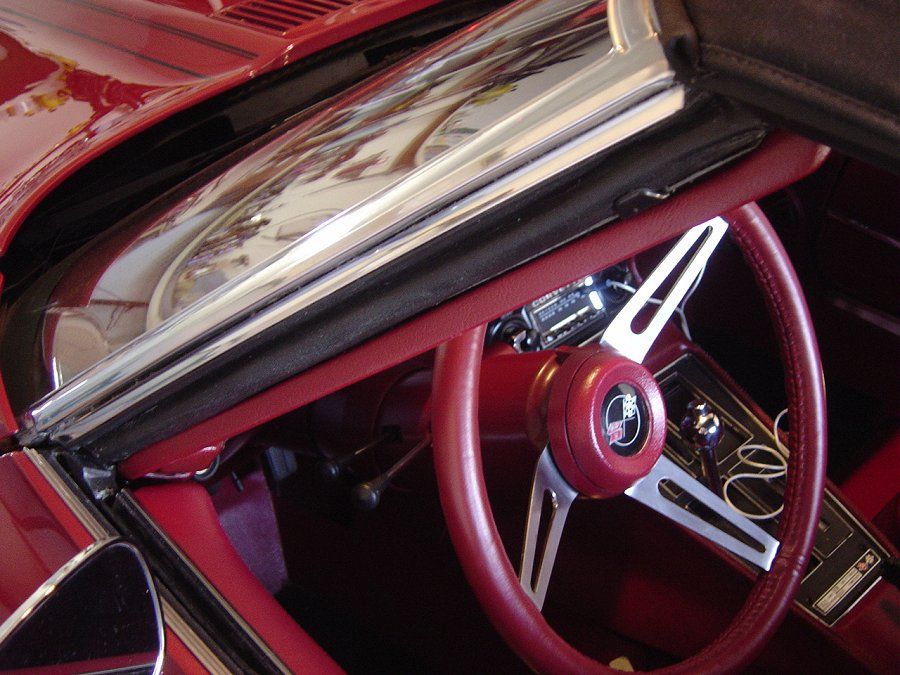
Mine is a convertible so I can't address many of the issues but here is the A-pillar Willcox/CRC weatherstrip. Fits perfectly. All done with anti-seize and dipped rubber on the clips.
I used a new screw kit and black Goop (incorrect I know but one of my favourite products) to seal under the SS trim.

The whiteish powder is SS metal polish and GM silicone emulsion. This was tidied up later as you can see in my first pic.
I used a new screw kit and black Goop (incorrect I know but one of my favourite products) to seal under the SS trim.
The whiteish powder is SS metal polish and GM silicone emulsion. This was tidied up later as you can see in my first pic.
Last edited by Paul L; Nov 6, 2009 at 07:08 PM.
Thread Starter
Le Mans Master
Joined: Jan 2007
Posts: 5,485
Likes: 7
From: Peekskill NY
Glenn
Corvette Stories
The Best of Corvette for Corvette Enthusiasts

Every 2027 Corvette Engine Explained
Joe Kucinski
Designer Imagines A Corvette That Looks More Like a Corvette Than the Corvette
Verdad Gallardo
10 Ugly Corvettes That We Still Kinda Love
Joe Kucinski
Top 10 Most Expensive Corvettes Ever Sold on Bring A Trailer
Brett Foote
10 Things Every Corvette Owner Needs (2026 Edition)
Michael S. Palmer
8 Most "Only Corvette Owners Understand" Quirks and Problems
Pouria Savadkouei
10 Reasons the C6 Z06 is Still A Performance Benchmark After 20 Years
Joe Kucinski
How Much Horsepower Every Corvette Engine "LOST" in 1972
Joe Kucinski
Top 10 DOs and DON'Ts for Protecting Your Convertible Top!
Michael S. PalmerPro


Joined: Feb 2007
Posts: 592
Likes: 55
From: Loxahatchee Florida
I too just purchased these parts from Wilcox. I am doing the front and rear window seals. I got these 4 clips, I see where the front ones go but where are the other ones located? My old seals are long gone.. Thanks!

Thread Starter
Le Mans Master
Joined: Jan 2007
Posts: 5,485
Likes: 7
From: Peekskill NY
I think in 78? two clips were used on the A pillar WS retainer. One near the top & the other near the bottom.
Thread Starter
Le Mans Master
Joined: Jan 2007
Posts: 5,485
Likes: 7
From: Peekskill NY
Mine is a convertible so I can't address many of the issues but here is the A-pillar Willcox/CRC weatherstrip. Fits perfectly. All done with anti-seize and dipped rubber on the clips.
I used a new screw kit and black Goop (incorrect I know but one of my favourite products) to seal under the SS trim.
The whiteish powder is SS metal polish and GM silicone emulsion. This was tidied up later as you can see in my first pic.
I used a new screw kit and black Goop (incorrect I know but one of my favourite products) to seal under the SS trim.
The whiteish powder is SS metal polish and GM silicone emulsion. This was tidied up later as you can see in my first pic.
That's where I hope to be tomorrow. The CRC WS's are very nice. After the A pillars are finished, on to the doors.
Glenn
Thread Starter
Le Mans Master
Joined: Jan 2007
Posts: 5,485
Likes: 7
From: Peekskill NY
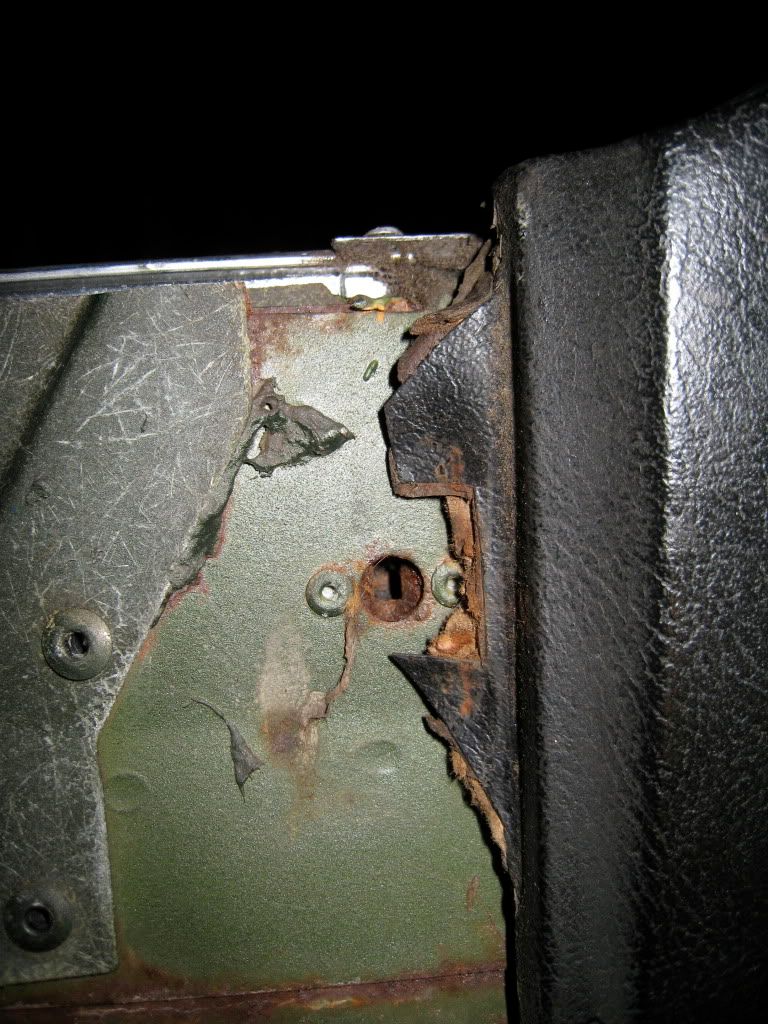
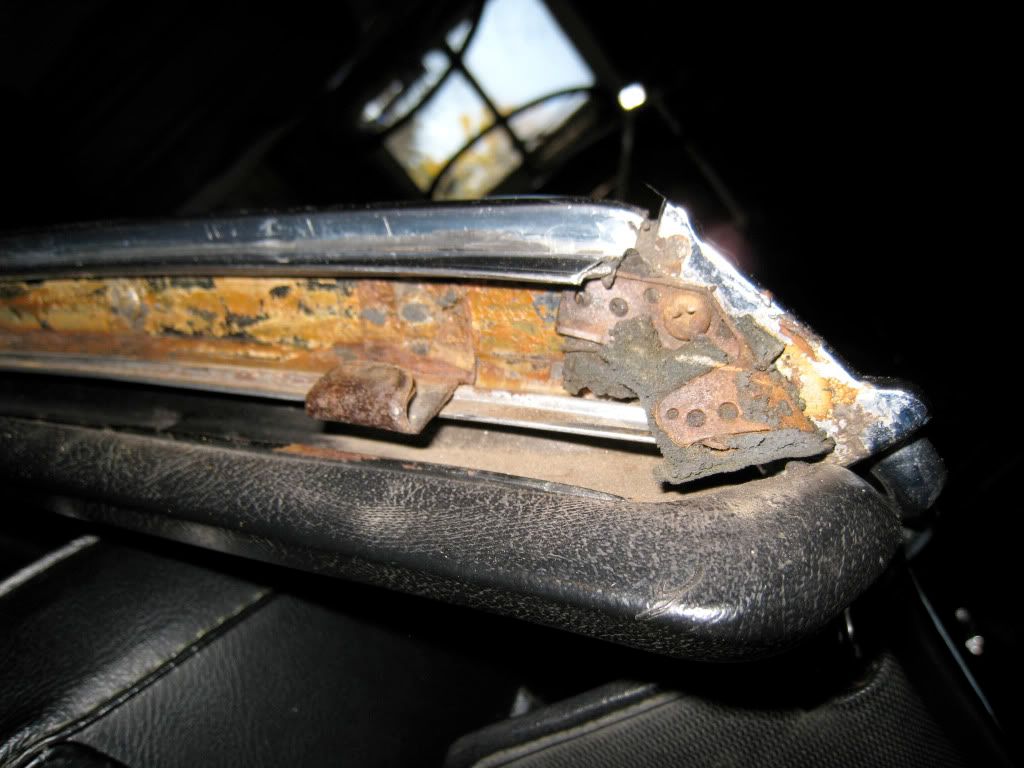
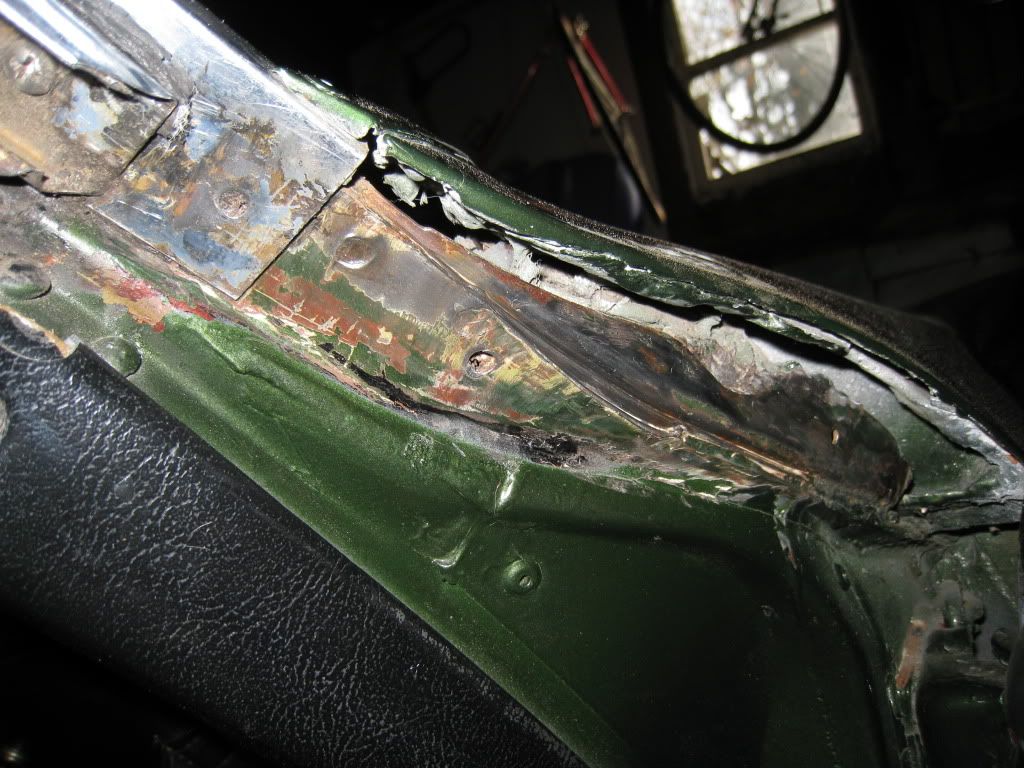
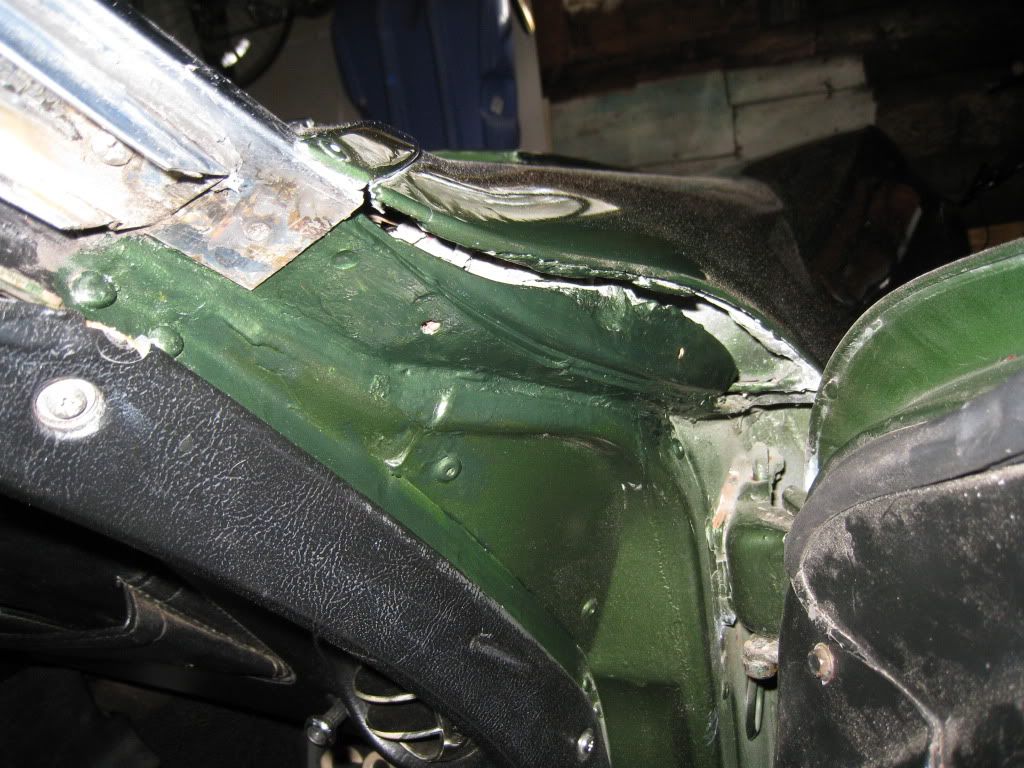
Here's the cracked Halo and repairs. Both were cracked though the left side was the bad one. Right side front corner was cracked. Hope to get the A-pillar ws's in today.
Glenn

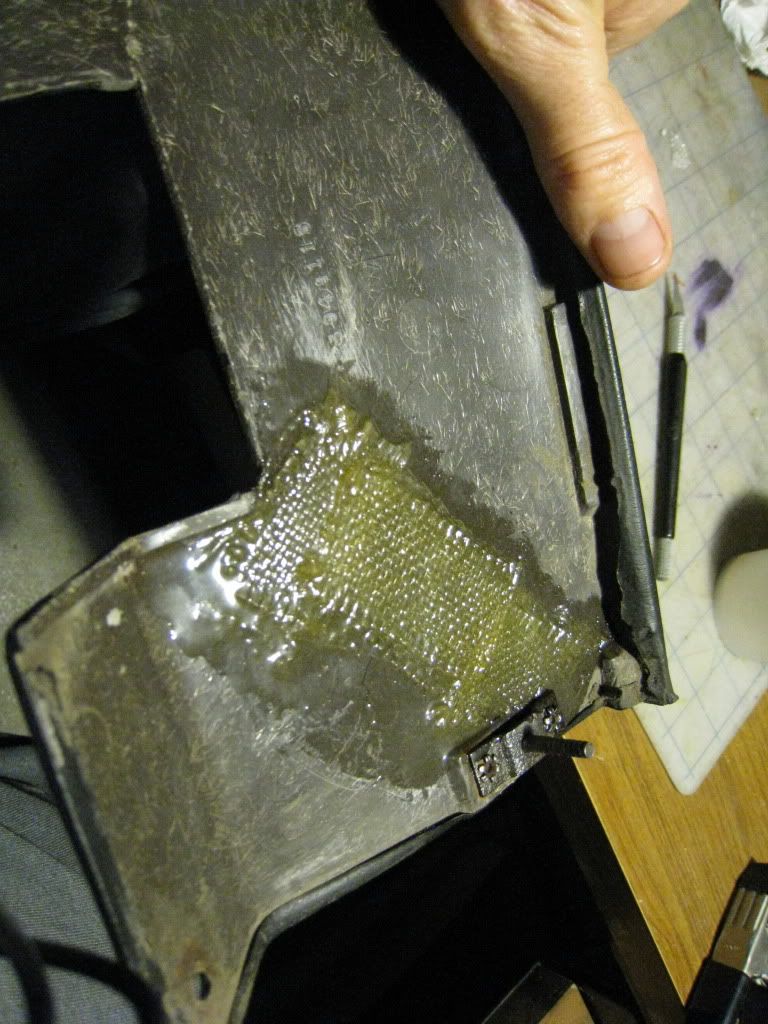

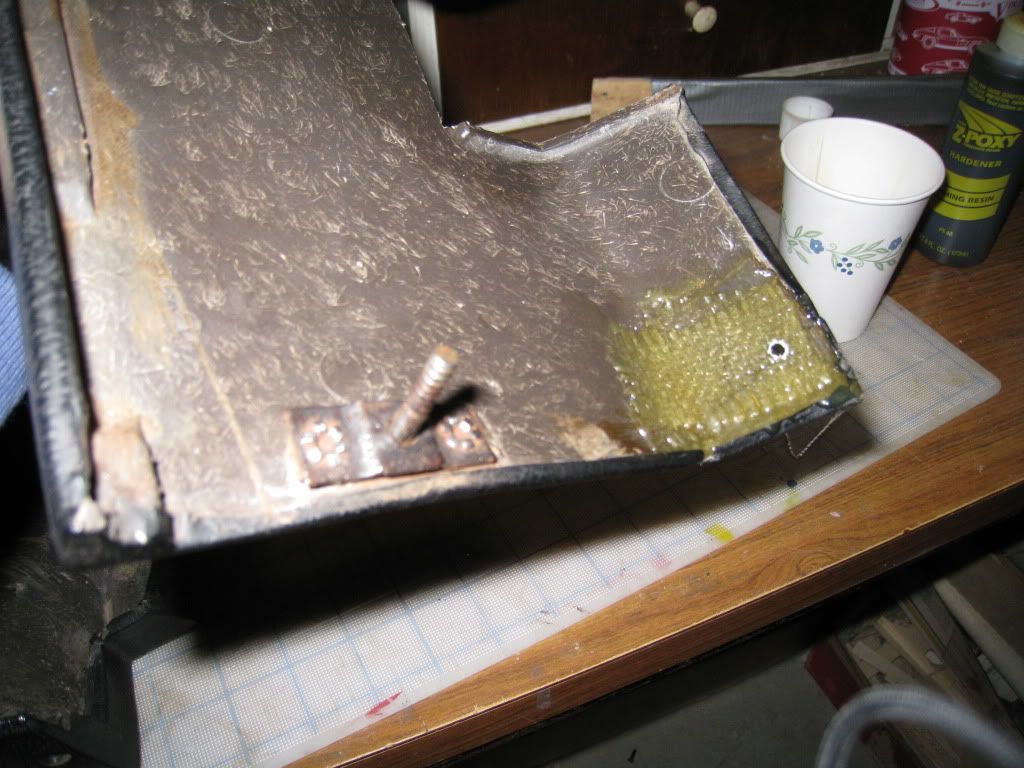
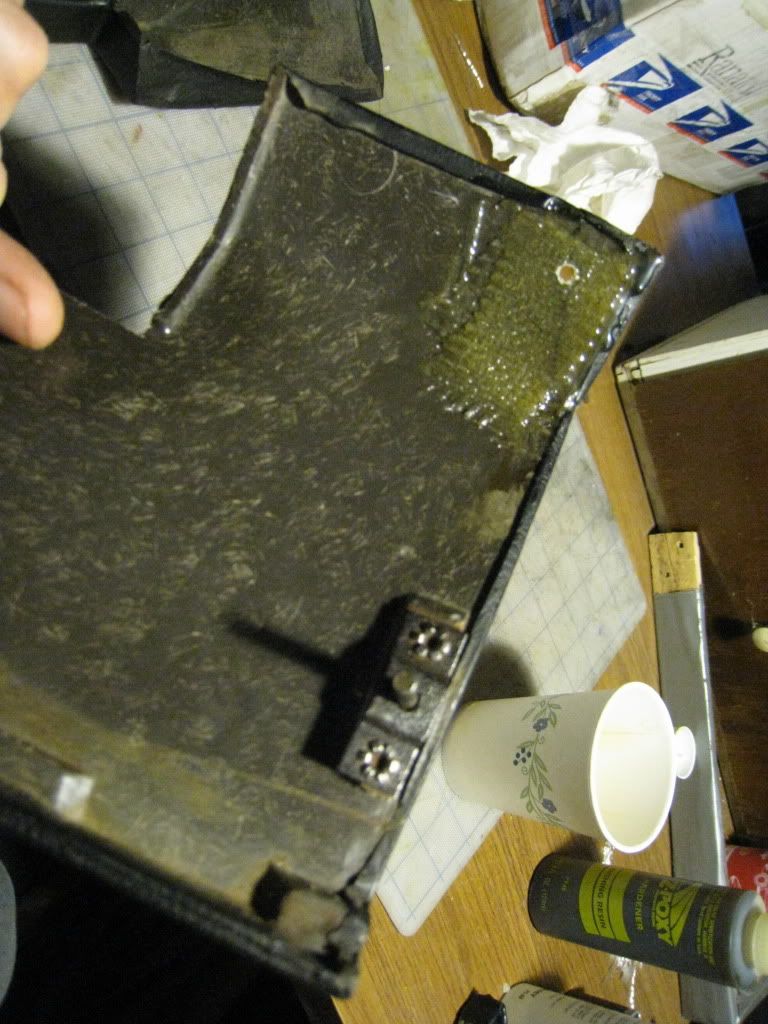
Glenn
Thread Starter
Le Mans Master
Joined: Jan 2007
Posts: 5,485
Likes: 7
From: Peekskill NY
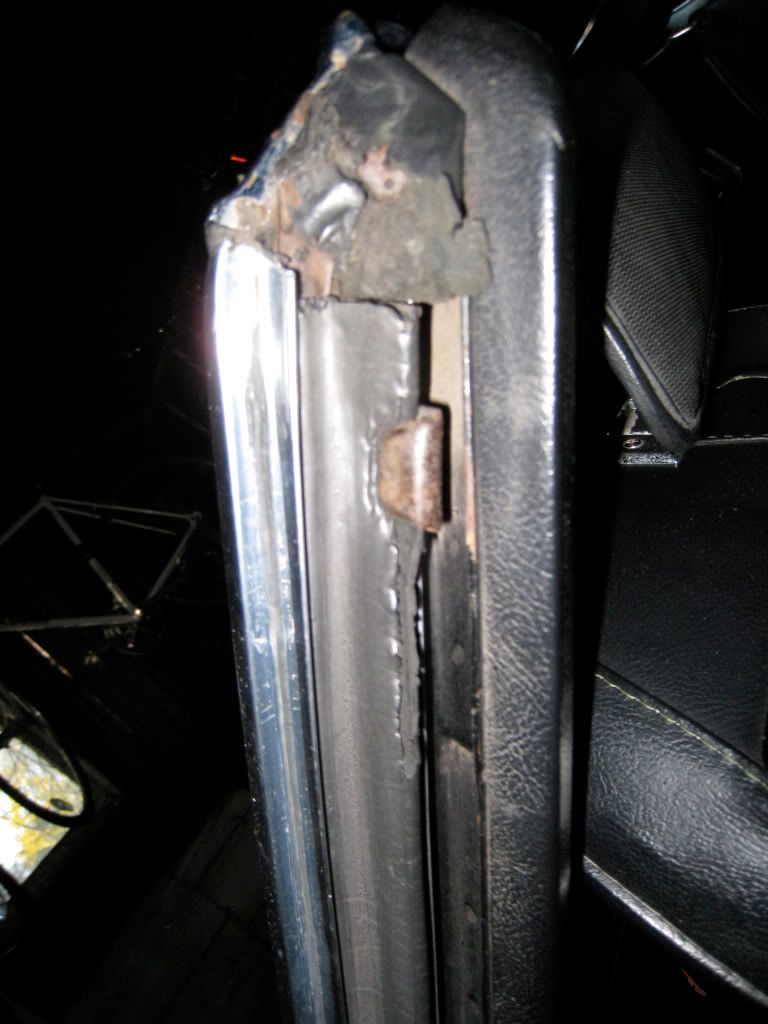
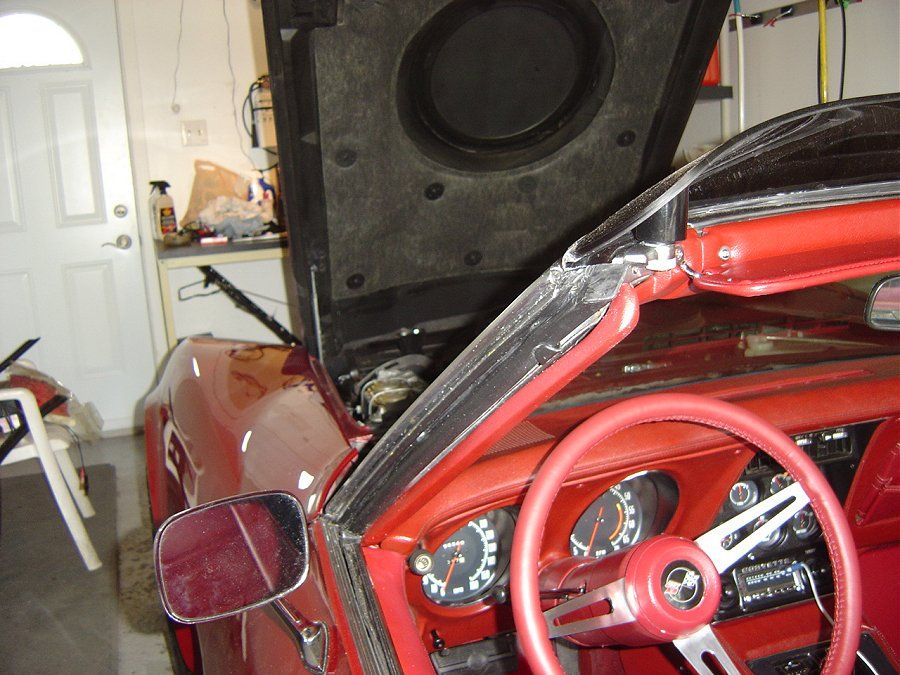
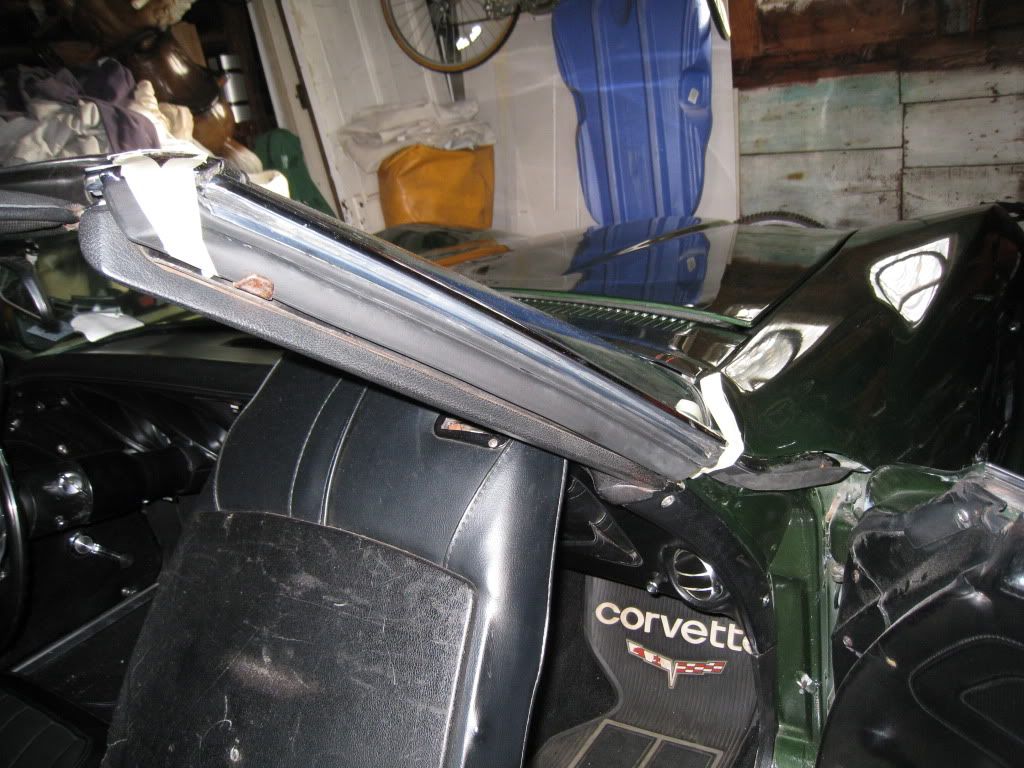
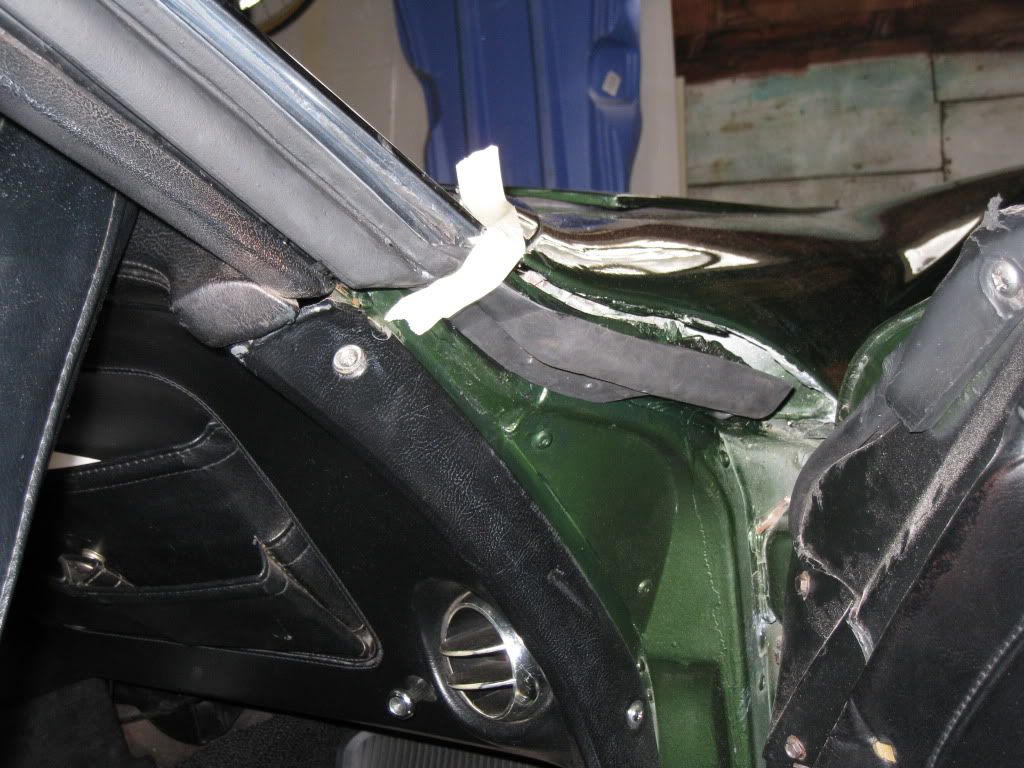
Put in the left A pillar ws. The lower birdcage looks great and I cleaned it up with the Dremel & wire brush. Just a small amount of surface rust.
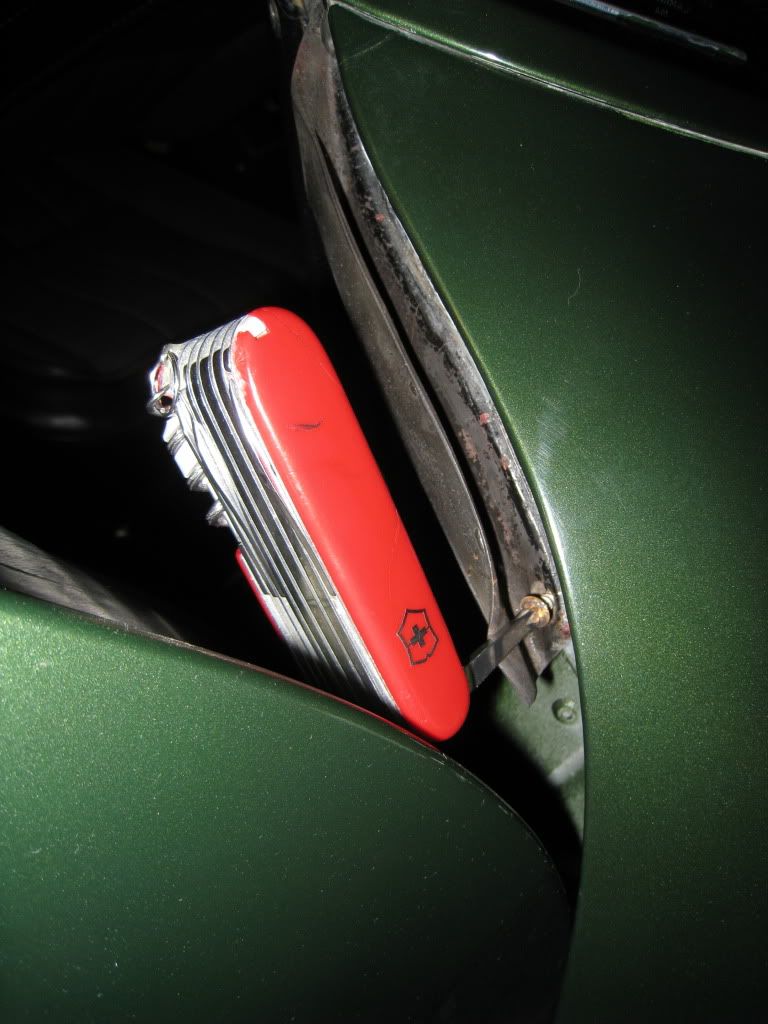
I started at the bottom of the WS. Put the screws in place on the ws before you glue it to the base of the windshield. I used a lot of adhesive and covered all the bare metal to make sure it would be sealed well. The front most screw is a royal PITA to get at, as you need a very short philips screw driver, or as I did used my Swiss Army knife with the screw driver open at a 90 degree angle to fit in there. After that section is in place, I then glued the rest of the ws and retainer and used a plastic putty knife from Home depot. Sand the corners round and dull the blade so it doesn't cut into the ws when you are pressing it in. I put the rear edge in first, then used the putty knife to tuck in the front edge. You must work quickly as the glue starts to dry very quickly.
The base area.
The ws installed.
I'll need to adjust the side window so it seals against the side rear ws, there's about a 1/16th gap now.
On to the right side soon.
What is the purpose of the blowout clip? It seems that the adhesive would be sufficient to hold the ws in place. Mine also looks a bit too tight & pinching the ws too much compared to Paul74's ws.
Glenn
Last edited by GD70; Nov 8, 2009 at 01:04 PM.
Team Owner


Joined: Sep 2006
Posts: 31,301
Likes: 4,389
From: Westminster Maryland
Hi GD,
My understanding is that the clip is there to prevent the side window from being sucked out at HIGH speed. It's one of those things that the car seems to be able to do without but you know it wouldn't be there if Chevrolet didn't think it was necessary.
Regards,
Alan
My understanding is that the clip is there to prevent the side window from being sucked out at HIGH speed. It's one of those things that the car seems to be able to do without but you know it wouldn't be there if Chevrolet didn't think it was necessary.
Regards,
Alan
Thread Starter
Le Mans Master
Joined: Jan 2007
Posts: 5,485
Likes: 7
From: Peekskill NY
Hi GD,
My understanding is that the clip is there to prevent the side window from being sucked out at HIGH speed. It's one of those things that the car seems to be able to do without but you know it wouldn't be there if Chevrolet didn't think it was necessary.
Regards,
Alan
My understanding is that the clip is there to prevent the side window from being sucked out at HIGH speed. It's one of those things that the car seems to be able to do without but you know it wouldn't be there if Chevrolet didn't think it was necessary.
Regards,
Alan
I'm not seeing how this would work, being that it does not physically clip onto the glass, but sits under it.
Glenn
Drifting


Joined: Aug 2003
Posts: 1,328
Likes: 17
From: Fl
Glenn,
Looks nice!!!
I think that the clip actually helps keep the glass from riding to far inward when rolling it up. The glass makes light contact with the clip while rolling it up. It also keeps the WS centered and inplace when the glass is down.
From your pictures it looks like it is pinching the WS pretty tightly -
I don't remember mine being like that. I will take a picture for you tomorrow AM and post it. Be really sure the WS in stuffed all the way in the chanels and is completely flush on the back with the stainless trim.
Thread Starter
Le Mans Master
Joined: Jan 2007
Posts: 5,485
Likes: 7
From: Peekskill NY
Glenn,
Looks nice!!!
I think that the clip actually helps keep the glass from riding to far inward when rolling it up. The glass makes light contact with the clip while rolling it up. It also keeps the WS centered and inplace when the glass is down.
From your pictures it looks like it is pinching the WS pretty tightly -
I don't remember mine being like that. I will take a picture for you tomorrow AM and post it. Be really sure the WS in stuffed all the way in the chanels and is completely flush on the back with the stainless trim.
Looks nice!!!
I think that the clip actually helps keep the glass from riding to far inward when rolling it up. The glass makes light contact with the clip while rolling it up. It also keeps the WS centered and inplace when the glass is down.
From your pictures it looks like it is pinching the WS pretty tightly -
I don't remember mine being like that. I will take a picture for you tomorrow AM and post it. Be really sure the WS in stuffed all the way in the chanels and is completely flush on the back with the stainless trim.
Thanks! It does look like it's pinching the ws too tight and will try to bend it out a bit. The ws is tucked in the retainer strip and fit like a glove! I wish the 3M adhesive had a bit more working time though. You have to move quickly once it's applied!
Glenn
Thread Starter
Le Mans Master
Joined: Jan 2007
Posts: 5,485
Likes: 7
From: Peekskill NY
I've always wondered what the purpose of that clip is as it's been on every GM 69 & up vintage car I've owned or have seen.
I always appreciate your input.
Glenn
Edit: I bent out the clip this morning and much better & not pinched. I'll need to adjust the side window for now and readjust once I get the T-top ws's. Meanwhile I'll replace the right side A pillar ws, which is in pretty good shape, but want it to match the left side. Then on to the doors.
Last edited by GD70; Nov 10, 2009 at 11:06 AM.
Thread Starter
Le Mans Master
Joined: Jan 2007
Posts: 5,485
Likes: 7
From: Peekskill NY
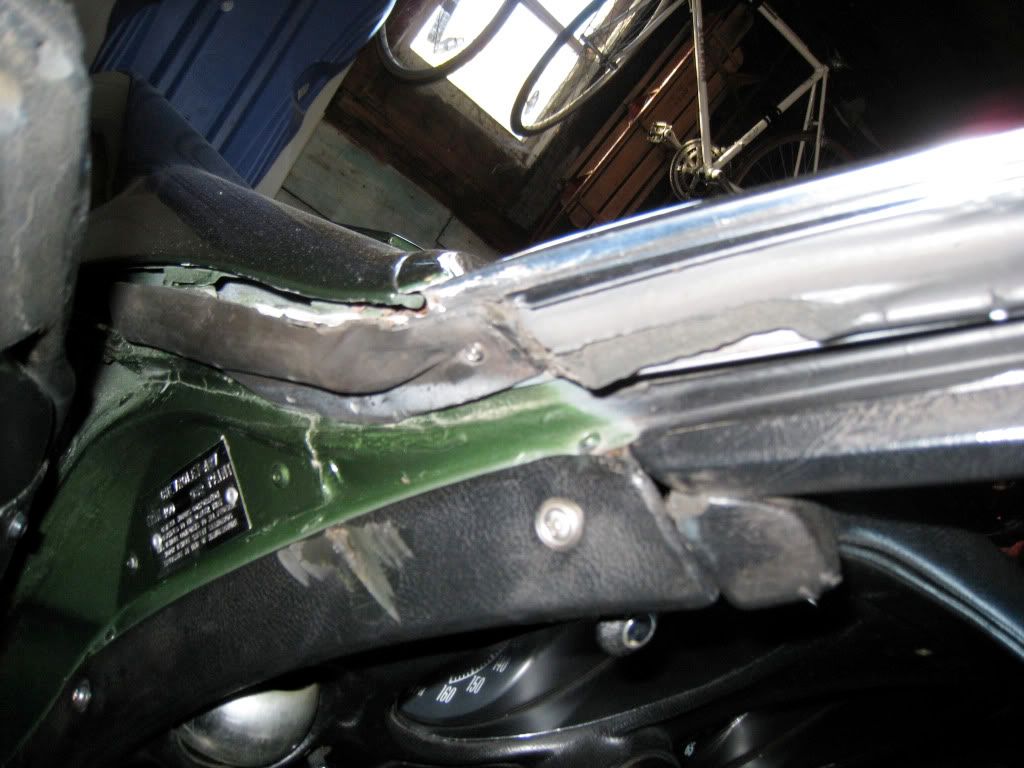
Got the right A pillar done today. I thought it had the original ws but it was a replacement, but pretty old. Here's a comparison to the new CRC part.
The old ws was in decent shape, but wanted it to match the new ws on the left side.
You can see it wasn't very well blended to the extension.
It's a real PITA getting at the front screw and had to use my trusty Swiss Army knife to get at it.
I cleaned all the old adhesive an repainted the birdcage surface.
Here's the new ws in place. I needed to tape it in a few places until the ws adhesive was fully cured.
This is important: Screw in the PITA front screw almost completely in BEFORE you put the adhesive on the surfaces. Set the second screw in place on the ws. Let the ws pivot down on the front screw and now add the adhesive, then quickly move up into the correct position and screw in the second screw tight, then go back and tighten the front screw. Then get the 3rd screw in place, add adhesive and screw it in. Then finish the upper A pillar section.
And here it is completed.

My one complaint is that the 3M adhesive dries way too quickly and had to reapply some in a few spots.
Next will be the driver door.
Glenn
The old ws was in decent shape, but wanted it to match the new ws on the left side.
You can see it wasn't very well blended to the extension.
It's a real PITA getting at the front screw and had to use my trusty Swiss Army knife to get at it.
I cleaned all the old adhesive an repainted the birdcage surface.
Here's the new ws in place. I needed to tape it in a few places until the ws adhesive was fully cured.
This is important: Screw in the PITA front screw almost completely in BEFORE you put the adhesive on the surfaces. Set the second screw in place on the ws. Let the ws pivot down on the front screw and now add the adhesive, then quickly move up into the correct position and screw in the second screw tight, then go back and tighten the front screw. Then get the 3rd screw in place, add adhesive and screw it in. Then finish the upper A pillar section.
And here it is completed.
My one complaint is that the 3M adhesive dries way too quickly and had to reapply some in a few spots.
Next will be the driver door.
Glenn