
Installing new one piece front clip and need a little help (pics included)
 07-10-2010, 04:08 PM
#1
Drifting

Thread Starter
Member Since: Aug 2005
Location: East Waterboro Maine
Posts: 1,289
Likes: 0
Received 3 Likes
on
1 Post

For the past two days I've been working on installing the new one piece front clip I bought from ACI. I've generally been following the procedure in Ecklers fiberglass repair manual on how to install a one-piece front clip and overall the process has gone pretty well. However, I'm running into some fit up issues that I haven't been able to resolve.
Right now the front clip is on the car and positioned correctly (I think) front to back and left to right. I've also adjusted the radiator support so that the back hood hinge bolt is 43" from the firewall drip rail.
I've also installed the hood and have been able to align it to give pretty even gaps on all sides.
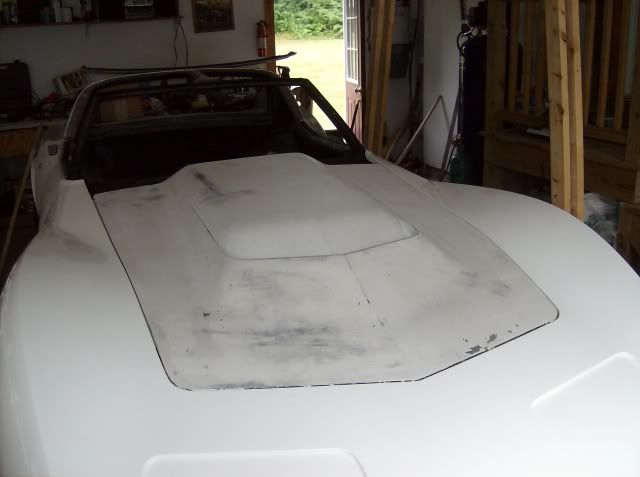
However, this is where the issue comes in. Essentially the hood is sitting about 1/8" to 3/16" higher than the hood surround. I've tried various adjustments to bring the hood down, but have had little luck. The only way I've been able to get it into alignment is by shimming between the inner skirt brackets and the header bar as shown in the photo below. Essentially I've shimmed about 3/16" to 1/4" in these areas
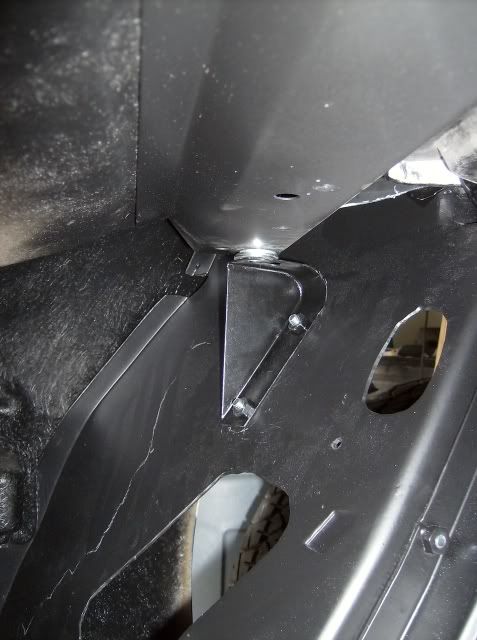
Additionally, I also end up having to shim the nose support bracket that connects to the front crossbar. At this location it takes about 3/8" to 1/2" of shims
I'm pretty certain you're not supposed to use any shims in these areas (although I can't find the corresponding pages in my AIM to verify this) so I'm at a loss at what to do. With these shims in place the clip seems to fit up pretty nicely.
The one other minor issue, which I believe is unrelated, is that although I have good gaps around the hood when it's closed, when I open the hood there's a slight rub that occurs between the side of the hood and the side of the hood surround.
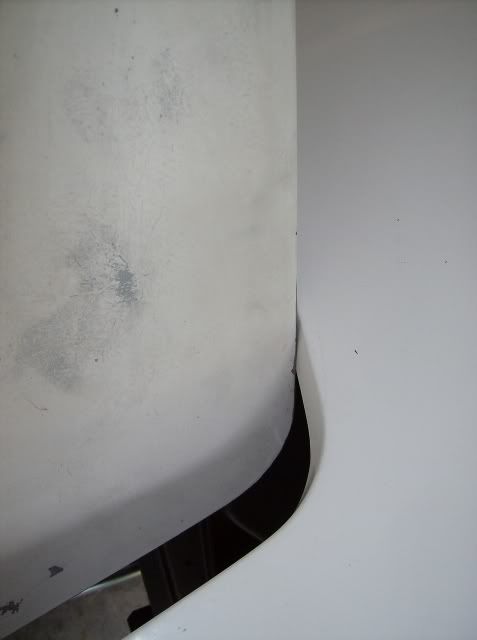
Any ideas on how to resolve this rub? Perhaps when I glue and clamp the front clip in place it will get resolved?
And, before trimming anything, I thought I'd post some photos of the front clip along the front of the doors. It looks like the door gaps will end up being about 3/16" when everything is trimmed up, does this sound reasonable? I could make them smaller by 'scooting' the entire front clip backwards, but I think that will cause fit-up issues around the hoodd.
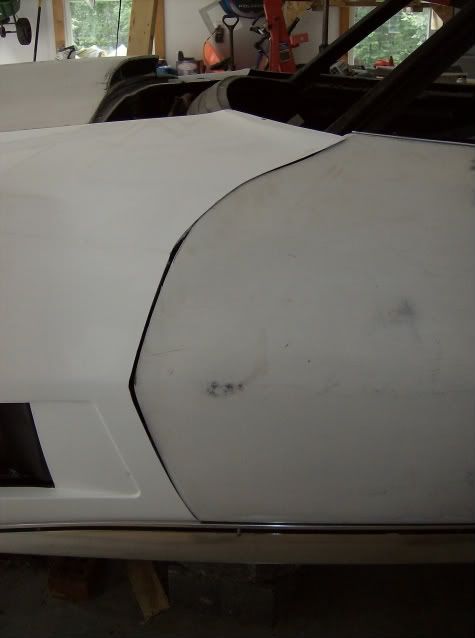
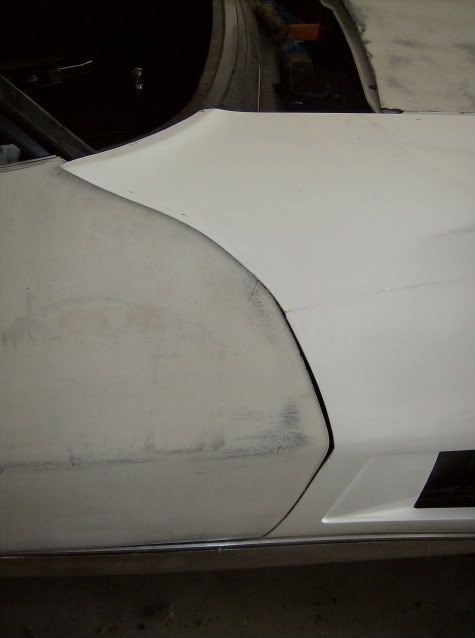
Thanks for any help or input you guys can provide!
Right now the front clip is on the car and positioned correctly (I think) front to back and left to right. I've also adjusted the radiator support so that the back hood hinge bolt is 43" from the firewall drip rail.
I've also installed the hood and have been able to align it to give pretty even gaps on all sides.
However, this is where the issue comes in. Essentially the hood is sitting about 1/8" to 3/16" higher than the hood surround. I've tried various adjustments to bring the hood down, but have had little luck. The only way I've been able to get it into alignment is by shimming between the inner skirt brackets and the header bar as shown in the photo below. Essentially I've shimmed about 3/16" to 1/4" in these areas
Additionally, I also end up having to shim the nose support bracket that connects to the front crossbar. At this location it takes about 3/8" to 1/2" of shims
I'm pretty certain you're not supposed to use any shims in these areas (although I can't find the corresponding pages in my AIM to verify this) so I'm at a loss at what to do. With these shims in place the clip seems to fit up pretty nicely.
The one other minor issue, which I believe is unrelated, is that although I have good gaps around the hood when it's closed, when I open the hood there's a slight rub that occurs between the side of the hood and the side of the hood surround.
Any ideas on how to resolve this rub? Perhaps when I glue and clamp the front clip in place it will get resolved?
And, before trimming anything, I thought I'd post some photos of the front clip along the front of the doors. It looks like the door gaps will end up being about 3/16" when everything is trimmed up, does this sound reasonable? I could make them smaller by 'scooting' the entire front clip backwards, but I think that will cause fit-up issues around the hoodd.
Thanks for any help or input you guys can provide!
 07-10-2010, 05:10 PM
#2
Melting Slicks

As far as the rubbing goes on the side of the hood, I would not assume that when you glue the clip on it will fix itself. You may need to work on the edge of the hood to get enough clearance if your other side has the right amount of gap. You should also screw the clip in place as you need to fit and mark everything before you glue it on. I must have had mine on and off a dozen times.
As for needing to shim the clip up, are you sure the inner skirt brackets are in the right spot. It looks like you have new inner fenders and I assume the holes were not drilled ahead of time. I also thought there was some slop in those brackets when you loosen them will they slide up some?. Short of drilling new or slotting the holes in the glass, shimming is our only option as you need to get the fender up to the hood before you glue. The Ecklers book says to drill the inner fender bracket holes for the inner skirt bracket after you get the fenders lined up with the hood. It looks like they were already in before you had it aligned, that is why you need shims.
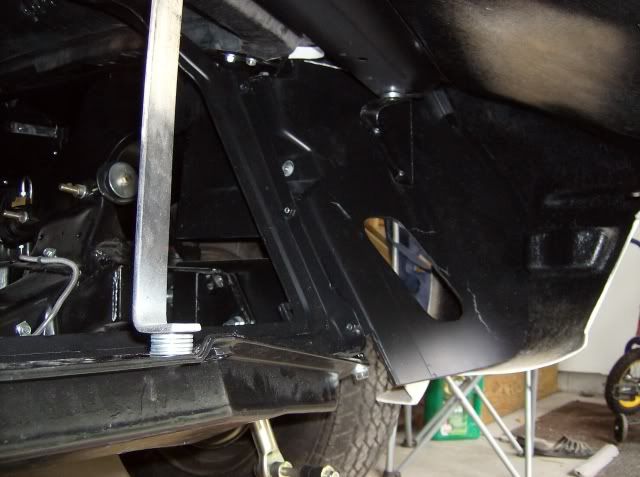
The nose support bracket you have in the picture, sure doesn't look like the factory bracket. The only support bracket on the front that I have goes from the lower edge of the core support to the very front of the nose and nothing goes to the header bar.
As for needing to shim the clip up, are you sure the inner skirt brackets are in the right spot. It looks like you have new inner fenders and I assume the holes were not drilled ahead of time. I also thought there was some slop in those brackets when you loosen them will they slide up some?. Short of drilling new or slotting the holes in the glass, shimming is our only option as you need to get the fender up to the hood before you glue. The Ecklers book says to drill the inner fender bracket holes for the inner skirt bracket after you get the fenders lined up with the hood. It looks like they were already in before you had it aligned, that is why you need shims.
The nose support bracket you have in the picture, sure doesn't look like the factory bracket. The only support bracket on the front that I have goes from the lower edge of the core support to the very front of the nose and nothing goes to the header bar.
Last edited by RobRace10; 07-10-2010 at 05:31 PM.
07-10-2010, 05:16 PM
#3
Melting Slicks

I am by no means an expert here but I thought that the shims went on the bottom of the radiator support (on my 71 two bolts) between the frame and the support. I am sure there is an expert somewhere on the forum that can help.
Scott
Scott
07-10-2010, 05:26 PM
#4
Melting Slicks
If you shim the core support up that would only make the hood higher verse the surround as the inner fenders are attached to the radiator support and the hood hinges attache to the inner fenders. If there were shims under the core support and they are removed that would help.
07-10-2010, 05:53 PM
#5
Drifting
Thread Starter
Member Since: Aug 2005
Location: East Waterboro Maine
Posts: 1,289
Likes: 0
Received 3 Likes
on
1 Post
As for needing to shim the clip up, are you sure the inner skirt brackets are in the right spot. It looks like you have new inner fenders and I assume the holes were not drilled ahead of time. I also thought there was some slop in those brackets when you loosen them will they slide up some?. Short of drilling new or slotting the holes in the glass, shimming is our only option as you need to get the fender up to the hood before you glue. The Ecklers book says to drill the inner fender bracket holes for the inner skirt bracket after you get the fenders lined up with the hood. It looks like they were already in before you had it aligned, that is why you need shims.
Having done this before, any other words of advice?
07-10-2010, 06:11 PM
#6
Melting Slicks
Take your time and as I said, you need to get some screws into it so that it is where it will be when the adhesive goes on. I did have to build up some of the bonding strips in some areas and grind the other side to get the panels flush with the doors. You will not be able to finalize your gaps until you get it screwed in place. I have the same issue with my hood rubbing the clip on one side and I should have taken the edge of the hood down some before it was painted. I also used some temporary shims between the inner fender and the surround to get the surround to match the hood lines and then ran some screws in for alignment.
What adhesive will you use. I bought Lord Fuser with a fairly long work time.
There should be a support rod that goes from the core support to the very front center of the nose, not from the core support to the header bar.


http://www.parts123.com/parts123/yb....5Z5Z50000050G#
What adhesive will you use. I bought Lord Fuser with a fairly long work time.
There should be a support rod that goes from the core support to the very front center of the nose, not from the core support to the header bar.
http://www.parts123.com/parts123/yb....5Z5Z50000050G#
07-10-2010, 06:41 PM
#7
Drifting
Thread Starter
Member Since: Aug 2005
Location: East Waterboro Maine
Posts: 1,289
Likes: 0
Received 3 Likes
on
1 Post
Take your time and as I said, you need to get some screws into it so that it is where it will be when the adhesive goes on. I did have to build up some of the bonding strips in some areas and grind the other side to get the panels flush with the doors. You will not be able to finalize your gaps until you get it screwed in place. I have the same issue with my hood rubbing the clip on one side and I should have taken the edge of the hood down some before it was painted. I also used some temporary shims between the inner fender and the surround to get the surround to match the hood lines and then ran some screws in for alignment.
What adhesive will you use. I bought Lord Fuser with a fairly long work time.
There should be a support rod that goes from the core support to the very front center of the nose, not from the core support to the header bar.
http://www.parts123.com/parts123/yb....5Z5Z50000050G#
What adhesive will you use. I bought Lord Fuser with a fairly long work time.
There should be a support rod that goes from the core support to the very front center of the nose, not from the core support to the header bar.
http://www.parts123.com/parts123/yb....5Z5Z50000050G#

I'll be using Fusor 127 which has a 60 minute open time so that shouldn't be an issue. I think I may opt to apply adhesive to only some of the bonding surfaces initially, set the body in place, and then apply adhesive to the other accessible areas. Getting the front clip on is a really tight squeeze and it seems that much of the adhesive would just be wiped away during placement of the clip if I did a few of the surfaces. I'm going to do a few dry runs to figure it all out before making the final plunge though.
07-10-2010, 07:01 PM
#8
Drifting
Thread Starter
Member Since: Aug 2005
Location: East Waterboro Maine
Posts: 1,289
Likes: 0
Received 3 Likes
on
1 Post
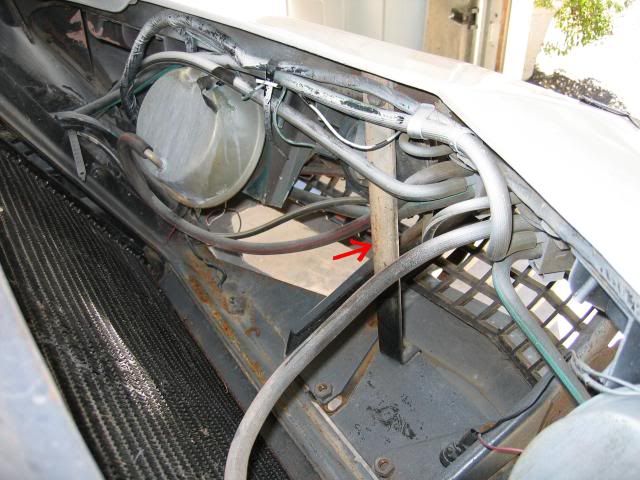
Here's a photo of the support bracket that was in place when I started my disassembly.... I'm starting to suspect it was added as part of the hack job body repairs one of the previous owners did.
07-10-2010, 07:10 PM
#9
Le Mans Master


Member Since: Jul 2006
Location: charlotte north carolina
Posts: 8,117
Likes: 0
Received 100 Likes
on
92 Posts
i installed a one-piece clip from ecklers. had the same issue with the rubbing(whuich i fixed by trimming the hood, after the clip was set), and the difference in height between the hood and the surround. i think that the drill points on the repo inner fenders are incorrect, and when the radiator is tilted correctly, the inner fenders are too low. i ended up cutting the surround just below the top line-angle (where it drops down into the drip rail), and glassing the opening that formed when the surround was raised to be even with the hood. all the repair is in the drip rail area, and it takes a very close inspection to see it.
two words of caution. one, add a couple of shims under the hood hinges to determine the height(easy to remove if needed later, but if no shims are used, it's impossible to lower), and two, keep the cowl area high enough so that the wipers don't strike the hood(or wiper door if so equiped).
also, i bonded the clip to the inner fenders, and then did final trimming by the door. th ere's enough flex in the glass to allow access in the cowl areas to pull the clip outwards to trim and apply epoxy to the joints. i used 3m epoxy that comes in cartridges and has an hour of working time. didn't have to rush when i was bonding.
07-10-2010, 07:22 PM
#10
Burning Brakes


I bought a original front clip at Carlisle for my wrecked 70, and had the same issues. You must either redrill the holes where the brackets attach to the inner fender, or use shims as you show. I used shims with no problems. As has been pointed out, that Bubba bracket in the front is not correct or needed. My hood fit fine with the OEM clip, but in your case, I would just sand the hood as needed to fit. Most important is to go slowly, and resolve all the fit issues before bonding anythng. I must have had my front clip on and off a dozen times until I was happy with the fit.
10-15-2010, 06:03 PM
#12
Team Owner

Member Since: Sep 2006
Location: Westminster Maryland
Posts: 30,173
Likes: 0
Received 2,878 Likes
on
2,515 Posts

Hi MV,
There's some front clip info and pictures in this thread. Check the last pages.
I hope they help!
Regards,
Alan
http://forums.corvetteforum.com/c3-g...barn-find.html
There's some front clip info and pictures in this thread. Check the last pages.
I hope they help!
Regards,
Alan
http://forums.corvetteforum.com/c3-g...barn-find.html
Last edited by Alan 71; 10-16-2010 at 08:56 AM.
10-15-2010, 06:08 PM
#13
Pro


 10-16-2010, 06:08 AM
#14
Advanced

Member Since: Sep 2009
Posts: 70
Likes: 0
Received 0 Likes
on
0 Posts
Try this link http://www.vettemod.com/forum/showthread.php?t=956 lot's of good information on installing a front clip.
Thank you gr8t73!
