


Redoing my seats
Thread Starter
Racer

Joined: Dec 2009
Posts: 404
Likes: 1
From: roscoe il.
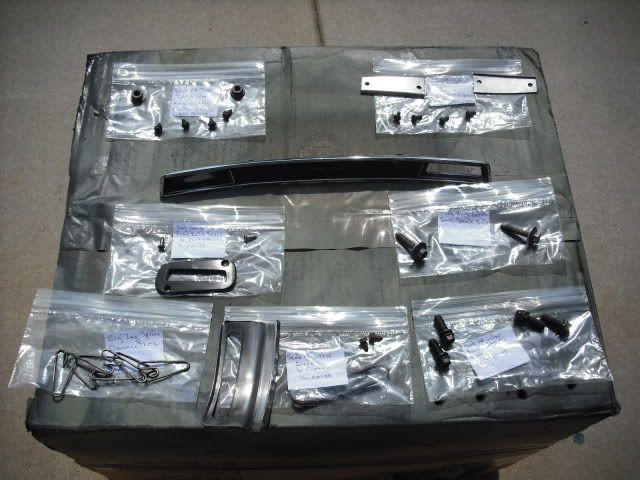
Cant beleive how rusty the seat frames can get... Sandblasted the frames, straighted the bottom frame, made new braces welded them on, and primed and painted them.(the date on the picture is wrong. lol just did them..)

IMG]http://i976.photobucket.com/albums/ae247/ozzyrulesme1948/seats/seats016.jpg[/IMG]


IMG]http://i976.photobucket.com/albums/ae247/ozzyrulesme1948/seats/seats016.jpg[/IMG]
Burning Brakes


Joined: Sep 2009
Posts: 1,124
Likes: 140
From: Western New York
Don't stop there! I want to see you pulling the covers on and hog ringing them. Everything right to the finish. I've been putting off new seat covers and foam for quite a while, and maybe if I see that it can be done successfully I'll give it a try. Good luck!
Burning Brakes
Joined: Jul 2008
Posts: 914
Likes: 10
From: Brooklet Ga.
I didn`t use hog rings I used plastic electrical zip ties and they are so much easier.

Instructor
Joined: Aug 2010
Posts: 246
Likes: 0
From: San Diego CA
Where did you get your new seat foams / covers from?
How would you rate the overall difficulty of the task?
Interior is one of the things next on my to-do list and this will be my first time doing upholstery work.
How would you rate the overall difficulty of the task?
Interior is one of the things next on my to-do list and this will be my first time doing upholstery work.
Burning Brakes
Joined: Jul 2008
Posts: 914
Likes: 10
From: Brooklet Ga.
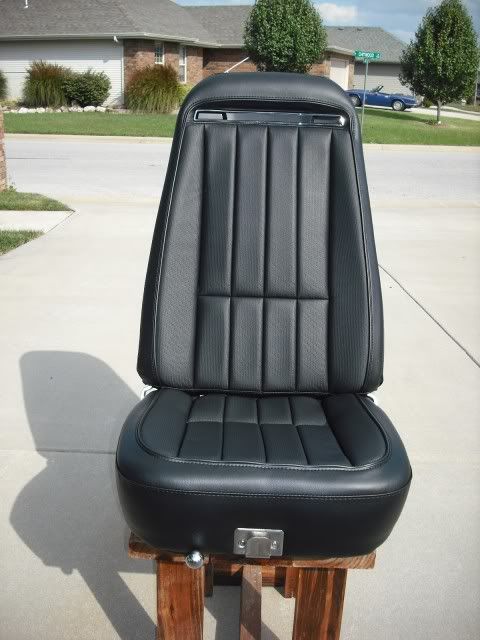
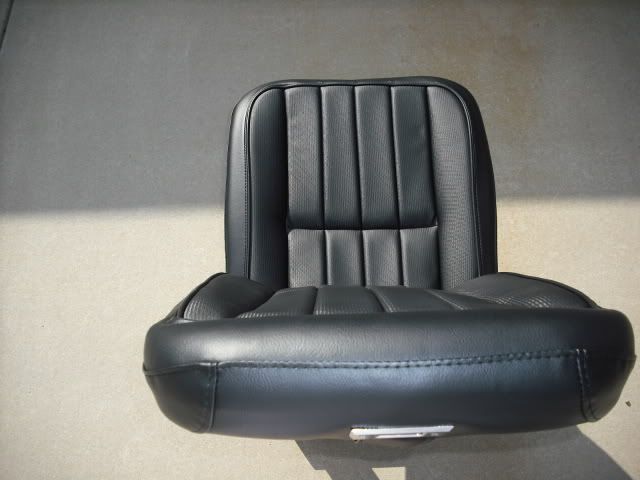
My foams were in really good shape so I reused them. I just sandblated the frames primed and painted them. The big seat stops that are in the back needed to be heated and worked easily back and forth to keep them from wringing off but if you go slow you can get them out. My covers came from Corvette America. It`s really not a bad job I did one on sat and one on sunday. I had just done a pair of Austin Healey 3000 seats that were a real bitch to get right but next to them the Vette seats were a piece of cake. Get new wires and use plastic zip ties and they will look great. I got a spray can of black dye to spray the hard seat back and mine looked great.
Thread Starter
Racer
Joined: Dec 2009
Posts: 404
Likes: 1
From: roscoe il.
I bought the foam and covers from wilcox. i love dealing withe them...I haven't got to the task of putting the covers on yet. this weekend.
Last edited by ozzyrulesme; Oct 26, 2010 at 10:08 PM.
Thread Starter
Racer
Joined: Dec 2009
Posts: 404
Likes: 1
From: roscoe il.
Thread Starter
Racer
Joined: Dec 2009
Posts: 404
Likes: 1
From: roscoe il.
Corvette Stories
The Best of Corvette for Corvette Enthusiasts

Top 10 Most Expensive Corvettes Ever Sold on Bring A Trailer
Brett Foote
10 Things Every Corvette Owner Needs (2026 Edition)
Michael S. Palmer
8 Most "Only Corvette Owners Understand" Quirks and Problems
Pouria Savadkouei
10 Reasons the C6 Z06 is Still A Performance Benchmark After 20 Years
Joe Kucinski
How Much Horsepower Every Corvette Engine "LOST" in 1972
Joe Kucinski
Top 10 DOs and DON'Ts for Protecting Your Convertible Top!
Michael S. Palmer
Top 10 Most Explosive Corvettes Ever Made: Power-to-Weight Ratio Ranked!
Joe Kucinski
150 hp to 1,250 hp: Every Corvette Generation Compared by the Specs That Matter
Joe Kucinski
8 Coolest Corvette Pace Cars (and Replicas) of All Time
Verdad Gallardo


Drifting


Joined: Oct 2004
Posts: 1,255
Likes: 7
From: Coralville Iowa
Melting Slicks

Joined: Jan 2010
Posts: 2,416
Likes: 8
From: Charlotte (Area) North Carolina
St. Jude Donor '11-'12-'13-'14
NCM Sinkhole Donor
Le Mans Master

Joined: Jan 2006
Posts: 8,246
Likes: 114
From: Watkins Glen NY
 I have only done ONE set of seats and never used hog rings before. Made sure i bought the pliers....and it was a piece of cake.
I would be concerned about the zip ties becoming brittle over time and snapping, or wearing thin if they move around a bit and snapping.
Drifting
Joined: Mar 2008
Posts: 1,900
Likes: 3
From: Nixa Missouri
Hi Oz,
Last year I wanted to rebuild one of my seat from my 70 coupe cause I've never rebuilt one before and found it pretty easy if you allow yourself time to do so. Mine had a little rust but not to bad and I sanded and buffed it all off then primed and painted. I replaced all the old springs in the base and back sections. Once I had all the hardware all cleaned up and polished and or painted I placed the covers outside in the sun for a few hours prior to installing to soak up the heat which is the trick. The day I placed the covers on the frames was sometime in october and only about 70 degrees out and streched very well over the foam and frame and was easy to handle.
I used hog rings and after doing the seat and know how to do one now, I guess you could go with the tie wraps but think they may break down after time and wear.
Heres some pic's of my seats when I rebuilt mine. On a scale of 1 to 10 in difficulty they where about a 4 but installing the new springs on the frame was about a 6 maybe.
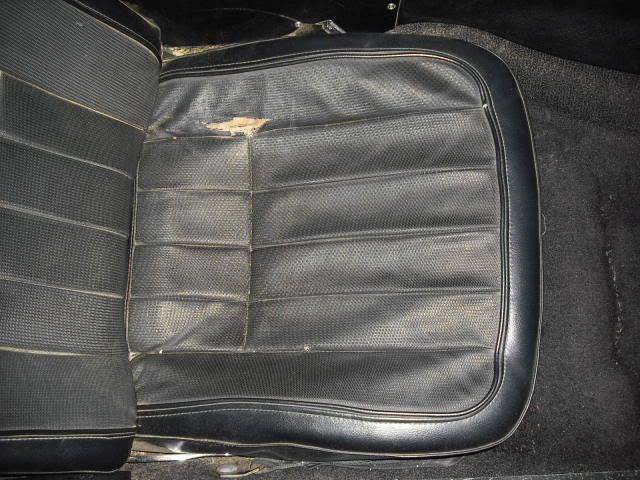
You can see the foam and the covers where wore out.

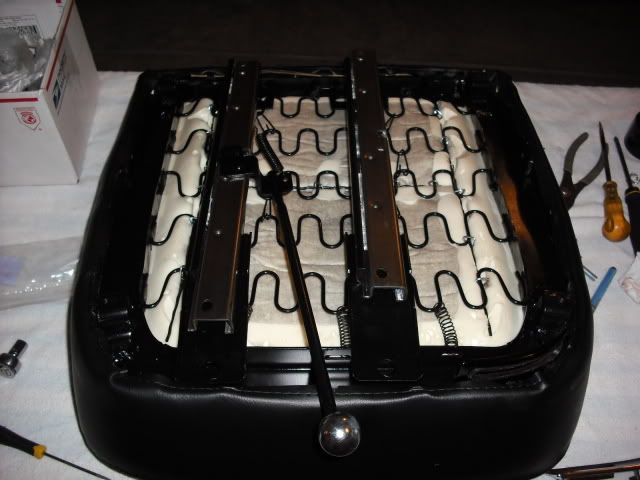

I made sure I had all the hardware seperated and polished and or repainted before I installed the foam and the covers cause I want these seats to last another 30 to 40 years if possible.
Hope this helps.
GG
Last year I wanted to rebuild one of my seat from my 70 coupe cause I've never rebuilt one before and found it pretty easy if you allow yourself time to do so. Mine had a little rust but not to bad and I sanded and buffed it all off then primed and painted. I replaced all the old springs in the base and back sections. Once I had all the hardware all cleaned up and polished and or painted I placed the covers outside in the sun for a few hours prior to installing to soak up the heat which is the trick. The day I placed the covers on the frames was sometime in october and only about 70 degrees out and streched very well over the foam and frame and was easy to handle.
I used hog rings and after doing the seat and know how to do one now, I guess you could go with the tie wraps but think they may break down after time and wear.
Heres some pic's of my seats when I rebuilt mine. On a scale of 1 to 10 in difficulty they where about a 4 but installing the new springs on the frame was about a 6 maybe.
You can see the foam and the covers where wore out.
I made sure I had all the hardware seperated and polished and or repainted before I installed the foam and the covers cause I want these seats to last another 30 to 40 years if possible.
Hope this helps.
GG

Team Owner

Joined: Jul 2004
Posts: 40,404
Likes: 791
From: Redondo Beach, California
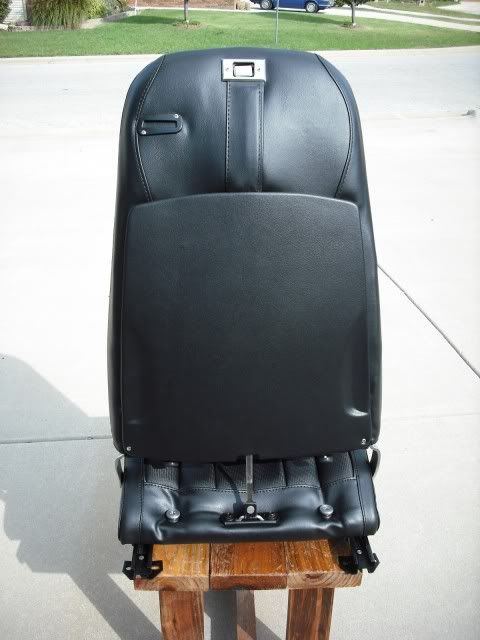
Al Knoch sells a DVD showing seat cover installation. I watched the same man that was on the DVD install my seat covers at Pomona, Ca last June.
Before watching the DVD, I tried myself and wasn't able. I didn't understand it takes a lot of forearm and hand muscle power to push the foam down and pull the seat covers over the foam seat cushion. Also, where the foam seat cusion mates up around the seat frame, the installer used a bread knife to trim a little of the foam away to help curl the seat covers under the frame.
The bread knife makes trimming the foam easy. I always wondered how your trim that stuff. Make sure you don't trim too much.
I de-rusted my frames by soaking them in vinegar. Made a fiberglass trough to dip them in. Then I sprayed them with Eastwood "ceramic" frame paint.
Race Director


Joined: Nov 2002
Posts: 12,142
Likes: 54
From: Taylor Michigan

Drifting
Joined: Oct 2004
Posts: 1,255
Likes: 7
From: Coralville Iowa
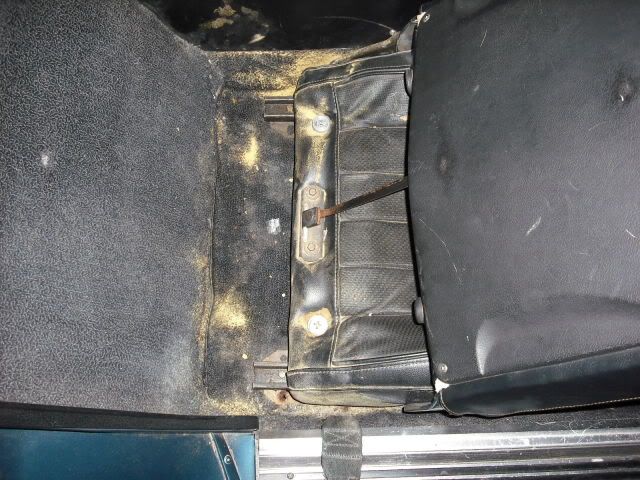
the problem starts out almost from new, they 'all leak and moisture trapped under the seats over time kills the frames. They dont get a chance to dry out with sound deadeners and other bright idea fixes incorporated into areas where water is under the carpets and seats....If the seat frames are bad its logical there's rust throughout the Vette....just because there plastic is not a defense against the elements.....
You'd think Al Knoch was your brother or something.
