
250 hrs later, paint with pics
 08-30-2011, 07:50 PM
#1
Instructor

Thread Starter
Member Since: Jul 2007
Location: Sheboygan Wisconsin
Posts: 167
Likes: 0
Received 0 Likes
on
0 Posts
last Fall while stopped at a light, bang, rear-ended. One week before storage time. Luckily the bumpers did their job, only 2 small cracks in the body.
Spring weather was poor, so I decided this was a good time to get the Vette ready for paint. Little did I realize how many hours I'd spend to achieve this task. All those who have painted their cars know what I'm talking about. Old fiberglass and new technology will now meet and become one.
I began the striping process. Razor blades, DA and a heat gun were used to remove the paint. And lots of block sanding. Becasue of the body style of the C3, block sanding is the only way to get at many areas.
Priming was a 2 step process, First the Acrylic coats and then a build up primer. During each there was much block-sanding.
Now we apply the paint and clear and again much block-sanding, first with 1000 grit on to 1500 and finally 2000 grit. Are you getting my drift on block-sanding.
So here we are, the pics. only a few, I won't bore you.
[IMG]http://i420.photobucket.com/albums/pp286/djrammer_photos/VettePaint2011009.jpg[/IMG
[IMG]http://i420.photobucket.com/albums/pp286/djrammer_photos/VettePaint2011009.jpg[/IMG
[IMG]http://i420.photobucket.com/albums/pp286/djrammer_photos/VettePaint2011009.jpg[/IMG
[IMG]http://i420.photobucket.com/albums/pp286/djrammer_photos/VettePaint2011009.jpg[/IMG
[IMG]http://i420.photobucket.com/albums/pp286/djrammer_photos/VettePaint2011009.jpg[/IMG


 08-30-2011, 09:23 PM
#5
1969/1971/1976 Coupes


 08-30-2011, 11:00 PM
#7
Burning Brakes


 08-31-2011, 04:45 PM
#12
Instructor
Thread Starter
Member Since: Jul 2007
Location: Sheboygan Wisconsin
Posts: 167
Likes: 0
Received 0 Likes
on
0 Posts
Thanks for all the compliments. Sorry I wasn't able to get the pics entered properly for all to see, so we'll try again.
Yes, I did this in my garage. Made up a temporary booth and had at it.
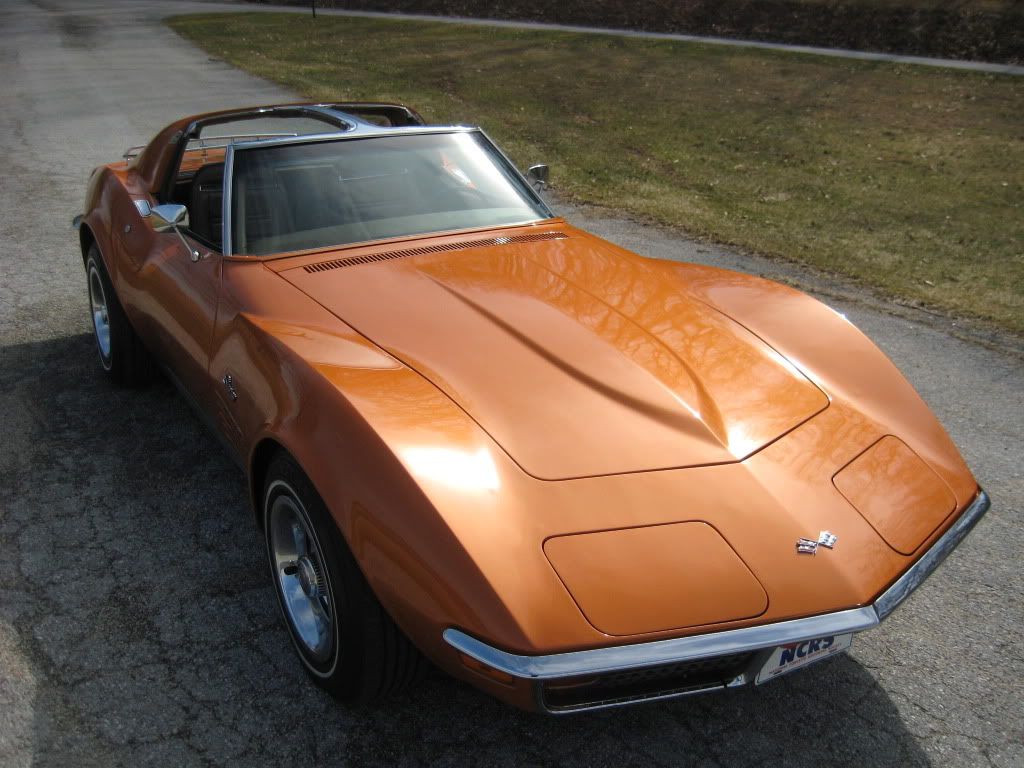
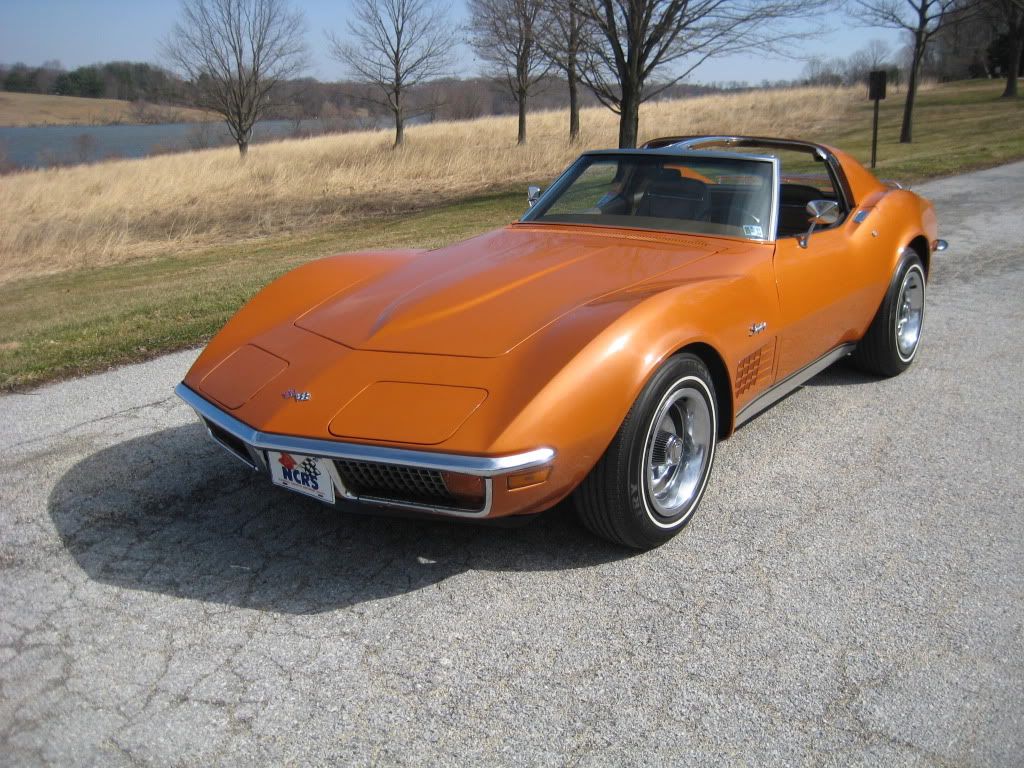
I have to say thanks to the guys at "The Car Paint" store in Sheboygan. they were very helpful in walking me through the new technology in auto paints. I was not able to get the 72 Ontario Orange, so we went with the next which was 73 Orange Metallic. After all the block-sanding with the different grits, buffing was very easy. Buffing was also a 2 step process.
These last 2 pictures were taken at the EVS Corvette show in Saukville.


Yes, I did this in my garage. Made up a temporary booth and had at it.
I have to say thanks to the guys at "The Car Paint" store in Sheboygan. they were very helpful in walking me through the new technology in auto paints. I was not able to get the 72 Ontario Orange, so we went with the next which was 73 Orange Metallic. After all the block-sanding with the different grits, buffing was very easy. Buffing was also a 2 step process.
These last 2 pictures were taken at the EVS Corvette show in Saukville.
 08-31-2011, 05:09 PM
#14
Instructor
Thread Starter
Member Since: Jul 2007
Location: Sheboygan Wisconsin
Posts: 167
Likes: 0
Received 0 Likes
on
0 Posts
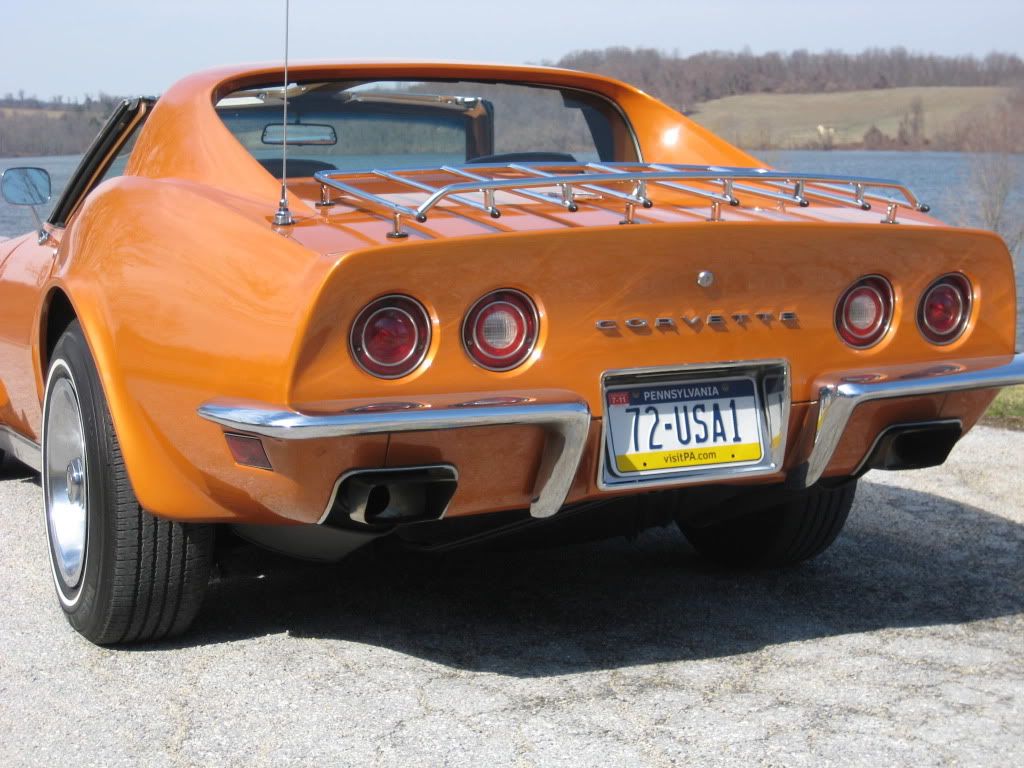
I get a lot of remarks on those. They are from the Taxi cab / Police cruiser era.
They really show off the depth of the dish of the wheel.
They really show off the depth of the dish of the wheel.
08-31-2011, 06:46 PM
#15
Racer
Thanks for all the compliments. Sorry I wasn't able to get the pics entered properly for all to see, so we'll try again.
Yes, I did this in my garage. Made up a temporary booth and had at it.
I have to say thanks to the guys at "The Car Paint" store in Sheboygan. they were very helpful in walking me through the new technology in auto paints. I was not able to get the 72 Ontario Orange, so we went with the next which was 73 Orange Metallic. After all the block-sanding with the different grits, buffing was very easy. Buffing was also a 2 step process.
These last 2 pictures were taken at the EVS Corvette show in Saukville.
08-31-2011, 06:55 PM
#16
Melting Slicks


Thanks for all the compliments. Sorry I wasn't able to get the pics entered properly for all to see, so we'll try again.
Yes, I did this in my garage. Made up a temporary booth and had at it.
I have to say thanks to the guys at "The Car Paint" store in Sheboygan. they were very helpful in walking me through the new technology in auto paints. I was not able to get the 72 Ontario Orange, so we went with the next which was 73 Orange Metallic. After all the block-sanding with the different grits, buffing was very easy. Buffing was also a 2 step process.
These last 2 pictures were taken at the EVS Corvette show in Saukville.
Yes, I did this in my garage. Made up a temporary booth and had at it.
I have to say thanks to the guys at "The Car Paint" store in Sheboygan. they were very helpful in walking me through the new technology in auto paints. I was not able to get the 72 Ontario Orange, so we went with the next which was 73 Orange Metallic. After all the block-sanding with the different grits, buffing was very easy. Buffing was also a 2 step process.
These last 2 pictures were taken at the EVS Corvette show in Saukville.
Thanks
 08-31-2011, 08:51 PM
#18
Instructor
Thread Starter
Member Since: Jul 2007
Location: Sheboygan Wisconsin
Posts: 167
Likes: 0
Received 0 Likes
on
0 Posts
I started with 1000 grit, then 1500 and finally 2000.
From there I used a new wool pad with Meguiars Diamond Cut (85) 2.0. Keep in mind to keep the buffer speed low, you don't want to burn the paint. Secondly I used Meguiars Diamond Cut (9) 2.0 with a foam pad. The speed of the buffer was just a tad faster.
On all the high edges I applied masking tape, to protect them from burning through.
During assembly, I again used masking tape on all edges to keep from chipping or scratching the fresh paint. And there was some hand buffing in areas that the machine could not do.
Good luck and take your time, it's all worth in the end. By the way, it took my 60 year old hands 2 months to recoup.
08-31-2011, 09:15 PM
#20
Burning Brakes
Beautiful! Nice crisp clean lines. Of course, I'm partial to 72's and "firemist" colors...
Your color came out good.
Not too too far from Ontario Orange....
Your color came out good.
Not too too far from Ontario Orange....