


Doorgunner's '68 Convertible Project
Thread Starter
2026 Loser of the Year


Joined: Sep 2013
Posts: 36,601
Likes: 7,048
From: New Or-leens Loo-z-anna
Took me three weekends to finally get my dash harness back in so you have something to look forward too
Exactly....I spent a month putting a '93/'89 harness in the '34 pickup.
Since you are back there have you replaced all light bulbs? I also highly recommend going through all the gauges.Will do....bulbs are waiting for me at Grainger/gauge panels will remain loose & not be reinstalled until all lighting & gauge-wiring is tested.
Getting the center console and harness in correctly was harder than removing the trailing arms. Toughest job on a vette IMHO other than maybe removing the PB booster.
It is all worth in in the end. Ain't it the truth on both counts!
Bill
Well.............................out to the GO-rajj.
Last edited by doorgunner; Jan 21, 2014 at 03:24 PM.
Thread Starter
2026 Loser of the Year
Joined: Sep 2013
Posts: 36,601
Likes: 7,048
From: New Or-leens Loo-z-anna
MAN!
If you don't do any work on your car for a few days.....You drop to page #6 on this Forum!
I HAVE to quit dodging that dash wiring.......a little progress/not much---along with daily life-interruptions...
The gauge bulbs have been replaced/gauges have been tested and new cables have been installed on the heater-box/vent doors....
The A.D.D. took over.....I HAD to give the headlight covers a light sanding/clearcoat of .....Krylon..... .....to see if the old paint could be salvaged while the car gets roadworthy/bugs get worked out.....YES! A "10 foot" touch-up job is in order!
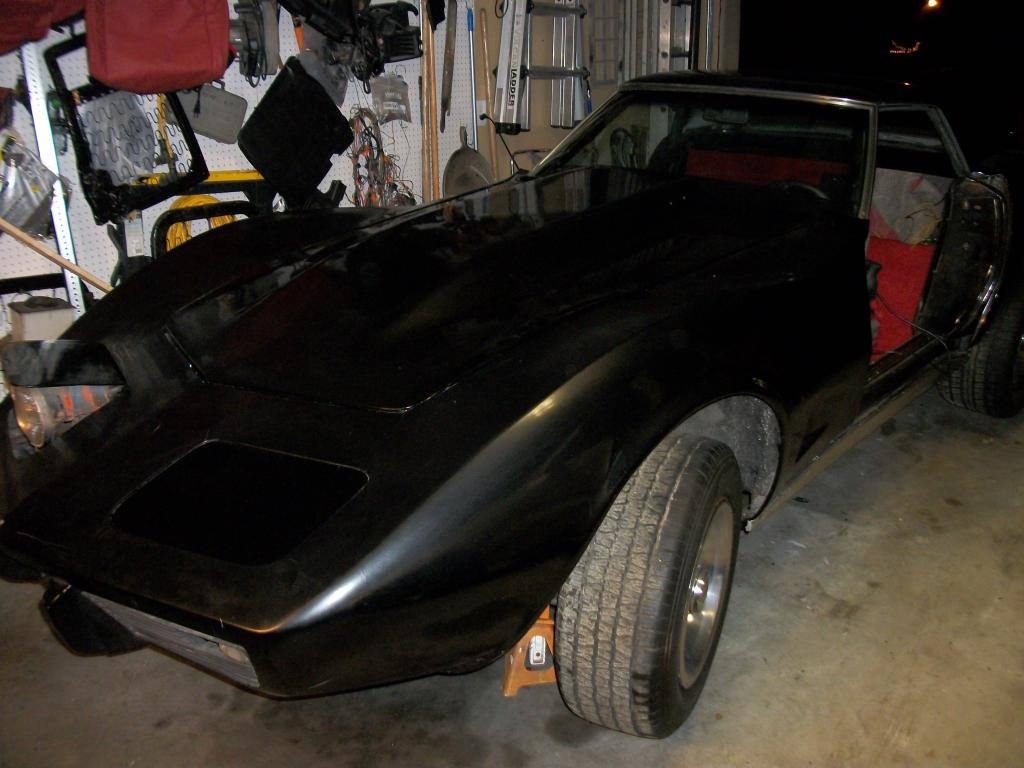
I should re-title this thread......."The Poor Man's Guide to Resto-Modding!"
If you don't do any work on your car for a few days.....You drop to page #6 on this Forum!
I HAVE to quit dodging that dash wiring.......a little progress/not much---along with daily life-interruptions...
The gauge bulbs have been replaced/gauges have been tested and new cables have been installed on the heater-box/vent doors....
The A.D.D. took over.....I HAD to give the headlight covers a light sanding/clearcoat of .....Krylon.....
.....to see if the old paint could be salvaged while the car gets roadworthy/bugs get worked out.....YES! A "10 foot" touch-up job is in order!I should re-title this thread......."The Poor Man's Guide to Resto-Modding!"
Last edited by doorgunner; Jan 10, 2014 at 11:40 AM.
Thread Starter
2026 Loser of the Year
Joined: Sep 2013
Posts: 36,601
Likes: 7,048
From: New Or-leens Loo-z-anna
Finally my brain focused enough to get some dash wiring installed.....
annnd.....everything actually works...(I still need the headlight switch retaining nut/ignition switch retaing nut)
Man! That left visor has some dusty handprints all over it.....
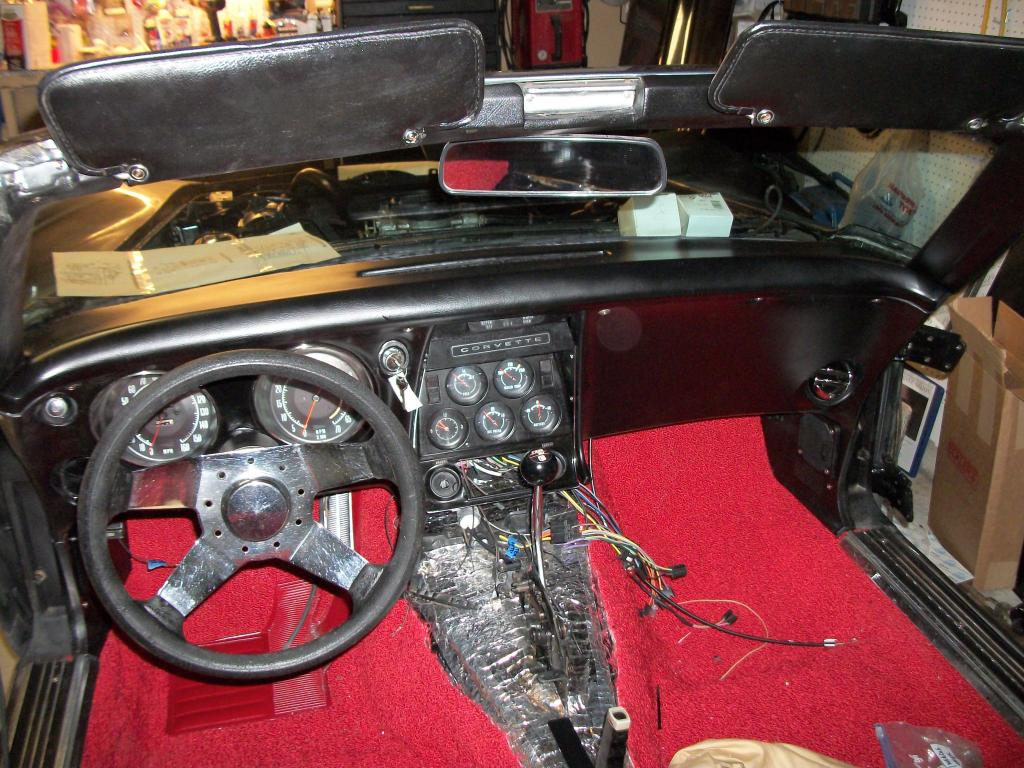
Tomorrow........the console........maybe.....God willing!
Ohhhhh......I accidentally started the engine while working the key switch to check the gauges and signal lights.....(any other time it would have taken 30 seconds to start it from "sitting-up" for years!
It was a LARGE relief to realize that I had connected the oil pressure line to the oil gauge. I had to fumble with the key a few seconds before it went to the OFF position because there is no retaining nut holding it in place YET--aarrrgghhh---That would have been really special to have 40psi oil squirted all over the new carpet!
annnd.....everything actually works...(I still need the headlight switch retaining nut/ignition switch retaing nut)
Man! That left visor has some dusty handprints all over it.....
Tomorrow........the console........maybe.....God willing!
Ohhhhh......I accidentally started the engine while working the key switch to check the gauges and signal lights.....(any other time it would have taken 30 seconds to start it from "sitting-up" for years!
It was a LARGE relief to realize that I had connected the oil pressure line to the oil gauge. I had to fumble with the key a few seconds before it went to the OFF position because there is no retaining nut holding it in place YET--aarrrgghhh---That would have been really special to have 40psi oil squirted all over the new carpet!
Last edited by doorgunner; Jan 10, 2014 at 12:46 PM.
Thread Starter
2026 Loser of the Year
Joined: Sep 2013
Posts: 36,601
Likes: 7,048
From: New Or-leens Loo-z-anna
Well..........I started reassembling the console.....and discovered that the $228 Hurst shifter that previous owner installed sat 2" TOO HIGH----the console would not go into place!
Two hours later the shifter "got" bolted to a 2" recessed mounting plate---now the console fits like it should.
Two more hours of installing 2 vent-door cables/heater cable/defroster cable.. ...(had to re-form the wire ends of two OEM cables that had the attaching loops cut off!) an hour went to installing that section of the new wiring harness.
Nothing happens fast on V.A. meds!
I also had to remove some of the wrapping from the new wiring harness after fighting with it for an hour---the manufacturer did a great job of wrapping the wiring---but had it wrapped so tightly that there wasn't enough slack to reach the gauges without the slightest movement during installation causing the dash lights to pop out of their locations--Military helicopters always had several inches of "free wiring" so the gauges could be pulled out and away from the dash for repairs.
Pics tomorrow after everything is finished.
Last edited by doorgunner; Nov 14, 2013 at 10:51 AM.
Safety Car


Joined: May 2008
Posts: 3,754
Likes: 721
From: Lafayette Louisiana
Looks SUPER!!!
Congratulations!!!
Really like that black/red combo!!
Drew Brees will be wanting you to take him for a ride in the Quarter and then on to Westwego on the Westbank Expressway and check out all the neighborhood bars along the way! LOL's!!
Congratulations!!!
Really like that black/red combo!!
Drew Brees will be wanting you to take him for a ride in the Quarter and then on to Westwego on the Westbank Expressway and check out all the neighborhood bars along the way! LOL's!!
Thread Starter
2026 Loser of the Year
Joined: Sep 2013
Posts: 36,601
Likes: 7,048
From: New Or-leens Loo-z-anna
Looks SUPER!!! Thanks a bunch!
Congratulations!!! Only waited for the right one 45 years!
Really like that black/red combo!! It was actually an accident...I forgot that the dash and door panels were supposed to match also...Ohh well--the red stands out more this way---I'll add some red dash lights to match the seats/carpet----flashback to military aircraft gauge-lights-red light is easier to look at for hours/doesn't "light-up" the cockpit!
Drew Brees will be wanting you to take him for a ride in the Quarter and then on to Westwego on the Westbank Expressway and check out all the neighborhood bars along the way! No bars for him/work-work-work--He has a SuperBowl to focus on!LOL's!!
Last edited by doorgunner; Nov 14, 2013 at 10:54 AM.
Safety Car
Joined: May 2008
Posts: 3,754
Likes: 721
From: Lafayette Louisiana
I just installed the new wiper switch and ran an independent ground wire to the wiper housing at one of the mounting screws---the wiper motor seems to have more power/doesn't slow down when blades change direction----even got the washer pump working even though it isn't "hosed" yet.
Thread Starter
2026 Loser of the Year
Joined: Sep 2013
Posts: 36,601
Likes: 7,048
From: New Or-leens Loo-z-anna
Corvette Stories
The Best of Corvette for Corvette Enthusiasts

Top 10 Most Expensive Corvettes Ever Sold on Bring A Trailer
Brett Foote
10 Things Every Corvette Owner Needs (2026 Edition)
Michael S. Palmer
8 Most "Only Corvette Owners Understand" Quirks and Problems
Pouria Savadkouei
10 Reasons the C6 Z06 is Still A Performance Benchmark After 20 Years
Joe Kucinski
How Much Horsepower Every Corvette Engine "LOST" in 1972
Joe Kucinski
Top 10 DOs and DON'Ts for Protecting Your Convertible Top!
Michael S. Palmer
Top 10 Most Explosive Corvettes Ever Made: Power-to-Weight Ratio Ranked!
Joe Kucinski
150 hp to 1,250 hp: Every Corvette Generation Compared by the Specs That Matter
Joe Kucinski
8 Coolest Corvette Pace Cars (and Replicas) of All Time
Verdad Gallardo
Thread Starter
2026 Loser of the Year
Joined: Sep 2013
Posts: 36,601
Likes: 7,048
From: New Or-leens Loo-z-anna
"Wiring by Bubba"
I found these cut wires hanging out of the bundle, so I added temporary connectors to them to prevent shorts.
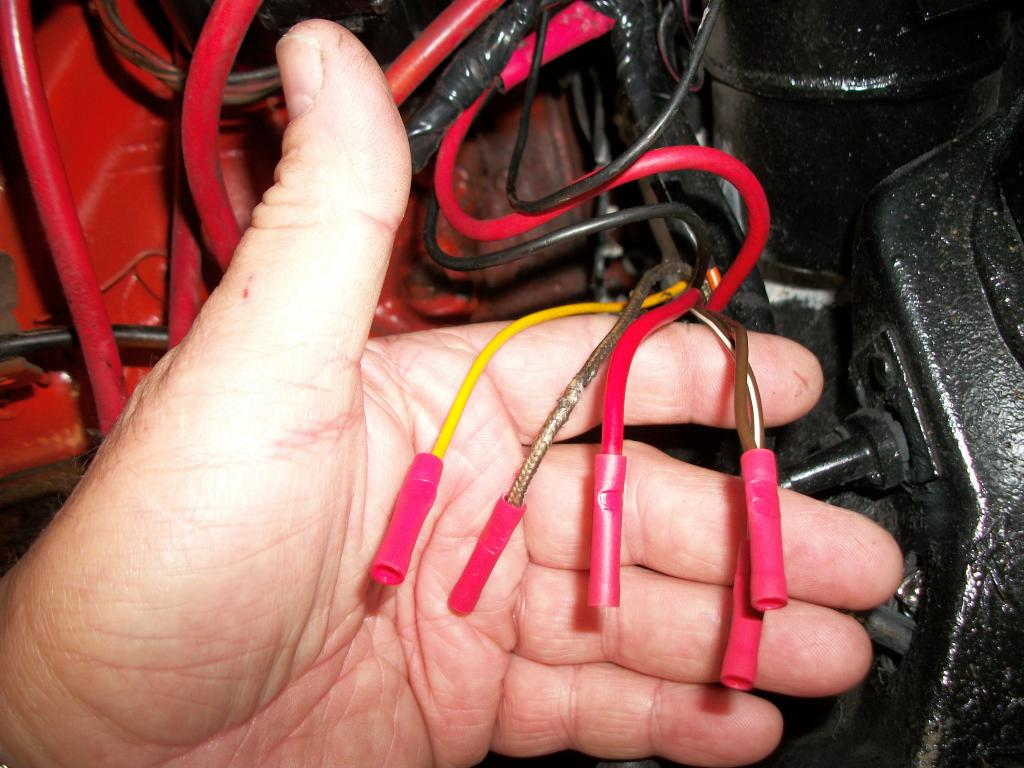
These loose wires are all in a separate sub-harness near the wiper motor at the firewall....
Does anybody know where the (2nd wire from left in my hand) sheath-cloth-wrapped steel-strand wire comes from & connects to??????
EDIT: After checking old threads, I found that the sheath-cloth-covered wire was intended to be used on a points-distributor.....the engine has been converted to a HEI dist. , so I'll heatshrink the N/A wire-end closed since it won't be needed.
Brown/White = Wiper door = N/A (door removed previously)
Brown = Wiper motor
Red = Wiper motor
Yellow = Wiper motor/Pump/Door-Limit Switch N/A (door removed previously)
I found these cut wires hanging out of the bundle, so I added temporary connectors to them to prevent shorts.
These loose wires are all in a separate sub-harness near the wiper motor at the firewall....
Does anybody know where the (2nd wire from left in my hand) sheath-cloth-wrapped steel-strand wire comes from & connects to??????
EDIT: After checking old threads, I found that the sheath-cloth-covered wire was intended to be used on a points-distributor.....the engine has been converted to a HEI dist. , so I'll heatshrink the N/A wire-end closed since it won't be needed.
Brown/White = Wiper door = N/A (door removed previously)
Brown = Wiper motor
Red = Wiper motor
Yellow = Wiper motor/Pump/Door-Limit Switch N/A (door removed previously)
Last edited by doorgunner; Jan 21, 2014 at 03:26 PM.
Thread Starter
2026 Loser of the Year
Joined: Sep 2013
Posts: 36,601
Likes: 7,048
From: New Or-leens Loo-z-anna
IS IT MY LAPTOP.... or does everyone see huge pics at first---then the pics reduce to normal size?
I've been out of town (RATTTS) ........but got the tach-drive cable from Wilcox f-a-s-t/got the backup light switch......
So...now I'll be able to wrap up the console installation annnnnnd...
all the gauges will be functional!
EDIT: I couldn't control myself....I became a Supporting Member....Thanks to the Members for all the great Info/Support!!!!!
Last edited by doorgunner; Nov 2, 2013 at 10:28 AM.
Thread Starter
2026 Loser of the Year
Joined: Sep 2013
Posts: 36,601
Likes: 7,048
From: New Or-leens Loo-z-anna
I am setting this day aside for my Son-in-law Jason.
He wanted to buy his first Corvette project-car.
But Destiny had other plans.
Today is their 10th wedding anniversary......
He went to Heaven this afternoon.
He wanted to buy his first Corvette project-car.
But Destiny had other plans.
Today is their 10th wedding anniversary......
He went to Heaven this afternoon.
Last edited by doorgunner; Jan 31, 2026 at 11:42 PM.

Thread Starter
2026 Loser of the Year
Joined: Sep 2013
Posts: 36,601
Likes: 7,048
From: New Or-leens Loo-z-anna


Thread Starter
2026 Loser of the Year
Joined: Sep 2013
Posts: 36,601
Likes: 7,048
From: New Or-leens Loo-z-anna
Thanks Men......My wife & I are spending the night at "their" home.....
My daughter is "dodging going to bed".......
They got married when they were 17.
My daughter is "dodging going to bed".......
They got married when they were 17.
Last edited by doorgunner; Nov 11, 2013 at 09:39 PM.

Thread Starter
2026 Loser of the Year
Joined: Sep 2013
Posts: 36,601
Likes: 7,048
From: New Or-leens Loo-z-anna
Thanks for the thoughts and prayers----they help a lot. Tomorrow is my Daughter & Son-in-law's Wedding Anniversary...and Funeral.
Last edited by doorgunner; Jan 31, 2026 at 11:45 PM.