


To pull or not to pull is the question

Thread Starter
Drifting

Joined: Aug 2012
Posts: 1,650
Likes: 2
From: Tulsa Oklahoma
That's pretty impressive my friend!

Melting Slicks


Joined: Apr 2007
Posts: 3,189
Likes: 111
From: Tolland CT
One note. As others have commented, POR-15 prefers rough surfaces to adhere to. I've heard of case where POR-15 has peeled off clean metal which was too smooth. If the metal is smooth, clean, I've heard of others using epoxy primer. I've been using the silver primer supplied by the manufacturer I posted the link to. It has worked well for me on the rocker channels and seat braces, both still look good. I can't say as much for the parts done with chassis paint twenty years ago.
If you were to take the body off or a least lift it a foot or two, I'd suggest replacing the fuel lines with stainless. Take a look at the condition of the rocker channels, treat if necessary.
Either way, frame off or body on, your choice.
If you were to take the body off or a least lift it a foot or two, I'd suggest replacing the fuel lines with stainless. Take a look at the condition of the rocker channels, treat if necessary.
Either way, frame off or body on, your choice.
Thread Starter
Drifting
Joined: Aug 2012
Posts: 1,650
Likes: 2
From: Tulsa Oklahoma
Digging that Donnie!
Thread Starter
Drifting
Joined: Aug 2012
Posts: 1,650
Likes: 2
From: Tulsa Oklahoma
Well guys I have loved all the input and have much to consider at this point and will make a decision probably tomorrow.
Thank you all for everything. If some of you aren't flowing my rebuild thread, here is the link and would really appreciate all of you helping me through this winter project ( if you dont mind we will move back over there)you all are the best and with your help I will be driving this baby in no time! Oh! Your motivation regularly will also be much appreciated!!!
https://www.corvetteforum.com/c3-gen...-1973-a-7.html
Last edited by FatCat; Sep 24, 2013 at 11:52 PM.
Melting Slicks
Joined: Apr 2007
Posts: 3,189
Likes: 111
From: Tolland CT
What was the buffer used for?

Le Mans Master

Joined: Jun 2007
Posts: 7,666
Likes: 1
From: Where it's always hot as Hell-South Louisiana.
St. Jude Donor '07-'08-'09-'10-'11-'12-'13

Instructor


Joined: Nov 2009
Posts: 225
Likes: 1
St. Jude Donor '12
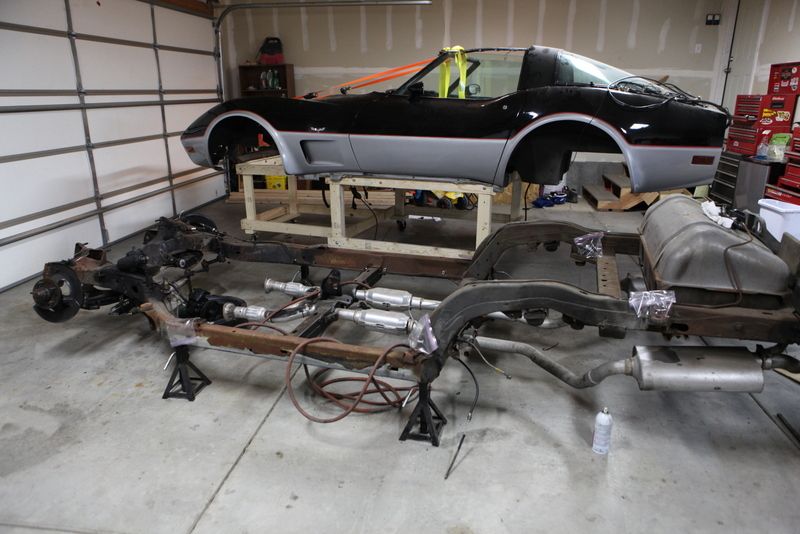
I have pulled the body on my 73 project by myself. Its no big deal if you take your time and make sure everything is disconnected. I stripped my frame completely and sandblasted made the necessary repairs and started putting it back together. Restoring the car is a lot easier with the body off. Its been two years to get to this point and I get the cat back from the body shop today. Will be starting on the interior, trim and lights tomorrow.
Corvette Stories
The Best of Corvette for Corvette Enthusiasts

Every 2027 Corvette Engine Explained
Joe Kucinski
Designer Imagines A Corvette That Looks More Like a Corvette Than the Corvette
Verdad Gallardo
10 Ugly Corvettes That We Still Kinda Love
Joe Kucinski
Top 10 Most Expensive Corvettes Ever Sold on Bring A Trailer
Brett Foote
10 Things Every Corvette Owner Needs (2026 Edition)
Michael S. Palmer
8 Most "Only Corvette Owners Understand" Quirks and Problems
Pouria Savadkouei
10 Reasons the C6 Z06 is Still A Performance Benchmark After 20 Years
Joe Kucinski
How Much Horsepower Every Corvette Engine "LOST" in 1972
Joe Kucinski
Top 10 DOs and DON'Ts for Protecting Your Convertible Top!
Michael S. PalmerBurning Brakes


Joined: Mar 2013
Posts: 1,018
Likes: 582
From: West Monroe Louisiana
2023 C3 of the Year Finalist - Unmodified
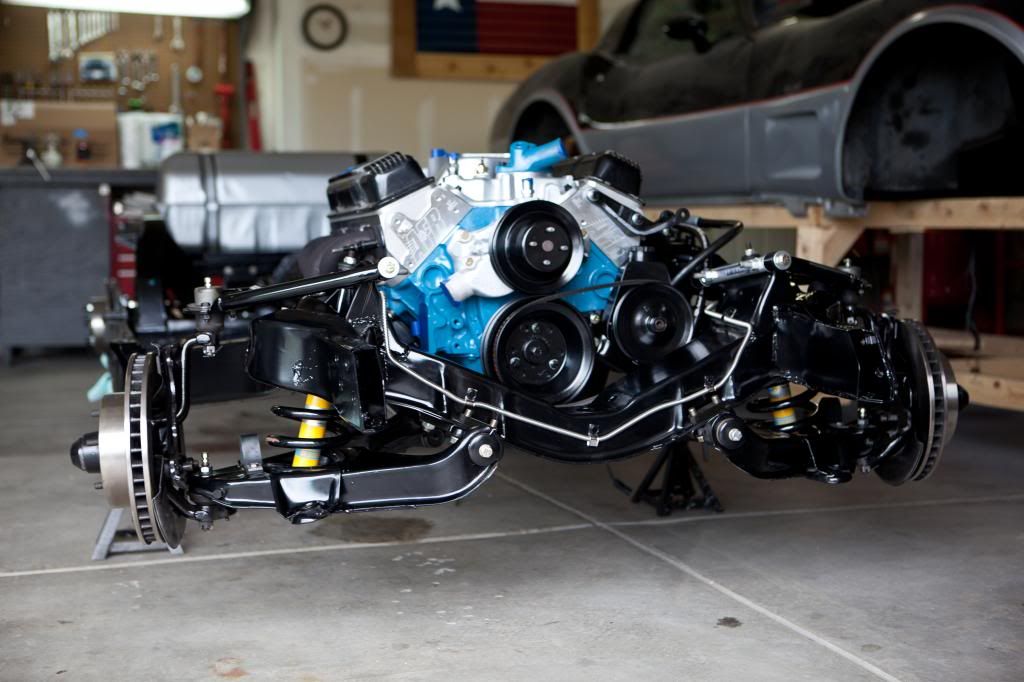
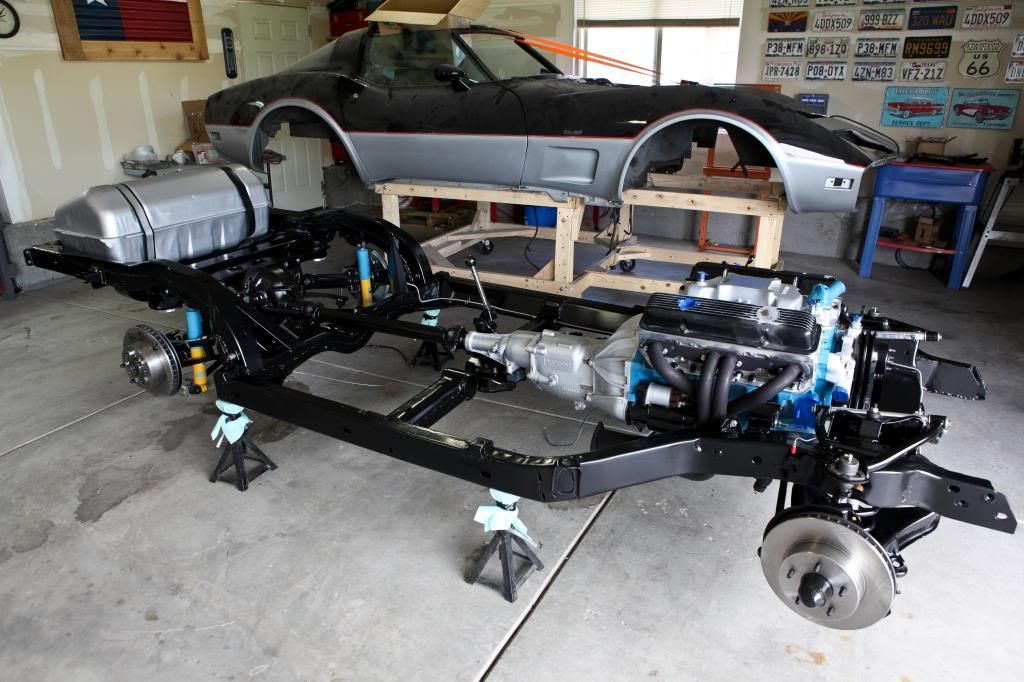
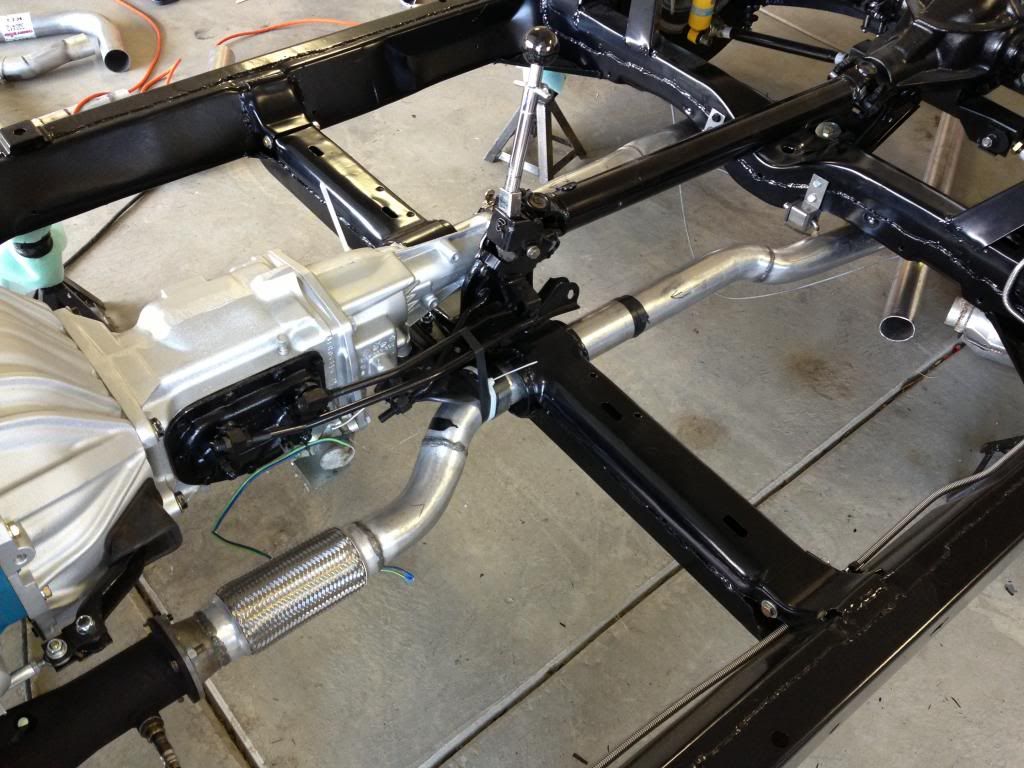
I could reach every other part of the frame because the engine, transmission, a-arms, trailing arms and gas tank were all removed.
Donnie
Le Mans Master
Joined: Dec 2009
Posts: 6,397
Likes: 649
From: Saskatoon Saskatchewan
Yes, I cleaned and POR everything. In the trailing arm pockets, I used a drill with wire brushes and even sand paper. The buffer (grinder) was a 4 1/2" Black and Decker 10,000 RPM with wire buffing wheels. It took time, but I cleaned and painted everything except the very top of the frame rail along the doors.
I could reach every other part of the frame because the engine, transmission, a-arms, trailing arms and gas tank were all removed.
Donnie
I could reach every other part of the frame because the engine, transmission, a-arms, trailing arms and gas tank were all removed.
Donnie

Melting Slicks


Joined: Feb 2004
Posts: 2,111
Likes: 32
From: Damascus MD
I just recently finished doing this on my 70.
I used the red scotchbrite pads that fit in a drill to clean my frame up. For the really tough stuff I used the black 3M stripper pad that fits in a drill. It took about 10 pads to do my frame. They did leave some very very slight scratches in the frame that are almost undetectable once painted. B e careful and let the pads do the work. Use a mask and safety glasses.
I don't want or need a photo bucket account or I would post pics of my frame. I can email the pics.
It came out beautiful. Nowhere near what Alan has done but very nice none the less. There are areas I could not get to but overall I am very pleased with the results.
I am just starting to reassemble everything. I pulled everything out from the transmission back.
Bill
Team Owner


Joined: Jan 2006
Posts: 37,637
Likes: 3,118
From: Crossville TN
If you don't pull the body, you can continue to use your car except for the short periods of time you put it up in the air to clean/paint/refurb particular areas of the underbody. And, you can do that in stages as time allows. So, you won't need to let the car sit unused...at all.

Thread Starter
Drifting
Joined: Aug 2012
Posts: 1,650
Likes: 2
From: Tulsa Oklahoma
Burning Brakes
Joined: Dec 2008
Posts: 971
Likes: 45
From: Middlesex NJ
Depends what you wanna do... spend the next few years taking it apart and then spending twice or 3x or 4x what you wanted to......
Or Drive it an enjoy it!...
If you need to repair the frame for safety issue then by all means pull it.
Or sell this one (let someone else clean it up) and buy someone else finished one you like for half the money and the instant gratification of driving it.
Or Drive it an enjoy it!...
If you need to repair the frame for safety issue then by all means pull it.
Or sell this one (let someone else clean it up) and buy someone else finished one you like for half the money and the instant gratification of driving it.
Thread Starter
Drifting
Joined: Aug 2012
Posts: 1,650
Likes: 2
From: Tulsa Oklahoma
Thought I would post these pictures of what things look like after the tank was out. If there are areas anyone would like to see or I should check good let me know.


Alarm still hooked up!


Trailing arm

Coating in fender well


If you look closely this looks like a panel of some sort in the rear fender well. Can anyone tell me what it is? It appears to be bolted on but also glassed on too???

Alarm still hooked up!
Trailing arm
Coating in fender well
If you look closely this looks like a panel of some sort in the rear fender well. Can anyone tell me what it is? It appears to be bolted on but also glassed on too???
Melting Slicks
Joined: Apr 2007
Posts: 3,189
Likes: 111
From: Tolland CT
Did you pull the kick panels, look at the #2 mounts?
How's the windshield frame?
Overall it doesn't look bad at all, a body on clean up may be all you need.
Thread Starter
Drifting
Joined: Aug 2012
Posts: 1,650
Likes: 2
From: Tulsa Oklahoma
How many body mounts total are there?
Inside kick panels good ( I'll post those )
Haven't pulled TTop trim but a flashlight along the pillar reveals no rust.
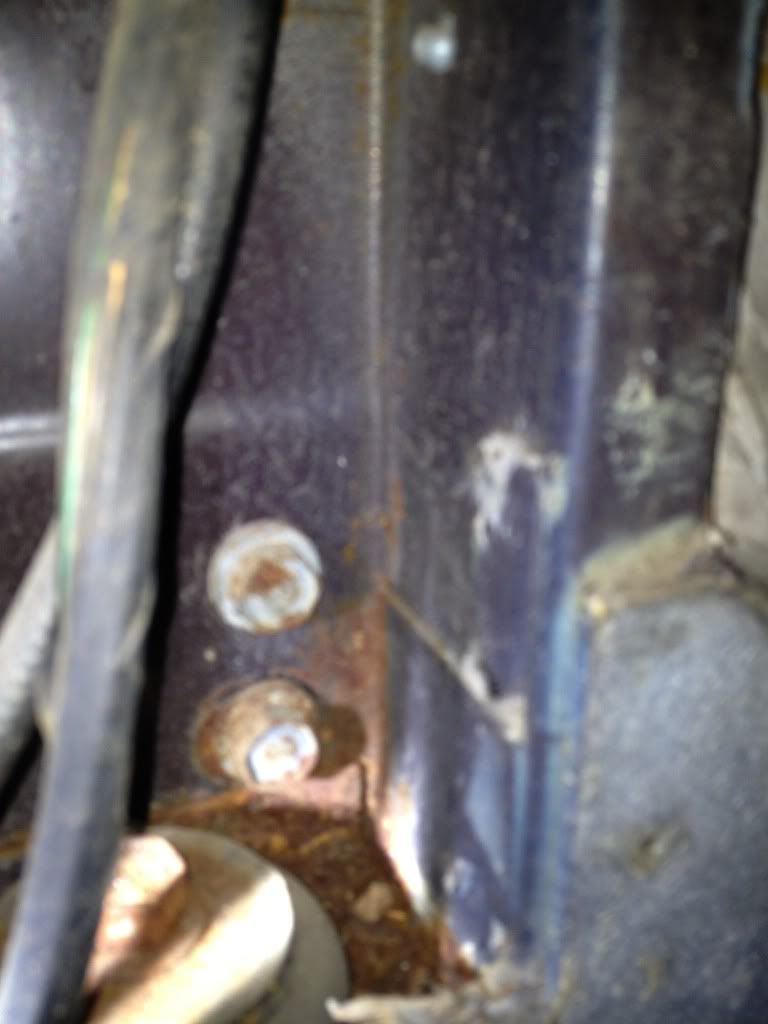
Here are the pix in the kick panels and rear panels.
The rubber on these mounts is still soft and not cracked.
Rear


Kick panels
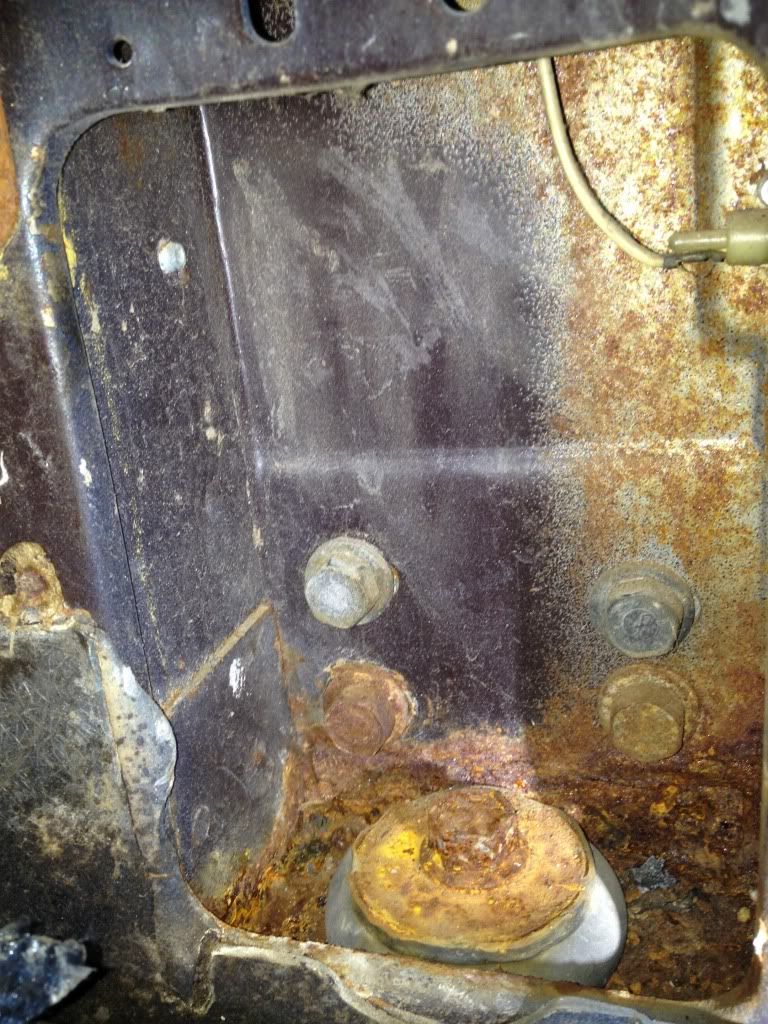
Inside kick panels good ( I'll post those )
Haven't pulled TTop trim but a flashlight along the pillar reveals no rust.
Here are the pix in the kick panels and rear panels.
The rubber on these mounts is still soft and not cracked.
Rear
Kick panels
Melting Slicks
Joined: Apr 2007
Posts: 3,189
Likes: 111
From: Tolland CT
Four body mounts on each side. Two you've found, there's one more just in front of the firewall and another right behind the rear wheel.
The last #2 mount area looks a bit crusty, hard to say from the picture. Not bad, I've seen much worse, but what appears to be a chunk of rust makes me wonder if it fell from inside the windshield frame, indicating you may have a water leak. Looks pretty typical overall.
The last #2 mount area looks a bit crusty, hard to say from the picture. Not bad, I've seen much worse, but what appears to be a chunk of rust makes me wonder if it fell from inside the windshield frame, indicating you may have a water leak. Looks pretty typical overall.

