


Hidden Subwoofer Amp

Thread Starter
Pro

Joined: Nov 2013
Posts: 730
Likes: 37
From: Catoosa Okla
 Hidden Subwoofer Amp
With the subwoofer box complete and the Rockford Fosgate PBR300x2 bridgeable amplifier now in hand, it was time to take this rather difficult to mount amplifier and as with the other projects, keep it hidden and operating seamlessly in the invisible to the eye environment. I had pre-selected a location in the jack storage compartment with the amplifier mounted to the inner area behind the passenger seat, located right behind the factory relay and flasher.
Here is the view of the area I'll be mounting the amplifier to. It's basically the backside of the area directly behind the passenger seat, inside the jack storage area.
[IMG] [/IMG]
At first I had planned on mounting the amp to a piece of plywood with 4 screws and using liquid nails to secure the plywood to the fiberglass backboard. The storage area is just big enough for me to get my head in and a small light. Had I glued the board to the backing, I wouldn't have have had the required room to remove the 4 screws holding the amp to the plywood.
[IMG] [/IMG]
Time for a re-think. I went ahead and cut out a piece of plywood about the size of the amp. This little Fosgate is small, but packs quite a punch according to the reviews. Here's a picture of it next to my cell phone cover for size reference.
[IMG] [/IMG]
I mounted the amplifier to the plywood.
[IMG] [/IMG]
[IMG] [/IMG]
Since I couldn't simply glue the plywood, i opted to drill two (2) 3/16" holes in the fiberglass behind the passenger seat. I installed two blind nuts on the frontside of the plywood giving me a secure set of threads to bolt the amp board to the fiberglass backboard.
[IMG]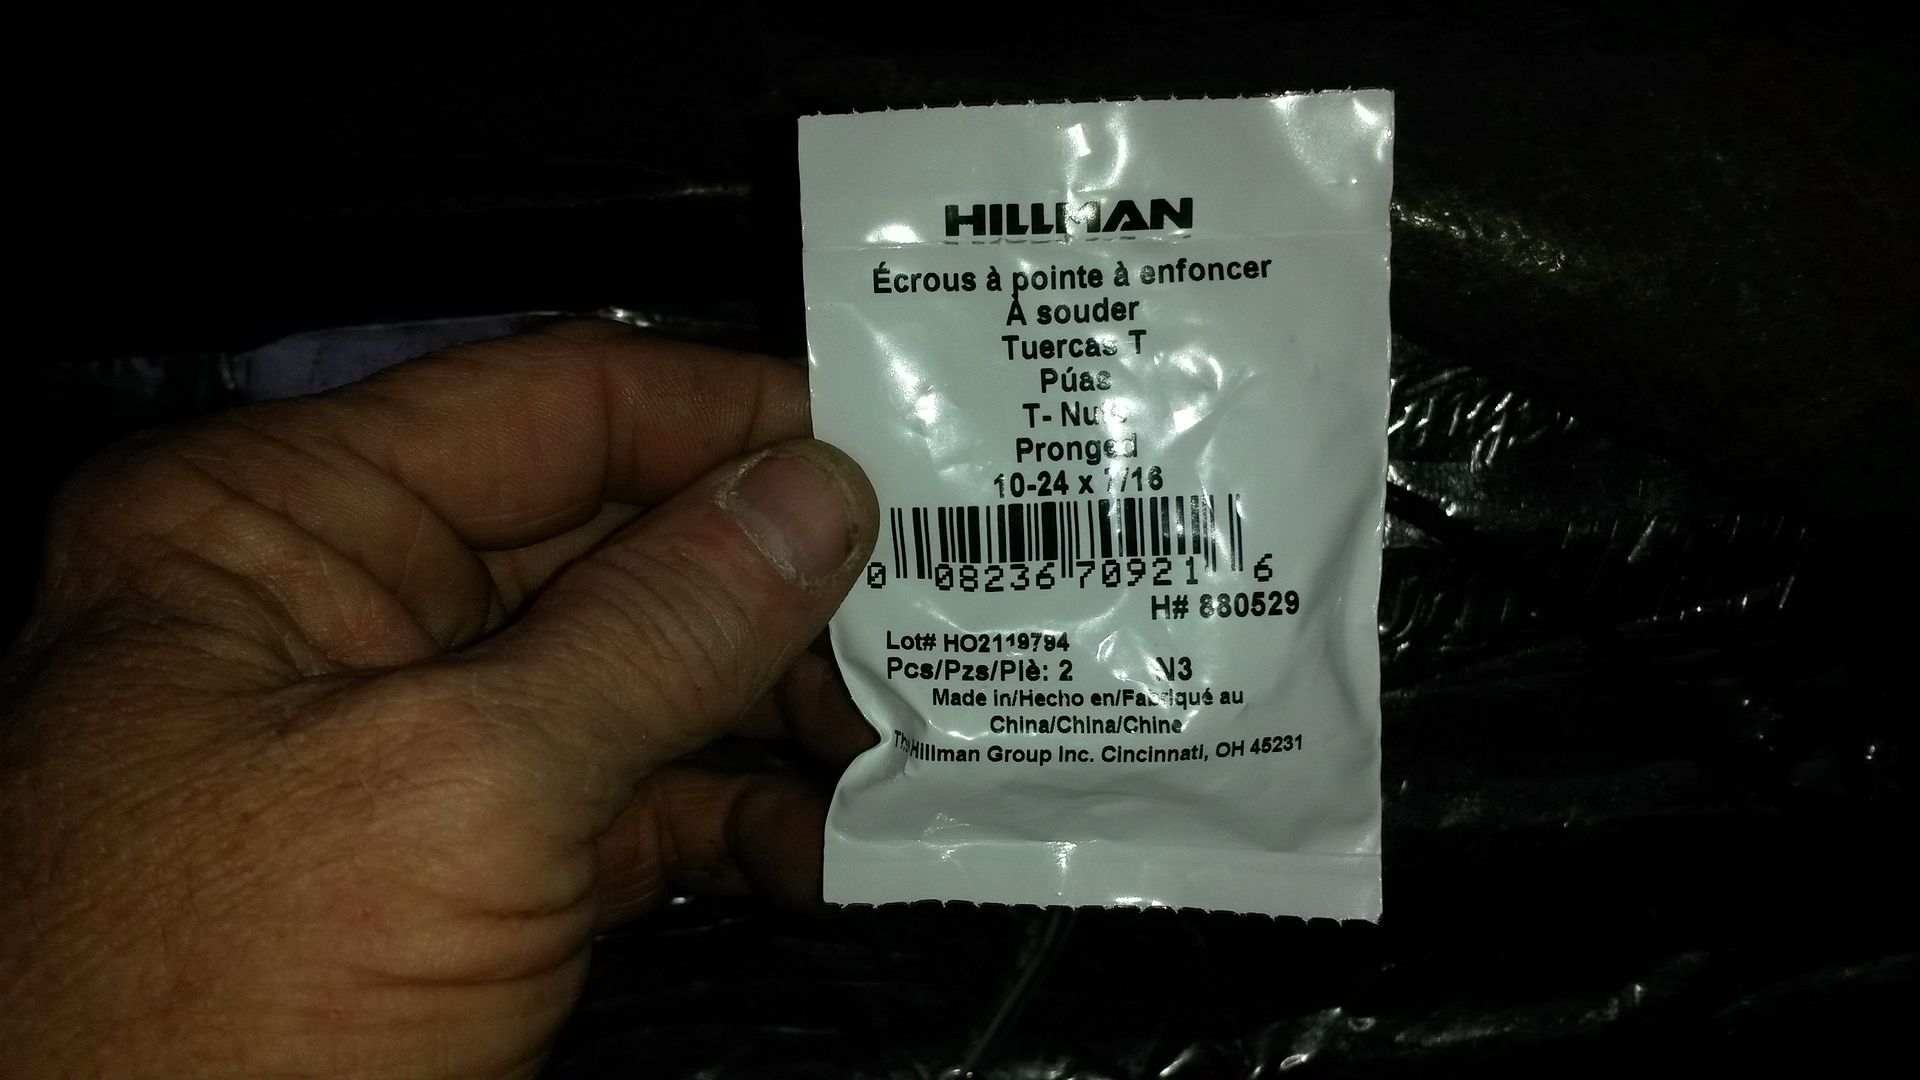 [/IMG]
[IMG] [/IMG]
The back of the Rockford Fosgate PBR300x2 sits flush on the plywood, so the nuts needs recessed. I just ground out a small area on both 1/4" pilot holes so the nuts fit flush.
[IMG] [/IMG]
[IMG] [/IMG]
[IMG] [/IMG]
[IMG] [/IMG]
This is what will be used to secure the amp/plywood to the backside fiberglass.
[IMG] [/IMG]
I will be able to remove it here.
[IMG] [/IMG]
[IMG] [/IMG]
I was able to get the camera in the jack storage area for a pretty good shot of the amp installed.
[IMG] [/IMG]
I'm using 12 gauge speaker wire from the amp to the hidden subwoofer
[IMG] [/IMG]
here's a view installed with all the wiring connected.
[IMG] [/IMG]
The amplifier main power is driven directly off the battery. The wires feeding the + and - of the amp are both 8 gauge wires. The side post terminals of our Vettes don't give us much to connect to. I took a razor (yea, I know, right?) and trimmed just enough to get a 3/8" SOLDERED ring terminal. Soldered is capped for a reason. I did both + and - this way. This insures when you close the battery lid, all the wiring is behind you. I also installed an inline fuse for the + side of the amplifier. It came in the 10 dollar kit from Amazon, that also provided me with most of the wiring duties in this project. It is recommended the fuse be located within 2 feet of the battery. Cant get much closer than this. And yes, I had to drill two (2) 1/8" holes here to secure the fuse holder. *Note the stainless steel screws holding the fuse assembly. Even in this corrosive environment, these screws should remain in good shape.
[IMG] [/IMG]
I should note before I installed the heat/soundproofing to the floorboard and installed the carpeting, I ran the amp trigger wire with two extra wires that go to nothing...for now. But I've learned from experience plan for the future. Just like your home really cant have too many outlets, my car should be treated the same way. I also ran a power, ground and trigger wire back to the area where the antenna resides. I plan a future electric antenna here. These wires are now neatly tucked into the radio area for any future plans. I popped the hidden subwoofer back into it's new home and fired up the radio. I ended up pulling the amp for final adjustments with the top up, doors closed and tweeked the gain, popped a Pink Floyd mp3 into the newly modded ashtray and kicked back in the drivers seat and enjoyed Wish You Were Here and a few other Floyd songs before before finishing up with Randy Travis's "Boy's 'Round Here". After setting the frequency and the gain once more, I can indeed say the Rockford Fosgate PBR 300x2 (in bridged mode) powers the Infinity Reference 860w as if the two were designed to work with one another in a perfect marriage. The sound isn't like your neighbor's kid's boom box taking up the entire back seat, not was it meant to. What it was meant to do is provide a crisp, clean, hard and tight subwoofer sound. If you want more boom, feel free to turn the gain up. I had to turn it down as it was TOO MUCH boom for my tastes. After a few settings of the gain and frequency signal, this mod has indeed came together in stellar fashion, improving the sounds in the cabin 100 fold, and then some. All installed. All invisible. Best of all...All done with this project!
[IMG] [/IMG]
[IMG] [/IMG]
Here is the view of the area I'll be mounting the amplifier to. It's basically the backside of the area directly behind the passenger seat, inside the jack storage area.
[IMG]
 [/IMG]
At first I had planned on mounting the amp to a piece of plywood with 4 screws and using liquid nails to secure the plywood to the fiberglass backboard. The storage area is just big enough for me to get my head in and a small light. Had I glued the board to the backing, I wouldn't have have had the required room to remove the 4 screws holding the amp to the plywood.
[IMG]
 [/IMG]
Time for a re-think. I went ahead and cut out a piece of plywood about the size of the amp. This little Fosgate is small, but packs quite a punch according to the reviews. Here's a picture of it next to my cell phone cover for size reference.
[IMG]
 [/IMG]
I mounted the amplifier to the plywood.
[IMG]
 [/IMG]
[IMG]
 [/IMG]
Since I couldn't simply glue the plywood, i opted to drill two (2) 3/16" holes in the fiberglass behind the passenger seat. I installed two blind nuts on the frontside of the plywood giving me a secure set of threads to bolt the amp board to the fiberglass backboard.
[IMG]
 [/IMG]
[IMG]
 [/IMG]
The back of the Rockford Fosgate PBR300x2 sits flush on the plywood, so the nuts needs recessed. I just ground out a small area on both 1/4" pilot holes so the nuts fit flush.
[IMG]
 [/IMG]
[IMG]
 [/IMG]
[IMG]
 [/IMG]
[IMG]
 [/IMG]
This is what will be used to secure the amp/plywood to the backside fiberglass.
[IMG]
 [/IMG]
I will be able to remove it here.
[IMG]
 [/IMG]
[IMG]
 [/IMG]
I was able to get the camera in the jack storage area for a pretty good shot of the amp installed.
[IMG]
 [/IMG]
I'm using 12 gauge speaker wire from the amp to the hidden subwoofer
[IMG]
 [/IMG]
here's a view installed with all the wiring connected.
[IMG]
 [/IMG]
The amplifier main power is driven directly off the battery. The wires feeding the + and - of the amp are both 8 gauge wires. The side post terminals of our Vettes don't give us much to connect to. I took a razor (yea, I know, right?) and trimmed just enough to get a 3/8" SOLDERED ring terminal. Soldered is capped for a reason. I did both + and - this way. This insures when you close the battery lid, all the wiring is behind you. I also installed an inline fuse for the + side of the amplifier. It came in the 10 dollar kit from Amazon, that also provided me with most of the wiring duties in this project. It is recommended the fuse be located within 2 feet of the battery. Cant get much closer than this. And yes, I had to drill two (2) 1/8" holes here to secure the fuse holder. *Note the stainless steel screws holding the fuse assembly. Even in this corrosive environment, these screws should remain in good shape.
[IMG]
 [/IMG]
 I should note before I installed the heat/soundproofing to the floorboard and installed the carpeting, I ran the amp trigger wire with two extra wires that go to nothing...for now. But I've learned from experience plan for the future. Just like your home really cant have too many outlets, my car should be treated the same way. I also ran a power, ground and trigger wire back to the area where the antenna resides. I plan a future electric antenna here. These wires are now neatly tucked into the radio area for any future plans. I popped the hidden subwoofer back into it's new home and fired up the radio. I ended up pulling the amp for final adjustments with the top up, doors closed and tweeked the gain, popped a Pink Floyd mp3 into the newly modded ashtray and kicked back in the drivers seat and enjoyed Wish You Were Here and a few other Floyd songs before before finishing up with Randy Travis's "Boy's 'Round Here". After setting the frequency and the gain once more, I can indeed say the Rockford Fosgate PBR 300x2 (in bridged mode) powers the Infinity Reference 860w as if the two were designed to work with one another in a perfect marriage. The sound isn't like your neighbor's kid's boom box taking up the entire back seat, not was it meant to. What it was meant to do is provide a crisp, clean, hard and tight subwoofer sound. If you want more boom, feel free to turn the gain up. I had to turn it down as it was TOO MUCH boom for my tastes. After a few settings of the gain and frequency signal, this mod has indeed came together in stellar fashion, improving the sounds in the cabin 100 fold, and then some. All installed. All invisible. Best of all...All done with this project!
[IMG]
 [/IMG]
[IMG]
 [/IMG]
Thread Starter
Pro
Joined: Nov 2013
Posts: 730
Likes: 37
From: Catoosa Okla
As soon as the weather clears, I'm going to implement the cooling solution. Though I haven't decided for sure, I'm leaning towards a ducted system, drawing cool air from outside, specifically from under the car, using the existing 3/4" hole for the jack box drain. There is enough room under the amp box to create a small rectangular duct leading to the amp. I have a near perfect fan setup off an old computer video card. The fans are built into a shroud that will fit the Fosgate with a little modding, The fans are 12v. I also don't believe this little amp is going to create a lot of heat, so much so, I plan on incorporating a temp actuated fan control using a small adjustable limit switch secured to the top of the amp. This way the fans only come on when the amp case reaches a preset temperature. Hopefully, I'll get started this weekend.

Team Owner


Joined: Jan 2006
Posts: 37,637
Likes: 3,116
From: Crossville TN
Reproducing low frequencies takes the most power in an audio system. If you turn the volume up much, the subwoofer amp will generate a lot of heat. And, if it gets too hot, that amp will start cutting out (if it has overtemp protection) or fail.









