When you click on links to various merchants on this site and make a purchase, this can result in this site earning a commission. Affiliate programs and affiliations include, but are not limited to, the eBay Partner Network.
Hi, I was hoping for some help on installing the RISER section of new carpet in my 72 coupe. I bought a new set of carpets from ACC, Auto Custom Carpets Inc a couple months back. I'm just now getting to install it. The old OEM riser carpet wasn't present so I don't have anything to go by, just the new carpet riser piece.
First, how far down should the riser center section go? i.e., does the center section notch that's already cut out, slide down over the middle console hump and cover up the bolt hole that holds the backside of the console? (This is the bolt hole that's inside the very rear of the center console... It mates with the nut that you have to put on inside the rear compartment section.
Or should the top of the center notch in the riser be placed just above that bolt hole?
Next, What holds the center section of the riser that folds over the top, down towards the rear compartment section... Is it supposed to fit under the front lip of the rear compartment frame?
I do know the front bottom edges are supposed to just cover up the bottom edge of the front floor pan carpets, but they've made these pieces so darn large, I'm not sure how much to trim off. It does look like I have to trim on all sides to get it to fit. Even the center notch isn't wide enough to fit as is.
Thanks in advance, Joe H.
PS-please read my other post on the large T rear section of new carpet too...I need some advice on that piece too....
Hi jh,
The seat riser is a difficult piece to install well.
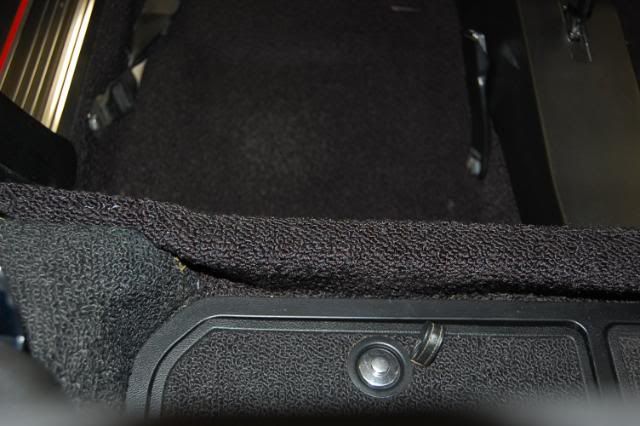
The back side tucks under the plastic frame for the three storage compartments.
Not easy to do…. it wants to slip out as you push the frame down into place. I used small pieces of duct tape to hold the carpet.
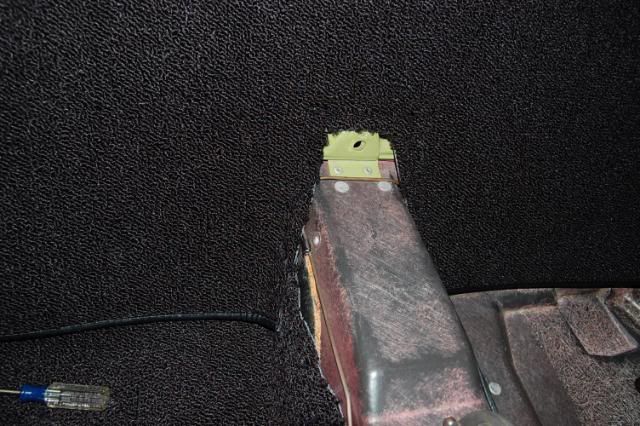
The position on the seat side…. the carpet must first be placed so the bottom of it touches the footwell carpet where you want it to. Then you may or may not need to trim so the carpet just touches the fiberglass tunnel below the bolt hole for the e-brake console bolt. Mine turned out to be above the hole but you MUST check that the e-brake console will cover the cut edge of the carpet.
Lastly you trim the carpet so just the 'right' amount extends under the storage door frame.
Regards,
Alan
How is the front edge of the wheel well pieces supposed to fit around the front of the wheel well? Is it supposed to tuck into the crevice between the wheel well and the B-pillar, and where exactly does the bottom edge that goes under the compartment frame meet up with the riser bottom edge. I assume at the front angled corner of the frame somewhere. My carpet was long gone, so don't really have a reference to go by. The molded pieces from Mid America seem to be cut way oversize, so am having a hard time determining how it all butts together as far as the riser piece and the wheel well pieces. Any help will be greatly appreciated, and more pictures of that area in front of the wheel well, and behind the riser would help greatly, if it is not to much trouble. The job you did on yours looks great, wanting mine to come out looking pretty good also. What type of adhesive did you use on the wheel well pieces that allowed you to get them in and stuck without causing to much trouble. From going thru all the posts, I know these pieces are not easy to fit, so looking for all the little tricks that I can.
Hi W,
The front edge of the wheel well pieces do get tucked down between the fiberglass underbody and the steel seat bulkhead,
Just a tint part of the wheel well piece is tucked under the compartment frame. This helps in not seeing any carpet gap there.
The edge along the compartment floor tucks under the compartment floor just a little bit too.
I used regular interior adhesive sparingly to help hold the wheel well piece snugly to the wheel arch.
This is a job that takes lot's of patience and cut ONLY when you're absolutely sure.
Regards,
Alan
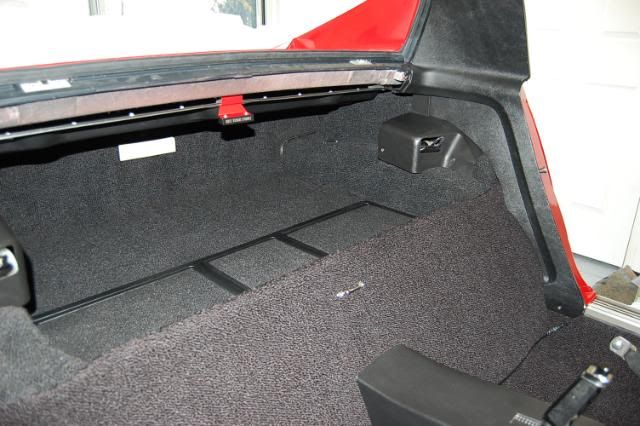
If you look carefully you can differentiate between the bulkhead piece and the wheel well piece AND see the tuck behind the bulkhead AND see the 1/4" that gets tucked under the compartment frame.
Hi W,
The front edge of the wheel well pieces do get tucked down between the fiberglass underbody and the steel seat bulkhead,
Just a tint part of the wheel well piece is tucked under the compartment frame. This helps in not seeing any carpet gap there.
The edge along the compartment floor tucks under the compartment floor just a little bit too.
I used regular interior adhesive sparingly to help hold the wheel well piece snugly to the wheel arch.
This is a job that takes lot's of patience and cut ONLY when you're absolutely sure.
Regards,
Alan
If you look carefully you can differentiate between the bulkhead piece and the wheel well piece AND see the tuck behind the bulkhead AND see the 1/4" that gets tucked under the compartment frame.
Thanks for that info and detailed picture. Does the front edge of the upper half of the wheel well piece also get tucked into the crevice created between the wheel well and door frame, or does it span that distance and just go behind the quarter panel? My 68 doesn't have the shoulder belt option so its kind of hard to tell where to position it for a good starting point. the rear of the piece seems to fit pretty good though without trimming it, so I'm thinking they left most of the excess on the front edge. Beautiful car by the way, probably looks better than the day it left the showroom floor!
Hi w,
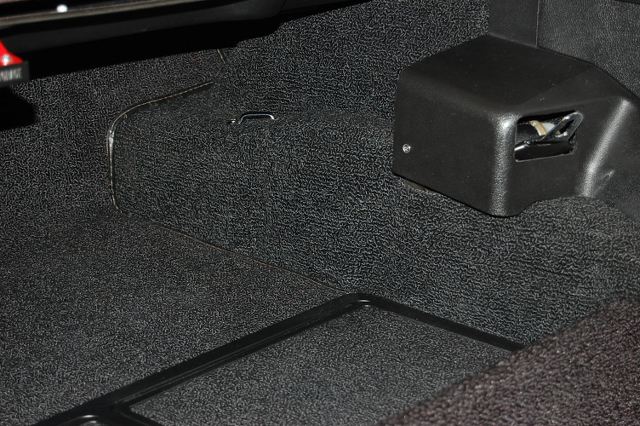
Here you can see the wheel well carpet tucking behind the upper lock pillar (note right side) and then the carpet still tucked behind the quarter trim.
Regards,
Alan
Hi w,
Here you can see the wheel well carpet tucking behind the upper lock pillar (note right side) and then the carpet still tucked behind the quarter trim.
Regards,
Alan
From that picture it looks like both the riser piece and the wheelwell piece get tucked in between the riser and wheelwell. That's good to know. So the wheelwell piece doesn't actually curve around the front of the wheelwell and butt up against the inside of the body rear quarter, just kind of makes a 90 degree bend toward the middle of the car and lays against the backside of the primered frame of the lock pillar? That makes things a little easier. I think I was making it more difficult by trying to get it to curve around the front of the wheelwell and still follow the frame of the cargo compartment. Thanks again for the pictures and explanation. What is that 1" thick rubber looking piece in your picture behind the lock pillar? Is that to make the area flat behind the pillar instead of being inset?
Just pulled my carpet out this weekend with lots of pictures. Is this the area your still looking for?
BTW Alan nice pics
yeah, right where all that goo is, that is the area I was interested in. If there was a shot taken after all the goo is removed, looking at the back side of the door lock pillar, how it transitions from the front of the wheelwell to the door pillar. That's a funny pic there, must have had a rattle or something back there.
Hi W,
It looks to me as though the spray insulation was intended to take the place of the foam baffles normally installed there.
Here are a couple more photos of the area.
Regards,
Alan
Hi W,
It looks to me as though the spray insulation was intended to take the place of the foam baffles normally installed there.
Here are a couple more photos of the area.
Regards,
Alan
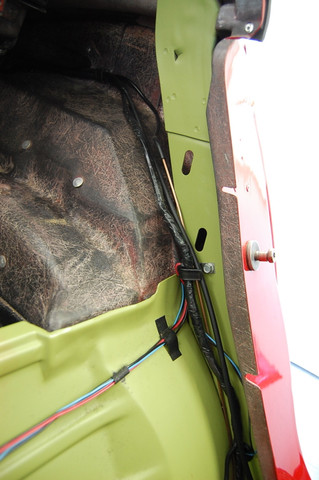
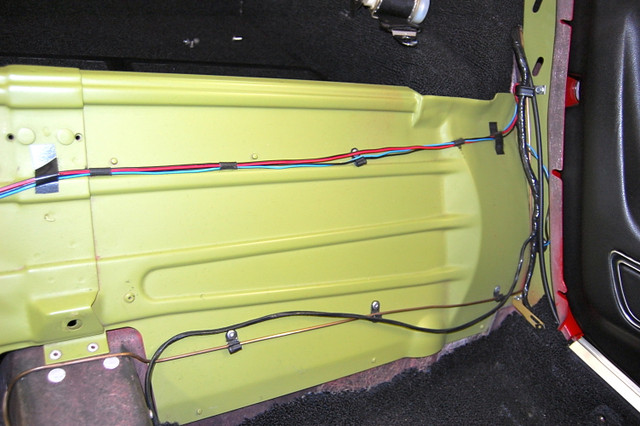
Interesting, looks like your rear light harness runs along the top back edge of the wheelwell, where mine was run along the first hump in the wheelwell. I think I will route mine like that so the carpet will lay flat there. Those are the pictures I was looking for. So that foam piece in one of your pictures is a baffle of sorts that fit against the back of the lock pillar? While were in this area of the car, when I took the two trim pieces off of the quarter panels, several of the threaded inserts came out with the screws. Are there readily available replacements for those that can be epoxied back in place, or should I just go to a hardware store and get some machine screw inserts and use machine screws and install those. Quarters are in good shape besides the fact that the inserts came out and are pretty much part of the screw now.
Hi W,
Yes, the rear lighting harness and the radio antenna cable run along the top of the wheel-well and are easily concealed by the wheel-well carpet.
There was a foam baffle for each side. Shaped a bit like the state of Texas.
There are replacement kits for the blind nuts used on the interior quarter trim. You might very well find something at the hardware store.
Try to be able to reuse the screws… they're a bit odd...very small machine thread, cross recess, oval head, counter sunk, and chrome plated. They're needed to snug down properly into the metal trim in the door jamb.
Regards,
Alan
Hi W,
Yes, the rear lighting harness and the radio antenna cable run along the top of the wheel-well and are easily concealed by the wheel-well carpet.
There was a foam baffle for each side. Shaped a bit like the state of Texas.
There are replacement kits for the blind nuts used on the interior quarter trim. You might very well find something at the hardware store.
Try to be able to reuse the screws… they're a bit odd...very small machine thread, cross recess, oval head, counter sunk, and chrome plated. There're needed to bury down into the metal trim in the door jamb.
Regards,
Alan
That was the problem with the screws, somebody used sheetmetal trim screws in them, so I'll probably have to look into replacement kits to see what thread pitch the machine screws are supposed to be. Thanks.
Actually it’s not spray insulation, it’s a crumbled up foam material like out of a seat cushion, it’s on both sides I assume original to what was used in 1969 which I neglected to mention 69.
Hi Rick,
I don't remember reading anything or seeing anything like that indicates that was done in St.Louis.
I'm pretty sure we're looking at an owner inspired installation.
Regards,
Alan
If you say it my money is on you! It sure looks as old as the original seats. I do now see it is used on the two corners of the window tray too. I'll make note not to reinstall it back in there. Lol thanks







 1972 coupe carpet install question -RISER-