

C3 General General C3 Corvette Discussion not covered in Tech
Sponsored by:
Sponsored by:

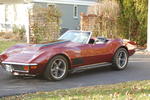
72 Vert Lite RestoMod Project
Thread Tools
 
Search this Thread
 
Old Jun 7, 2014 | 08:13 AM
  #1  
Ranger24's Avatar
Ranger24
Thread Starter
Pro
 
Joined: Jan 2011
Posts: 586
Likes: 10
From: Alexandria VA
Default 72 Vert Lite RestoMod Project

Ok, I'm starting this sooner than planned but because an engine issue has cropped up that may cause it to detonate I've decided to park it and start on the restoration work now. The approach I'm taking is to work on the bottom half of the car moving from the stern to the bow and then do the motor and interior.

The first thing I am doing is dropping the fuel tank, removing the tail light assemblies and bumper brackets so I can begin working the frame issues. I plan to knock the rust back and spray as much of the frame as I can with rust inhibitor. With the tank out of the way this becomes a much easier job I believe.

The following photos are of the various pieces I am focusing on now and as progress moves forward I will continue to share. Currently, I've removed the fuel from the tank (truck is now half full) and removed the connections from the sending unit. As you may be able to see in the photos I have already run into an issue. The male end on the sending unit was frozen into the wiring harness so I'll need to address that when the new tank goes in. Today the tank comes down.


Enjoy the ride.
Attached Images    

Last edited by Ranger24; Jun 7, 2014 at 08:16 AM.

Reply
Old Jun 7, 2014 | 08:15 AM
  #2  
Ranger24's Avatar
Ranger24
Thread Starter
Pro
 
Joined: Jan 2011
Posts: 586
Likes: 10
From: Alexandria VA
Default

More photos:
Attached Images    
Reply
Old Jun 7, 2014 | 03:04 PM
  #3  
Ranger24's Avatar
Ranger24
Thread Starter
Pro
 
Joined: Jan 2011
Posts: 586
Likes: 10
From: Alexandria VA
Default

Tank is out along with all the bumper brackets and wiring harness. Bracket bolts were a *&^*&%.
Attached Images  
Reply
Old Jun 7, 2014 | 03:08 PM
  #4  
Ranger24's Avatar
Ranger24
Thread Starter
Pro
 
Joined: Jan 2011
Posts: 586
Likes: 10
From: Alexandria VA
Default

Couple of pics of the frame once everything was out of the way, after a bit of grinding and then with the paint.
Attached Images    
Reply
Old Jun 8, 2014 | 03:54 PM
  #5  
Ranger24's Avatar
Ranger24
Thread Starter
Pro
 
Joined: Jan 2011
Posts: 586
Likes: 10
From: Alexandria VA
Default

Got the back end grinded and painted.
Attached Images   
Reply
Old Jun 8, 2014 | 04:01 PM
  #6  
Ranger24's Avatar
Ranger24
Thread Starter
Pro
 
Joined: Jan 2011
Posts: 586
Likes: 10
From: Alexandria VA
Default

I found this mounted behind the left rear body mount. Is this the car horn...seems like an odd place for the car horn and I can't find this on Ecklers or Zip.

Anyone know what it is?
Attached Images  
Reply
Old Jun 8, 2014 | 04:13 PM
  #7  
GRipp 73's Avatar
GRipp 73
Burning Brakes
10 Year Member
 
Joined: Sep 2010
Posts: 822
Likes: 82
From: Columbus OH
Default

Originally Posted by Ranger24
I found this mounted behind the left rear body mount. Is this the car horn...seems like an odd place for the car horn and I can't find this on Ecklers or Zip.

Anyone know what it is?
That is the horn for your alarm system
Reply
Old Jun 8, 2014 | 04:24 PM
  #8  
Ranger24's Avatar
Ranger24
Thread Starter
Pro
 
Joined: Jan 2011
Posts: 586
Likes: 10
From: Alexandria VA
Default

Originally Posted by GRipp 73
That is the horn for your alarm system
Thanks!
Reply
Corvette Stories

The Best of Corvette for Corvette Enthusiasts

story-0

10 Reasons the C6 Z06 is Still A Performance Benchmark After 20 Years

 Joe Kucinski
story-1

How Much Horsepower Every Corvette Engine "LOST" in 1972

 Joe Kucinski

story-2

Top 10 DOs and DON'Ts for Protecting Your Convertible Top!

 Michael S. Palmer
story-3

Top 10 Most Explosive Corvettes Ever Made: Power-to-Weight Ratio Ranked!

 Joe Kucinski

story-4

150 hp to 1,250 hp: Every Corvette Generation Compared by the Specs That Matter

 Joe Kucinski

story-5

8 Coolest Corvette Pace Cars (and Replicas) of All Time

 Verdad Gallardo
story-6

Top 10 Corvette Engines RANKED by Peak Torque (70+ Years of Muscle!)

 Joe Kucinski

story-7

Corvette ZR1X Will Be Pacing the Indy 500, And Could Probably Race, Too!

 Verdad Gallardo
story-8

Top 10 Corvettes Coming to Mecum Indy 2026!

 Brett Foote

story-9

Top 10 C9 Corvette MUST-HAVES to Fix These C8 Generation Flaws!

 Michael S. Palmer
Old Jun 8, 2014 | 04:49 PM
  #9  
Ranger24's Avatar
Ranger24
Thread Starter
Pro
 
Joined: Jan 2011
Posts: 586
Likes: 10
From: Alexandria VA
Default

Anyone have any thoughts on how to fix this little problem? The male end from the fuel sending unit broke off in the connector.
Attached Images  
Reply
Old Jun 8, 2014 | 05:52 PM
  #10  
DBez93's Avatar
DBez93
Instructor
10 Year Member
 
Joined: Feb 2014
Posts: 104
Likes: 1
Default

Good luck with the project, I'm following it, as for the connector, buy a new one & crimp it in place, an entirely new harness would be a total pain, but I've cracked into the center console to see an electricians nightmare in my car, so when the time (& money) come to truly tear apart the car, wiring is going to be a high priority after sanding & painting the frame... 30+ year old wiring is never to be trusted
Reply
Old Jun 8, 2014 | 07:02 PM
  #11  
doorgunner's Avatar
doorgunner
2026 Loser of the Year
Supporting Member
10 Year Member
Veteran: Army
Photogenic
Photoriffic
 
Joined: Sep 2013
Posts: 36,582
Likes: 7,020
From: New Or-leens Loo-z-anna
Default

Originally Posted by Ranger24
Anyone have any thoughts on how to fix this little problem? The male end from the fuel sending unit broke off in the connector.
If there is enough still protruding from the sending unit, you could clean off the rust and solder an extension to it........
then as the other member said------Buy a new connector/
cut off the rusted connector/
slip heat-shrink onto the original wiring/
splice the new connector into the original wiring/
SOLDER the splices/
slide the heat shrink over the soldered connections and heat-shrink it.
Reply
Old Jun 9, 2014 | 11:16 AM
  #12  
Ranger24's Avatar
Ranger24
Thread Starter
Pro
 
Joined: Jan 2011
Posts: 586
Likes: 10
From: Alexandria VA
Default

Originally Posted by doorgunner
If there is enough still protruding from the sending unit, you could clean off the rust and solder an extension to it........
then as the other member said------Buy a new connector/
cut off the rusted connector/
slip heat-shrink onto the original wiring/
splice the new connector into the original wiring/
SOLDER the splices/
slide the heat shrink over the soldered connections and heat-shrink it.
There wasn't anything protruding. I have located a replacement and plan to do just as you suggest by using the solder/heat shrink approach. There are a few other areas that need the same treatment.
Reply
Old Jun 9, 2014 | 08:48 PM
  #13  
doorgunner's Avatar
doorgunner
2026 Loser of the Year
Supporting Member
10 Year Member
Veteran: Army
Photogenic
Photoriffic
 
Joined: Sep 2013
Posts: 36,582
Likes: 7,020
From: New Or-leens Loo-z-anna
Default

Thanks for the update....keep us informed.
Reply
Old Jun 10, 2014 | 06:08 AM
  #14  
terrys6t8roadster's Avatar
terrys6t8roadster
Melting Slicks
10 Year Member
 
Joined: May 2012
Posts: 2,192
Likes: 343
From: Allenton Wisconsin
Default

Originally Posted by Ranger24
Anyone have any thoughts on how to fix this little problem? The male end from the fuel sending unit broke off in the connector.
If the plastic housing is OK, they sell new copper ends, both male & female that you can replace. You should be able to get them from any good parts house. T
Reply
Old Jun 15, 2014 | 11:51 AM
  #15  
Ranger24's Avatar
Ranger24
Thread Starter
Pro
 
Joined: Jan 2011
Posts: 586
Likes: 10
From: Alexandria VA
Default

Originally Posted by terrys6t8roadster
If the plastic housing is OK, they sell new copper ends, both male & female that you can replace. You should be able to get them from any good parts house. T
Thanks, I'll give that a try.
Reply
Old Jun 15, 2014 | 11:57 AM
  #16  
Ranger24's Avatar
Ranger24
Thread Starter
Pro
 
Joined: Jan 2011
Posts: 586
Likes: 10
From: Alexandria VA
Default

This weekend, as I wait on parts, I started cleaning up the bumper brackets and lower fuel tank cross member.
Attached Images    
Reply
Old Jun 15, 2014 | 12:01 PM
  #17  
Ranger24's Avatar
Ranger24
Thread Starter
Pro
 
Joined: Jan 2011
Posts: 586
Likes: 10
From: Alexandria VA
Default

After a lot of grinding with discs and wire wheels the brackets are now cleaned and painted.
Attached Images     
Reply

Get notified of new replies

To 72 Vert Lite RestoMod Project

Old Jun 16, 2014 | 06:52 PM
  #18  
72LS1Vette's Avatar
72LS1Vette
Safety Car
20 Year Member
 
Joined: Aug 2001
Posts: 4,883
Likes: 11
From: North Easton Mass
Default

What are you painting the parts with? If you aren't using a base prep like RustBullet or POR-15 you may be just wasting your effort. Grinding to bare metal is good but ordinary paint will start rusting again very quickly.


Rick B.
Reply
Old Jun 17, 2014 | 03:25 PM
  #19  
Ranger24's Avatar
Ranger24
Thread Starter
Pro
 
Joined: Jan 2011
Posts: 586
Likes: 10
From: Alexandria VA
Default

Originally Posted by 72LS1Vette
What are you painting the parts with? If you aren't using a base prep like RustBullet or POR-15 you may be just wasting your effort. Grinding to bare metal is good but ordinary paint will start rusting again very quickly.


Rick B.
Thanks for the heads up, I appreciate the input. I'm using Eastwood Rust Ecapsulator, which acts as a primer and rust inhibitor. According to the tech at the company it can be sprayed on clean rust or clean bare metal.
Reply
Old Jun 17, 2014 | 06:09 PM
  #20  
Ranger24's Avatar
Ranger24
Thread Starter
Pro
 
Joined: Jan 2011
Posts: 586
Likes: 10
From: Alexandria VA
Default

Parts for the tank came in along with the tail light housings. I couldn't wait for the weekend so I assembled the tank with the exception of the sending unit. I won't put that on until the tank is mounted in the car.
Attached Images   
Reply


All times are GMT -4. The time now is 08:38 AM.

story-0
10 Reasons the C6 Z06 is Still A Performance Benchmark After 20 Years

Slideshow: 10 reasons why the C6 Z06 is still a performance benchmark after 20 years.

By Joe Kucinski | 2026-05-27 17:20:09


VIEW MORE
story-1
How Much Horsepower Every Corvette Engine "LOST" in 1972

Slideshow: How much horsepower every Corvette engine lost in 1972.

By Joe Kucinski | 2026-05-27 16:54:53


VIEW MORE
story-2
Top 10 DOs and DON'Ts for Protecting Your Convertible Top!

Slideshow: How to Protect A Convertible Top: 10 DOs & DON'Ts

By Michael S. Palmer | 2026-04-03 00:00:00


VIEW MORE
story-3
Top 10 Most Explosive Corvettes Ever Made: Power-to-Weight Ratio Ranked!

Slideshow: The 10 most explosive Corvettes ever built based on power-to-weight ratio.

By Joe Kucinski | 2026-05-20 07:23:03


VIEW MORE
story-4
150 hp to 1,250 hp: Every Corvette Generation Compared by the Specs That Matter

Slideshow: From C1 to C8 we compare every Corvette generation by the numbers.

By Joe Kucinski | 2026-05-12 16:54:12


VIEW MORE
story-5
8 Coolest Corvette Pace Cars (and Replicas) of All Time

Slideshow: Some Corvette pace cars became collectible legends, while others perfectly captured the look and attitude of their era.

By Verdad Gallardo | 2026-05-11 09:50:51


VIEW MORE
story-6
Top 10 Corvette Engines RANKED by Peak Torque (70+ Years of Muscle!)

Slideshow: Ranking the top 10 Corvette engines by torque output.

By Joe Kucinski | 2026-05-05 11:58:09


VIEW MORE
story-7
Corvette ZR1X Will Be Pacing the Indy 500, And Could Probably Race, Too!

Slideshow: A Corvette pace car nearly matching IndyCar speeds sounds exaggerated, until you look at the numbers.

By Verdad Gallardo | 2026-05-04 20:03:36


VIEW MORE
story-8
Top 10 Corvettes Coming to Mecum Indy 2026!

Among a rather large group of them.

By Brett Foote | 2026-05-04 13:56:44


VIEW MORE
story-9
Top 10 C9 Corvette MUST-HAVES to Fix These C8 Generation Flaws!

Slideshow: the top 10 things Corvette owners want in the C9 Corvette

By Michael S. Palmer | 2026-04-30 12:41:15


VIEW MORE