When you click on links to various merchants on this site and make a purchase, this can result in this site earning a commission. Affiliate programs and affiliations include, but are not limited to, the eBay Partner Network.
Update: The Junkyard trip. I am back from the pick and pull Junkyard and I got myself a really nice, dual electric fan set, that have a built in shroud and nearly fit the C3 radiator perfectly. The best part, was how easy it was!
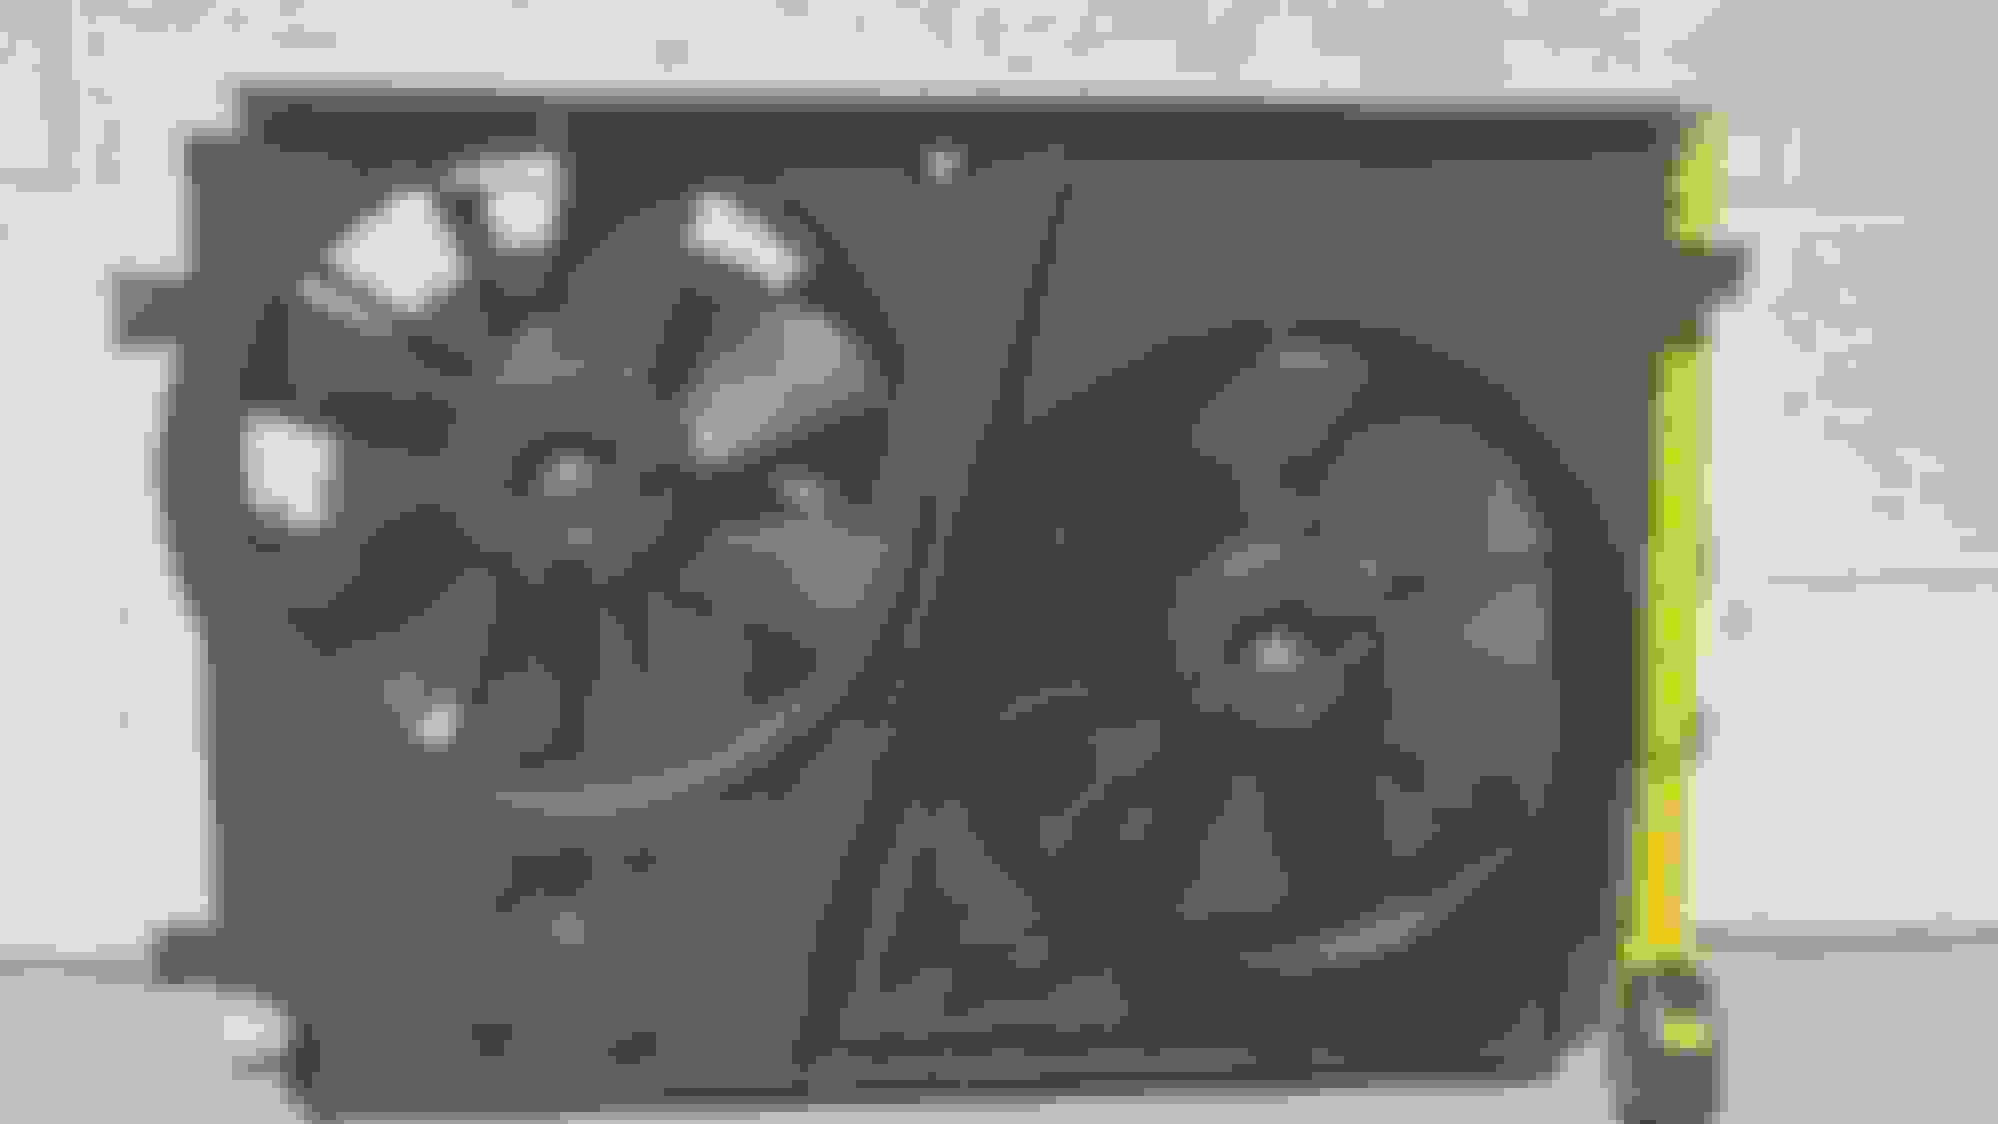
After wandering around, I went back to the 90's Camaro with the 3.8L V6 and the radiator has almost the same tilt as the C3. So I removed the four 10mm bolts on the top plate and pulling the plate off, I found to my pleasant surprise, that was all, that was holding both the radiator and the electric fans and shroud in!
You remove the hoses and pull straight up. No screws, nuts, bolts. Nothing, but a four tabs that seat the square plastic shroud, into the radiator itself. One set of the fan wires goes to the throttle body and the other goes into the engine harness, no connector, so I had to cut those, where it went into the harness.
There are two wires going into each fan and I used my multimeter to check them, on the spot, simply driving the probes into the connector on the back of each fan. They both measured 5-7 ohms, spun freely and that was good enough for me. If they were open or shorted, I would've passed, but they're going to work just fine.
Darn near a perfect fit too. Will put up pics as I install them.
Forgot to mention. $41..., with a warranty. Some elbow grease, some Simple Green and a bucket, Then, I went at it with a plastic or vinyl conditioner and it looks brand new. Nice design. Ducted fans, enclosed in a duct themselves in the one piece square shroud, with seven fat blades. The duct ring has a curved surface on the outer circumference.
The shroud itself has a 1/2 inch standoff edge, built in, all the way around and it sits just above the surface of the radiator. No rubber cushion needed, but I'm going to lay some vacuum hose on the edge, cut edgewise, so it doesn't damage the soft aluminum radiator either.
We've got pics. I just figured out again, that I can take out the Micro SD card out of my phone and put it directly in the PC, versus trying to message my PC, with the awful reception we get at the shop (one bar, even!, like 1G).
Here's the fan, I pulled out of the Camaro this morning at the junkyard (ahhh, the smell of oil soaked dirt, old upholstery and cars being made into carcasses)
It took me less than 15 minutes to pull it! Oh, and if you have to lay underneath, pull a seat bottom out of the car next to you. Much more comfy and clean!
Front of fan... 25" side to side.
Rear of fan... 17 1/2" top to bottom
Fan Thickness... 3 1/2", except for fan motors in center. Note flange on sides, more like 1" or so and not the 1/2" I estimated earlier.
Tested the fans with power, they blow hard and make little noise, very smooth bearings. No rattle, wobbling or vibration, nicely balanced. Love how they look and they'll be welcome in my engine compartment!
Here's the fit on the radiator. Just about a perfect fit, with very little to do, to make them work.
Fan on Radiator
The flange on both top and bottom, sits perfectly on the upper and lower sheet metal edges on the aluminum radiator. Overall, not a floppy piece that you can flex. Pretty rigid too. I'd call this a success and for what little I spent and an hour cleaning it up, that's even better!
When picking out the fan, besides ohm'ng out the motor, use your finger to spin the blades on each fan. They should spin smoothly, with no roughness or contact of the outside edge of the duct, nor should they wobble. In fact, they should carry a little momentum and come quietly to a stop.
Man that looks nice! Good find too. Hurry up so we can see it mounted!
What kind of radiator is that?
Thanks for the kudos! This has been a blast. Now I'm researching what the 'trick' setup is out there. Looking at the Jeep Forums, Rangers, Nasty Z28, etc and apparently, the hot setup is the Volvo dual speed relay, along with the BMW dual temp sensor (so you don't have to run two different temp sensors, when you only have room for one). We don't have a dual speed fan, but why not run the low temp wire to one fan relay and the high temp wire to the second fan relay?
As far as the rad, it's a cheap aluminum replacement radiator from a local radiator shop. Works well enough, has never overheated, or leaked and seems well built enough, if crude.
We've got to put the engine in, but, before we do that, we went out and got a bunch of anodized fittings this afternoon at the local Speed Shop and John is working on the engine as we speak. The setup he's doing, is going to be very cool! Then after the engine goes in, radiator, then out to a Muffler Shop to get the exhaust system redone, to accomodate the block hugger headers, as well as redoing the crummy install, all the way back to the mufflers.
Mission today, was finding a Volvo and a BMW with the parts I wanted. Got to Junkyard #1 and kicked up the dust in 96 degree heat and bright sunshine. Note, get there earlier (slept in good though!) and bring a flashlight, even in the bright sunlight.
Half a dozen beemers and all were missing what looked like the dual temp sensor and the pigtail. They were all missing the radiator, but I didn't know where exactly I'd find it. I just assumed that I'd see it, somewhere, radiator, hose outlet/inlet, engine block. Got a lot of conflicting images, of where exactly it was on any BMW. Some of them, even had it in the backside of the block!
After cooling off, in the car, while doing the phone image search, went back a second time in the heat. Really tried to get a look at the backside of the block on the driver's side, but saw nothing. Got back in the car and drove ten miles up the same road, to Junkyard #2.
Now we're talking!
This is hilarious, not only because, the relay is right on top of the radiator in the open, it's just as easy to remove as the Camaro radiator! Not a single screw, nut, bolt, it slides out as a friction fit. To me, the important part, is getting the pigtail or pigtails! Because you can buy a new one, but how are you going to hook it up?
Ripped and torn violently out of the Volvo, like a raven tearing the insides of a cute bunny rabbit that died in the middle of the road (actually, carefully clipped out, to maximize wire length!)
Hey a BMW! The cheap tool set, is a cheap tool set, but means I don't have to get it out of my box and then put it back, though it's lacking a meaty pair of linesman style pliers and a Channel Lock;
Closing in. Coming in hot and it looks complete and untouched.
That's right where it is, the BMW dual temp sensor. Right on the side of the radiator. But I'm not taking the sensor. I'll just buy a new one for $20-$30 at the auto parts store. I want the pigtail!
Note the distinct three prong plug. Went and found two more Beemers and I clipped the pigtails off. They are the exact same shape, but differ with the wire colors and they added a 'butt crack' to the flat back side, which means, it will still fit either sensor.
Ultimately, this is a dual purpose thread. First, to document a experiment, that's so far so good on the serpentine fan and now, the electric fan hookup, including the relays and sensors. I wanted to make sure, that the locations of the yard parts was shown, because if I'm pulling it, I can show you were I found it and from what.
Secondly, it's to see just how cheap you can do this. The relay and three pigtails were $14. So with the fan and the relays, we're at $54, add a max of $30 for a brand new BMW temp sensor - fan switch and that's $84! Not even a C-note for a complete electric fan setup that will fit in your C3.
Very nice thread F22, showing how to DIY projects on the cheap. Much like the electric headlight mod that Richards454 helped to make into a simple mod. I think I spent about $175 on that project. Works so slick, too bad it wasn't a factory design. Now I'm modding the vacuum wiper door system to electric. It's just too darn good of a mod not to do. Your serpentine conversion is very low buck compared to commercially available kits.
Very nice thread F22, showing how to DIY projects on the cheap. Much like the electric headlight mod that Richards454 helped to make into a simple mod. I think I spent about $175 on that project. Works so slick, too bad it wasn't a factory design. Now I'm modding the vacuum wiper door system to electric. It's just too darn good of a mod not to do. Your serpentine conversion is very low buck compared to commercially available kits.
Not looking to hijack this thread. But was wondering if you could post a link to
Richards454 headlight conversion?
Not sure who the question was aimed at, but the serp belt and electric fan conversion is going on a '74. Like the headlight conversion, I can't see, why it wouldn't work on any C3.
Sunday PM. Got into the shop late and I'm ready to go! Today is mount the relay. From one of the threads, there's a Chevy S-10 fender bracket, that has the correct tabs, to fit into the raised slots behind the relay. The Volvo piece, you'd have to cut off, just that section of plastic and then, that would be the holder, riveting it in the back.
Decided to make one instead. It might have been easier to go the Volvo route, but I didn't want some weird plastic L piece and good luck finding an S-10 in the yard, they're long gone and it's Tahoes and Colorado's now.
The plate and the relay. I did check, that a corner of the metal fit into the slot. There's a gripper wedge at the top, on the side of the relay, and once the metal tab is up there, it is very solidly clamped. Before cleaning it up and testing the fit.
Then I widened out the slots, with a thin dremel wheel and then used a small drill to clean it up, so the whole width of the tab went up inside. Make sure the holes are centered on both tabs. Test fit and you'll see. Note the bends I put into the tabs, to push them out from the firewall and have some room for the raised slots on the back of the relay.
Now the plate mounted on the firewall, with pop rivets. Solid as a rock. This spot (if you have it) is idea. The big red power wire is right there, next to the junction. The two thin yellow wires are behind the engine on the driver's side and will go straight up the intake manifold to the BMW Dual Temp sensor that will be on the driver's side of the intake manifold. The thick red and green wires go to the individual fans to power them up. Run them right along the fender with the vacuum hoses and it's gonna look alright.
Why the Volvo relay? From what I'm reading, it's a heavy duty relay set, very reliable and easy to wire up. Instead of a two or even little plug-in Relays that plug into the fuse box area, like the newer American pickups, this is a single unit that's completely potted in hard epoxy with waterproof, rubber gasketed electrical plugs. The schematic is printed, right there on the front! Two going in, in the center and two going out on the side and a power wire. How hard can that be? Made in Ireland even!
Now a peek into the engine plumbing for the heater hoses. We scrapped the longass heater line on the El Camino, yes it was dumb, but even a failure, can give you an idea.
Man that's a good looking engine. Can you post better pictures.
Thank You! The best pic, we have so far (less the braces and heater hose setup), is back on page 3 of this thread. I'm going to wait, until John gets the fuel lines and installs the fuel pressure gauge and then, I'll snap a new pic, as it will be done. Also, want to show the temp sensor-switch install on the driver's side of the manifold (where the plug is in now).
Next, installing the engine and then wiring up the new fan system. The BMW sensor will be here Monday and our local Auto Parts Store, delivers!
Designer Imagines A Corvette That Looks More Like a Corvette Than the Corvette
Slideshow: A Jaguar designer's personal project imagines what a modern front-engined Corvette might look like if Chevrolet revisited the golden age of the Stingray.