
Any "Factory Correct" Restorations going on?
 09-10-2015, 01:36 PM
#21
Burning Brakes


I have great respect for members who can afford/who are willing to put blood, sweat, and sometimes tears into restoring Corvettes. I appreciate a rebuilt stock 327 engine as a part of history!
Unfortunately I do not have the extra $30,000 above the $20,000 allocated-retirement "fund" to restore my "tractor-shed find" '68 basket-case.
Unfortunately I do not have the extra $30,000 above the $20,000 allocated-retirement "fund" to restore my "tractor-shed find" '68 basket-case.
 09-10-2015, 01:50 PM
#22
Burning Brakes
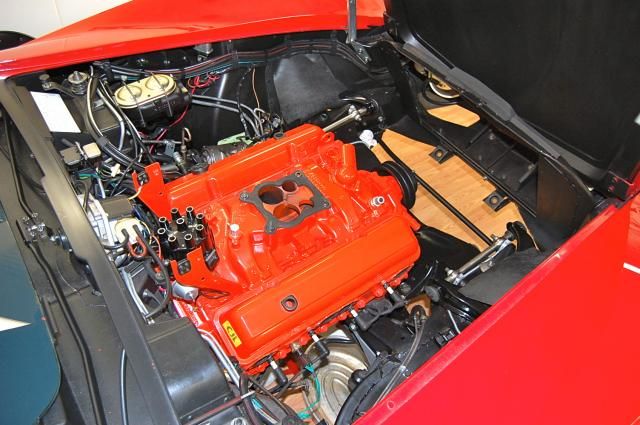
Ok, so here is an example of an exciting restoration project on my 72.
The charcoal vapor canister wasn't absorbing the fuel vapors anymore. Gas fumes were excessive in my garage when tank was full. I could not find any vendor that sold an exact duplicate of the original. I removed it, cut out half the grate on the bottom, put new charcoal and filters in it, repainted it and installed it. Exciting isn't it. Agonized over whether to use gloss, semi gloss, flat, semi flat, or satin paint. Total coat was less than $26. Would have been less, but I bought a large can of charcoal. I'll share it with my buddies .
The charcoal vapor canister wasn't absorbing the fuel vapors anymore. Gas fumes were excessive in my garage when tank was full. I could not find any vendor that sold an exact duplicate of the original. I removed it, cut out half the grate on the bottom, put new charcoal and filters in it, repainted it and installed it. Exciting isn't it. Agonized over whether to use gloss, semi gloss, flat, semi flat, or satin paint. Total coat was less than $26. Would have been less, but I bought a large can of charcoal. I'll share it with my buddies .
09-10-2015, 01:57 PM
#23
TheCorvetteBen

Im starting one on a 1978 Silver Anniversary L82 4-Speed car. Ill be making videos on it so stay tuned. Going as close to stock as I can get it.
www.youtube.com/user/thecorvetteben
subscribe for updates.
www.youtube.com/user/thecorvetteben
subscribe for updates.
09-10-2015, 02:24 PM
#24
Melting Slicks


Ok, so here is an example of an exciting restoration project on my 72.
The charcoal vapor canister wasn't absorbing the fuel vapors anymore. Gas fumes were excessive in my garage when tank was full. I could not find any vendor that sold an exact duplicate of the original. I removed it, cut out half the grate on the bottom, put new charcoal and filters in it, repainted it and installed it. Exciting isn't it. Agonized over whether to use gloss, semi gloss, flat, semi flat, or satin paint. Total coat was less than $26. Would have been less, but I bought a large can of charcoal. I'll share it with my buddies .
The charcoal vapor canister wasn't absorbing the fuel vapors anymore. Gas fumes were excessive in my garage when tank was full. I could not find any vendor that sold an exact duplicate of the original. I removed it, cut out half the grate on the bottom, put new charcoal and filters in it, repainted it and installed it. Exciting isn't it. Agonized over whether to use gloss, semi gloss, flat, semi flat, or satin paint. Total coat was less than $26. Would have been less, but I bought a large can of charcoal. I'll share it with my buddies .
Were you the person who originally posted this procedure on the forum? Very cool stuff!
Regards,
Stan
 09-10-2015, 02:52 PM
#25
Burning Brakes
Nah, that's where I learned how to do it. I was surprised that you can't find repros anywhere.
That and the QJ carbs are the only two parts I know of that aren't been reproduced. As time goes by, I'll probably find others.
That and the QJ carbs are the only two parts I know of that aren't been reproduced. As time goes by, I'll probably find others.
09-10-2015, 05:51 PM
#26
Team Owner

Member Since: Sep 2006
Location: Westminster Maryland
Posts: 30,173
Likes: 0
Received 2,878 Likes
on
2,515 Posts

Hi RR,
I'm thinking the fellow who had the thread with the instructions and pictures showing how to decapitate and refill the vapor canister is a fellow from Australia or New Zealand….I think!
Maybe Craig?
Yup! CraigH, Canberra, Australia!
Regards,
Alan
I'm thinking the fellow who had the thread with the instructions and pictures showing how to decapitate and refill the vapor canister is a fellow from Australia or New Zealand….I think!
Maybe Craig?
Yup! CraigH, Canberra, Australia!
Regards,
Alan
Last edited by Alan 71; 09-10-2015 at 06:11 PM.
09-10-2015, 06:50 PM
#27
Drifting


I feel to that since the aftermarket has so much more now to offer and the struggles to find quality made or reproduced parts to do a "factory" style restoration it is much easier to modify or "rod" than leave correct and stock. I have seen personally guys that horde OEM, NOS parts on the garage shelves at their home b/c they do not trust the foreign made parts, but that also hurts the guys trying to do a quality to stock resto. The vendors just don't have the parts. It is life it happens.
I like to be safe and only "upgrade" when necessary, brake lines is a good example. But like stated earlier, you're car, you're money, make it the way you want it, we all have a Corvette Dream and each Dream is different!
I like to be safe and only "upgrade" when necessary, brake lines is a good example. But like stated earlier, you're car, you're money, make it the way you want it, we all have a Corvette Dream and each Dream is different!
09-10-2015, 07:30 PM
#28
Melting Slicks
Did a search and that's who I came up with as well. Great solution to an often overlooked maintenance item! A little activated charcoal, some foam, a factory filter, and a large O ring... A little bit of work and you're good to go for another forty plus years.
By the way, I dismounted the two Firestones that were on wheels so now all three tires are ready to go. Hopefully, I'll be able to get you up here in a few weeks so you can take a look at them.
Regards,
Stan
09-10-2015, 07:53 PM
#29
Race Director

Thread Starter
 09-10-2015, 07:55 PM
#30
Race Director
Thread Starter
09-10-2015, 08:12 PM
#31
Team Owner
Member Since: Sep 2006
Location: Westminster Maryland
Posts: 30,173
Likes: 0
Received 2,878 Likes
on
2,515 Posts
Hi WB,
Yes, that's a current photo.
It all started when I came up with an original aluminum radiator.
The original from this car looks beautiful but 'weeps' along it's bottom tube.
The turkey pan is actually MY mother's pan. Anne and I use HER mother's pan for the turkey.
Regards,
Alan
Yes, that's a current photo.
It all started when I came up with an original aluminum radiator.
The original from this car looks beautiful but 'weeps' along it's bottom tube.
The turkey pan is actually MY mother's pan. Anne and I use HER mother's pan for the turkey.
Regards,
Alan
09-10-2015, 08:17 PM
#32
Team Owner
Member Since: Sep 2006
Location: Westminster Maryland
Posts: 30,173
Likes: 0
Received 2,878 Likes
on
2,515 Posts
Hi RR,
Thanks for the update! I do want to get those tires from you.
We're going to be away for a few weeks but I'll call you when we return.
Are you in Wisconsin or on your way? I continue to be a bit bummed about not going but it's proved to have been a good idea that we're still at home until next week.
Regards,
Alan
09-10-2015, 09:10 PM
#33
Le Mans Master

Willcox is doing some research, I sent them a couple of photos of mine.
Regards,
Dave
I have an AIM for my car, it's called Alan's Incredible Memory!
Last edited by 71 Green 454; 09-10-2015 at 09:13 PM.
09-11-2015, 05:59 AM
#34
Safety Car


 09-11-2015, 07:12 AM
#35
Team Owner
Member Since: Sep 2006
Location: Westminster Maryland
Posts: 30,173
Likes: 0
Received 2,878 Likes
on
2,515 Posts
Hi Green,
I believe that typically the sb steel valve cover grommet for the breather had the flat top while the bb valve cover has the round grommet�.but I'm unsure about the grommet in the LT-1's aluminum valve cover.
It's somewhat memory but more so a few sources to search through!
Regards,
Alan
I believe that typically the sb steel valve cover grommet for the breather had the flat top while the bb valve cover has the round grommet�.but I'm unsure about the grommet in the LT-1's aluminum valve cover.
It's somewhat memory but more so a few sources to search through!
Regards,
Alan
09-11-2015, 08:52 AM
#36
Race Director
Thread Starter
Here is a picture of first the BB then the LT 1.
Alan is correct on the BB with the round grommet and it is the same round found on the aluminum LT 1 valve cover grommet.
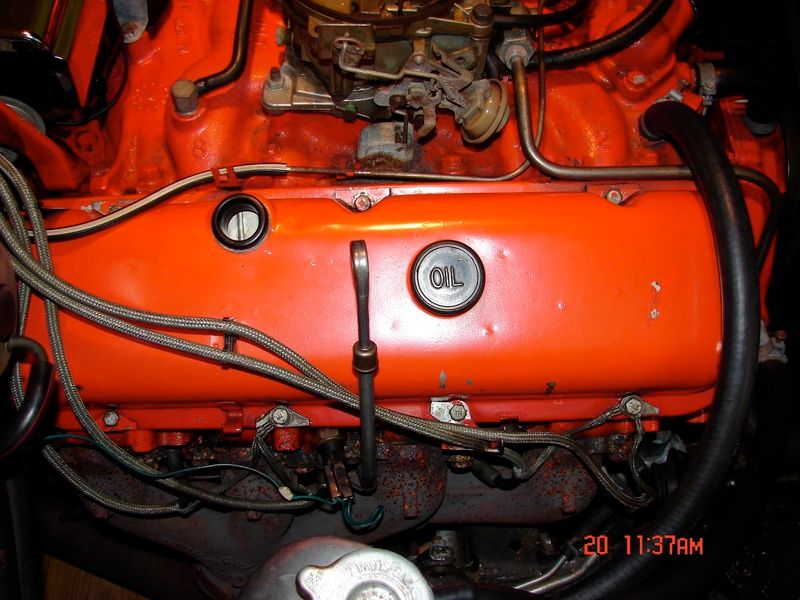
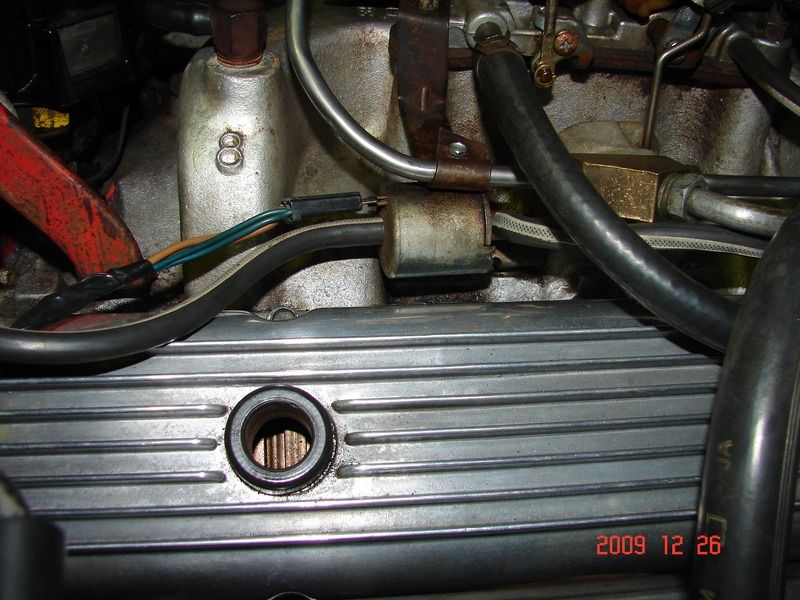
Alan is correct on the BB with the round grommet and it is the same round found on the aluminum LT 1 valve cover grommet.
09-11-2015, 09:19 AM
#37
Drifting

I herd you are doing a big block ? Question , will an M21 hold up on a stock LS 5 ?
 09-11-2015, 09:28 AM
#38
Le Mans Master
Hey....I looked at a ton of BB photos trying to find one with the spark plug wire bracket mounted on the 2nd lower valve cover bolt. There it is in your photo....I couldn't get any responses when I posted. I put mine back on like the one in your picture.

 09-11-2015, 09:34 AM
#39
Race Director
Thread Starter
Thanks WB, maybe Willcox will figure it out today. Here's a picture of mine....looks like the one in your BB photo.
Hey....I looked at a ton of BB photos trying to find one with the spark plug wire bracket mounted on the 2nd lower valve cover bolt. There it is in your photo....I couldn't get any responses when I posted. I put mine back on like the one in your picture.
Hey....I looked at a ton of BB photos trying to find one with the spark plug wire bracket mounted on the 2nd lower valve cover bolt. There it is in your photo....I couldn't get any responses when I posted. I put mine back on like the one in your picture.
 Glad the pictures are of help to you! The purpose for starting the thread in the first place!
  Sorry, I missed your request for this information previously......I think there is a black plastic protector on that wire holding bracket?
I do notice a difference in the LT 1 vs. the BB now that they are seen side by side. The LT 1 doesn't have the embossed letters seen on the BB grommet, it also appears slightly different in size.
WB
Last edited by Don Rickles; 09-11-2015 at 09:36 AM.
09-11-2015, 09:57 AM
#40

I think there are a lot of us who try to keep our cars as original as possible. There's not as much posting on it because it's not as exciting to say you just replaced your "keep your GM car all GM" sticker right after some guy posted that he just installed a 7000 hp engine.
 Think it would fit? Might not be factory correct though.....
Last edited by Faster Rat; 09-11-2015 at 04:19 PM.