When you click on links to various merchants on this site and make a purchase, this can result in this site earning a commission. Affiliate programs and affiliations include, but are not limited to, the eBay Partner Network.
What is the proper position for 68-73 rear bumper?
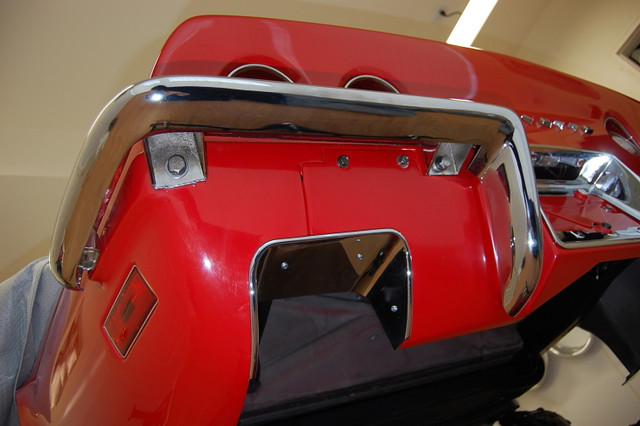
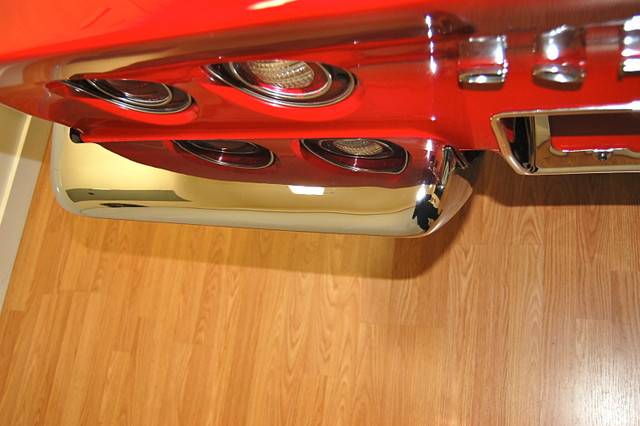
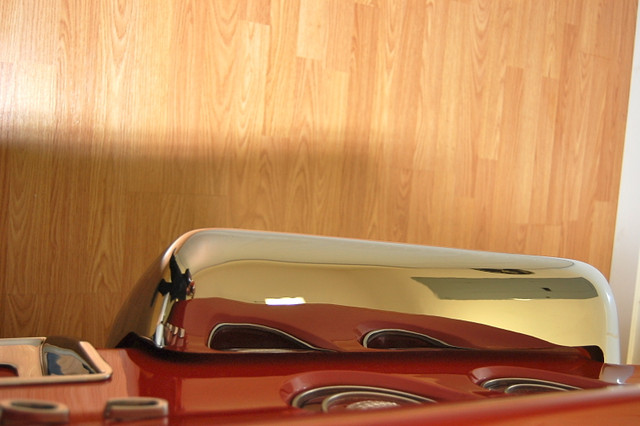
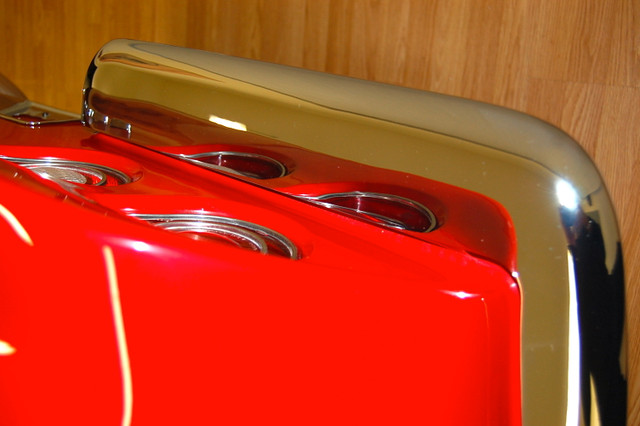
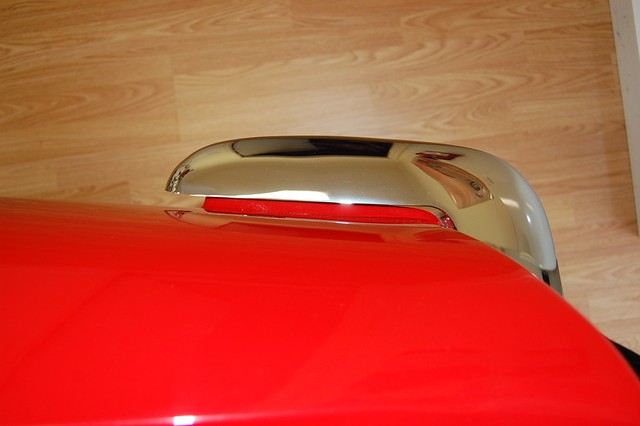
I'm trying to line up my rear bumper to mark where the holes should be and I'm not sure how the bumper should be placed. If I place the bumper so the bulge in the exhaust filler panel is in the middle of the vertical part of the bumper (first picture) the part that goes horizontally across the quarter panel is not flush with the quarter panel (second picture taken with camera facing upwards). Should it be like in the second picture or should it be flush to the bulge on the quarter panel as is shown in the third picture?
Hi P,
Maybe these?
Do you need some dimensions?
Regards,
Alan
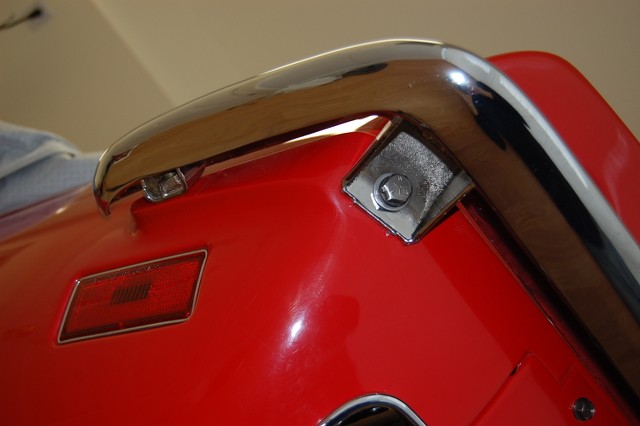
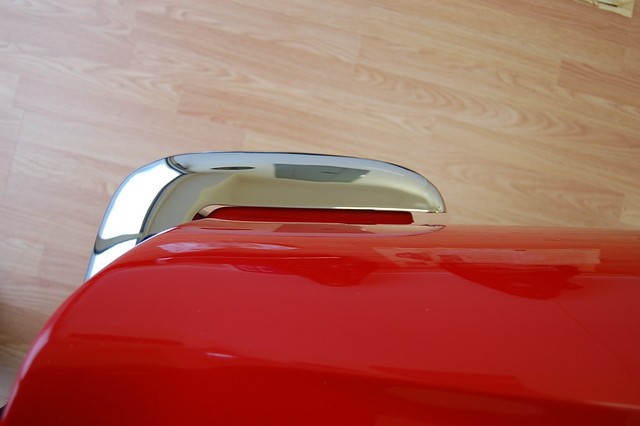
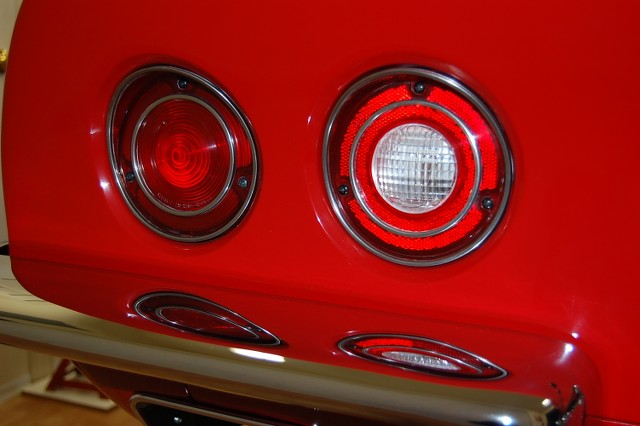
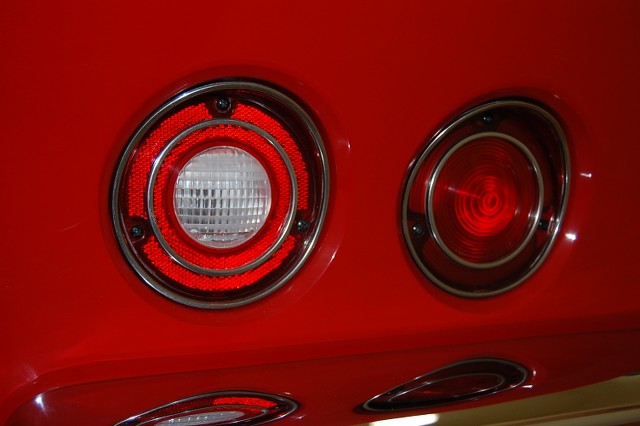
Yes, those are the pictures I was after. If you could get me a measurement from the top of the bumper to the opening on the fiberglass for the tail light (not to the tail light lens itself) as shown below that'd be great.
Yes, those are the pictures I was after. If you could get me a measurement from the top of the bumper to the opening on the fiberglass for the tail light (not to the tail light lens itself) as shown below that'd be great.
Waiting for Alan, but just for reference, I checked the measurement on my '71. The rear bumpers have never been removed. The distance from the top of the bumper to the opening/edge as shown in the photo is 7/8" on both bumpers. On the other lens, the distance is 3/4" on both bumpers.
Last edited by 71 Green 454; 02-25-2017 at 07:49 AM.
Hi P,
Are you at a point that you can temporarily test fit the bumpers using the bumper brackets?
I think it won't be until you do that that you'll get a realistic idea of their fit.
It's quite different just holding the bumper in place compared to having the brackets support the bumper in place.
Remember�. don't over tighten the bumper bolts (just snug) and don't use the brackets to 'pull' the bumper because that so often leads to cracked paint and fiberglass.
Tedious work back there (x2), but such a great looking area on the car.
Regards,
Alan
Hi Priya and Alan,
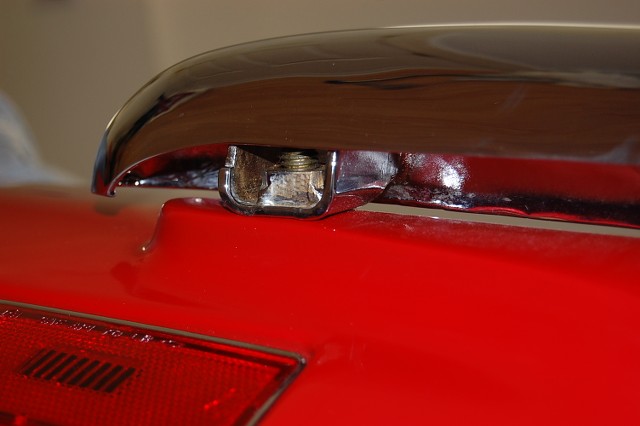
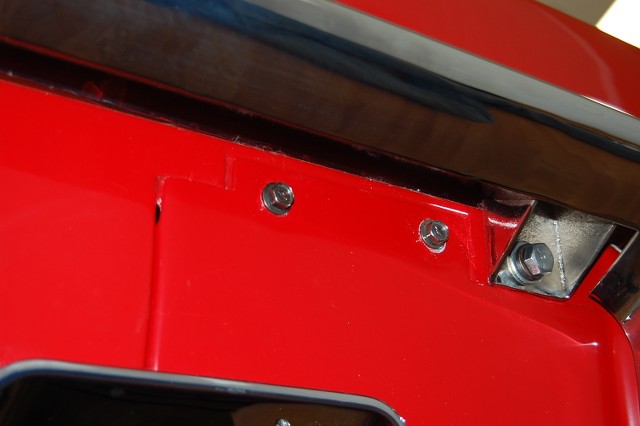
Alan, looking at your 2nd and 3rd photos above that shows the side bumper mounting bracket where it mounts to the side of the fender above the side marker lights, I didn't notice a black grommet. Unless it is just not visible. You guys don't mention one. On the 73 there is a rubber grommet that fits in the side fender hole. It is very thin and difficult to notice unless you are looking for it. The side bumper bolt slides through it. These are called out in the 73 JG and of course mine were missing. I had a tough time finding these for judging. The only place I could find them was at Willcox. They were rather thick, so I had to cut them in half so they would fit as original. Which is barely showing. You can see the slight cracking where the previous owner tightened things too tight, without the grommet being present. I checked my 3rd edition 68-69 Judging manual, and my 4th edition 70-72 Manual and didn't notice these mentioned. Just wondering!
Sorry Alan for the condition of my paint back there, she's a driver!
Tooch
Hi Jimmy,
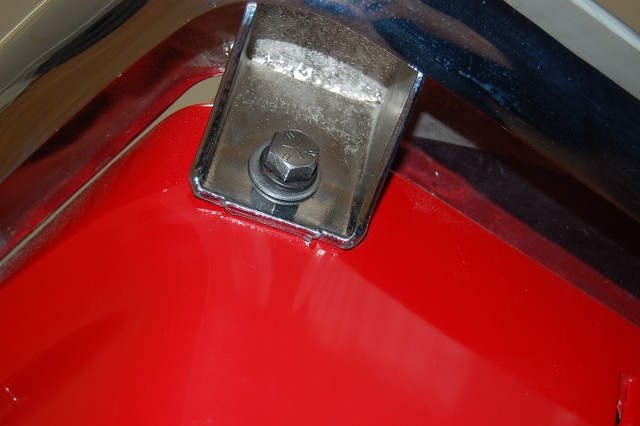
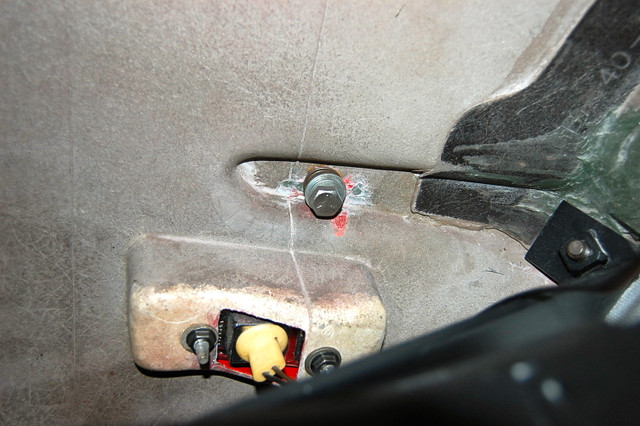
At least through 71 and perhaps (72?) there was no bumper bracket at the location you show. The bumper bolt (from the inside) simply fastened against the fiberglass. ( IF too LARGE a flat washer is used it will split the fiberglass depression it fits in.
I wonder if (?) when the bracket was added the grommet was added?
Regards,
Alan
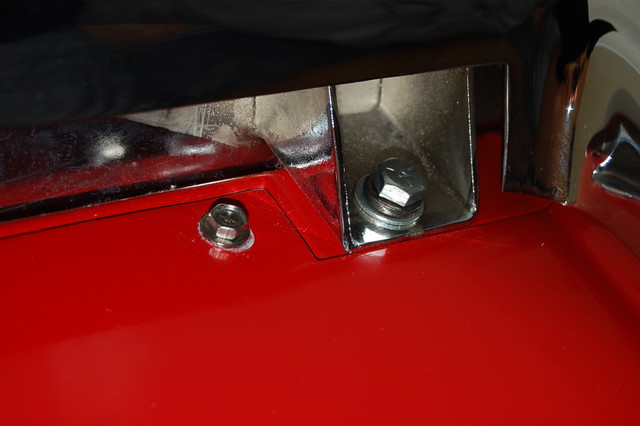
The AIM indicates a bolt, lock washer, and flat washer.
Right side.
Hi P,
Are you at a point that you can temporarily test fit the bumpers using the bumper brackets?
Alan
No, I'm a long way from that. I expect that to be the most difficult part of this project as I plan on trying to fit part of the 79 crash bar to the rear frame (if there's room) and modifying the 73 bumper brackets to attach to that rather than the frame. Even if I can't fit the crash bar and attach to the frame the 79 rear frame crossmember is different than the 68-73 so its not going to be straightforward.
Originally Posted by Alan 71
Remember�. don't over tighten the bumper bolts (just snug) and don't use the brackets to 'pull' the bumper because that so often leads to cracked paint and fiberglass.
Tedious work back there (x2), but such a great looking area on the car.
Regards,
Alan
I'm sure glad you mentioned that, it hadn't occurred to me!
Hi Priya and Alan,
Alan, looking at your 2nd and 3rd photos above that shows the side bumper mounting bracket where it mounts to the side of the fender above the side marker lights, I didn't notice a black grommet. Unless it is just not visible. You guys don't mention one. On the 73 there is a rubber grommet that fits in the side fender hole. It is very thin and difficult to notice unless you are looking for it. The side bumper bolt slides through it.
Tooch
Thanks for mentioning that. I'm going to use those on my car.
Hi Jimmy,
At least through 71 and perhaps (72?) there was no bumper bracket at the location you show. The bumper bolt (from the inside) simply fastened against the fiberglass. ( IF too LARGE a flat washer is used it will split the fiberglass depression it fits in.
I wonder if (?) when the bracket was added the grommet was added?
Regards,
Alan
The AIM indicates a bolt, lock washer, and flat washer.
Alan,
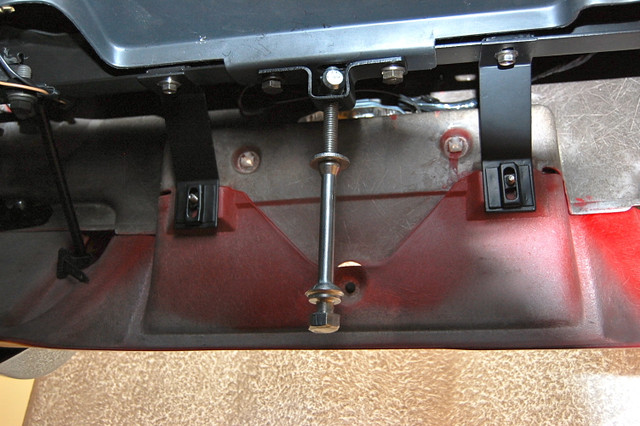
The bumpers were exactly the same through 73. My weld nut wasn't welded on straight. Made it look different. However, for 73 they added an inner brace rod that attaches from the frame over to the side bumper bolt. The 73 AIM shows bolt, lockwasher, flat washer, brace on the inside of the fender. The rubber bushing (GM part # 6263571), goes in the hole from the outside. Here's a photo from the other side. I'm thinking this addition was part of the more stringent safety regs. starting in73.
Tooch
Hi P,
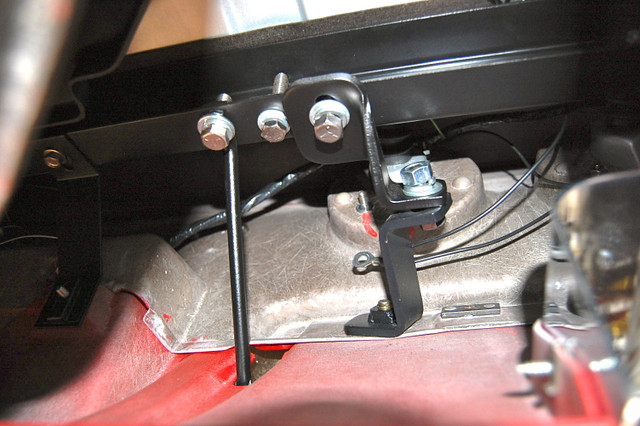
Your mention of brackets made me think of these 2 for the valance panel.
I don't know if your 'scheme' will require them or if having them might help you in some way when it becomes time to mount the bumpers/brackets.
I 'think' you'll have your hands full getting brackets formed up to use with the 79 frame rear crossmember.
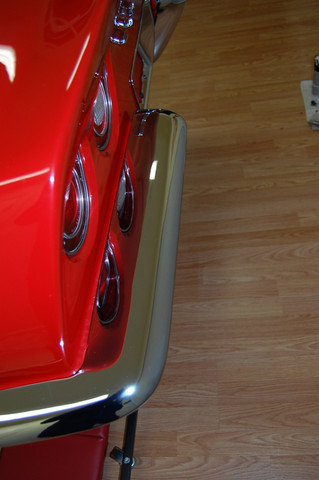
The rear crossmember is actually quite close ro the back side of the taillight panel/bumpers so the inner bracket is an odd configuration even on the 68-73 frame. (Note it's 2 pieces so it can pivot on the bolt in the middle.)
Regards,
Alan
Thanks for those pictures Alan. It looks a lot tighter than I was expecting, I don't think there's going to be any room for any part of the 79 crash bar.
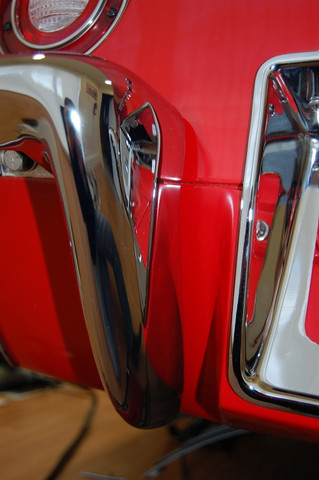
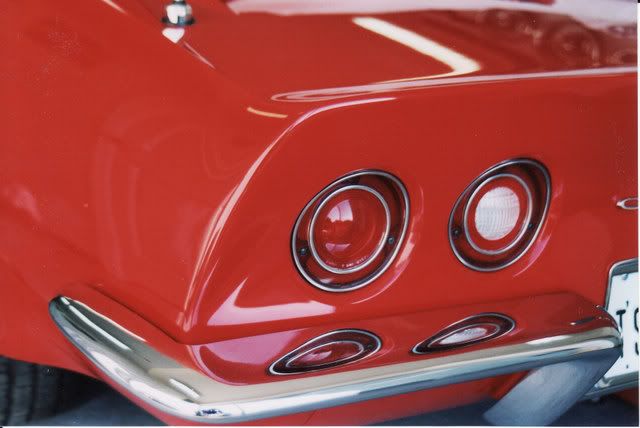
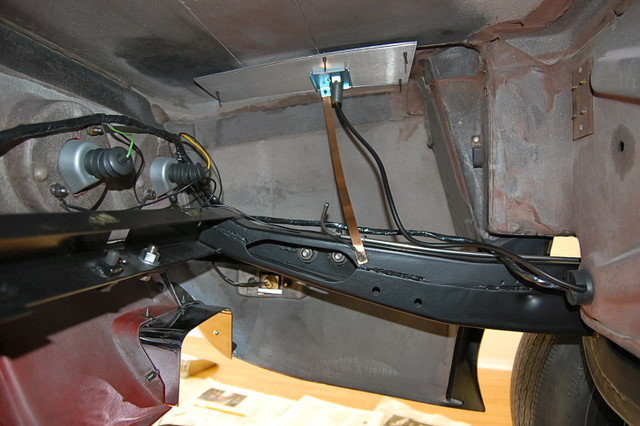
I'm surprised to see in your picture that there's no holes in the exhaust filler panel for the lower part of the license plate bezel to bolt to. On my exhaust filler panel I have holes where the lower yellow arrows are like the holes/plastic screw plugs shown for the license plate by the upper arrows. Does your license plate bezel not attach at the bottom to the exhaust filler panel? How is it secured at the bottom?
Hi P,
The rear of the frame rail is different also� I believe.
Regards,
Alan
Yes, that's something I have to work out as well. on the 79 frame rail there is no oval hole as shown in this picutre to allow you to get to the backside of the bolts that attach the bumper bracket to the frame rail. Hubby suggested welding a long flat piece of steel to the two bolt heads so the bolts can be held in place inside the frame rail by holding the end of the long flat piece of steel at the opening of the box part of the frame rail at the rear end of the frame. I don't really like the idea of cutting an oval hole on the inside of the frame rail as is done on the 68-73 frame as on those frames the edges of the oval hole are depressed inward to give extra strength and I can't duplicate that.

 02-24-2017, 04:46 PM