
1969 Chassis Restoration Work - Follow Along II
 03-25-2017, 06:16 AM
#1
Senior Member


Thread Starter
Member Since: Jan 2008
Location: Easton, PA
Posts: 12,154
Received 2,031 Likes
on
1,103 Posts
St. Jude Donor '10

The first time I started this thread it was moving along nicely and then it took a deep dark turn into an area it should not have tread. So this time lets do our best to keep this upbeat, informative, and collaborative, okay?
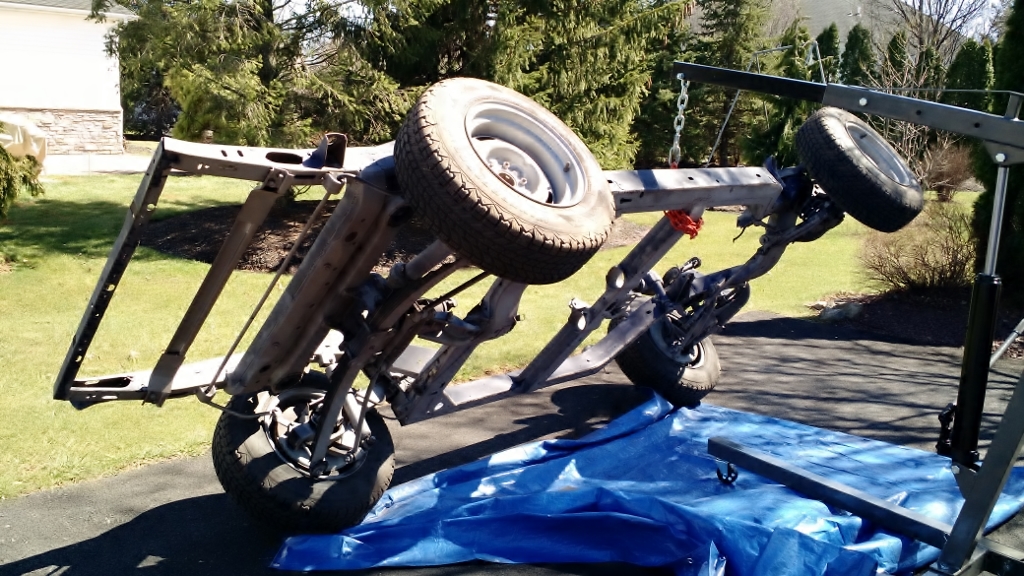
I will be restoring a 1969 rolling chassis from a neglected roller into a nice rolling chassis once again.
The original had an engine and a transmission from other years and those have been removed.
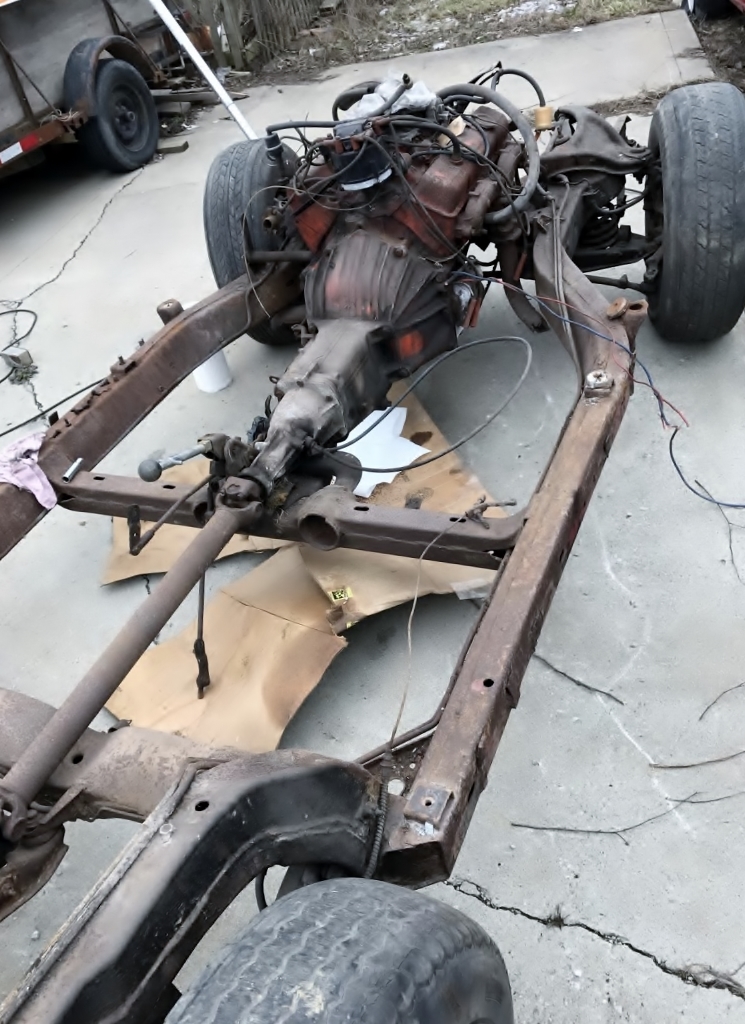
The chassis had non Corvette wheels on it and tires that would not hold air; brake calipers were frozen; and the drive shaft was still connected to the transmission and differential. Those are removed now and I restored four corvette wheels (not matching, not 1969) and I bought four Firestone winter tires to get the chassis into a rolling configuration once again.

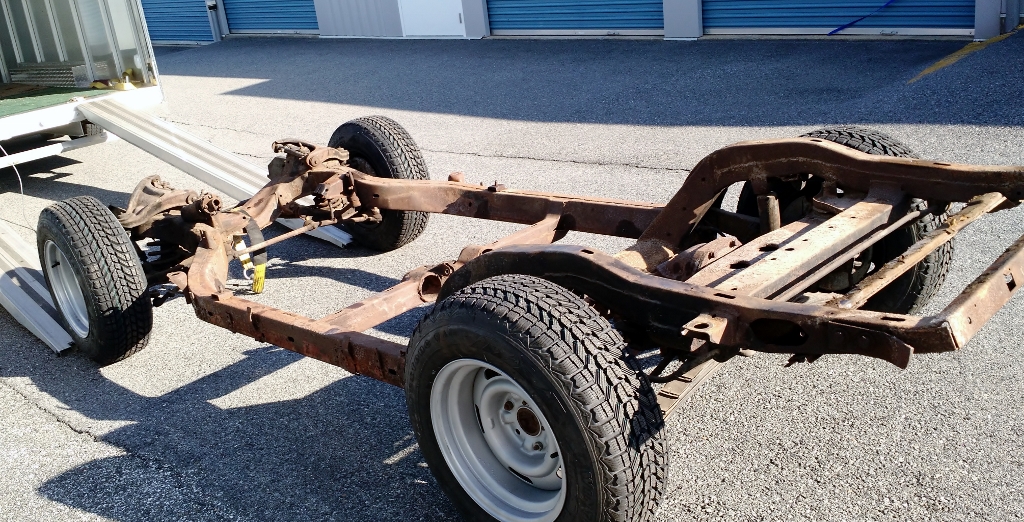
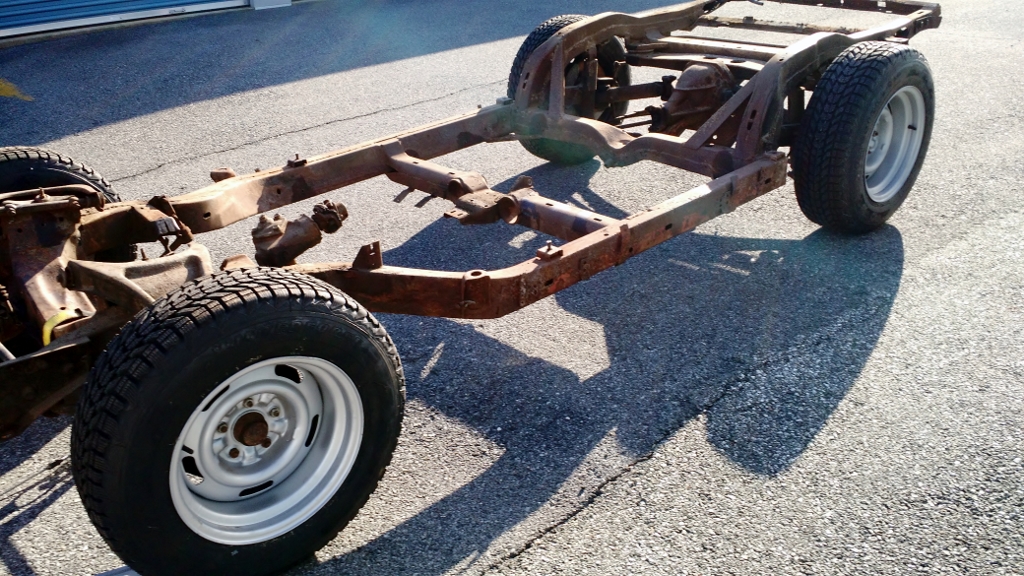
After getting it rolling smoothly again I then scheduled some time to remove brackets that had been welded into place at various locations on the frame of the chassis. Those details will be next.
Thanks for following along.
David
I will be restoring a 1969 rolling chassis from a neglected roller into a nice rolling chassis once again.
The original had an engine and a transmission from other years and those have been removed.
The chassis had non Corvette wheels on it and tires that would not hold air; brake calipers were frozen; and the drive shaft was still connected to the transmission and differential. Those are removed now and I restored four corvette wheels (not matching, not 1969) and I bought four Firestone winter tires to get the chassis into a rolling configuration once again.
After getting it rolling smoothly again I then scheduled some time to remove brackets that had been welded into place at various locations on the frame of the chassis. Those details will be next.
Thanks for following along.
David
 03-25-2017, 06:46 AM
#2
Senior Member
Thread Starter
Member Since: Jan 2008
Location: Easton, PA
Posts: 12,154
Received 2,031 Likes
on
1,103 Posts
St. Jude Donor '10
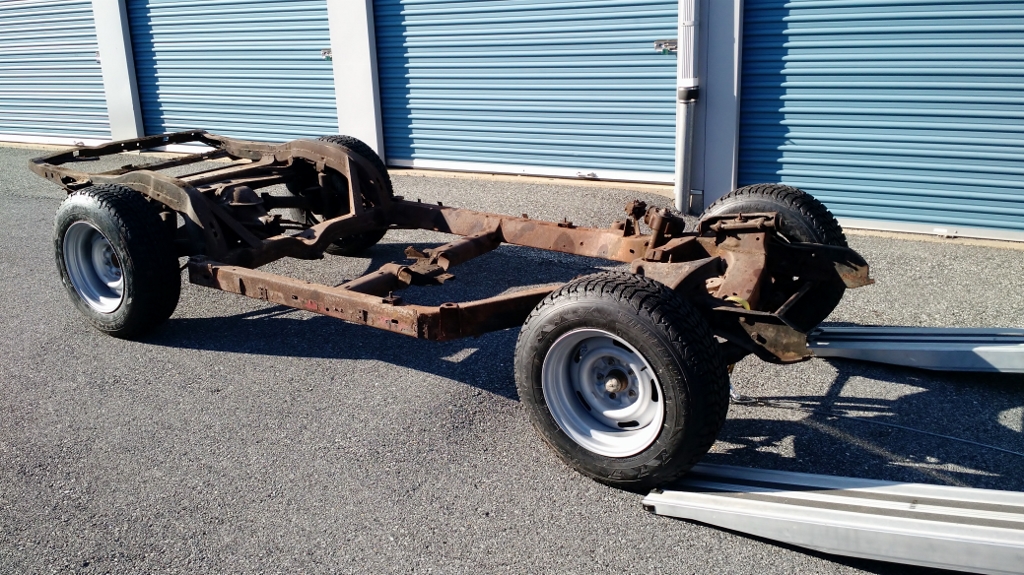
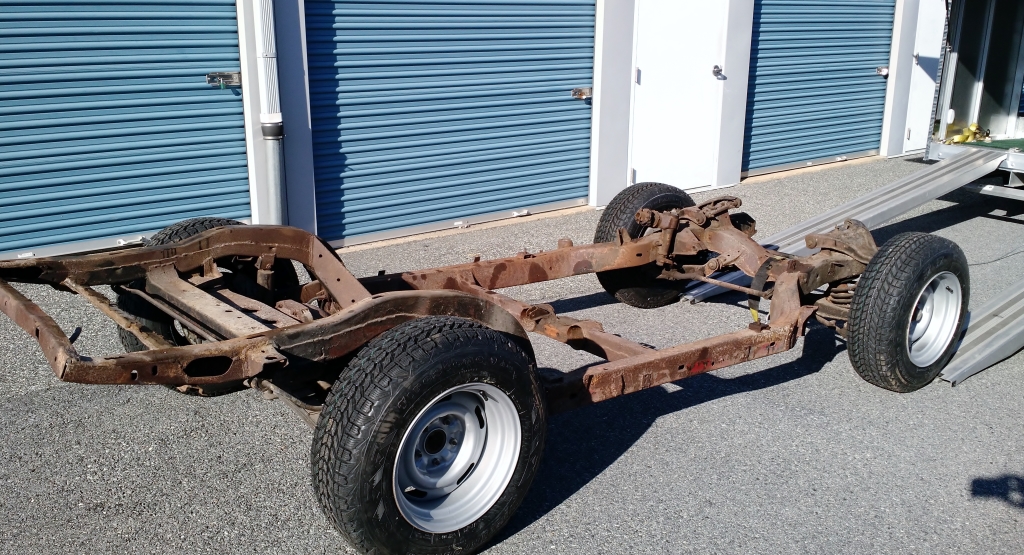
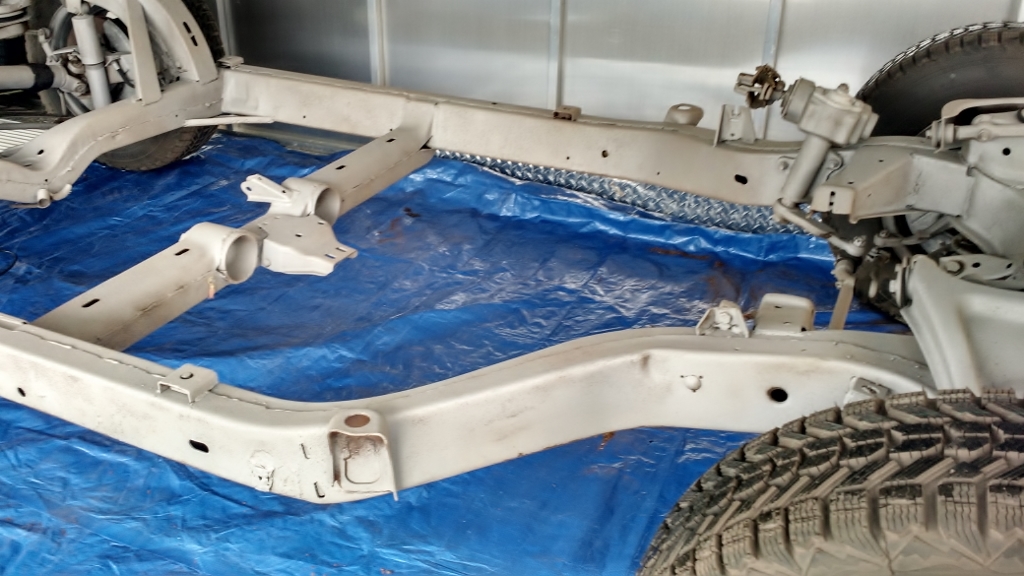
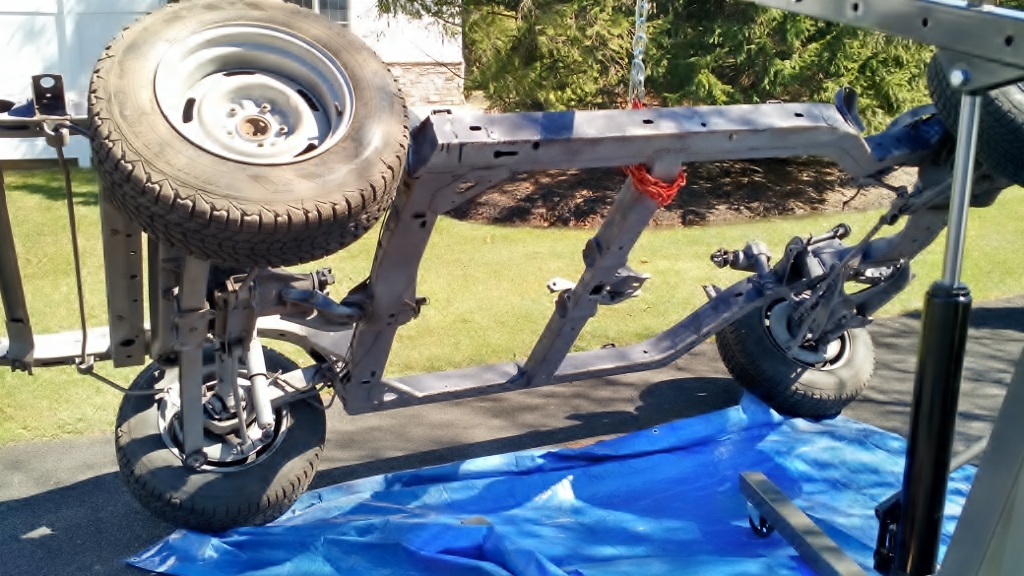
The work on the brackets was my next challenge. There were lots of extra brackets welded to the frame for side pipes and other attachments. I first identified them, then removed them.
Brackets...
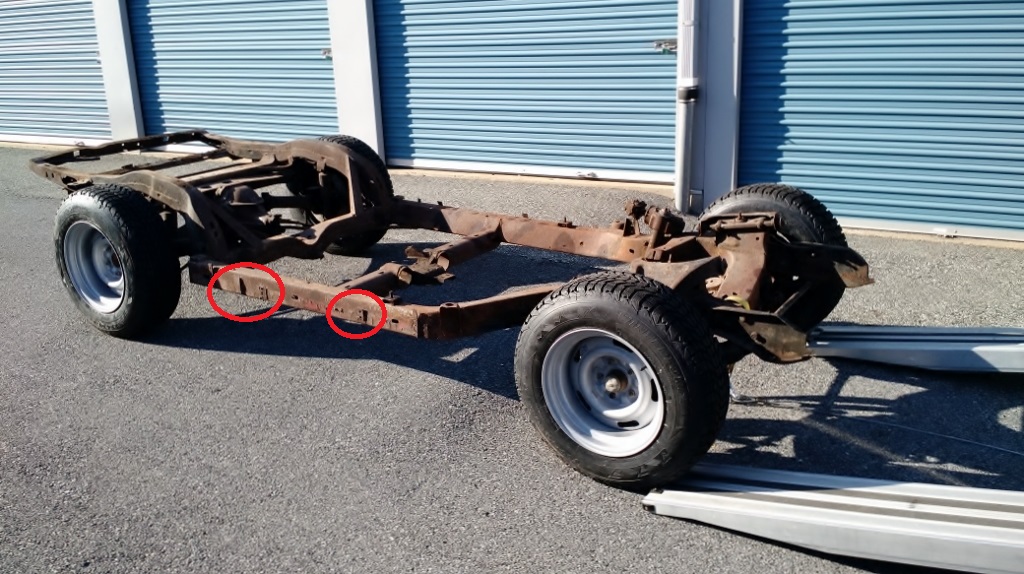
More brackets...
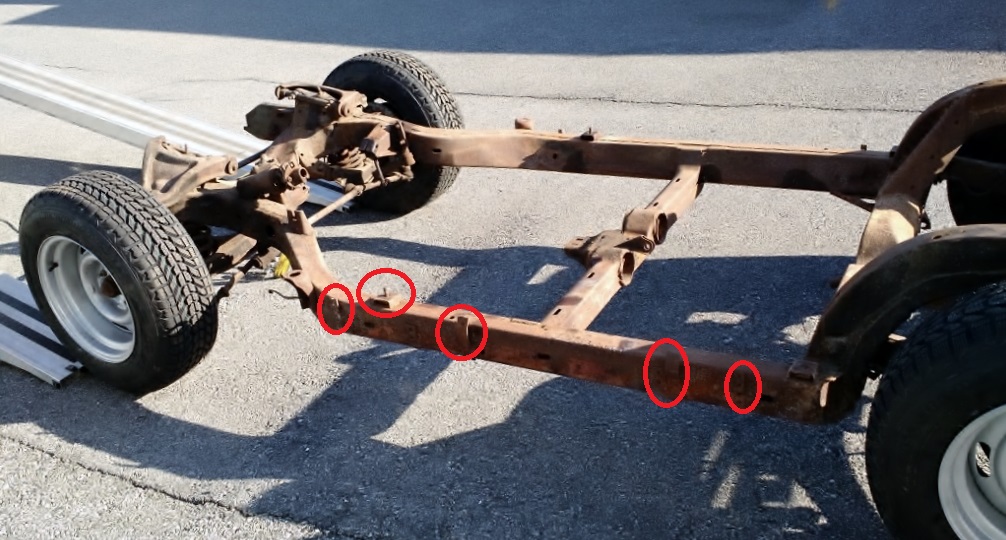
And still more brackets...
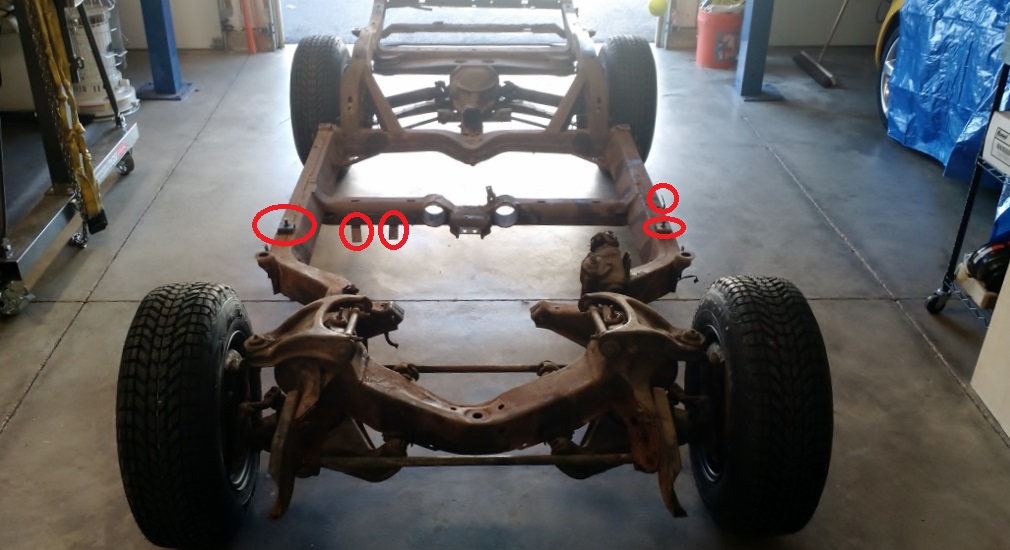
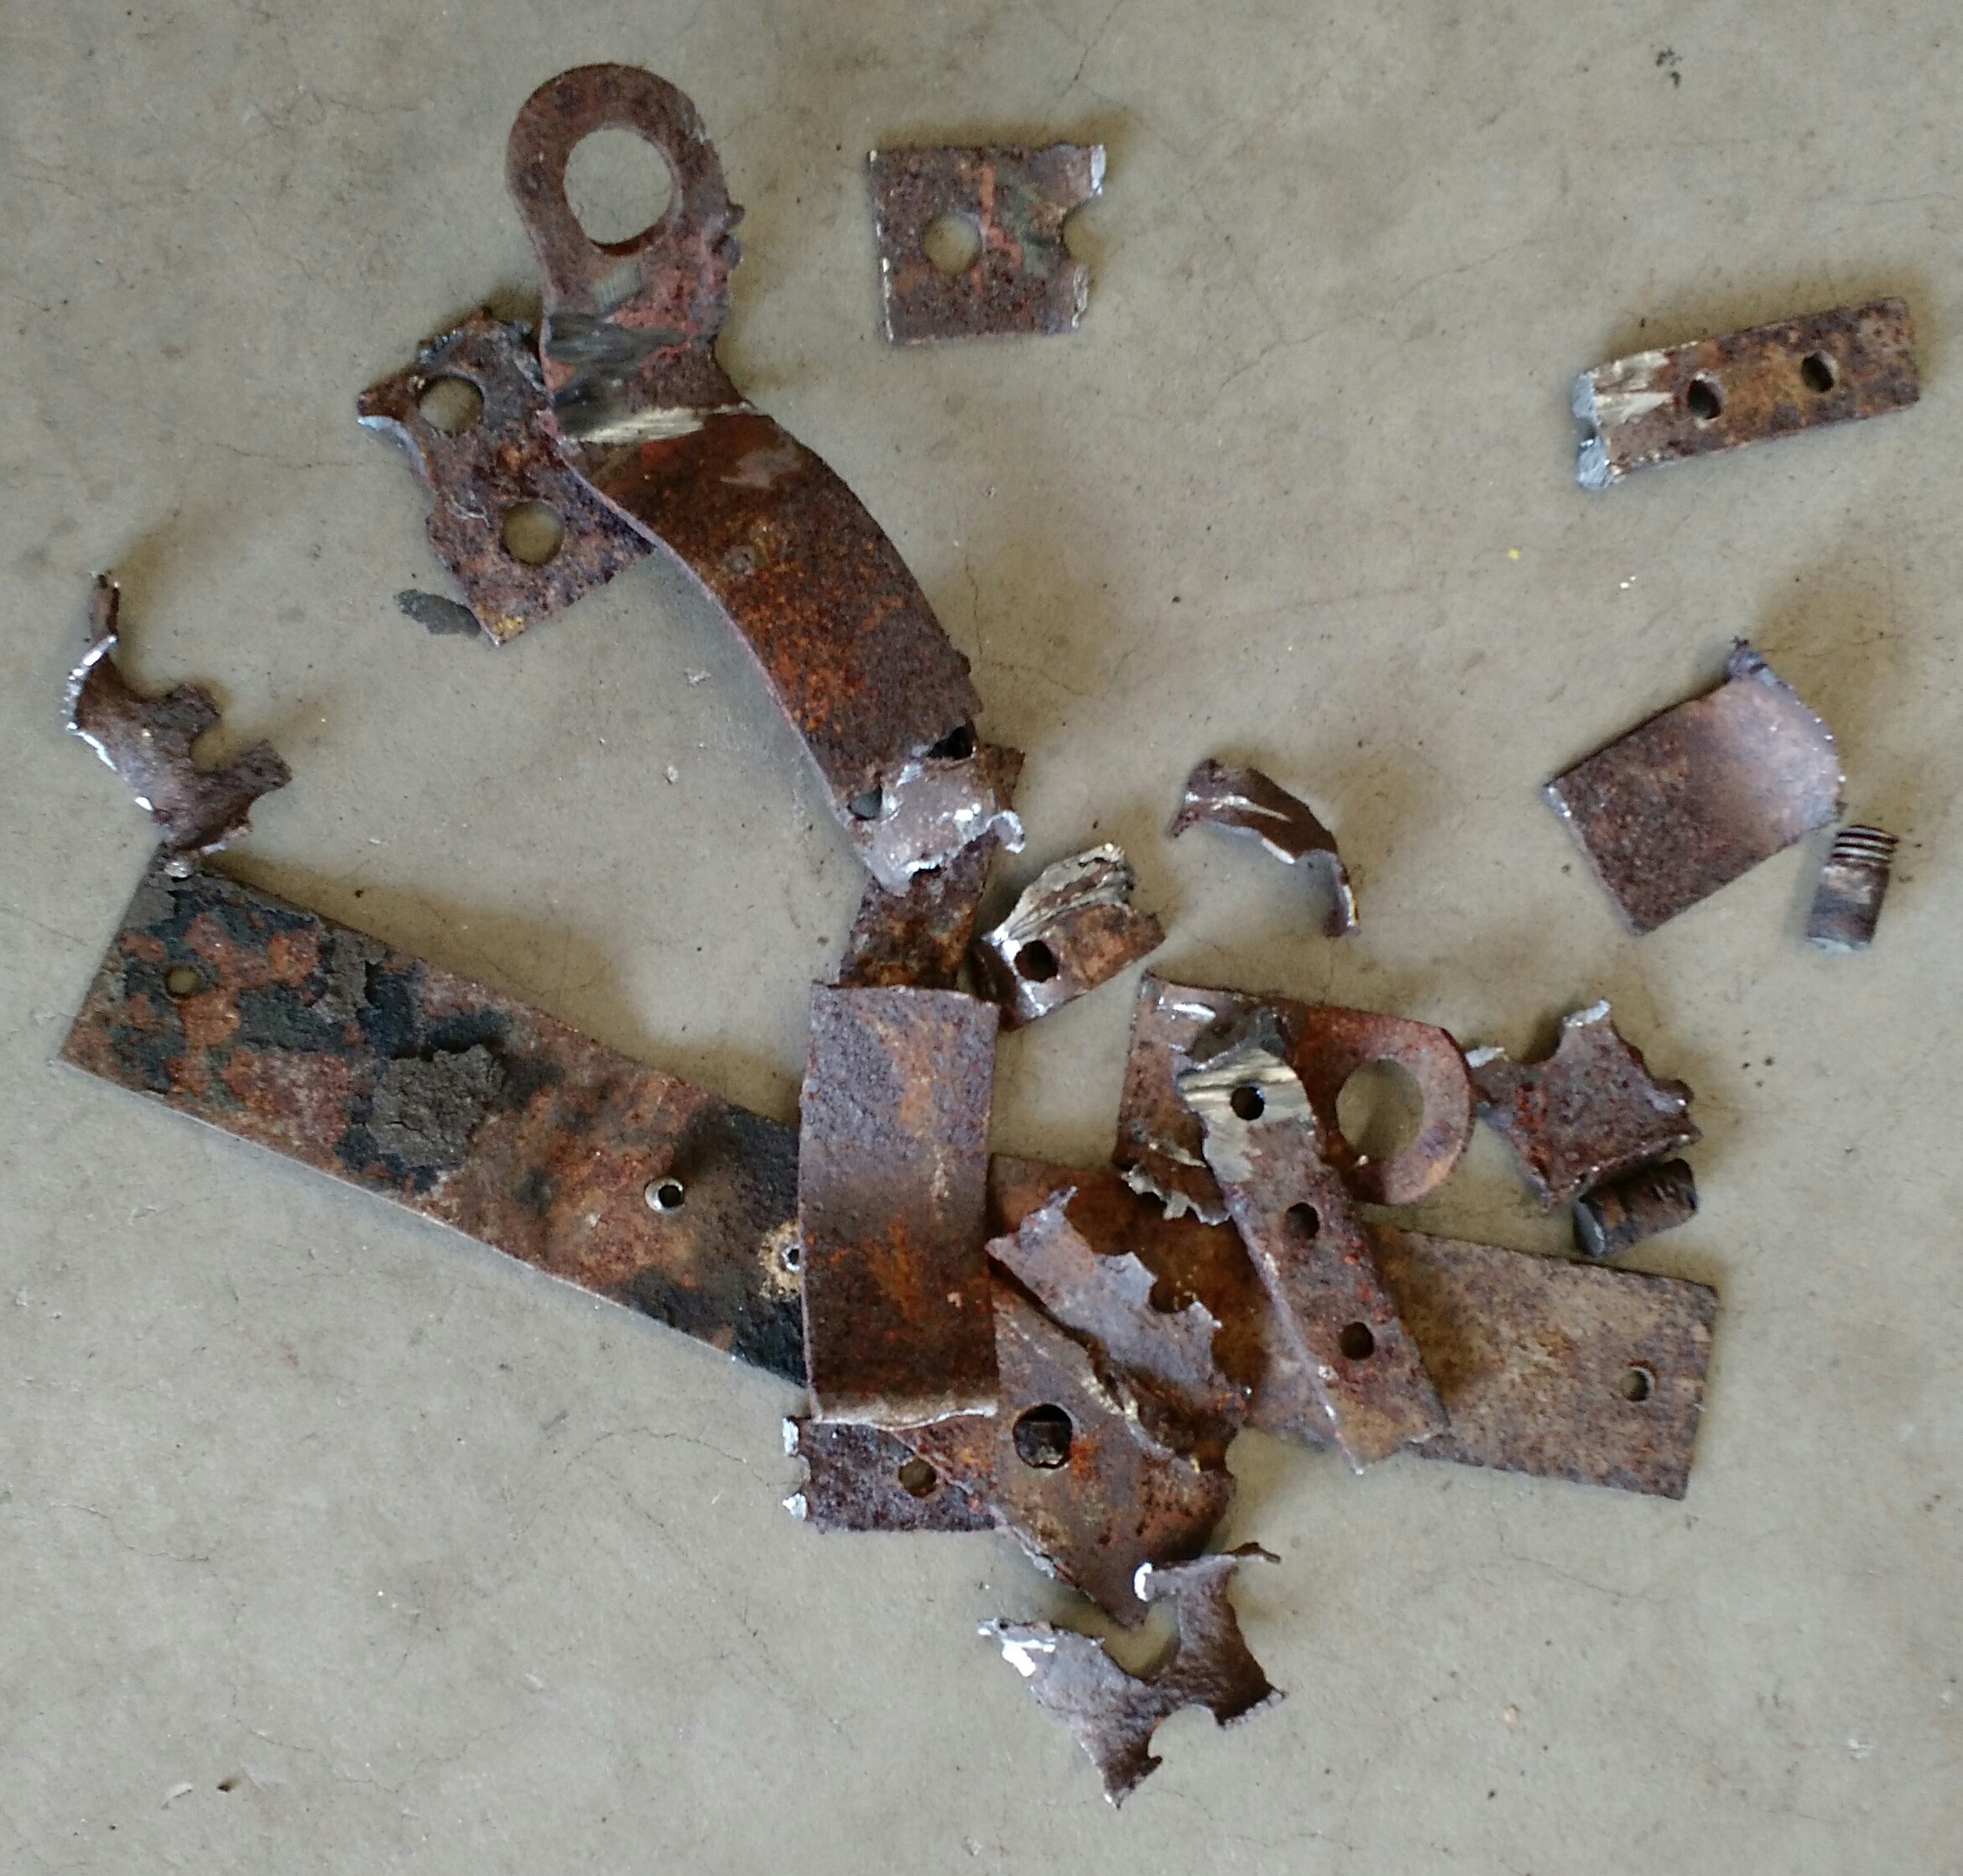
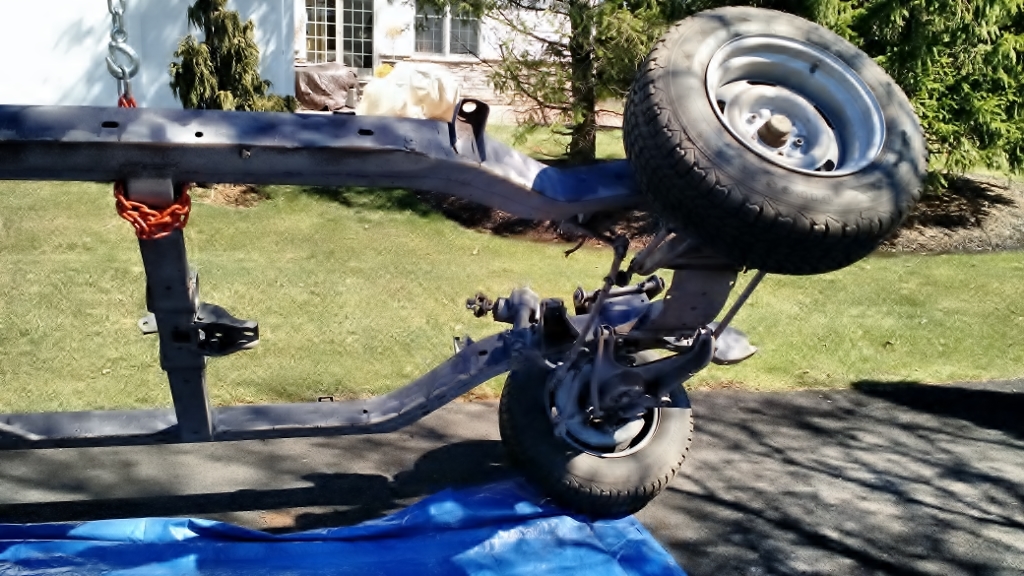
Brackets removed...doesn't look like much but my hands are still vibrating from the cutting and grinding I had to do on those welds.
I shaved off the extended bolts that had been cut off in the #2 body mounts and will remove those mounts later. Just wanted to make this safer.

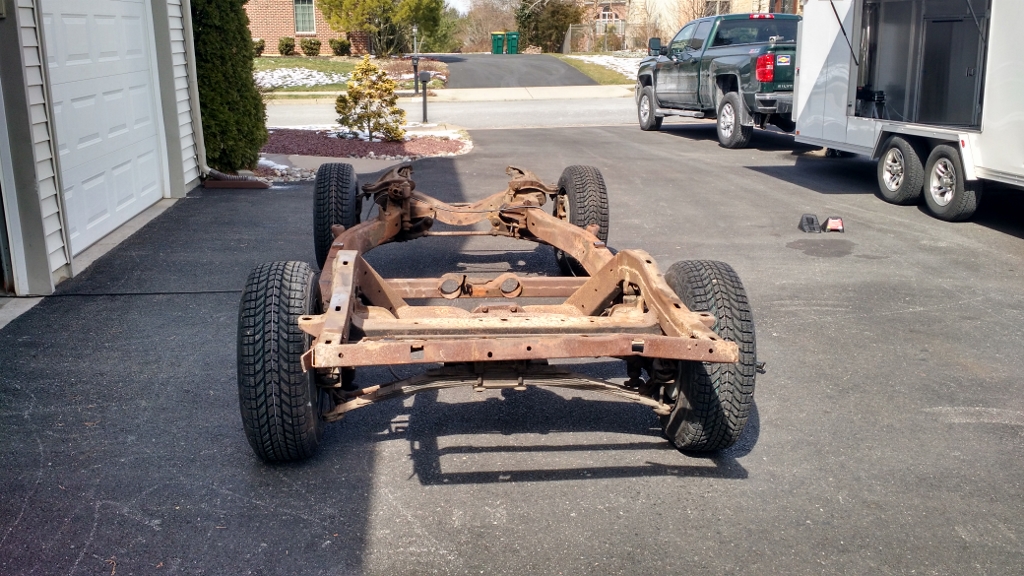
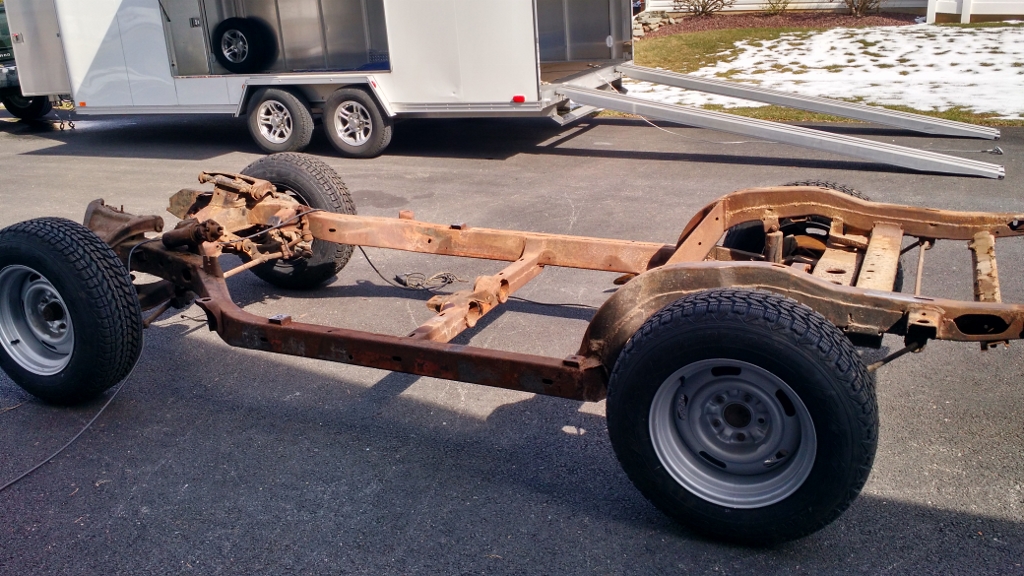
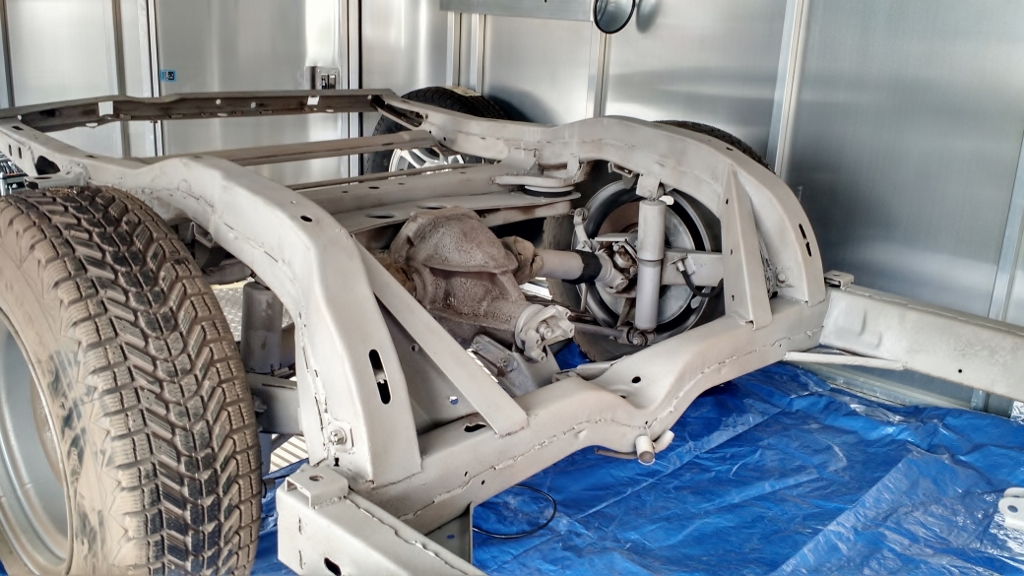
Chassis after grinding and before loading into trailer to take to my media blasting friends.
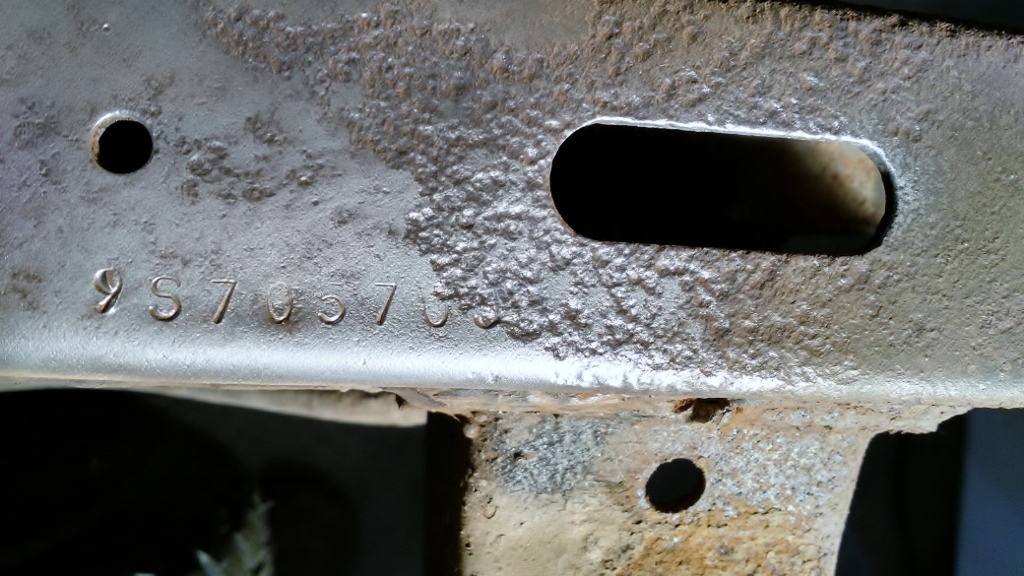
Confirmed 1969 frame.
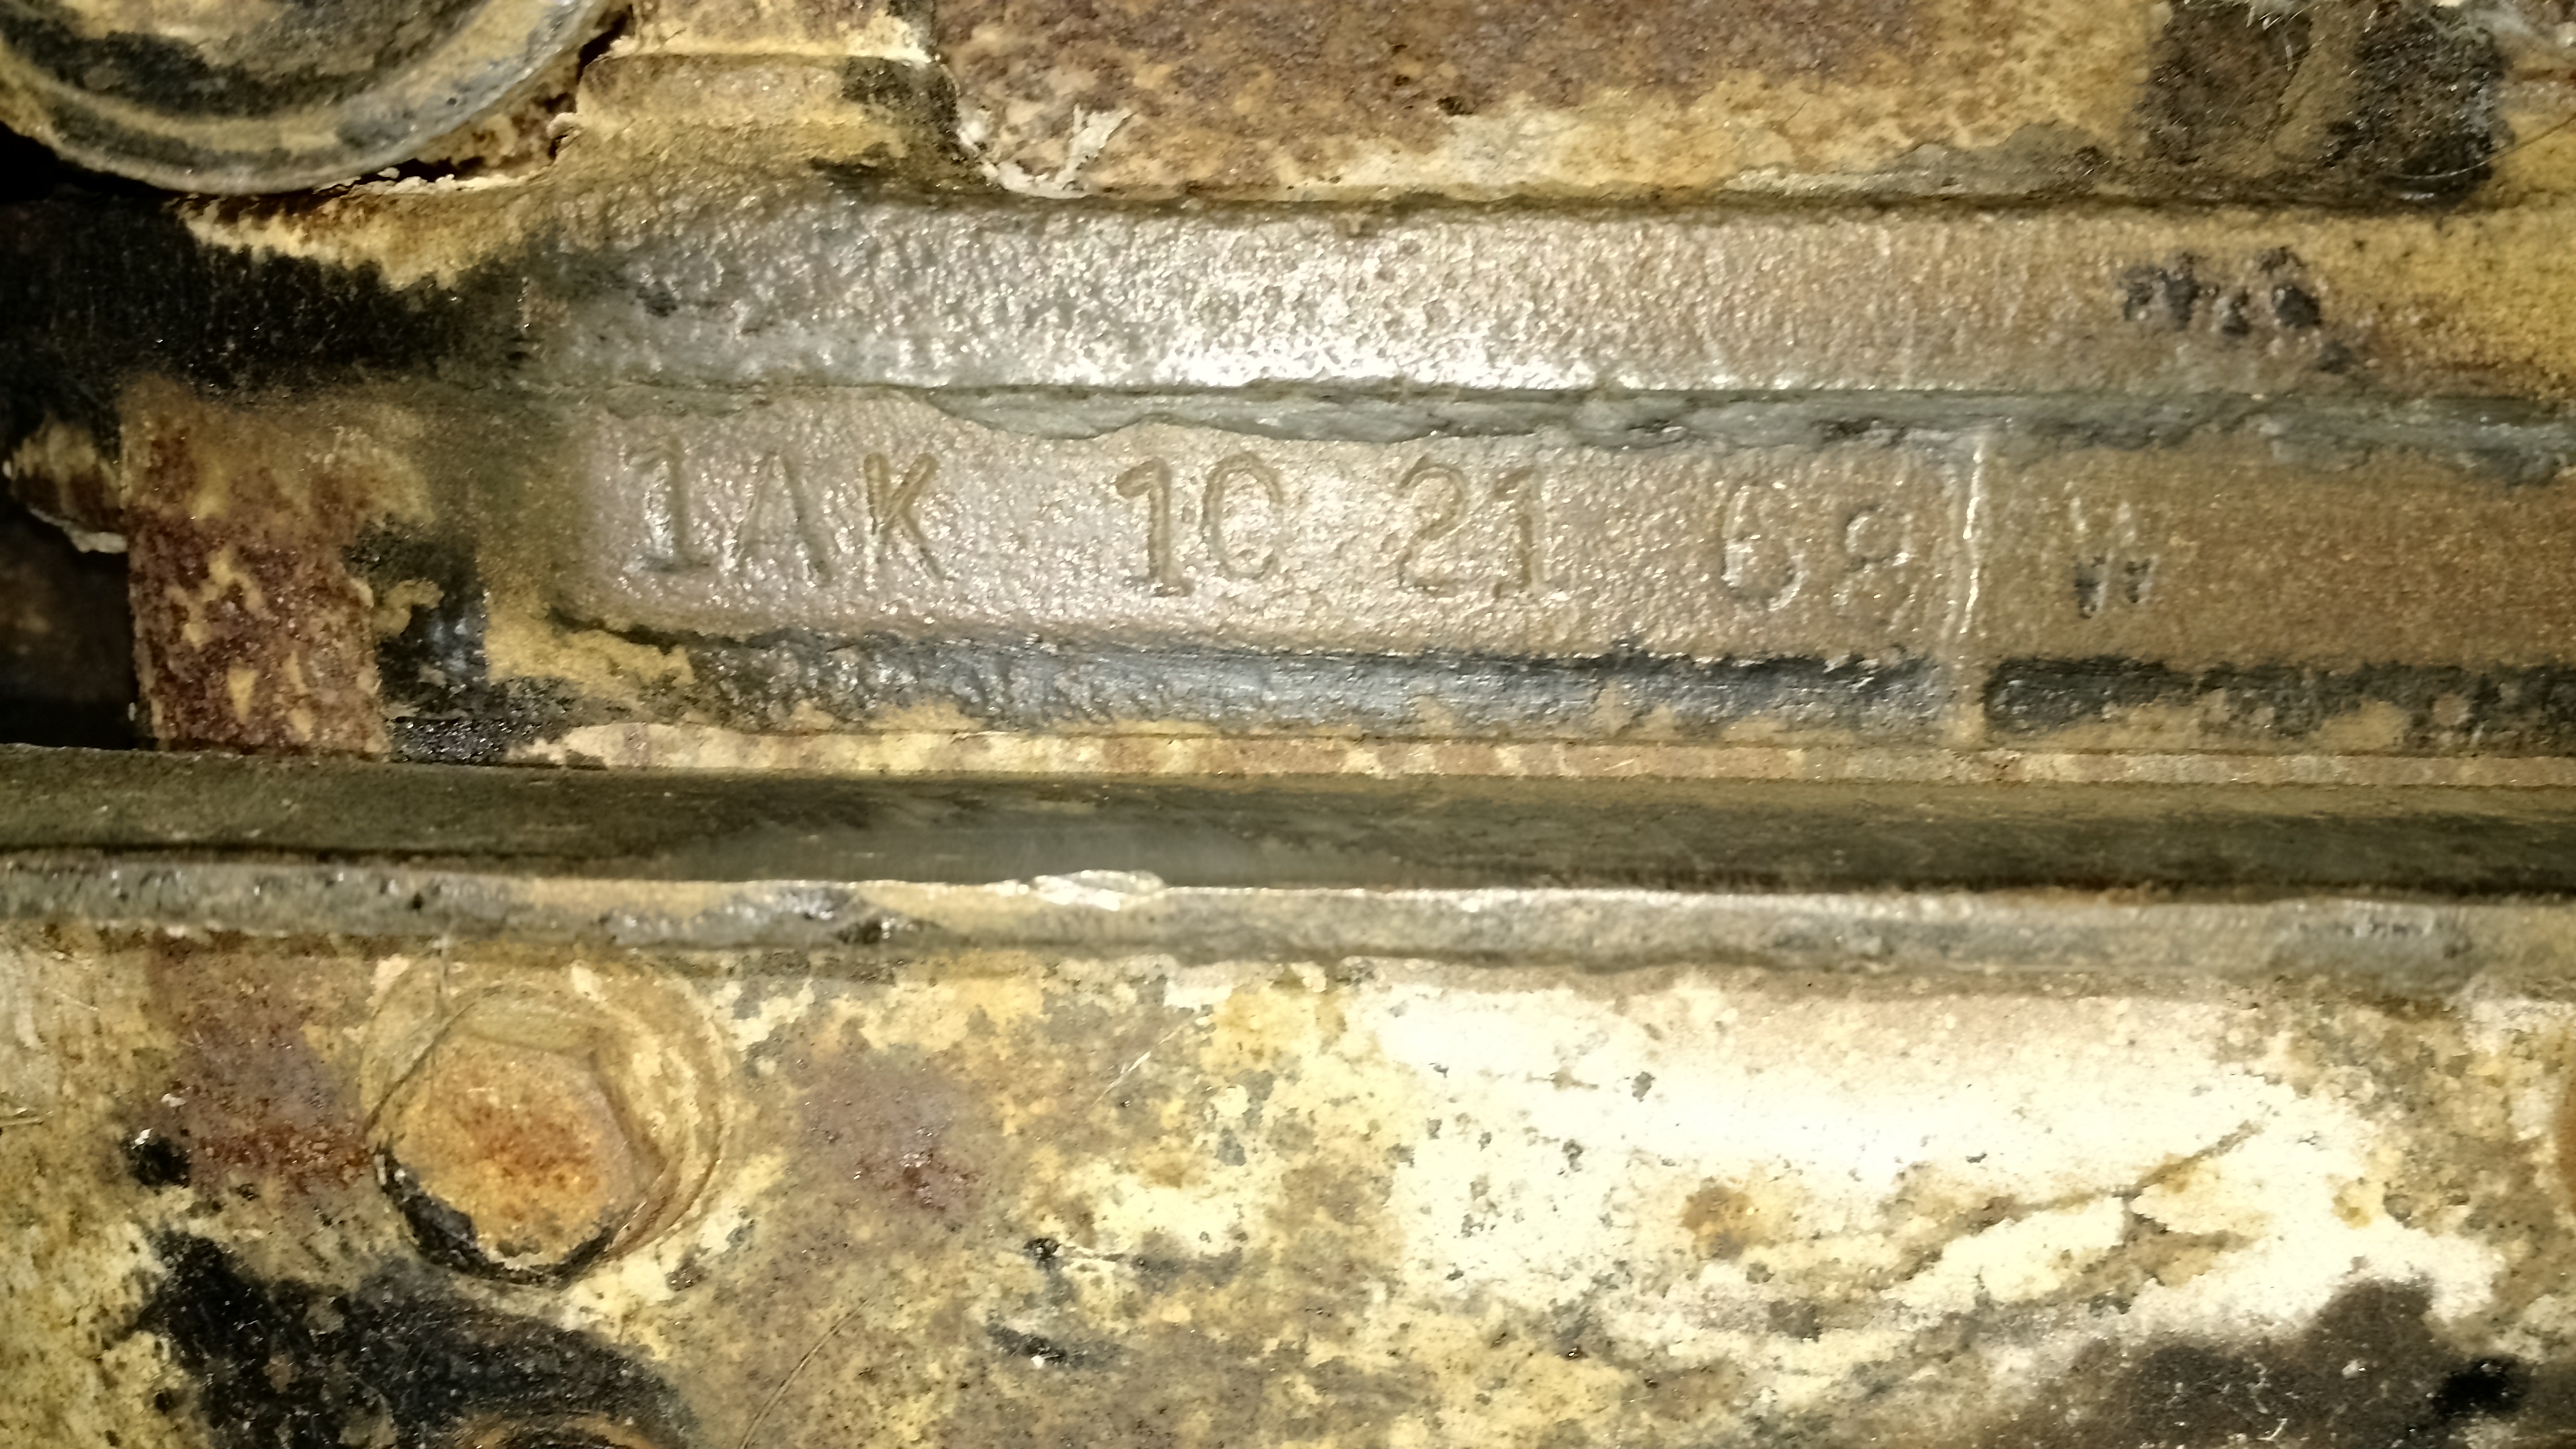
Confirmed 1969 differential, manufactured October 1968 and code indicates a 3.36 to 1 ratio which is how I measured this one.
I then took the chassis to my local media blast shop where they bead blast and powder coat. No powder coating for this one at this time but they do media blast frames while still rolling on the chassis, so I am trying this for the first time myself. All previous frames have been blasted bare, hopeful we like how this turns out. More soon.
Thanks for following.
David Howard
AllVettes4Me
Brackets...
More brackets...
And still more brackets...
Brackets removed...doesn't look like much but my hands are still vibrating from the cutting and grinding I had to do on those welds.
I shaved off the extended bolts that had been cut off in the #2 body mounts and will remove those mounts later. Just wanted to make this safer.
Chassis after grinding and before loading into trailer to take to my media blasting friends.
Confirmed 1969 frame.
Confirmed 1969 differential, manufactured October 1968 and code indicates a 3.36 to 1 ratio which is how I measured this one.
I then took the chassis to my local media blast shop where they bead blast and powder coat. No powder coating for this one at this time but they do media blast frames while still rolling on the chassis, so I am trying this for the first time myself. All previous frames have been blasted bare, hopeful we like how this turns out. More soon.
Thanks for following.
David Howard
AllVettes4Me
03-25-2017, 06:51 AM
#3
Senior Member
Thread Starter
Member Since: Jan 2008
Location: Easton, PA
Posts: 12,154
Received 2,031 Likes
on
1,103 Posts
St. Jude Donor '10
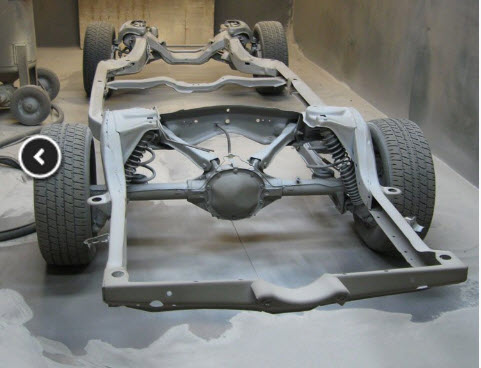
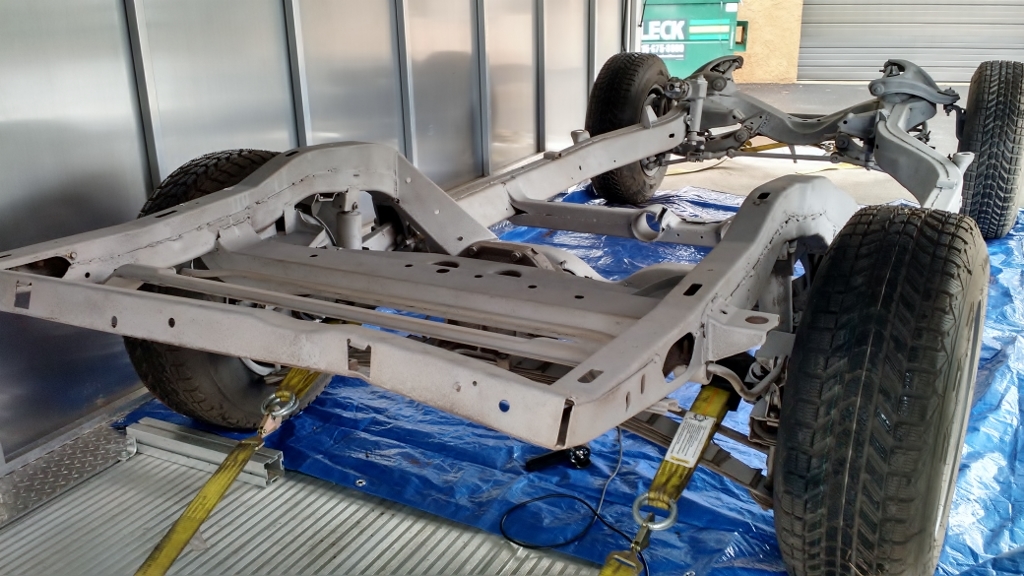
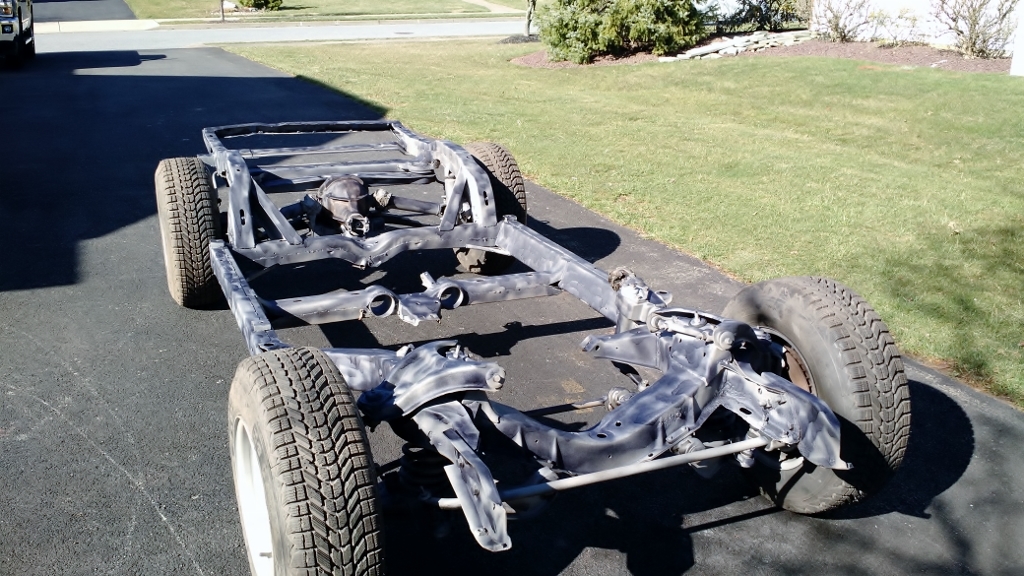
Media blast rolling chassis examples shown. This is not my chassis but an example of post media blasting a frame while still on a rolling assembly.

I will share pictures of my chassis when I get it back next week.
Thank you for following along.
David
I will share pictures of my chassis when I get it back next week.
Thank you for following along.
David
The following users liked this post:
carriljc (03-26-2017)
03-26-2017, 08:52 AM
#4
Dementer sole survivor

Member Since: Oct 2015
Location: YUPPY HELL Westford MASS
Posts: 16,446
Received 6,295 Likes
on
3,920 Posts
2020 C3 of the Year Finalist - Modified
2020 Corvette of the Year Finalist (performance mods)
2019 C3 of Year Winner (performance mods)
2016 C3 of Year Finalist
 03-26-2017, 10:59 AM
#5
Race Director


Frequent updates with pictures will surely keep us following along. 
03-27-2017, 10:24 AM
#6
Senior Member
Thread Starter
Member Since: Jan 2008
Location: Easton, PA
Posts: 12,154
Received 2,031 Likes
on
1,103 Posts
St. Jude Donor '10

 03-27-2017, 01:33 PM
#8
Senior Member
Thread Starter
Member Since: Jan 2008
Location: Easton, PA
Posts: 12,154
Received 2,031 Likes
on
1,103 Posts
St. Jude Donor '10
03-28-2017, 06:16 PM
#9
Senior Member
Thread Starter
Member Since: Jan 2008
Location: Easton, PA
Posts: 12,154
Received 2,031 Likes
on
1,103 Posts
St. Jude Donor '10
I just picked up my rolling chassis from the media blasting shop. Raining here today so it will sit on the trailer until tomorrow when we are supposed to get sunny weather and warmer temperatures. I'll pull it off tomorrow and get it primed for now so it can go into service holding my 72 race car body for the next few weeks.
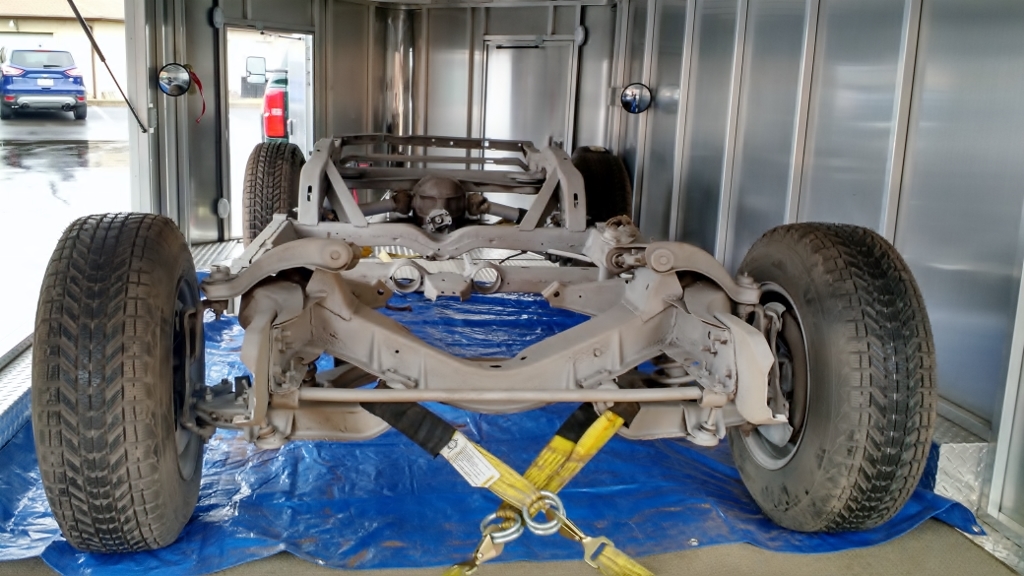

Looking much better already even if only temporary.
More soon.
David
Looking much better already even if only temporary.
More soon.
David
03-29-2017, 05:17 PM
#10
Melting Slicks

What was the cost for the blasting, if I may ask..?
03-29-2017, 05:24 PM
#11
Senior Member
Thread Starter
Member Since: Jan 2008
Location: Easton, PA
Posts: 12,154
Received 2,031 Likes
on
1,103 Posts
St. Jude Donor '10
03-30-2017, 07:47 AM
#12
Senior Member
Thread Starter
Member Since: Jan 2008
Location: Easton, PA
Posts: 12,154
Received 2,031 Likes
on
1,103 Posts
St. Jude Donor '10
Removed it from my trailer yesterday and elevated it both sides to move media from inside the frame. Used leaf blower to blow out the excess materials, worked well. Then applied rust converter to stop bare surface from rusting in our Spring moist period. Made the frame look like a camouflaged ship, but did the job well.
Drying In The Sunshine we had yesterday and almost made it to 60 degrees, but we will take it.
Staged now under the road racer awaiting body lift Saturday where it will go into service as a body dolly until I complete my road race chassis. After which I will take this one apart and restore it.
More as it happens. Thanks for watching.
David Howard
AllVettes4Me
04-05-2017, 01:02 PM
#13
Senior Member
Thread Starter
Member Since: Jan 2008
Location: Easton, PA
Posts: 12,154
Received 2,031 Likes
on
1,103 Posts
St. Jude Donor '10
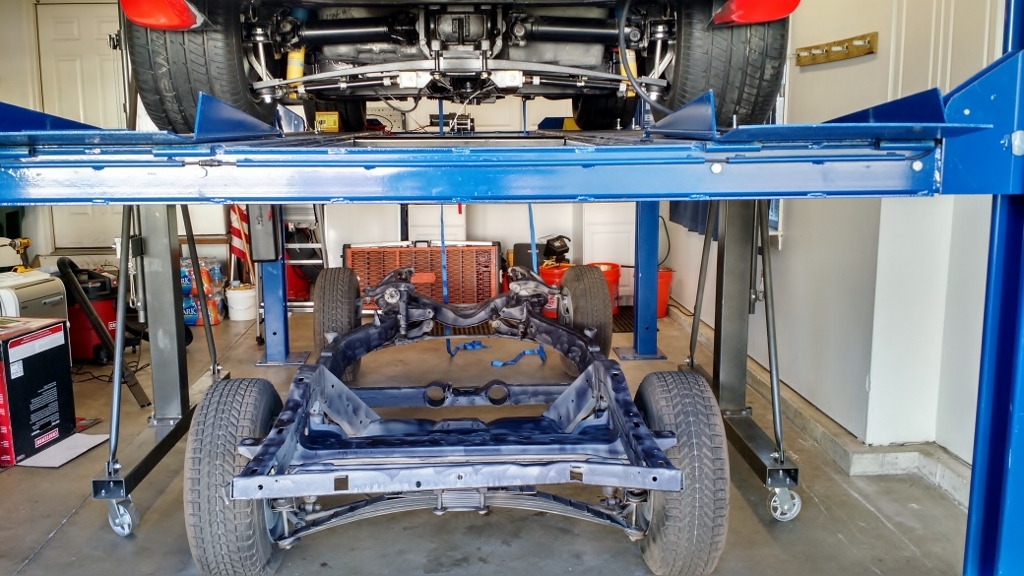
Saturday, April 1st we lifted the road shark body.
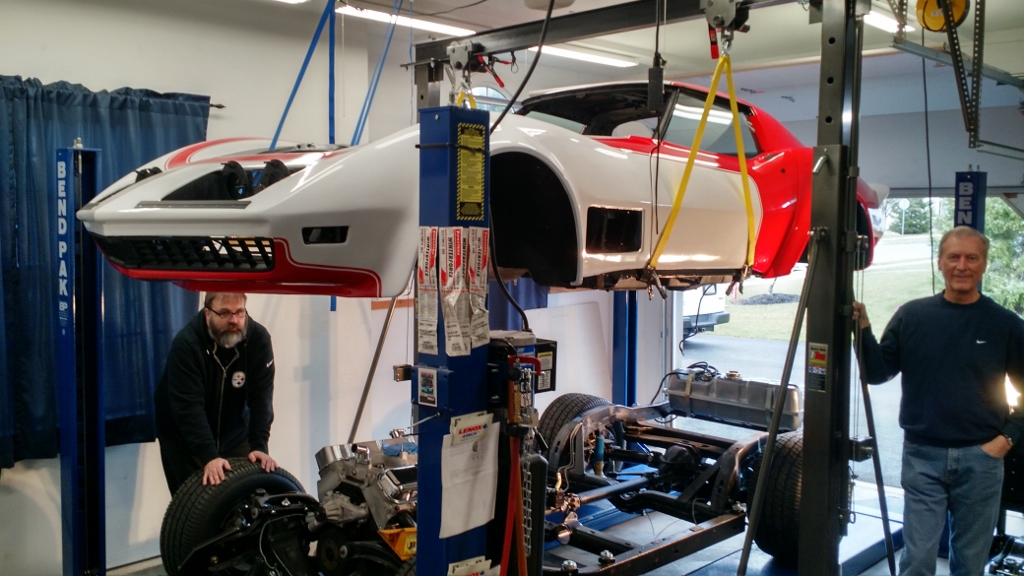
And the 69 rolling chassis went in to service as my road shark body dolly.
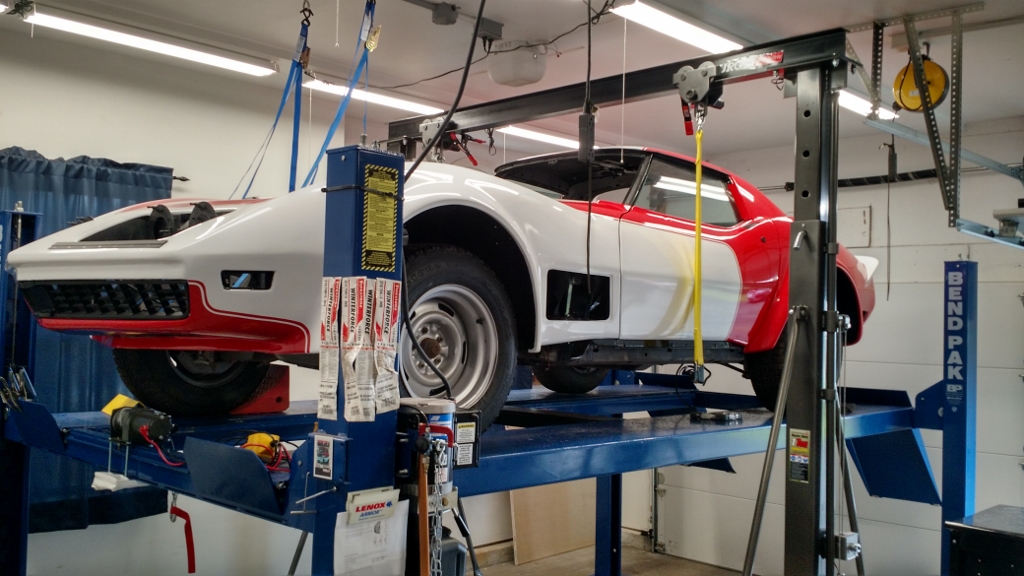
I really could not ask for a better donor to hold the body for a few weeks while I work on the road shark chassis. That work is on another thread. When that work is done I will put this body back on the 72 and make plans for the 69 from that point forward.
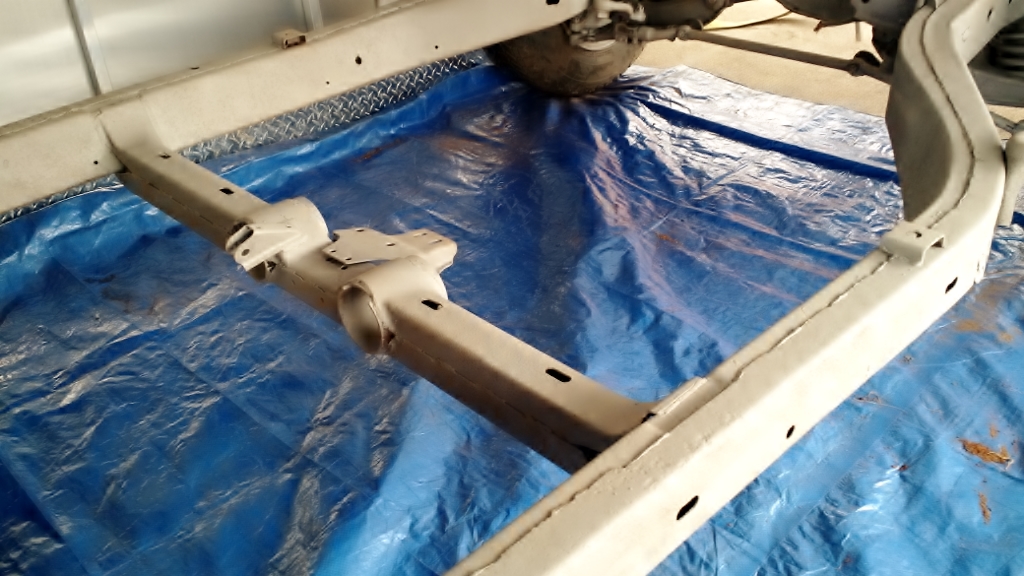
Purchased to date are all eight body mounts; front extension support repair parts; rear kickup gussets left and right; and a new rear cross member.
All parts will be removed and new parts welded into place and frame will be given more welding to stiffen the frame. That will be followed by frame re-measurement and straightening if needed.
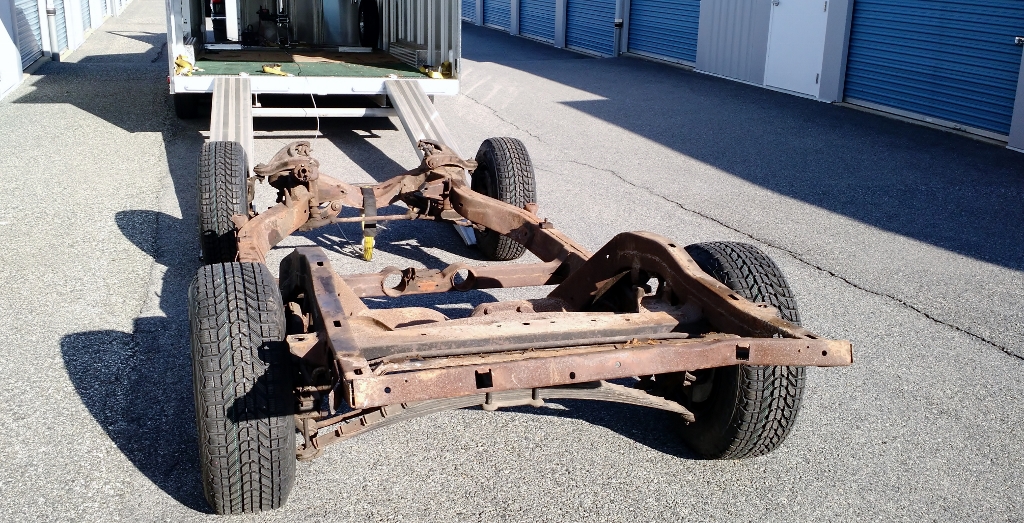
One point of additional note. The rear straps used on the 3.36 differential clearly indicates that this was not a big block frame originally, but it also appears that this one has the F-41 suspension in the rear. Always fun to uncover mysteries.
More soon. Thanks for watching. David
And the 69 rolling chassis went in to service as my road shark body dolly.
I really could not ask for a better donor to hold the body for a few weeks while I work on the road shark chassis. That work is on another thread. When that work is done I will put this body back on the 72 and make plans for the 69 from that point forward.
Purchased to date are all eight body mounts; front extension support repair parts; rear kickup gussets left and right; and a new rear cross member.
All parts will be removed and new parts welded into place and frame will be given more welding to stiffen the frame. That will be followed by frame re-measurement and straightening if needed.
One point of additional note. The rear straps used on the 3.36 differential clearly indicates that this was not a big block frame originally, but it also appears that this one has the F-41 suspension in the rear. Always fun to uncover mysteries.
More soon. Thanks for watching. David
04-05-2017, 01:16 PM
#14
Team Owner


Member Since: Jun 2000
Location: Southbound
Posts: 38,928
Likes: 0
Received 1,469 Likes
on
1,248 Posts
Cruise-In II Veteran


 04-12-2017, 06:18 AM
#16
Senior Member
Thread Starter
Member Since: Jan 2008
Location: Easton, PA
Posts: 12,154
Received 2,031 Likes
on
1,103 Posts
St. Jude Donor '10
The chassis will be loosing it's rolling storage status on Saturday, April 29th, when the 72 road shark is lifted and put back into place on it's chassis for what we hope to be the last time.
I have now received the rear cross member (new) which will be added to the chassis along with new body mounts and new gussets. The welding will all take place in May and the restoration will begin.
New trailing arms and new half shafts are here and will be used on the chassis. The original 3.36 differential will be rebuilt by Blair's and put back on the chassis when it is ready. Going to be a very nice chassis when it is completed.
I have not made a decision yet on restoring or reusing the F-41 suspension, control bar, spring yet. Open to suggestions.
David
04-12-2017, 07:57 AM
#17
Racer


Wow
05-12-2017, 08:16 AM
#19
Senior Member
Thread Starter
Member Since: Jan 2008
Location: Easton, PA
Posts: 12,154
Received 2,031 Likes
on
1,103 Posts
St. Jude Donor '10
The rolling chassis has finalized its service as a body dolly for the 1972 road shark and is now available for me to begin the restoration. I have accumulated many/most of the parts I will need now to restore this chassis to its original (better) condition.
1) New body mount pads for all four mounts on both sides purchased and ready for installation.
2) New rear kick up gussets purchased and ready for installation.
3) New front horn braces purchased and ready for installation.
4) New front cross member lower frame purchased and ready for installation.
5) New rear cross member purchased and ready for installation.
When I have the parts listed above welded on to the frame I will also have it reinforced and welded for additional strength.
This frame will be ready to support either a big block or small block setup in the future. I may have it modified to have a removable center section for the transmission support as well, have not decided on that yet.
Pictures and updates will begin in June, so stay tuned for a fun new project.
Best regards,
David
05-13-2017, 12:27 PM
#20

Hi David, sorry to interrupt but I used the HF tumbler and that thing work great! I can't believe how clean the stuff comes out. Anyway thanks for the tip And I will be watching you restore the 69 frame.
RVZIO
RVZIO