
HELP...I need a quik pic of fiberglass "tab" at top of door pillar on a '68 convertib
 08-15-2017, 03:27 PM
#1
Nam Labrat


Thread Starter
Member Since: Sep 2013
Location: New Orleans Loo-z-anna
Posts: 33,898
Received 4,178 Likes
on
2,738 Posts

White piece of paper is in the area where the tab is missing on both door pillar fiberglass panels.....


"While I'm at it" I need to repair the tabs also.....can someone provide a close-up pic of the "tab"?
Thanks.


"While I'm at it" I need to repair the tabs also.....can someone provide a close-up pic of the "tab"?
Thanks.
Last edited by doorgunner; 08-15-2017 at 03:50 PM.
 08-15-2017, 03:46 PM
#2
Team Owner

Member Since: Sep 2006
Location: Westminster Maryland
Posts: 30,173
Likes: 0
Received 2,878 Likes
on
2,515 Posts

Hi D,
This is a 69.
I don't know if a 68 was a different configuration.
Regards,
Alan
This is a 69.
I don't know if a 68 was a different configuration.
Regards,
Alan
The following users liked this post:
doorgunner (08-17-2017)
08-15-2017, 03:56 PM
#3
Nam Labrat
Thread Starter
Member Since: Sep 2013
Location: New Orleans Loo-z-anna
Posts: 33,898
Received 4,178 Likes
on
2,738 Posts
Alan.....do you have a "not so close" pic of the one with the door open?
Thanks, Tony
Thanks, Tony
 08-15-2017, 04:19 PM
#5
Team Owner
Member Since: Sep 2006
Location: Westminster Maryland
Posts: 30,173
Likes: 0
Received 2,878 Likes
on
2,515 Posts
Hi Tony,
Sorry, but no.
The photos are from about 5 years ago.
I have more of the area of the door that meets the quarter and lid, but not of that area of the lock pillar and lid.
Regards,
Alan
Sorry, but no.
The photos are from about 5 years ago.
I have more of the area of the door that meets the quarter and lid, but not of that area of the lock pillar and lid.
Regards,
Alan
08-15-2017, 09:01 PM
#6
Nam Labrat
Thread Starter
Member Since: Sep 2013
Location: New Orleans Loo-z-anna
Posts: 33,898
Received 4,178 Likes
on
2,738 Posts
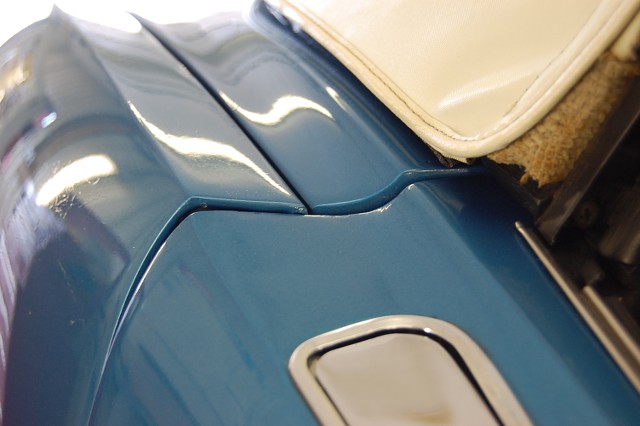
Thanks Alan.....it looks like the '68 convertible has a "rain trough".....That seems to be what I am missing on both pillars.
Does your '69 have a built in trough to channel rainwater?
Thanks Chazde3....a pic from overhead with the door open will show me what the '68 looks like.
Does your '69 have a built in trough to channel rainwater?
Thanks Chazde3....a pic from overhead with the door open will show me what the '68 looks like.
Last edited by doorgunner; 08-15-2017 at 10:01 PM.
08-15-2017, 11:06 PM
#7
Drifting

Thanks Alan.....it looks like the '68 convertible has a "rain trough".....That seems to be what I am missing on both pillars.
Does your '69 have a built in trough to channel rainwater?
Thanks Chazde3....a pic from overhead with the door open will show me what the '68 looks like.
Does your '69 have a built in trough to channel rainwater?
Thanks Chazde3....a pic from overhead with the door open will show me what the '68 looks like.
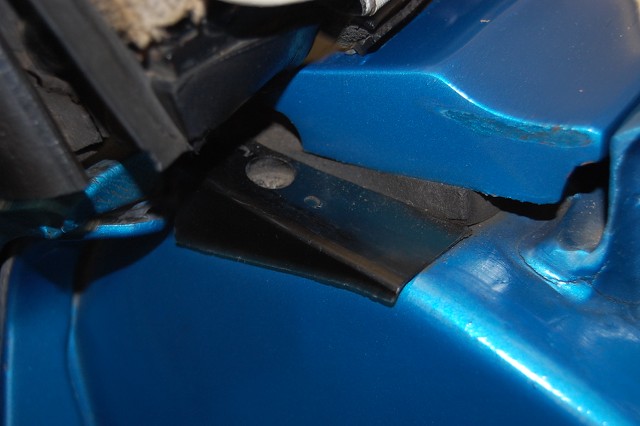
My passenger side is broken like yours so it doesn't look great, but here ya go.
My driver's side
And lastly, through the use of modern technology...a mirror image of the driver's side to show what the passenger's side should look like.
The following users liked this post:
doorgunner (08-17-2017)
08-16-2017, 09:12 AM
#8
Instructor

I believe that there is a very small part missing from this photographs. As I recall in this area there is a very small two prong tab that sticks out and is used to attach the facia. Does that sound familiar?
08-16-2017, 10:29 AM
#9
Drifting
Could be. My car was missing plenty of little pieces here and there.
08-16-2017, 10:45 AM
#10
Nam Labrat
Thread Starter
Member Since: Sep 2013
Location: New Orleans Loo-z-anna
Posts: 33,898
Received 4,178 Likes
on
2,738 Posts
Thanks Members! I think I have enough great pics to reproduce the pieces on both door pillar panels!

08-17-2017, 08:35 AM
#11
Instructor
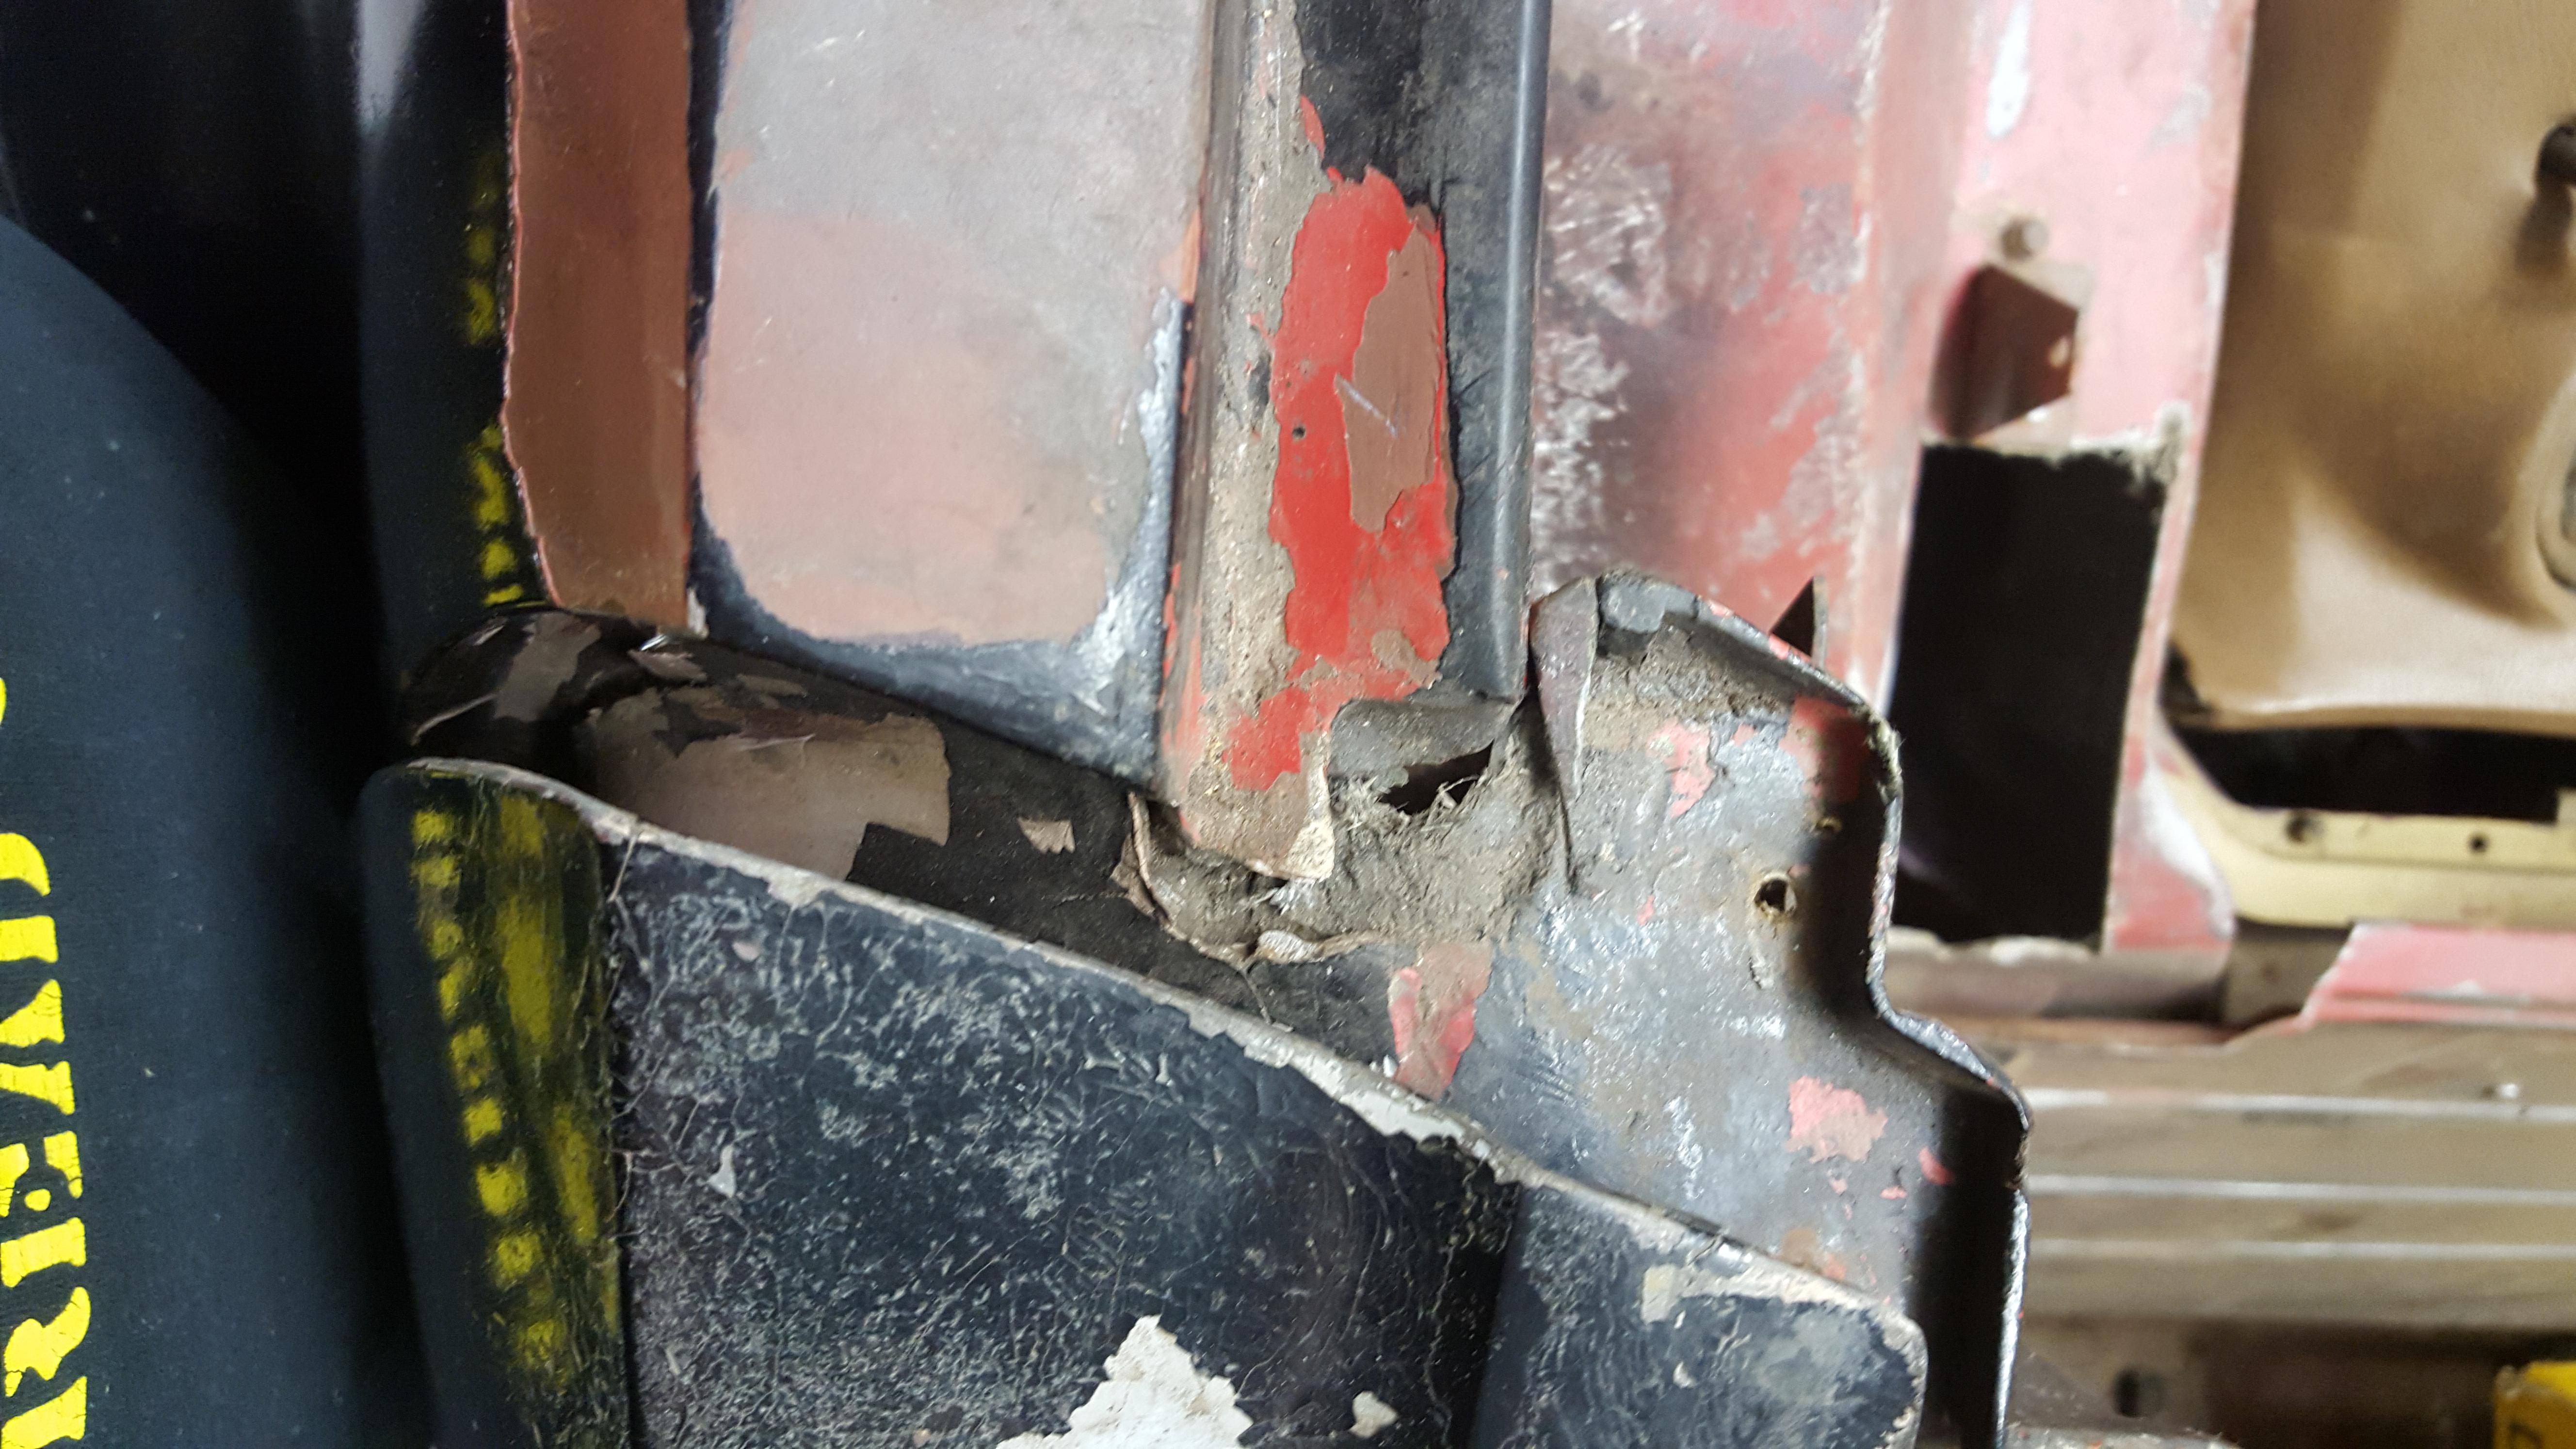
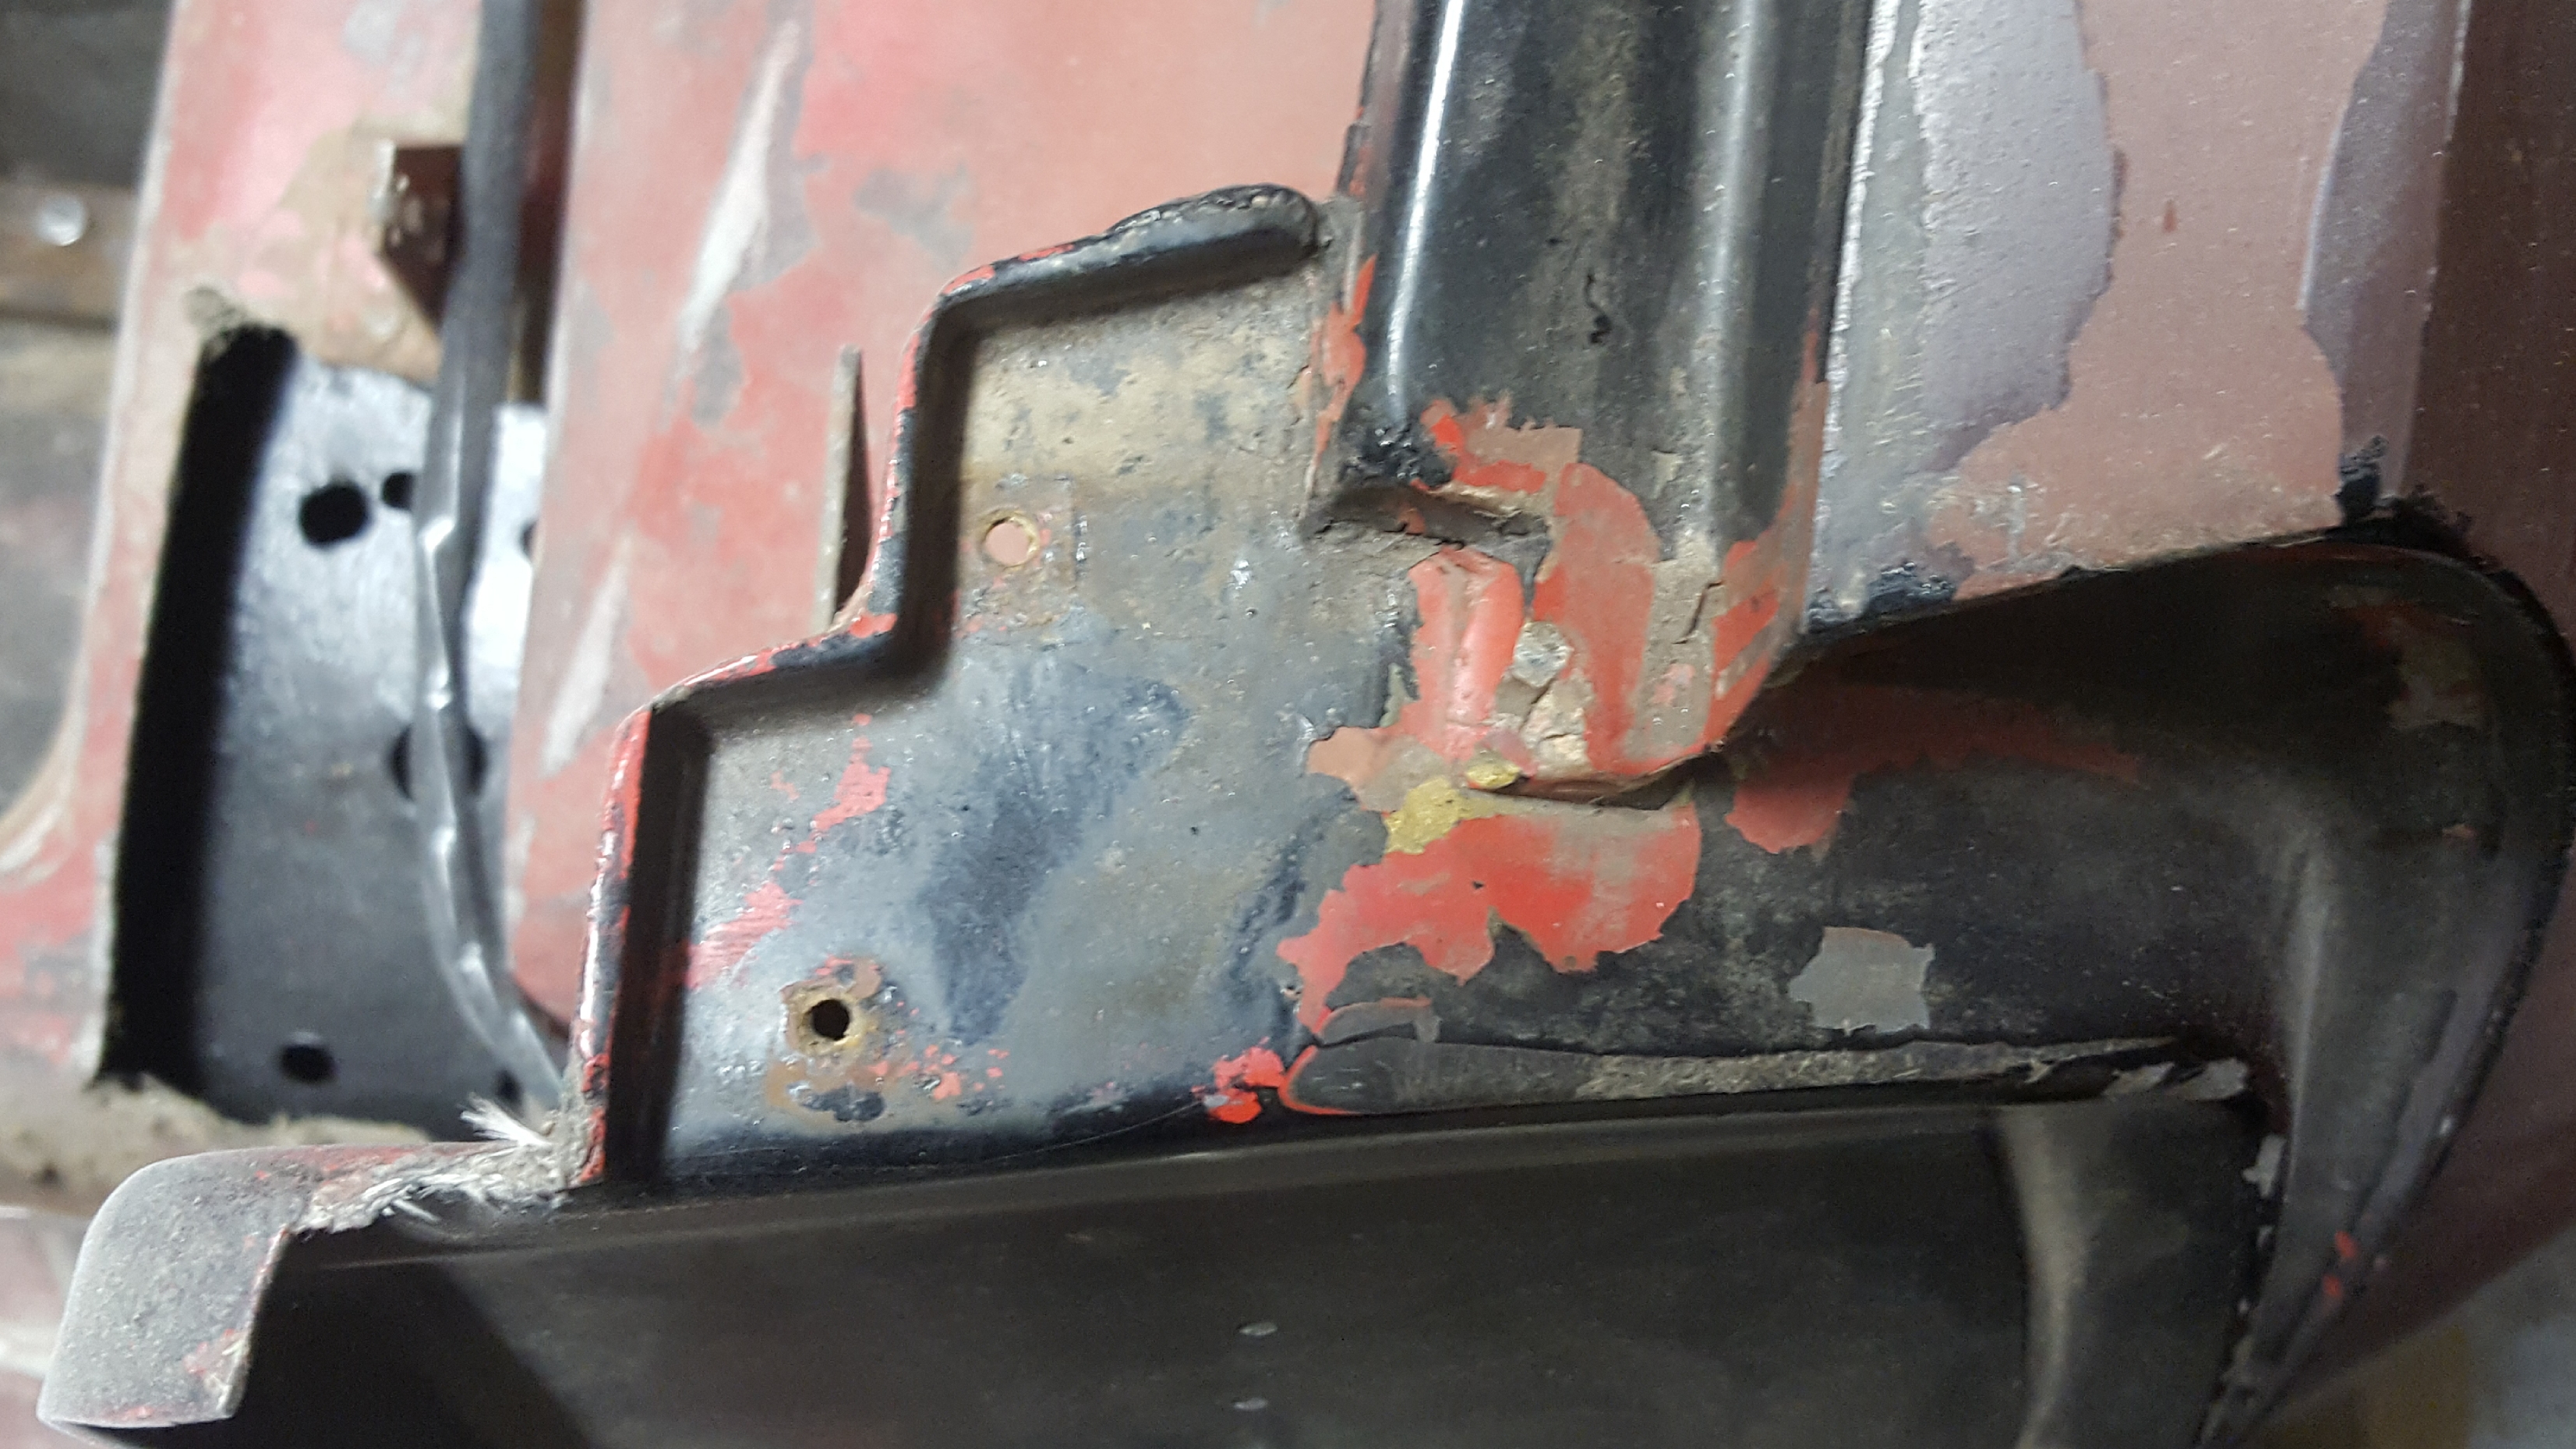
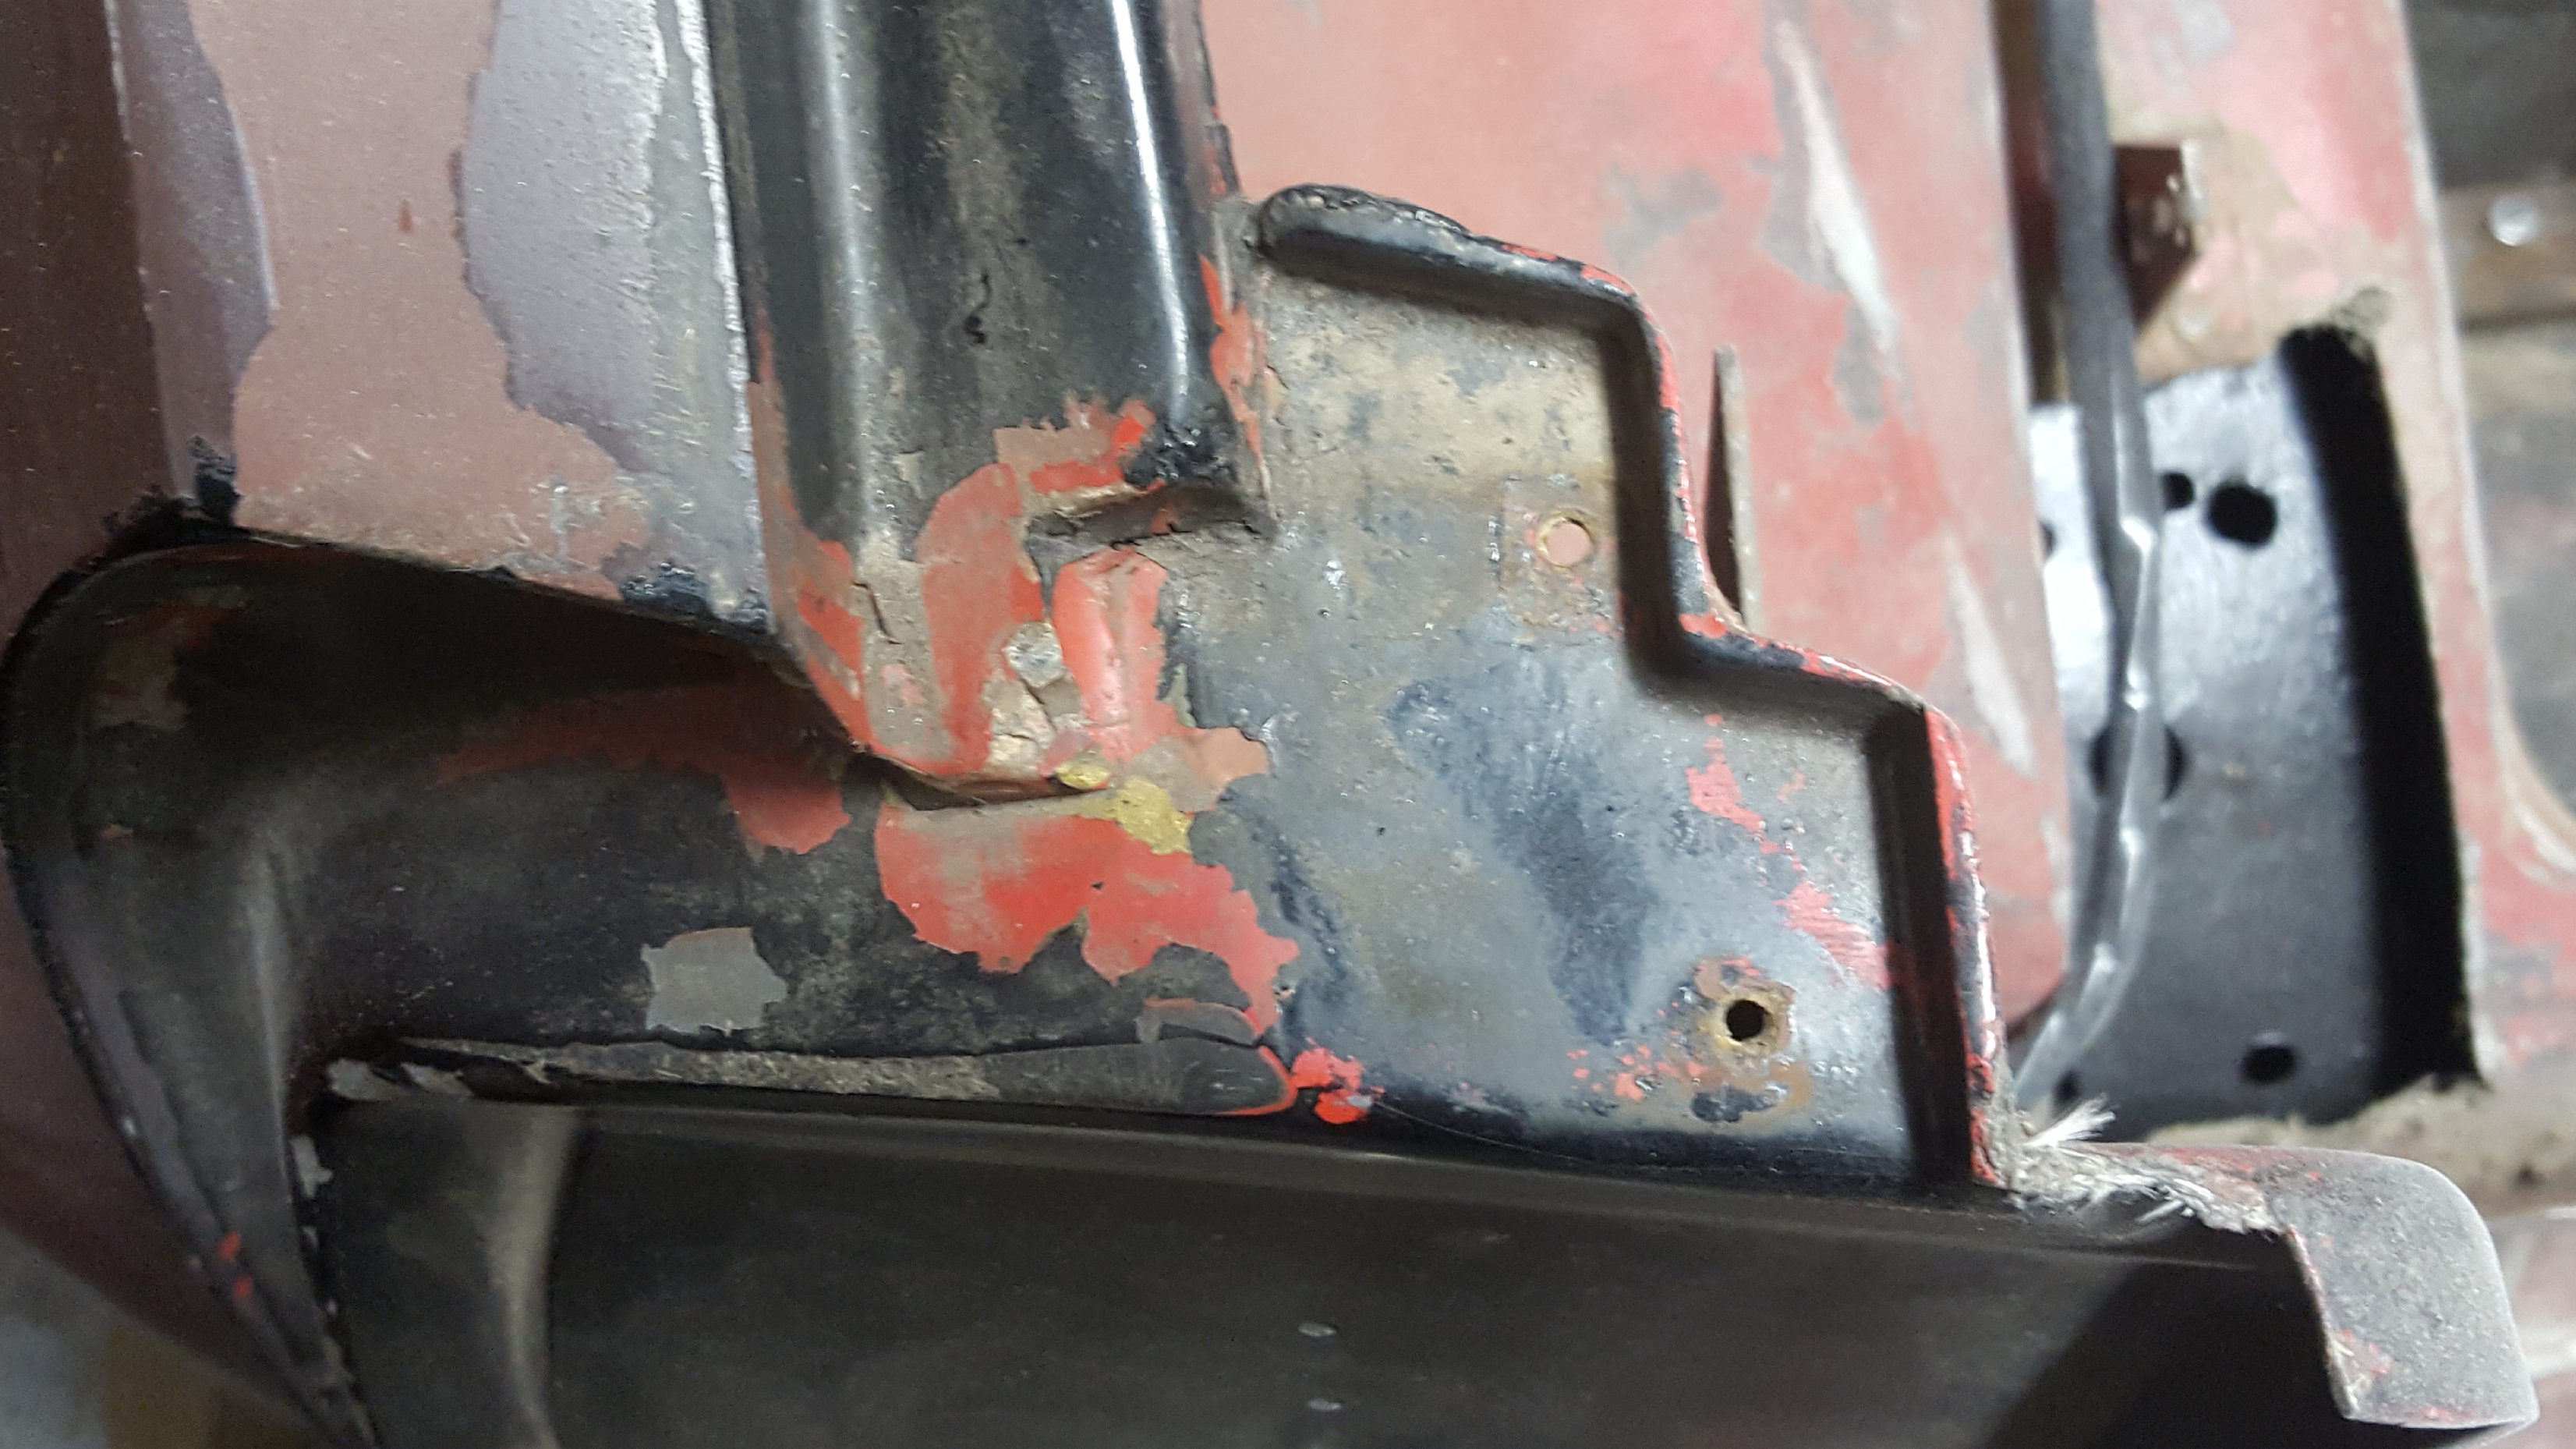
This is the tab to which I referred. I believe I can see remnants of these same attaching points in your photos. These are quite thin and fragile.


The following 2 users liked this post by NRAROX:
chazde3 (08-17-2017),
doorgunner (08-17-2017)
08-17-2017, 08:55 AM
#12
Drifting
Yeah you can see where mine were ripped off at some point. I didn't have any interior trim at that location when I started the project. It was a race car, so damage happened.
08-17-2017, 12:15 PM
#13
Nam Labrat
Thread Starter
Member Since: Sep 2013
Location: New Orleans Loo-z-anna
Posts: 33,898
Received 4,178 Likes
on
2,738 Posts
NRAROX Thanks for the pics. They may have been designed "thin and fragile"......but this Rookie is gonna' beef 'em up.
I'm saving ALL pics in this thread to my build thread!
I'm saving ALL pics in this thread to my build thread!
Last edited by doorgunner; 08-17-2017 at 12:43 PM.
08-17-2017, 04:28 PM
#14
Drifting


Not sure if this is what you want. Driver side with and without the little weatherstrip piece. RA
08-17-2017, 05:08 PM
#15
Nam Labrat
Thread Starter
Member Since: Sep 2013
Location: New Orleans Loo-z-anna
Posts: 33,898
Received 4,178 Likes
on
2,738 Posts
Thanks RA!
Can you guys give me some measurements in the pic below.....maybe I can start fabricating the drip troughs tomorrow.......

You may have to enlarge the pic to see the dimension lines better.
Can you guys give me some measurements in the pic below.....maybe I can start fabricating the drip troughs tomorrow.......

You may have to enlarge the pic to see the dimension lines better.
08-18-2017, 08:32 AM
#16
Instructor
I may be able to get to this today, but I have never pulled that seal. Ron, will you have time today to take these measurements? Your seal looks like it's already removed. Or is that an old photograph?
08-18-2017, 05:42 PM
#18
Instructor
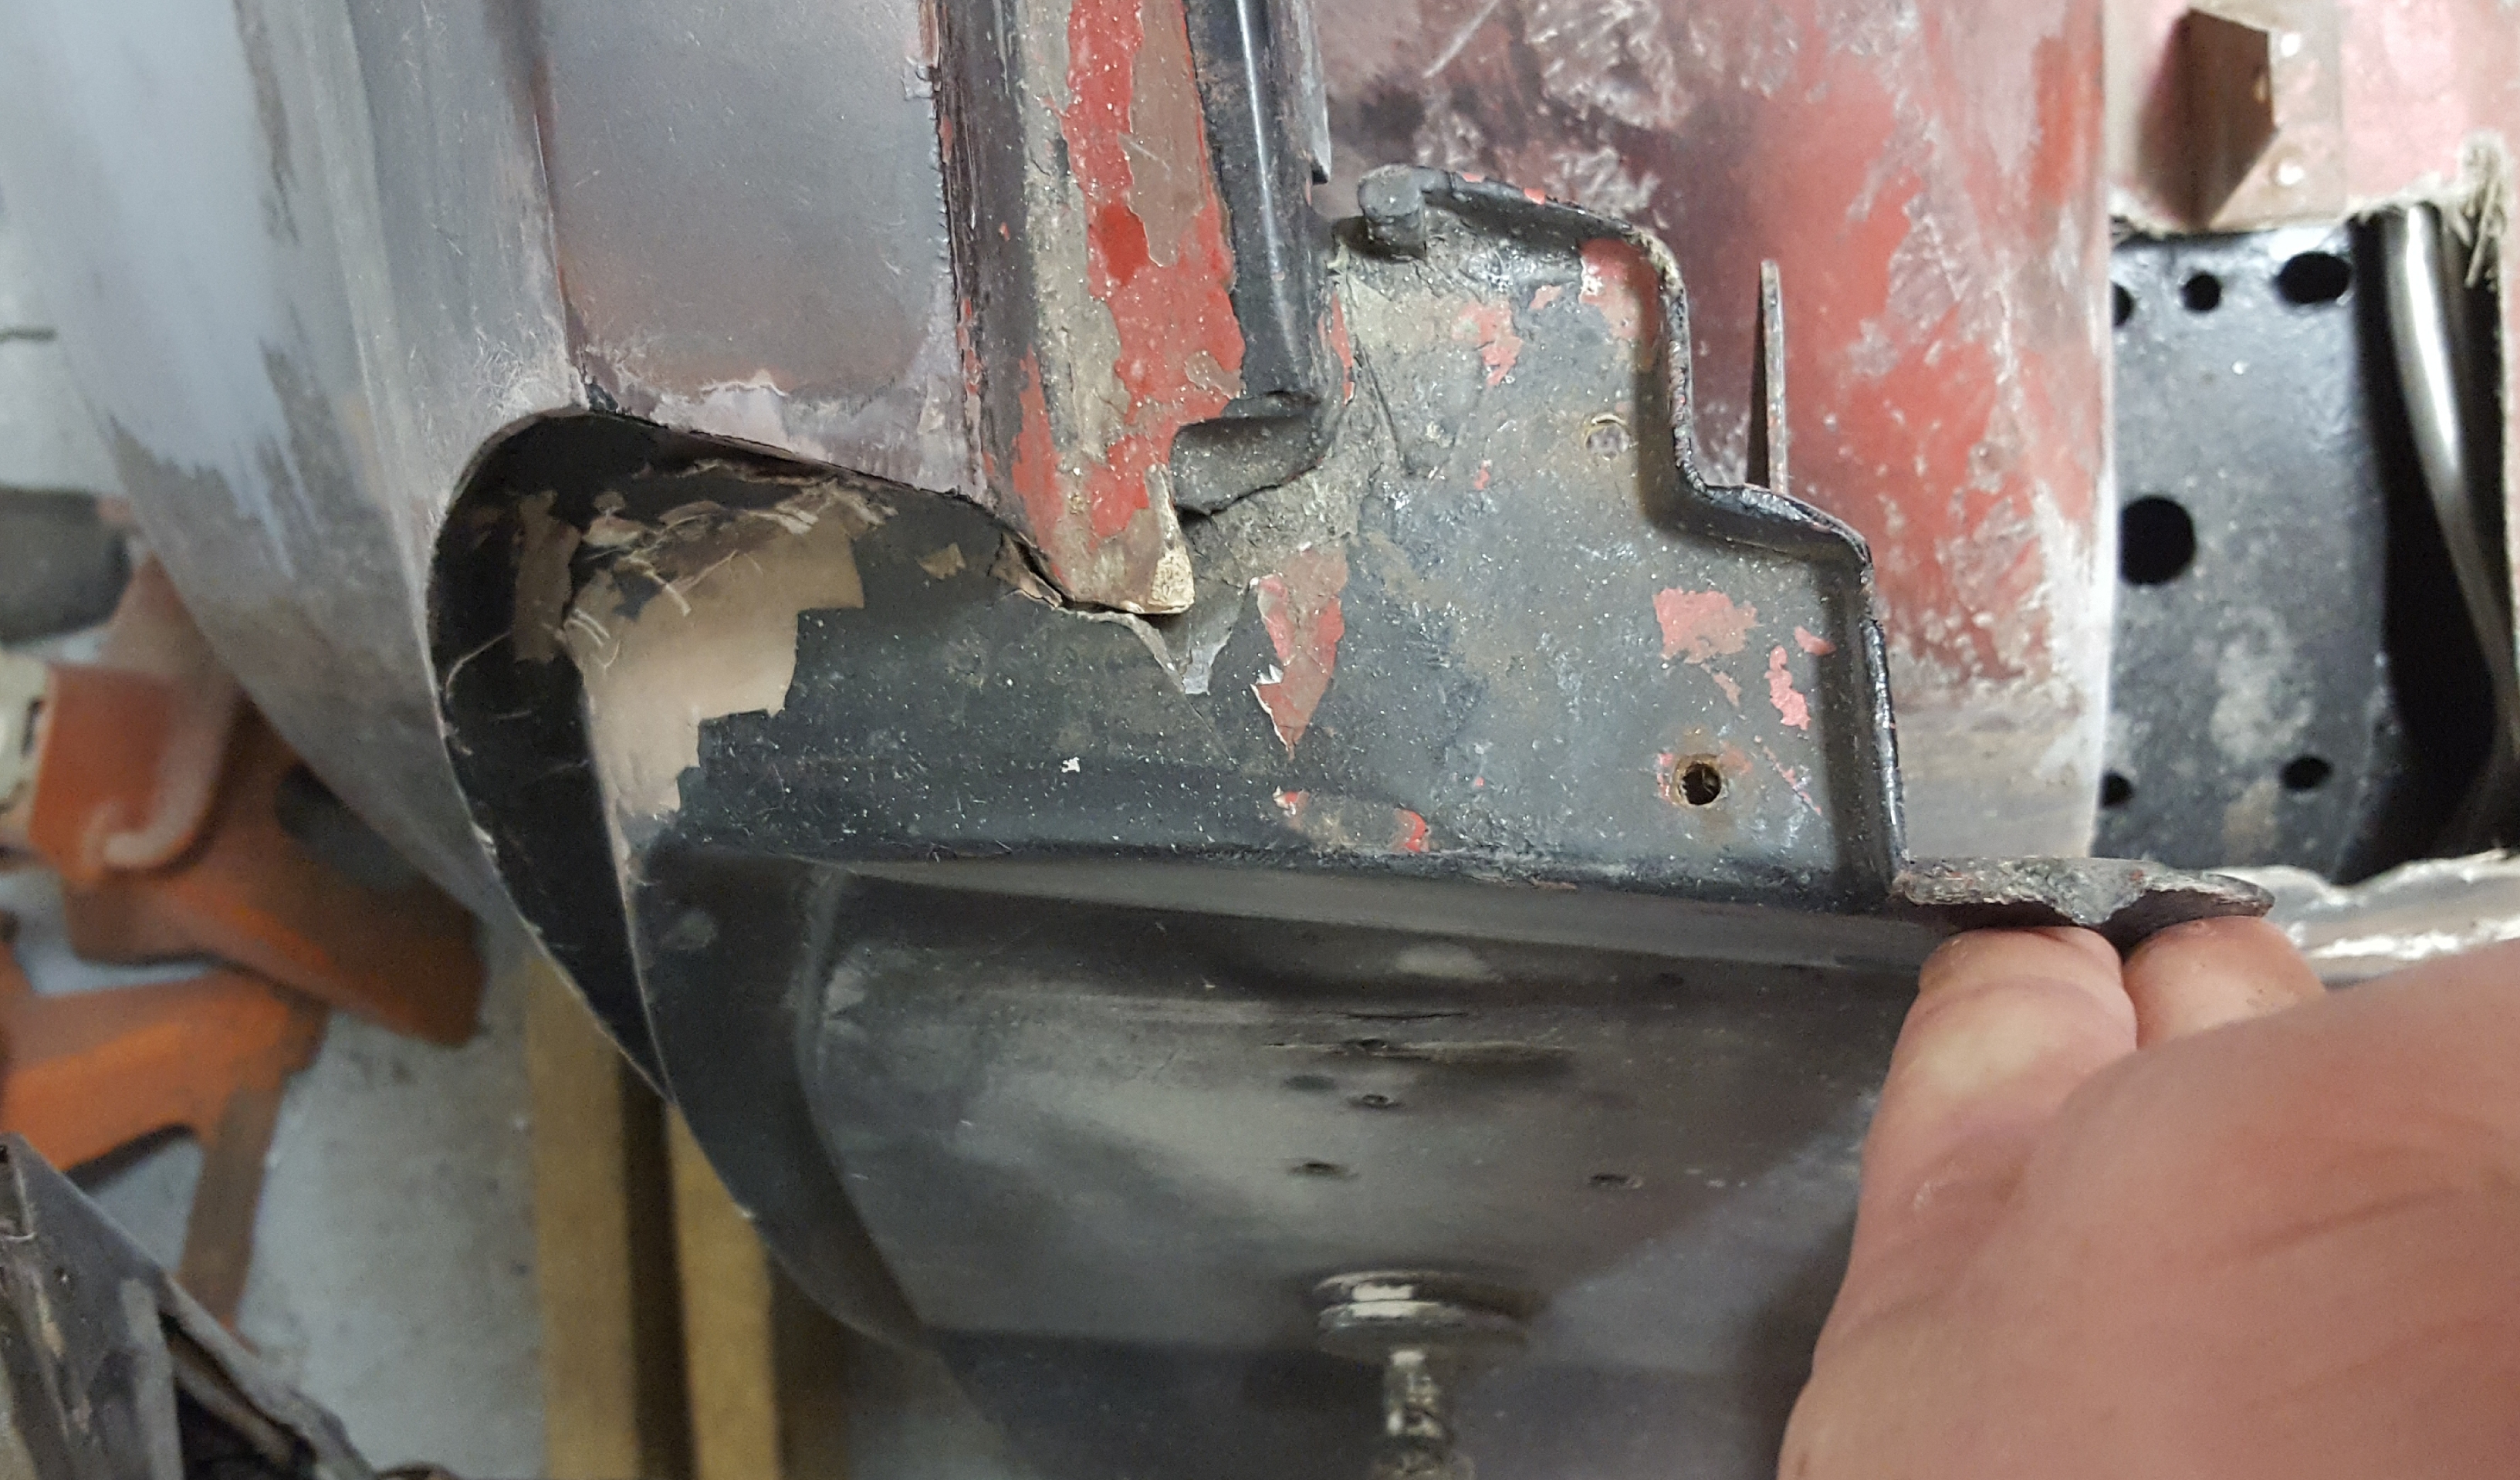
Here are the measurements from my car. I would not be offended by another '68 owner doublechecking my work.  Below this photo I will insert a photo indicating what I used as the take off point on the right. As you know, this edge is concave.

Below this photo I will insert a photo indicating what I used as the take off point on the right. As you know, this edge is concave. 08-18-2017, 05:59 PM
#19
Instructor
This shows how I took the measurements from the right after taping a stir stick to the car following the final arc of the edge. All measurements are perpendicular to the direction of the car, i.e., a right angle to the drive shaft. The screws are 1/2" x 1/8" (ignoring the threads). I don't have any reference screw to say if they are #x, y, or z. Appear to have been black manganese phosphate, but difficult to tell. As I said in the photo markup, I would drill the holes after you acquire the part and use that as a template.


Last edited by NRAROX; 08-18-2017 at 06:11 PM.
The following users liked this post:
doorgunner (08-18-2017)
08-18-2017, 11:49 PM
#20
Nam Labrat
Thread Starter
Member Since: Sep 2013
Location: New Orleans Loo-z-anna
Posts: 33,898
Received 4,178 Likes
on
2,738 Posts
Thanks NRAROX. My car was/is a basket case project, so I'm just trying to reproduce pieces that do the job intended. Those measurements are perfect for me to reproduce pieces for both door pillars.
Forum Members are great!
Forum Members are great!