When you click on links to various merchants on this site and make a purchase, this can result in this site earning a commission. Affiliate programs and affiliations include, but are not limited to, the eBay Partner Network.
C3 chrome outside door mirror mount plate repair/replacement
I know it happens ...because it has happened to me many times. I go to replace an outside chrome mirror only to find either rusted screws that will not come out...or the screws have been replaced with some other screw. I have seen many different attempts to try to keep the mirror mount base attached. And..I am sure some of you may have found this also when you went to replace the outside mirror mount base and mirror.
Well..make no mistake...there is a fix for this that is not that hard to do.
*** BACK STORY*** A long time ago when I was working on a Corvette and I needed to get the mirror base off so I could strip the paint off the door....the inevitable occurred. The screws did not want to cooperate and come out and I knew right then and there I was in for a major problem like I had encountered a few times before that.
Well Instead of using penetration oil and other methods. I chose to take the door off because I was going to deal with it later. I removed other parts off the door and noticed something I had not noticed before. This got me to think..and it is what I am going to show you
This thread is to show that the metal retainer that is installed under the door skin for the chrome mirrors for the doors can be serviced/replaced or installed.
This will show that there is no need to cut any part of your door to do this.
This thread may help those who may find they have broken/rusted/ screws that hold the base on and when replacing an outside chrome mirror that 'snap' and when wonder what to do next. Like I had briefly mentioned above.
I figured out how to do this. A reasonably simple way to repair it without having to butcher your door....or use whatever screw you can find.
Also...if you are installing the right hand door mirror. And if you are not wanting to use the Well-nuts that are provided for a right side chrome mirror. This thread will show you can install a metal retainer just like GM did for the left door.
On a 1973 I have in my shop that is needing this mirror plate removed anyway due to being a drag racing car. I am using it to prove my method works.
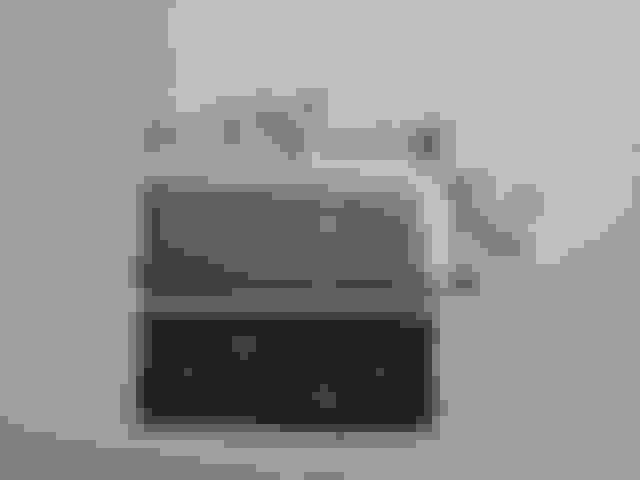
Description of the photos below begins here:
As you can see..I drilled out the two center rivets that held the plate to the door as GM designed. Then I poked out the one rear hole that was covered by body filler by a previous person who painted it. The front hole is still covered for the photo.
I have already install a long section of welding wire into the door....and you will see where it comes out in the next photo.
WOW!!!! Can you see that!!!! I was just as amazed when I did it for the first time over 30 years ago. It is coming out of the door handle area and the door skin is still on and I did not have to cut any part of the door. All I did was remove the outside door handle to gain access to the channel.
On the door I described above...I cut away the mirror mounting base and saw that I needed to drill out one of the factory countersunk rivets. I was going to install a blind rivet in its place. When I flipped the door...some of the the drill shavings and portion of the solid rivet came out by the handle...THAT is what got me thinking. So I ran a wire out of the hole and drilled out the other factory rivet....and that is what got us to this point. A way to remove and repair the mirror mounting base.
Well, clearly seeing that the mounting base can come out. Logic would state that if it is repaired if needed or replaced with a new one it can go back in.
Where the tip of the screwdriver is showing the cavity/channel that is made into the door that will allow this repair to take place. Anybody who knows these doors knows what cavity/channel I am referring to.
The one that I took out of the door is on the left..and the new plate made out of stainless steel and threaded with the two screw in it is on the right.
This stainless steel plate will be removed after I am done and I am using it for speed of installation. It is pointless of me to restore that plate if I am not going to use it....right?
This is showing that when I make these plates....I thread all four holes.
This is the measurement of the plate if someone wants to try to make one. As for the drilling of the holes for the mirror base...use it as a gauge. And for the two other holes...use this photo to get you close. You can drill and tap them or drill out 3/16" holes and use a countersunk blind rivet. Also keep in mind.... you can use the general rule of thumb. And that is...if you are threading the plate like I did and not welding nuts to the backside of the plate... the thickness of the plate should be as thick as the diameter of the 10-32 machine screw you are going to use.
The countersunk rivets that were used by GM and the countersunk blind rivets you can use if you do not want to use machine screws.
The solid rivets that GM used is just to show what they look like.. you will not be able to use them due to the door skin is on the door frame.
Inserted the welding wire in the second hole and got it to come out by the handle.
Then I put the wire though the second hole in the plate.
It is hard to see but I am putting a knot in the wire so it can grab and pull on this plate when I pull the wire end at the mirror mount area.
Then I insert the welding wire into the third hole.
As you can hopefully see...both wires have been knotted up so they can grab and pull the plate into position.
Pull on both wires and VOILA!!! The plate is in position so the outer two screws can be installed so the inner screws or pop rivets can be installed when the welding wires are removed.
Here is a photo that shows the shiny threaded holes for the inner screws. thus showing that it was installed.
Obviously if a person chooses to use whatever they feel will work for them they can do as they wish...but for the Corvette owner who wants to challenge themselves and fix it like it was designed..this is not that hard to do.
I know I have these plates made up and I can swap one out really quick if I am replacing the left door plate. If I am having to drill the holes for the right side...that takes just a bit longer because I am careful tapering the fiberglass so my machine screws lay flush with the door surface. And seeing how I have had countless door panels and outside handles off....those are not a problem either and I feel it is well worth the effort for a much stronger solid mounting plate.
I know it happens ...because it has happened to me many times. I go to replace an outside chrome mirror only to find either rusted screws that will not come out...or the screws have been replaced with some other screw. I have seen many different attempts to try to keep the mirror mount base attached. And..I am sure some of you may have found this also when you went to replace the outside mirror mount base and mirror.
Well..make no mistake...there is a fix for this that is not that hard to do.
*** BACK STORY*** A long time ago when I was working on a Corvette and I needed to get the mirror base off so I could strip the paint off the door....the inevitable occurred. The screws did not want to cooperate and come out and I knew right then and there I was in for a major problem like I had encountered a few times before that.
Well Instead of using penetration oil and other methods. I chose to take the door off because I was going to deal with it later. I removed other parts off the door and noticed something I had not noticed before. This got me to think..and it is what I am going to show you
This thread is to show that the metal retainer that is installed UNDER the door skin for the chrome mirrors for the doors can be serviced/replaced or installed.
This will show that there is no need to cut any part of your door to do this.
This thread may help those who may find they have broken/rusted/ screws that hold the base on and when replacing an outside chrome mirror that 'snap' and when wonder what to do next. Like I had briefly mentioned above.
I figured out how to do this. A reasonably simple way to repair it without having to butcher your door....or use whatever screw you can find.
Also...if you are installing the right hand door mirror. And if you are not wanting to use the Well-nuts that are provided for a right side chrome mirror. This thread will show you can install a metal retainer just like GM did for the left door.
On a 1973 I have in my shop that is needing this mirror plate removed anyway due to being a drag racing car. I am using it to prove my method works.
Description of the photos below begins here:
As you can see..I drilled out the two center rivets that held the plate to the door as GM designed. Then I poked out the one rear hole that was covered by body filler by a previous person who painted it. The front hole is still covered for the photo.
I have already install a long section of welding wire into the door....and you will see where it comes out in the next photo.
WOW!!!! Can you see that!!!! I was just as amazed when I did it for the first time over 30 years ago. It is coming out of the door handle area and the door skin is still on and I did not have to cut any part of the door. All I did was remove the outside door handle to gain access to the channel.
On the door I described above...I cut away the mirror mounting base and saw that I needed to drill out one of the factory countersunk rivets. I was going to install a blind rivet in its place. When I flipped the door...some of the the drill shavings and portion of the solid rivet came out by the handle...THAT is what got me thinking. So I ran a wire out of the hole and drilled out the other factory rivet....and that is what got us to this point. A way to remove and repair the mirror mounting base.
Well, clearly seeing that the mounting base can come out. Logic would state that if it is repaired if needed or replaced with a new one it can go back in.
Where the tip of the screwdriver is showing the cavity/channel that is made into the door that will allow this repair to take place. Anybody who knows these doors knows what cavity/channel I am referring to.
The one that I took out of the door is on the left..and the new plate made out of stainless steel and threaded with the two screw in it is on the right.
This stainless steel plate will be removed after I am done and I am using it for speed of installation. It is pointless of me to restore that plate if I am not going to use it....right?
This is showing that when I make these plates....I thread all four holes.
This is the measurement of the plate if someone wants to try to make one. AS for the drilling of the holes for the mirror base...use it as a gauge. And for the two other holes...use this photo to get you close. You candrilladn tap tehm or drill out 3/16" hoels adn use a countersunk blind rivet.
The countersunk rivets that were used by GM and the countersunk blind rivets you can use if you do not want to use machine screws.
The solid rivets that GM used is just to show what they look like.. you will not be able to use them due to the door skin is on the door frame.
Inserted the welding wire in the second hole and got it to come out by the handle.
Then I put the wire though the second hole in the plate.
It is hard to see but I am putting a knot in the wire so it can grab and pull on this plate when I pull the wire end at the mirror mount area.
Then I insert the welding wire into the THIRD hole.
As you can hopefully see...BOTH wires have been knotted up so they can grab and pull the plate into position.
Pull on both wires and VOILA!!! The plate is in position so the outer two screws can be installed so the inner screws or pop rivets can be installed when the welding wires are removed.
Here is a photo that shows the shiny threaded holes for the inner screws. thus showing that it was installed.
Obviously if a person chooses to use whatever they feel will work for them they can do as they wish...but for the Corvette owner who wants to challenge themselves and fix it like it was designed..this is not that hard to do.
I know I have these plates made up and I can swap one out really quick if I am replacing the left door plate. If I am having to drill the holes for the right side...that takes just a bit longer because I am careful tapering the fiberglass so my machine screws lay flush with the door surface. And seeing how I have had countless door panels and outside handles off....those are not a problem either and I feel it is well worth the effort for a much stronger solid mounting plate.
DUB
I did this on my 69. The hole was so large in mine from po's drilling
Lots of holes to mount mirrors. I was able to pull the new backing plate in place and then spread epoxy on it. I was able to then pull it tight against the inner door skin with the screws. No need for blind rivets in my case.
I wish this had been posted before last weekend. I had to fix my right side mirror, whose rubber well nuts had failed.
I found another route which worked for me, but if my mirror ever gets loose again, I'll copy this method.
Side note: my reproduction passenger side mirror was still a little loose, even after getting the mounting plate snug. After a little investigation, I found that the allen head screw that secures the mirror to the mounting plate was a little too long. It was bottoming out in the threaded hole before the tapered shoulder was making good contact with the mounting plate. A couple seconds on my grinder and the screw was the right length and the mirror is on there tight.
HOLY SMOKES...can someone say 'Swiss cheese'! Not like I have not seen that before. I am often times amazed on what I find and see in regards to a repair that seemingly failed and ask myself why did the person just not stop and take a deep breath and think about it.
Glad that you got yours fixed. Looks very good!
I also appreciate the photo you posted of it so other forum members who may not be aware of this issue can see one of the 'worse case' scenarios.
I wish this had been posted before last weekend. I had to fix my right side mirror, whose rubber well nuts had failed.
Sorry for the delay and lets hope that your fix will last a long time so you do not have to revisit it again.
Sorry that your well nuts failed. I know that they can fail...or they can last for a very long time. With my luck..the well nuts would fail and I would have to do it again...and that is why I do it how I do it in this thread.
I agree with you that these aftermarket parts are often times off just enough that it will require some slight modification to get them to work.
Awesome write-up. Very gracious of you to take the time. Ingenious approach. You want to walk me through some 110 wiring I need to snake in my house?
Uhhhh...I feel for you on that one. That is when my patience gets put to a serious test...and I know me. I will gladly pay the electrician I know very well to come by and I will be his helper.
awesome thanks for sharing this method !
I really hate the vibration you get with the well nuts.
I agree with you. When I installed the well nuts in the past I would have to get them really tight to work. It seemed like a good thing at the time.
Clearly it is a fast way to put a mirror on. But I have seen and repaired so many doors that had the well nuts in them that had a failure of some type and damaged the fiberglass. I am glad I found a way to service the metal plate and have used it and never looked back since.
And as always ...just to be fair...those people who used the well nuts and have had great success..I am truly glad for you.
Dub, thanks for spending the time and effort to post this up. I posted a help request some time ago and got no response. This is exactly what I needed to know.
Dub, thanks for spending the time and effort to post this up. I posted a help request some time ago and got no response. This is exactly what I needed to know.
Glad to be of some assistance. Please come back and let us all know how you did.
And not that it matters...and God knows I am not the only one on the forum who can answer questions. But if you ask a question that deal with anything about the body or body work or paint and are not getting a response...post it in the 'paint and body' section because I go to it every day. And that way I will see it and if I can help I will. I often times miss threads that have to do with body or paint stuff when they are posted in teh 'general' section or the 'tech' section.

 08-15-2017, 05:21 PM