


1970 gauge cluster bezel removal - two lower posts

Thread Starter
Cruising

Joined: Sep 2017
Posts: 11
Likes: 0
I can't seem to get the two 3/8" nuts off the posts at the bottom of the gauge bezel. I've pulled the two access panels, contorted my body like a circus performer, and tried an ignition wrench, and a 3/8", 1/4"-drive socket both with and without a universal on it but can't get any leverage or movement to get those two nuts off the posts. What's the trick and what tool(s) should I be using?
Been futzing with this for about a month now, on-and-off. And it's driving my batsh^t crazy.
thanks
Been futzing with this for about a month now, on-and-off. And it's driving my batsh^t crazy.
thanks
Pro


Joined: Sep 2016
Posts: 720
Likes: 205
From: Michigan
The studs from the cluster bezel actually protrude through slots in the front of the console, as opposed to holes.
So, you may have some luck if you could just loosen the nuts and slide the bezel forward to clear the slot openings.
I didn't realize this until AFTER I got my bezel dis-assembled from the console.
So it only helped me when I re-assembled it, by allowing the nuts to be pre-started on the studs, and slipping the whole thing into the slots. Then tighten the upper screws, shifting for best fit, and tightening the lower nuts last.
FWIW. Any way you do it, it's a PITA.
I've got a new clock adjusting stem to install at some point, as well as a bulb or two to replace, and I'm delaying tearing this all apart again until absolutely necessary!
Drifting


Joined: Nov 2002
Posts: 1,787
Likes: 262
From: Blue Bell PA
2018 C3 of Year Finalist
If you have Ac it is impossible. I gave up ,I would like to change the
Panel below it but n
ESP you take out the Ac and heater control you can't get to it
Let me know if you have a secret.
Panel below it but n
ESP you take out the Ac and heater control you can't get to it
Let me know if you have a secret.
Drifting

Joined: Oct 2005
Posts: 1,615
Likes: 150
From: Forth Worth TX
I just left those nuts off when I put the center bezel back together, hasn't effected fit or finish. And since I've had to remove the center bezel on more than one occasion, it certainly made life easier.
Corvette Stories
The Best of Corvette for Corvette Enthusiasts

Top 10 Most Expensive Corvettes Ever Sold on Bring A Trailer
Brett Foote
10 Things Every Corvette Owner Needs (2026 Edition)
Michael S. Palmer
8 Most "Only Corvette Owners Understand" Quirks and Problems
Pouria Savadkouei
10 Reasons the C6 Z06 is Still A Performance Benchmark After 20 Years
Joe Kucinski
How Much Horsepower Every Corvette Engine "LOST" in 1972
Joe Kucinski
Top 10 DOs and DON'Ts for Protecting Your Convertible Top!
Michael S. Palmer
Top 10 Most Explosive Corvettes Ever Made: Power-to-Weight Ratio Ranked!
Joe Kucinski
150 hp to 1,250 hp: Every Corvette Generation Compared by the Specs That Matter
Joe Kucinski
8 Coolest Corvette Pace Cars (and Replicas) of All Time
Verdad GallardoDrifting


Joined: Nov 2013
Posts: 1,806
Likes: 258
From: Dublin Ohio
Here's my experience on this topic...I changed the entire radio bezel, put it back together, then I changed the radio and put it back together, then fixed my oil pressure line and put it back together, then changed the clock and put it back together, then fixed the second hand on my clock and put it back together, then realized the bezel was in crooked and put it back together.
I have a 72 4speed non AC and no fiber optics etc to get get in the way. With that said here's what I do...
Take off the shifter ball, vent *****, etc and take off the shifter surround plate and remove the screws holding in the heater control. Then set the heater control down inside the shift console.
Take off the radio side covers and the screws that are behind those pieces.
Take out the emergency brake console.
Unless I'm forgetting, that should allow you to lift the rear of the shifter console a little bit.
At that point, once I raise the back of the shift console I put my arm through the shifter plate hole and I can reach each nut fairly easily. Welllll, the passenger side is easy. Driver side, I have to maneuver around the heater control, but it's loose so it has a little wiggle to it.
I then get a socket that fits those nuts and I wrap a double sided scotch tape around the socket to give it grip. Amazing how much more torque you can put on a socket with tape on it.
Anyway, that's what I do.
Piece of cake
Last edited by BarryB72; Sep 13, 2017 at 08:37 PM.


Thread Starter
Cruising
Joined: Sep 2017
Posts: 11
Likes: 0
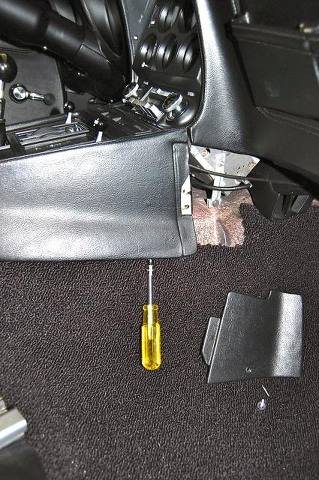
I did take the two screws out that hold the upside-down "U" bracket to the sides of the console (located under the forward trim panels on either side, which are visible in the white area which is where the screws that hold the trim piece [on the floor in the picture] go). I used a 1/4" drive, 3/8" socket with a 2" extension to a universal, then two extensions together to get it long enough. Took a lot of patience as you have to ratchet them slowly to keep the socket on the nut but they come out. For the "next time", I did order a 1/4" flex shaft which is about 6" long. I should be able to flex it up into the opening in front and get the 3/8" socket onto the nut.
I put the nuts back on, but not tight when I reassembled. The **ONLY* issues I ran into was that the bezel was sitting too low in the opening when I reassembled it, and I had to lift on the 'u'-bracket to get the mounting screws back into the sides of the console (which holds everything up and into place). Once I had lifted the bracket and reattached it to the sides (L/R) of the console, the bezel was at the right height and everything lined up. the other was getting the radio to slide back in at the right angle. I did remove the bolt you see in your picture which holds the side of the radio which allowed it to slide backwards which helped pivot the bezel backwards and then up and over the "U" bracket to get it out.
A couple notes about the process:
A. When you go to slide the bezel out, it catches on the left and right dash pads. because it's slightly wider. I wound up using a really wide-bladed screwdriver slid in between the dash pad and bezel to move it away just enough for me to slide it forward.
B. BE CAREFUL OF THE THREADED STUDS when you pull it forward. You will wind up scratching the front headlight fiber optic display panel which is located forwards of the heater controls.
C. If you are removing the bezel, take the time to clean all the electrical connections on the gauges. I cleaned all the copper connections and treated everything with DeOxit D100L. I'd strongly suggest it