When you click on links to various merchants on this site and make a purchase, this can result in this site earning a commission. Affiliate programs and affiliations include, but are not limited to, the eBay Partner Network.
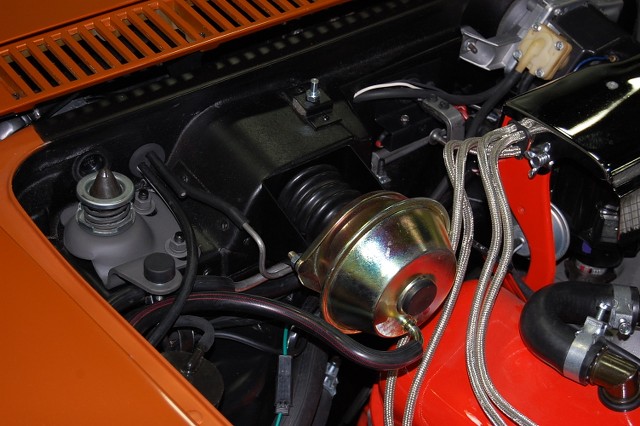
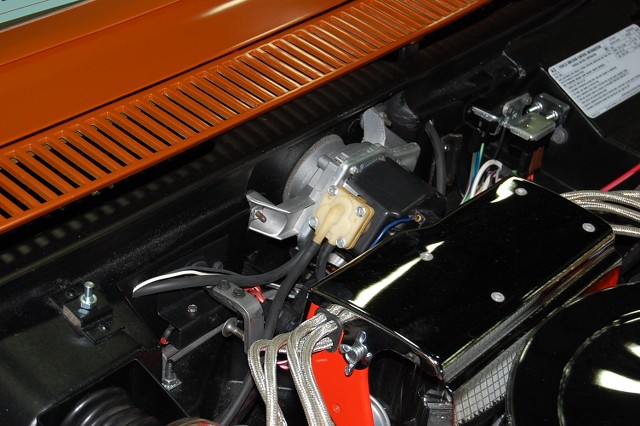
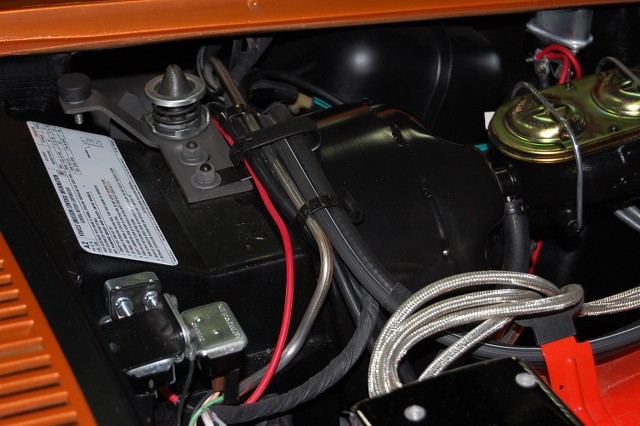
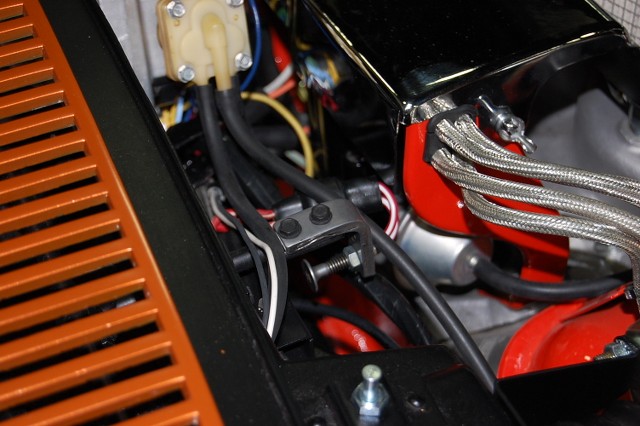
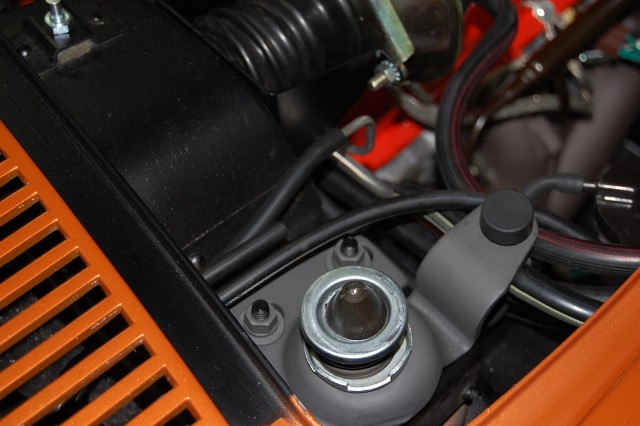
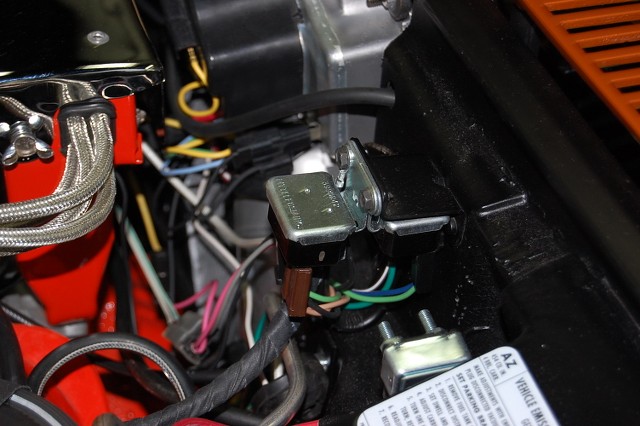
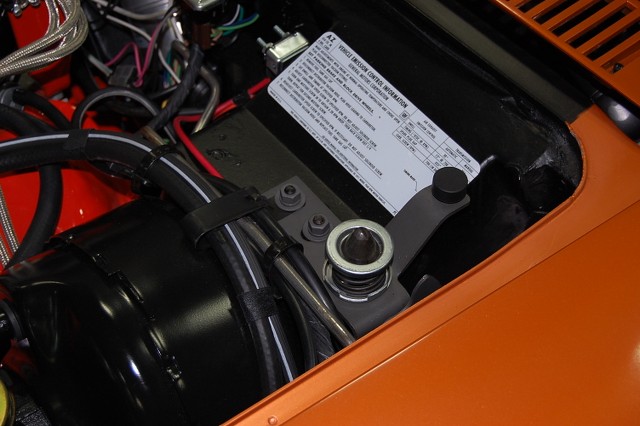
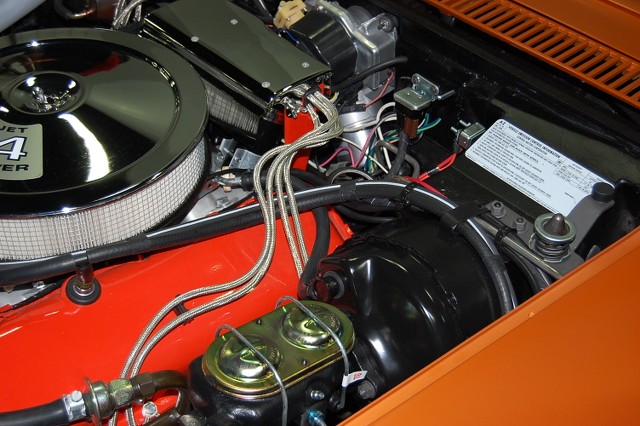
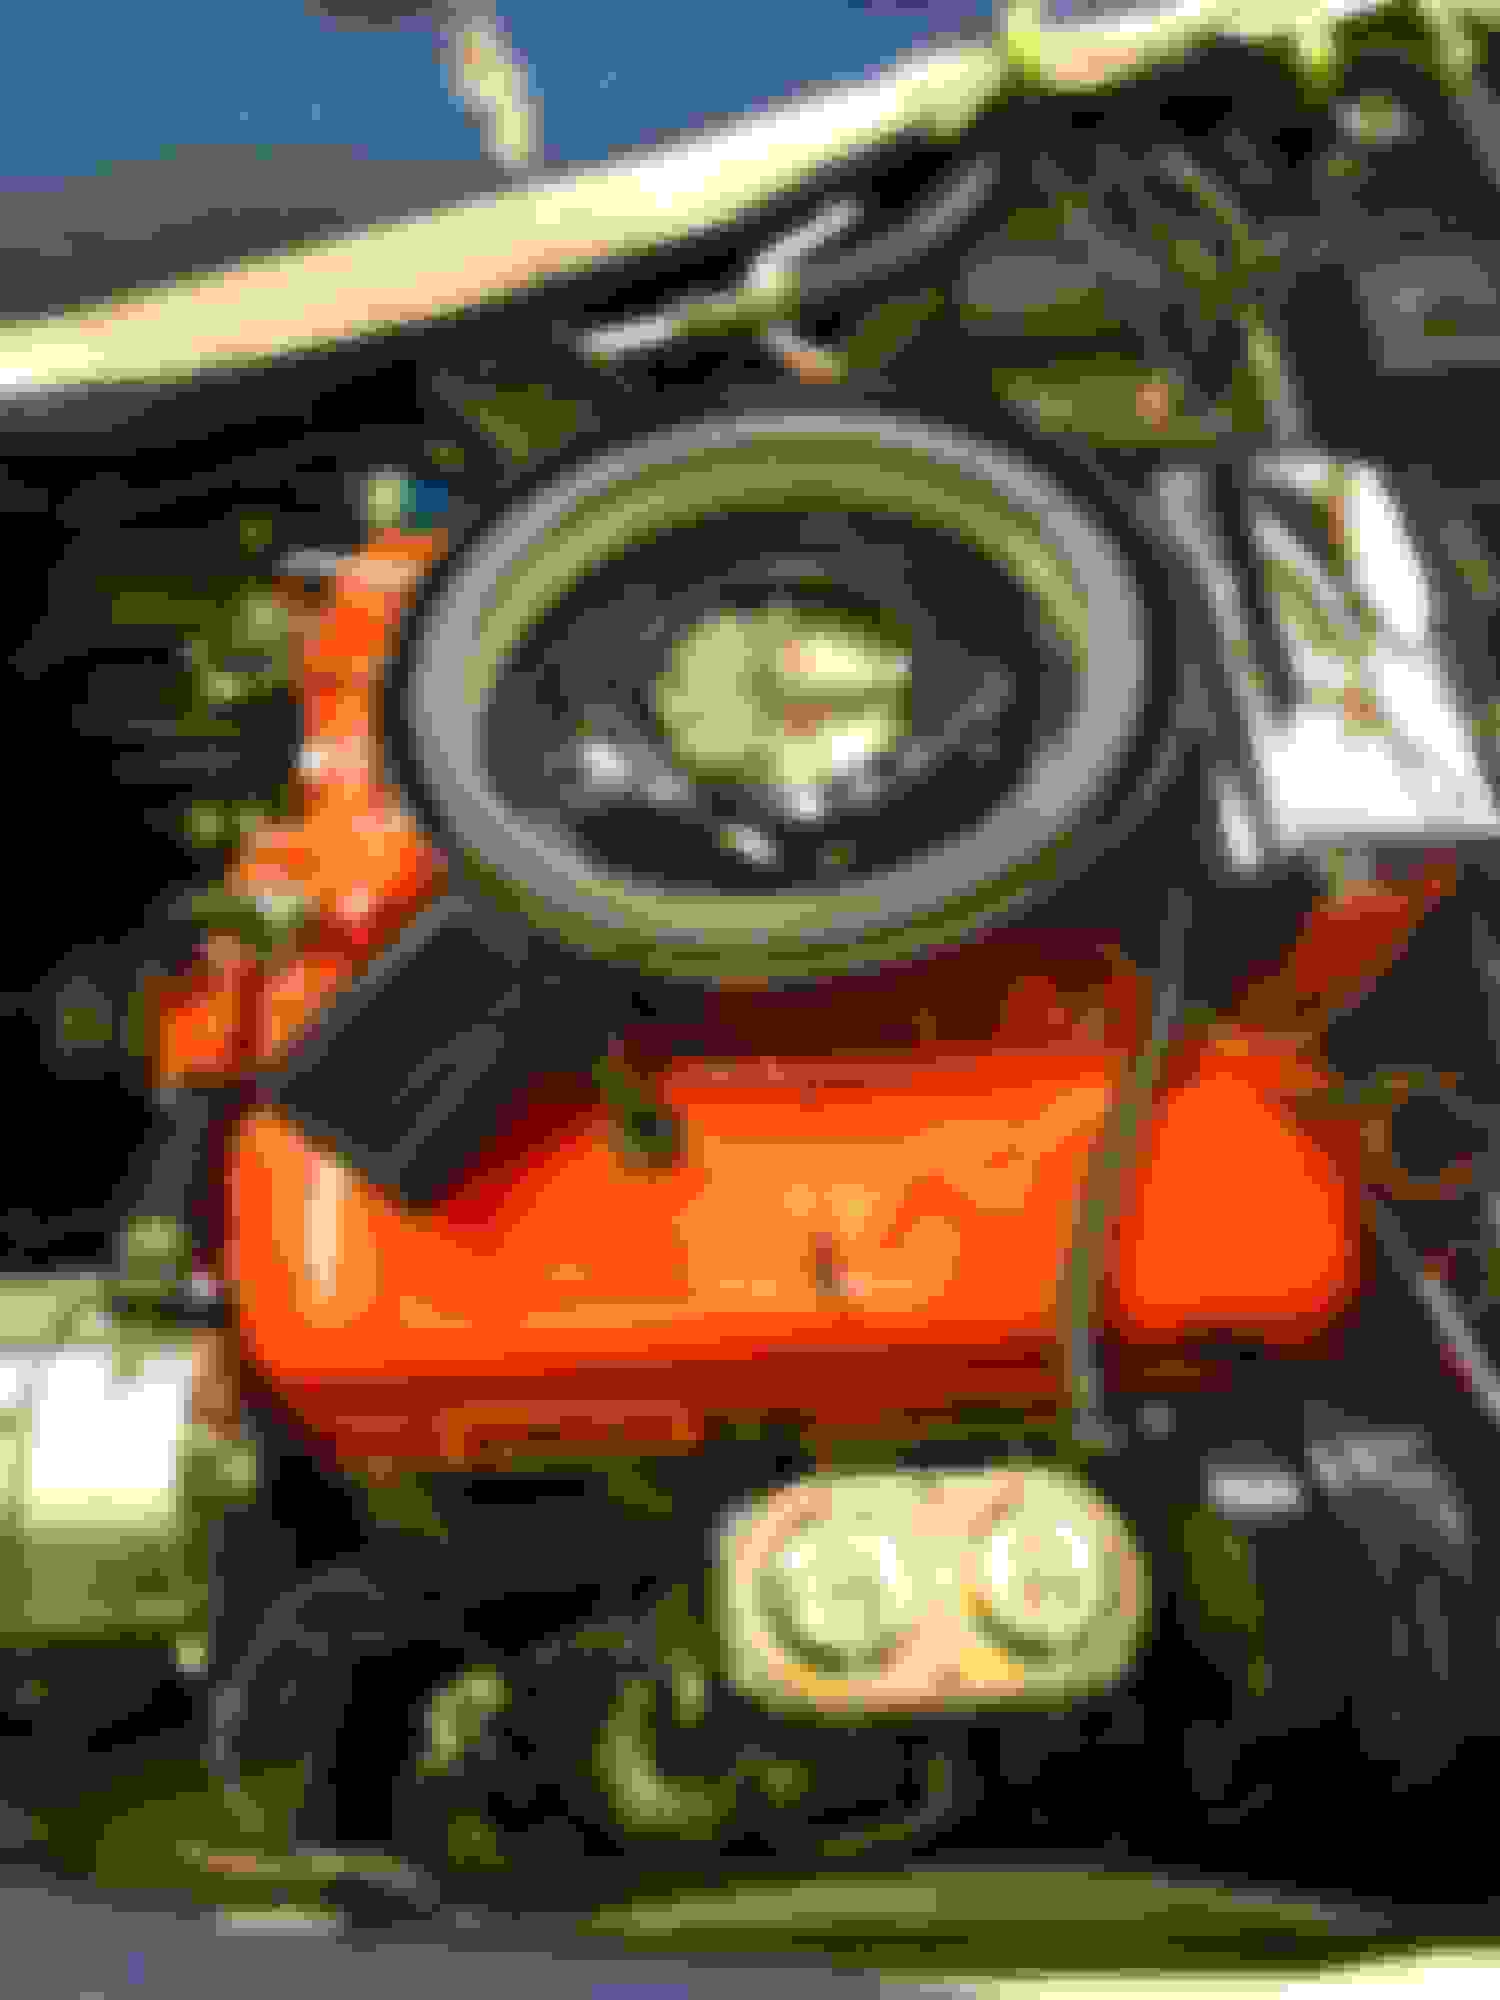
Here are some firewall photos from a nice, (!!!), 71 LS-6 that was restored by someone who has a pretty good idea what he's doing.
I don't know if this is what a firewall SHOULD look like, but it's certainly what one CAN look like!
72LS5. Please post pics of your progress and the techniques used to restore/clean/paint parts and the engine bay. Your Chevelle looks great. Did my '72 over 25 years ago before things like internet forums. So need to learn from members like you and renew mine to a higher standard. Thanks.
I have literally been waiting weeks on my new Dewitt's Black Radiator. As you know, assembly-installation of all the items back on the front end of the block is pretty much on hold until you get the Radiator and Shroud installed. Did install all new vacuum lines, cleaned the original actuators, new headlight harness, new engine harness and a couple of other items. Now to install the radiator and shroud and the progress should pick up quickly. Will be posting pics next week!
It seems to be only 1971 LT-1 decal as I looked at some other years on offer and they looked ok
Carburetor is spelt two different ways also on lines 2. & 4.
The annoying thing is a) I didn't spot it prior to applying & b) Paragon have offered a correct replacement (they say it's never been picked up before) to be included in a future order. Yeah right.. I sanded that area to bare glass to ensure they would stick properly so changing it would be a pain. I guess I'll wait and see if it gets picked up at shows.
Stuart
and the English would say none of us can spell carbuerettor...
Hi C2,
That's a GOOD looking compartment!
Lots of time and skills on display in that photo!!
What's in that photo doesn't happen by just standing around looking at it.
Regards,
Alan
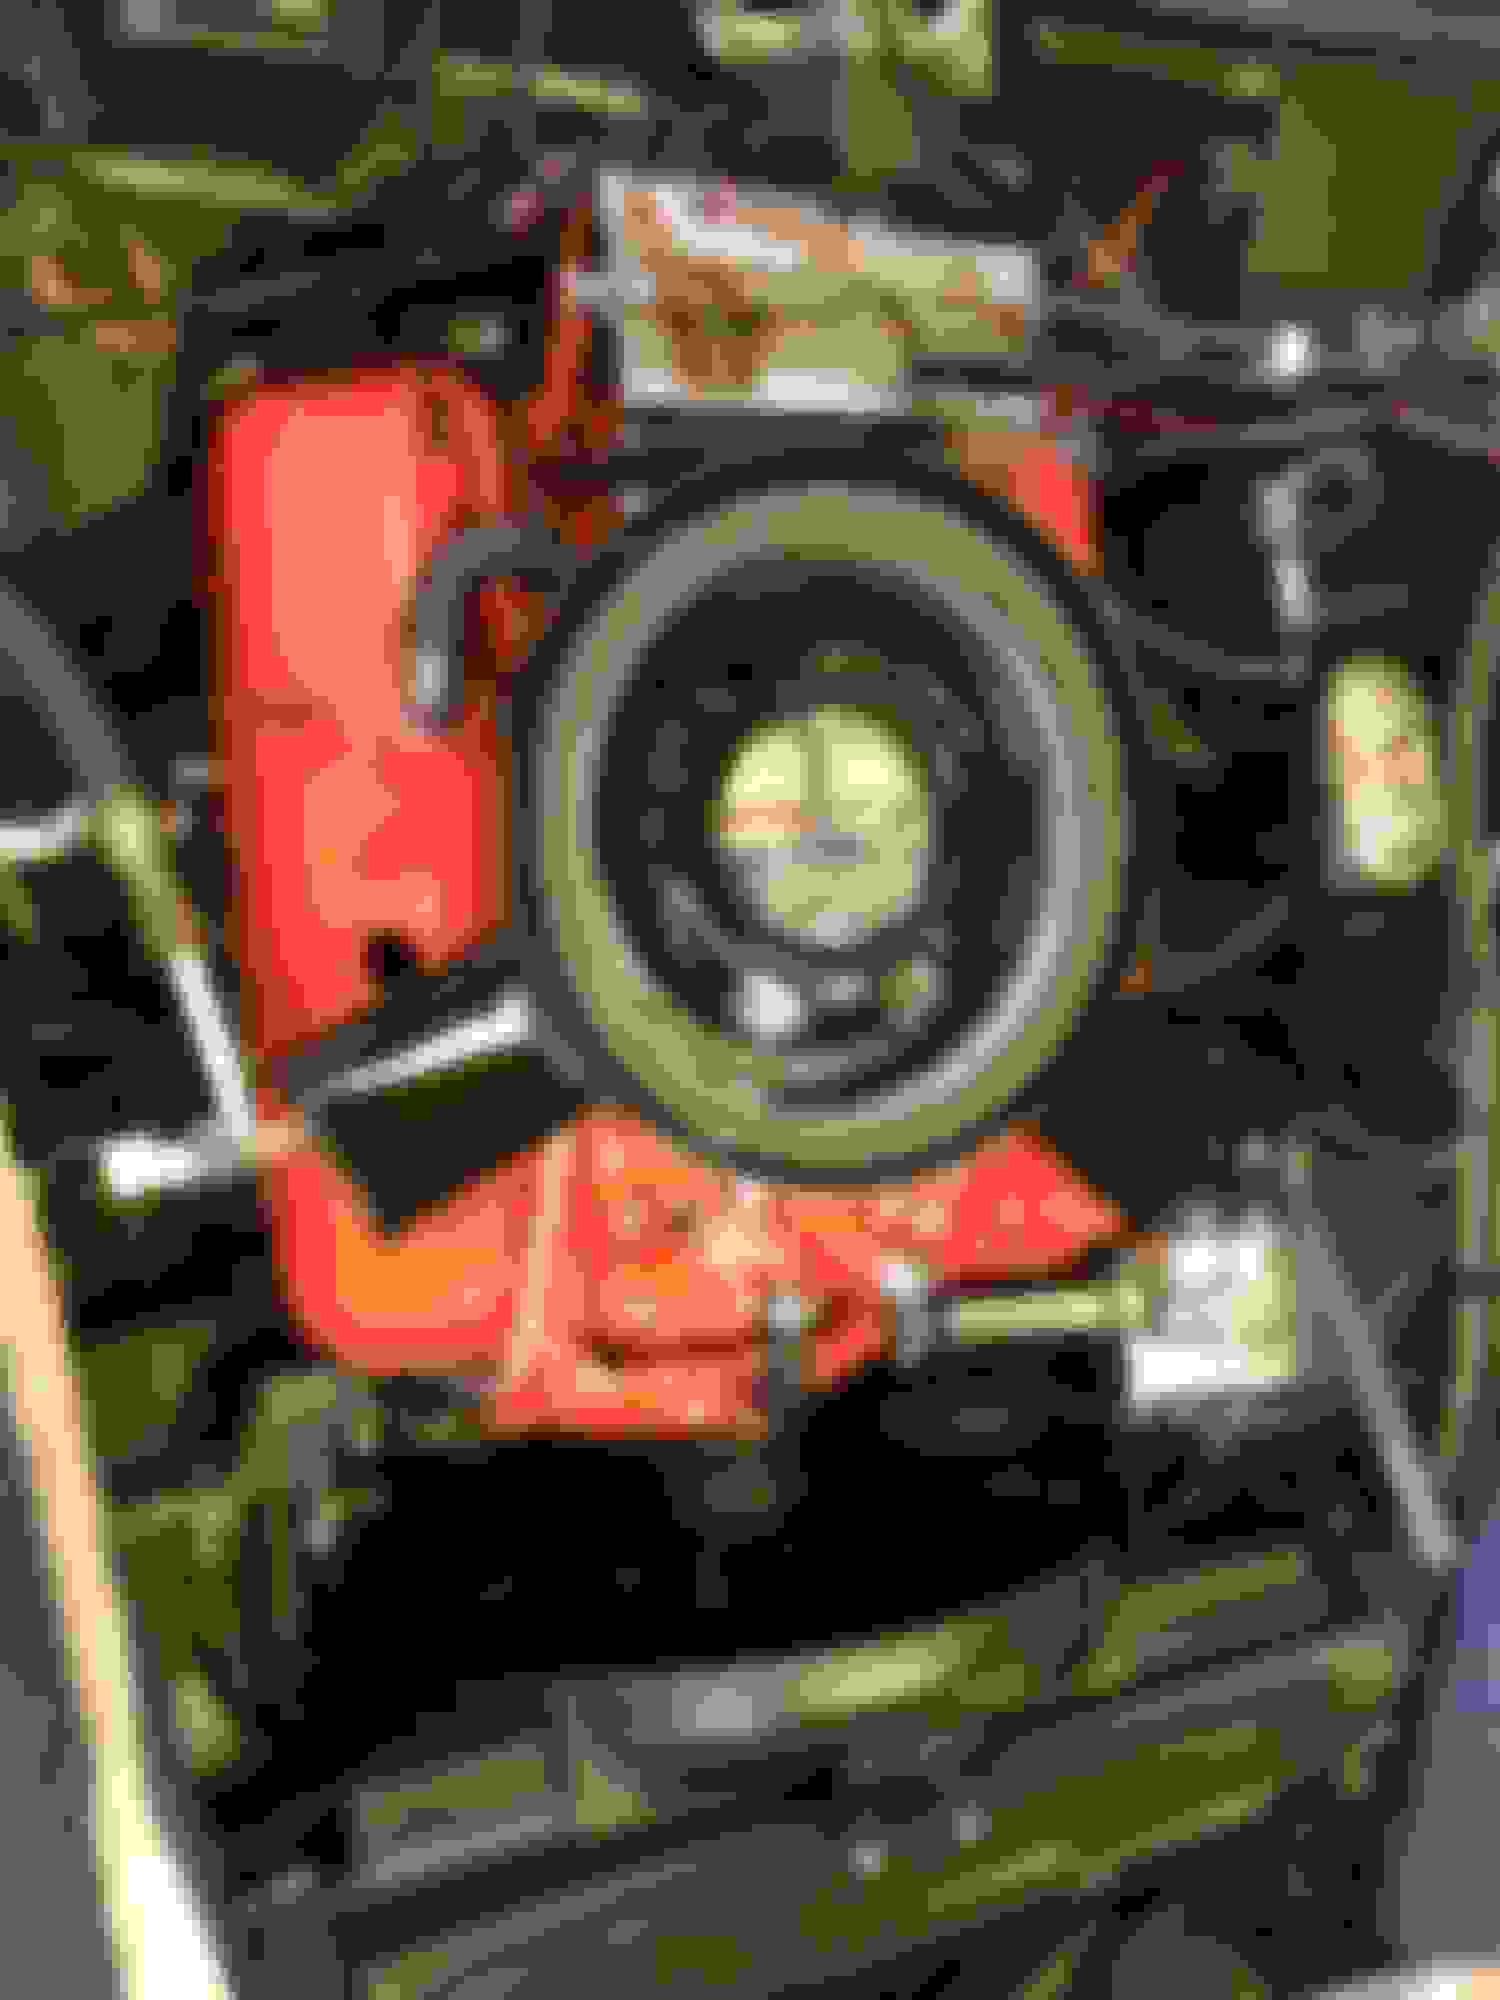
Here's the engine bay of my '72 LS5, maybe it'll be of some help.
Beautiful! I hope mine turns out that well. The only thing thats not stock on my entire car, is my hood, so I don't have the vacuum actuator for the cowl/wipers. I love my hood though, so I'm just rolling with it. Im not trying to bring back to NCRS Standards, just a top shelf driver that is capable of standing on it own at most Car Shows. I'm hoping to have mine wrapped up next week and back on the road. Just in time for the Ga pollen to die down some I hope! I will be posting pics next Friday
Hi C2,
That's a GOOD looking compartment!
Lots of time and skills on display in that photo!!
What's in that photo doesn't happen by just standing around looking at it.
Regards,
Alan
You are certainly right Alan. You cant "look them done" 😂 And I agree, great looking Engine Compartment C2 🍻
are the firewall and inner fenders semi-gloss black?
any pics with the engine out?
r
The Restoration is being done without pulling the motor. Like Alan 71 stated, with patience and ingenuity it can be done. The guy doing my car has 3 Bloomingtom Gold awards done in just this fashion. A lift is a must obviously. This is how far he tore it down to start. I'm anxious to show the nay sayers what quality can be achieved without pulling the Engine. If you go back a little further in the thread, you will see my 69 Chevelle SS 396 that was done in this fashion. It took Best in Class 2 years in a row Stock Class Super Chevy. And yes I believe the inner fenders are semi gloss, but they haven't been painted in this pic.
I have bought the 3M protectors for the rear deck lid and am contemplating running my Hard Top year round since I have A/C. I really like the look!
Wow! That is gorgeous! The color matched red really looks great. And I love the L88 hood, it really adds to the already sexy curves of these magnificent works of art.
As promised, some more pics of the progress on my 45 year old Engine Compartment. Still have some more work to do, but if the moon and stars align, I�m hoping for completion next weekend.
Looking great. Be interested to know what was replaced and what items were refinished.
These items look new to me: hoses, clamps, master cylinder cover, headlamp vacuum hose set, and alternator. But maybe refinished/cleaned?
Wiring harness looks good too. Tape wrap cleaned up or did you guys remove the old wrap and rewrap parts of the wiring harness with new tape?
I also see lots of new looking nuts and bolts. Or were these cleaned up like putting them through a tumbler.
I know lots of questions, but I have just started my teardown for a head swap and plan on an extensive engine bay detail while I'm at it. So trying to learn whats achievable and what new parts are needed. Some things you just cannot restore to a new condition look. Also, pulling wiper motor and everything off the firewall makes a difference for sure from what I see to avoid the overspray non factory look - like anything, more effort - better result.

 03-29-2018, 07:32 PM