When you click on links to various merchants on this site and make a purchase, this can result in this site earning a commission. Affiliate programs and affiliations include, but are not limited to, the eBay Partner Network.
Sorry I could not help myself!!! I have been cleaning up my 72 Vette and one of the things that bothered me was all the surface rust on the rear Differential, shaft, universal joints and yokes. So I decided to spend way too long cleaning up the surface rust. Much to my astonishment, from one weekend to another, alot of the surface rust just came back.
So on the second time cleaning it up, I sprayed it with some clear matte lacquer. I thought that would do it. Well two weeks later I can see some areas are OK, but others you can see some rust coming through. I put a fairly heavy coat.
So what have I done wrong? Bad prep? Lacquer a poor choice? Love to get the finish to stay. Greatly appreciate some advise from others who have cleaned up there rears!!!
Thanks Ike
Original condition
Hard to see, but some rust coming through on the left side.
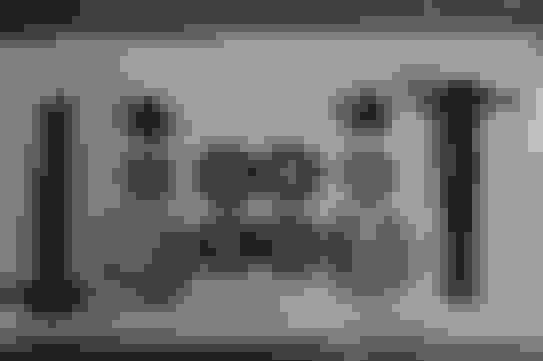
Lots of rust coming through on the yokes.
I am also cleaning up the gas tank. How should I protect that?
Last edited by general ike; 04-18-2018 at 05:38 PM.
Hi Ike,
Your wife is probably the best person to tell you what if anything is wrong with your rear.
Did you do some disassembly of the various parts like the half-shafts and strut rods or did you clean/de-rust them in place?
Any rust (even tiny amounts in pits) will 'bloom' quite quickly even under paint. I think the parts need to be removed in order to clean them scrupulously and remove ALL rust.
Alan thanks for the response, sadly I would be too anxious to attempt to take apart a functioning rear end. So I did the best I could under the circumstance, but the obvious answer is not very thorough sadly.
I am just amazed by the speed in which it reappears. There is rust that seems to be in cleaned out areas. I guess the true answer is that they were not 100% free of rust before I lacquered over it them.
May I ask what did you use as a protectant over your exposed raw metal on your Corvette? It would need to be something that left no sign that it was there.
ike
Last edited by general ike; 04-18-2018 at 06:18 PM.
If you take the time to clean it back up again go to your local ppg paint store and get a product called Ospho ! Spray on your clean metal let dry, next day take a scuff pad to it , blow clean , prime and paint !
Ospho changes the chemical composition of rust ( iron oxide ) to iron phosphate which is inert!
Don't let it get in your eyes and wash quickly if on your skin !
Check out my build in c-3 General 77 build stage one ! The rear end has been done for at least a couple months and still looks like the finish pics !
All of it ( metal ) was Ospho'd before prime and paint !
Hi Ike,
I wasn't suggesting that you take the differential apart.
I was suggesting that the half shafts and strut rods be taken off.
It appears the rear spring has been removed, so if you can do that you can remove the other parts too.
I'm using a product called Prelube 6 on un-painted and un-plated parts.
It's a clear protectorent but is best used on parts that aren't seeing 'difficult' weather conditions.
I think you might consider c42's thought about painting some of these parts for a more long lasting protection.
If you haven't already take a look at Eastwood's selection of chassis paints.
C42 I was hoping for a more authentic look. They were bare metal from the factory, so I was trying to duplicate the finish. I am not sure I would try to paint them, although I did think about it.
Ike
I guess I type too slowly, so for the other responses:
I am correct that they were unpainted raw metal from the factory, correct?
I am trying duplicate the original finishes as much as possible. I have used a rust encapsulator called "1" Step extensively on the Vette on areas that had an orignal finish with great success. But the problem with, I believe, all of them create a black coating when the convert the rust. So that was my issue, I thought I would clean them up and clear coat them. It did not work as well as I hoped!!!!
Alan Yes I understood your meaning, sorry bad terminology on my part, but the rear spring is a bunch of bolts. The half shafts, thats a different story for me. Maybe I can find a video to watch!
Last edited by general ike; 04-18-2018 at 06:55 PM.
Hi Ike,
I wasn't suggesting that you take the differential apart.
I was suggesting that the half shafts and strut rods be taken off.
It appears the rear spring has been removed, so if you can do that you can remove the other parts too.
I'm using a product called Prelube 6 on un-painted and un-plated parts.
It's a clear protectorent but is best used on parts that aren't seeing 'difficult' weather conditions.
I think you might consider c42's thought about painting some of these parts for a more long lasting protection.
If you haven't already, take a look at Eastwood's selection of chassis paint
The idea of having 'natural' parts on the chassis is a noble one, but difficult to achieve and live with in the real world.
Regards,
Alan
This is a photo showing the rear suspension with mostly painted parts... the differential, the strut rods, and the flanges on the half shafts are painted... the tubes on the half shafts have clear on them.
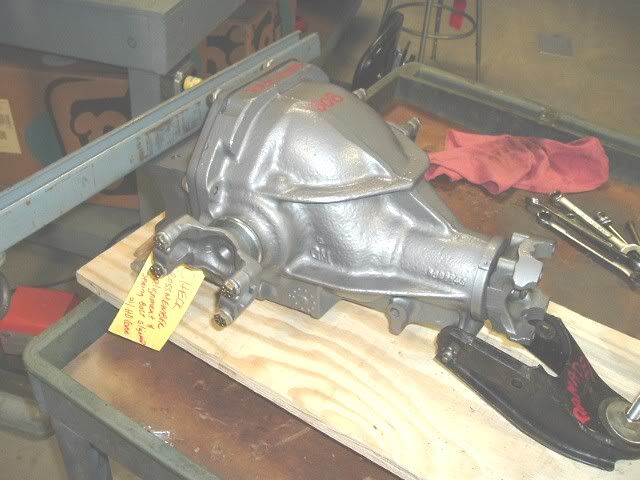
This is my latest attempt at trying for an 'original appearance. I worked on the differential case, half-shafts, strut rods, trailing arms and various fasteners.
Hi Ike,
Removing the half-shafts, strut rods, and shocks is really quite straight forward. It's less difficult and a lot less 'hazardous' than taking the spring off and putting it back on.
I'd take some photos (you have some), mark parts as right or left, and inner or outer, and disassemble.
Keep track of what fasteners were used where, where the lock washers were used, and how the french locks were installed. Tag and bag the fasteners as they come off.
The only part that may take some work will be getting the strut rod/shock lower mounts out of the spindle supports. (You need to be careful about not damaging the threads.)
You can restore the differential carrier in place and all the other parts on the bench.
At this time you can also decide what you want to do with the trailing arms cosmetically.
The heat zone on the half shafts and the drive shafts was done with a propane torch.
Regards,
Alan
The same processes that are used to restore the half-shafts are appropriate for the drive-shaft too.
Hi S77,
The heat zones on the half-shafts are actually done with a propane torch so they're not really 'faux', they're just not original.
They're actually pretty easy to do. It takes a little 'practice to learn how much heat to use, where it should be applied, and for how long.
Regards,
Alan
Note that the heat from the weld affected not only the tube but also the flange.
For a durable, non powder coat finish I blast- etch-POR15- top coat them. This is easy to touch if needed and lasts a long time. If I am doing an NCRS diff I blast and use RPM I found it works the best and keeps the iron natural. I have also used Fluid Film on bare iron, keep it wet 30 minutes then wipe down. It will leave a wax like film on the metal.
To do it right you need to remove the parts from the car.
Thanks all for the advise, and thanks Alan for your confidence in my skills. I am not sure if its deserved!!!! I did remove the shocks however to paint them. I used a bottle jack to raise the trailing arm so that I had a good angle to just be able to push them off with minimal force.
I have been working on the Vette all summer long up on jack stands and jacks for extra security. It's mostly on my back. I have come to realize that I am getting too old for this. So I have decided to finish up the work for now and buy a 4 post lift over the summer and continue the work in the fall allowing me to enjoy the Vette over the summer. Perhaps then I will tackle the shafts disassembly when it will be more confortable.
I know the lift discussion has been discussed extensively, but I am stuck on which to buy.
That looked too perfect of a heat zone tp be painted, I thought you torched it!!! You are quite the perfectionist. Careful its a nasty disease, in that it never stops!
GTR1999 I thought of a protective coating but my thought was that given the environment it would just attract tons of dirt and filth on the road making a mess. Have you driven the car and how does it hold up??
Thanks all Ike
Last edited by general ike; 04-19-2018 at 11:21 AM.
My personal cars all have the POR15 / top coat treatment. The NCRS type builds are around the world so I don't know how they have held up. I have tried the PreLube 6 but I didn't care for it as it is an aircraft grade cable lube and remained tacky when I used it. The Fluid Film and RPM are dry to the touch and dirt wasn't attracted to it.
In order to get the best results you need to get to clean bare iron, acid etch, flame dry,POR15, and top coat. My friend wire brushed his diff and clear coated it, in short time there were black spots showing up under the clear.
I'm always amazed when I see photos of your '71....I'm also impressed how well those laminate floors are holding up.
Regards,
Dave
Originally Posted by Alan 71
This is my latest attempt at trying for an 'original appearance. I worked on the differential case, half-shafts, strut rods, trailing arms and various fasteners.
GTR1999 that is exactly what happened to mine except I got a orange type of rust.
In the pic you posted is that paint over the differential or bare metal sealed? Can you tell us the finish on it?
Have you or anyone else tried PQR15 in clear?? I was surprised to find a clear version listed I wonder how well that would work with bare metal? Is it really clear? Anyone?
Thanks Ike
Last edited by general ike; 04-20-2018 at 12:27 AM.
Hi,
I do have Prelube6 on my rear differential.
I'm still using a supply I bought from Quanta when they were selling it. It's in cans similar to a WD40 can and goes on very thin. Personally I've not had a problem with it being sticky or tacky. I've bee using it about 20 years.
One thing you can do to improve the appearance of suspension and drive line parts is to make sure all the fasteners... bolts, washers, nuts. pins, etc have their proper appearance... this lends some contrast and interest to the chassis.

 04-18-2018, 05:30 PM