When you click on links to various merchants on this site and make a purchase, this can result in this site earning a commission. Affiliate programs and affiliations include, but are not limited to, the eBay Partner Network.
Hey everyone! This will be the build thread for my new to me 1977 C3 purchased 7.17.24.
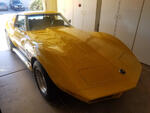
Here’s what I know about the vehicle. 1977 C3 with an engine swap in the early 2000’s for a new 350 small block and some cams (all from Tri Star Performance). I’m the vehicles 3rd owner and it has what’s listed on the old as 107k miles, so really not much to go off. It has the original bright orange (66L) paint, sun faded to a nice burnt orange witch I'm okay with, Go Longhorns, and 642 Trim code, the buckskin interior.
I came about this vehicle after several years of looking for the right project for the right price, and have had my eyes set on the C3 since I was a kid; one of those vehicles that really just piqued my interest and started my journey to the automotive community.
Much to my dad’s dismay (Proud owner of a 2008 Shelby Mustang), I have made the leap into Chevy land.
What I am planning is to have a beautiful well rounded weekend vehicle for weekend trips out to hill country and something that will turn heads and make people smile when driving around town; because you really don’t see too many C3’s running now a days.
This is not my first build thread or forum experience so please enjoy all the pictures. I will try and keep an updated parts and modifications list on this first post! I will also try to update as I go and keep everything in time order with links.
Disclaimer: I am by no means any sort of professional working on vehicles, especially ones that are 18 years older than me, so I am 1000% open to any advice!
Drove from Austin way up to north Texas, almost Louisiana to check on and hopefully purchase the car that was described to me over Facebook marketplace. Thankfully things seemed to be in order and was able to make the purchase and start the nearly 5 hour drive home. Stopping for a couple glamour shots out of excitement.
In speaking with the owner, I was told that the vehicle had not been running for ~ 6-8 months due to what was thought to be a faulty starter. He replaced this the day before I picked it up and it starts, but boy does it need some help!
Did a bit of a shake down cruise around town to see what all needed a little bit of love and first and foremost was the rough idle which I assumed was from 45 year old vacuum lines somewhere around the engine. Everything did however seem pretty great…. Until we got closer to home, rougher idle, stalling, low battery power, fading brakes, power steering was a distant thought.
Also, side exit exhaust was something I did not remember and made sure to leave myself a permanent reminder on the back of my left calf, hence the new Exhaust Wrap.
Last edited by BurntOrange_C3; Jul 24, 2024 at 09:53 PM.
The “quick” fixes and once over. So on day one i found that there was a parasitic drain coming from an unknown location, also the field pump stopped working, so my immediate go to was lets see what this wiring situation was and damn did that need some TLC. What i found were some chewed through wires, some not connected wires, a relay that was constantly hot and a battery that was flipped on its side from the previous owner leaking sulfuric acid…….
So i grabbed my assistant and had her take a look under the dash to check some fuses.
I ended up replacing the battery for something with slightly higher CCA and capacity than the previous. Also ditched the relay for a fuel pump switch (one small piece of anti theft) while I was in there I decided to add a couple creature comforts like USB charging port direct battery voltage meter, an extra 12v lighter outlet and a 6 circuit fuse panel for any future electrical add ons. The carpet on the battery doors was very rough and had some water damage, so I decided to cut out a new piece for now and will reupholster in the future.
Under the hood found a smooshed crank case breather filter so I just grabbed a new one of those while I was at it.
In trying to figure out the whole fuel pump issue and always hot relay i pulled some carpet. After pulling it i found lots of water damage and mold in all of the sound deadening material. Soooo like any sane person would do on day three of owning a vehicle I ripped out the entire interior. Hours of wire wheeling and sanding and prep work getting rid of every last remnant of rust and moldy carpet I began to paint, so I’d never need to deal with this issue again (fingers crossed).
After clean and painted I started laying new sound and heat barrier. Had never used the product, but I am very happy with the way it applied and turned out!
WORDS OF ADVICE do not forget to mark bolt holes after laying sound barrier or you will never be able to put your seats back in.
While i had everything out, I put some elbow grease into the interior pieces to clean as much dirt and grime as I could. Can say that refreshed everything very nicely!
As mentioned previously a small city of rats seem to have made a home in the engine bay while it was parked at the barn of the previous owner. They managed to chew through a number of vacuum lines, wires, almost made their way through the fuel line, and had some turd storage in the old air intake. So allll that needs replacing. While I was at it put in a new 10 micron fuel filter because I have no idea what crud is floating around in that tank.
Complaints from the girlfriend about the exhaust being too loud and her not being able to hear the music also called for a bit of a sound upgrade while i had all the room I wanted to work in. The factory mounting hardware for those tiny paper speakers did not cut it so I did end up making some new ones with a few pieces of scrap 1/8th x 1.5” aluminum
Fuel filter was a smooth install once I found the right spot to put it. Also ran a test to check flow rate which passed with flying colors, PSI is currently set to ~ 3.75 so this may need some adjusting in the future if fixing the vacuum leak doesn’t solve the stalling issue.
Interior all back in place as well (minus carpet)
Also purchased a vacuum gauge and brake bleed kit for the next steps
Wow!
You aren’t wasting any time and looks like you are doing some really nice work.
Keep it up and thanks for sharing.
P.S. Don’t let your dad turn you to the dark Ford side.
Wow!
You aren’t wasting any time and looks like you are doing some really nice work.
Keep it up and thanks for sharing.
P.S. Don’t let your dad turn you to the dark Ford side.
Really trying to dive in and get everything running well so the first few weeks are definitely going to be busy!
Unfortunately already have the Ford bug. Going to Carol Shelby’s 85th birthday party and seeing all of the classics he put together was insane. Already got the F150 too!
After doing my best to trace down every vacuum hose and possible area for leaks i began to get concerned that the intake manifold may be the issue and after a bunch of scrubbing and probably infection with the HantaVirus from all the mouse/rat turd I touched I found….something.
Graphic image below
Not one, but 2 cracks in that thang. What a nightmare was my first thought this morning. My second thought was I have a 9 pound pork shoulder, plenty of apple wood and a cold 24 pack. Silver lining eh’?
But in reality, that pork turned out amazing, but I’ve only got 16 beers left and that’s not enough to deal with diving into the top end of this, but here we go…..
With the cracks I already knew what the issue was, but didn’t want to admit it so I MacGyver’d a smoke detector for vacuum leaks (thanks YouTube) RIP Harbor freight soldering iron. And just as expected, it started to come right on out of both those cracks.
So time to mark everything and pull it all apart which is honestly a blessing. Pulled the water hose founds lots of good rusty water, so lets add coolant swap to the list….
What I did find, (or didn’t) was almost absolutely no RTV, the cheesiest cheapest paper gasket and what could be described as the front and rear hanging on for dear life on just about metal on metal with the smallest bead of sealant. Closer look and I can see a nice coolant oil mixture, YAY, but no metal shavings, non-sarcastic YAY.
Found a replacement intake manifold, REAL gaskets, plenty of color coord RTV and some new crank case gaskets. Will update a parts list once everything arrives and I know it fits.
Any tips or tricks from someone who has done this before will be appreciated, trying to do this once and do it right!
Decided that while I was in there I might as well pull the crank case and clean that up a bit better and I guess I’ll try and rebuild a carburetor?
One plus is the modern art wall in the garage has gained another installation.
This makes me feel really bad about my procrastination
That’s usually how I am about stuff. But I’ve got a couple weeks before getting back to work and want to be able to drive this around while the weather is still great!
2025 C3 ('68-'73) of the Year Finalist - Unmodified
2024 C3 of the Year Finalist - Unmodified
2023 C3 of the Year Finalist - Unmodified
Doesn't look too bad in there, no sludge / pretty clean, but I would also change out / flush the coolant, it looks pretty nasty !!!
LQQKIN pretty good so far. Keep up the good work.
Doesn't look too bad in there, no sludge / pretty clean, but I would also change out / flush the coolant, it looks pretty nasty !!!
LQQKIN pretty good so far. Keep up the good work.
Yeah I was honestly sorta shocked to see it that gross. Caught me off guard by how overfilled it was too, my garage floor did not appreciate that.










 BurntOrange_C3 Build/resto Thread