When you click on links to various merchants on this site and make a purchase, this can result in this site earning a commission. Affiliate programs and affiliations include, but are not limited to, the eBay Partner Network.
Name is Bob and I live in Pinellas Park, Florida. I currently have 3 Corvettes 1965 Coupe, 1968 Convertible and 2001 with 2 tops, and I am a long-time member of this forum and the Suncoast Corvette Club in Pinellas County Florida. For many, many years I have been restoring my 1968 custom Corvette and documenting it on another Forum, the Corvette Restoration Forum, which use to be very active, but although many views are still coming in, most of the people documenting their progress have fizzled out.
One of the posters, a guy named Paul (NWAV8TOR) started posting here as well and I decided to do the same.
Background (long story short!) Graduated HS 1968, Joined Navy Jan. 1969, 2 years in Navy Engineering school then my 1st Submarine in Newport News, Va. January 1971. Bought my 1968 Corvette from a shipmate in March 1971 for $2300. It went into a body shop for paint while I was on sea trials May - June 1971, and the car was actually stolen by the body shop owner May-June 1971. I recovered it, the car was drivable but it had been wrecked by his 16 year old son (no frame or suspension, only body) June 1971. I was relocated to Charleston SC (new home port) August 1971. Sept – Dec 1971 was spent at sea on patrol. 1971 was not a good year for me.
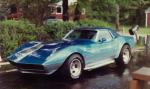
Early 1972, based on advice from members of Charleston Corvette Club, Corvette Charleston, I took the car to Jamison’s Custom Corvette for repairs. Car had been driven over an embankment and under a chain link fence, literally destroying 70% of the body. Since it was far too expensive to repair stock, and back then everyone wanted their car to look different than everyone else’s, I decided to go custom, as it was also far cheaper to rebuild. Each submarine patrol (3-4 months long) it went back to Jamison’s for more custom work. Then in 1973, while racing at an Inter-Corvette Club event on the old Charlotte Motor Speedway (not the one that is there now), I over-revved the engine and had a crankshaft explosion. What I thought was a 4 bolt main 327/365 turned out to be a 2 bolt main 327/300. Through our Corvette Club sponsor, E.M. Jones Chevrolet, I bought a brand new 1971 350/370 LT-1 long block for $400 and beefed it up even farther. Eventually, 1974, John Jamison finished the car with a custom tilt nose, custom hood design, hidden headlights behind a custom grill, custom wheel wells, custom rear design, no front or rear bumpers, custom rear spoiler, custom remote side mirrors, Cougar tail lights, Dodge Charger gas cap, many small details and a multi-shade blue custom paint job. Even the louvers behind the front wheels were from a 1964 Corvette.
Then I was transferred to Connecticut late 1975, no more work on the car for many years. I retired from Navy Dec 1989 and relocated back home to Florida. The car had many issues by then, so I stored the car for a few years waiting for the opportunity to work on it again. By the time I got back to working on it, the entire car needed repainted. The car was painted with acrylic lacquer, which never stops shrinking. Eventually, the paint got smaller than the car and small spider cracks started showing up everywhere in the paint, not the body. Fortunately, much better paints are available today. I stripped the paint, then got distracted when I bought a partially restored 1965 Coupe. By the time it was finished (4 years instead of the expected 6 months), I took the ’68 out of storage and found the bad news. The car, which was stored in an unconditioned storage unit had the entire tilt nose body, doors and rear wheel wells, which was stored as bare, porous, unprimed fiberglass panels, were covered with black mold and all of it was beyond fixing. Door #1, part out the car (no), Door #2, buy a doner body (no, just lots of expensive old parts), Door #3, rebuild it back stock (no, way too expensive for a non-numbers matching car) or Door #4, something else. Chose Door #4. Made the choice to do a complete body off restoration and conversion to an actual Mako Shark convertible resto-mod. Bought new rear quarter panels, Kerry Jamison found 2 replacement doors and then I bought a complete, new Mako Shark front body from John Bohannon in Tennessee. I hauled the car and body parts back to Jamison’s in Charleston and they installed the doors, rear quarter panels and the Mako nose.
Still lots of fit-up and finishing, but the tilt nose and body panels are on and functioning. I have it here in Florida now, completing the rest of the restoration which included a new HP 454 engine and Vintage Air AC. I will start posting as far back as I can with photos that I have of the journey up to now. Hope you enjoy.
First thing I did was pull the engine and transmission then trailer to car to Van Steel Corvettes in Clearwater Florida, about 5 miles from my house. Really fortunate to have quite a few big Corvette houses close to me. The first thing they did was to lift the body, which was from the firewall back, off the frame, put it back onto my car trailer so I could take it back home to work on, then they totally broke down the chassis all the way to a bare frame. You can see the original build sheet, or what was left of it, on the gas tank. Also notice the completed C3 frame and chassis in the background for another customer.
Doesn't look that stable, but it was. All the support was under the frame and tied down with the straps. Made the trip home with ease.
There is the build sheet on the tank, or what was left of it. You could still read about 2/3 of it after we removed the dirt. The rest was destroyed by heat and age.
Next came sand blasting and checking the entire frame for defects, cracked welds, etc. Didn’t find many, but what they did, they fixed. The most noticeable and surprising issue was the passenger side front shock tower. It had a cut worn in the side of the hole for the shock that was scary! Yes, they welded it up.
Next came removing the transmission crossmember and welding in the mounts for a removable crossmember. Needed to do this for installing the Kiesler 5 speed transmission I was installing. Then it was into an acid bath, cleaning bath, completely powder coated and into the oven. They also owned DPS Powder coating and had an oven large enough to hold about 6 - 7 frames at once. You can see the removed crossmember under the frame.
Once finished, back to Van Steel to have the complete suspension installed.
I had their C6 style upper control arms installed for much better handling.
Oversized trans axles, 4" offset trailing arms to allow for wider wheels and micro adjustable strut shafts instead of the adjustment cams that came stock.
At the same time the frame work was going on, the engine was over at Schooley Engines where it was having the machine shop work done for re-building the LT-1 small block and I was home working on the body.
As you know, you are in good hands at Van Steel. Artie stripped and powder coated the frame on my 66 many years ago. Looks new today. They did the trailing arms on the 66 and my 68. I am over in Temple Terrace across the Howard Franklin Bridge. Keep the pictures coming. Good luck. Jerry
Not just a story...a SAGA. Heroes, villains, robberies, honest townfolk. SUBMARINES! I am sure there were even a few pretty girls in this tale. And you have run the gauntlet of Corvette master craftsmen, starting with Jamisons. He is still here doing amazing work. You had a vision and kept at it. An inspiration to those of us that don't want their cars to look like all the rest. And you can sure tell a good story that will keep us interested. Keep it coming.
Got started working on the body from the firewall back. Needs a lot of work in several areas. When I took the body off the frame, the #4 body mounts were totally gone, nothing left but dirt and rust. The reason they were in such bad shape, and you other early C3 owners take notice, the Astro Ventilation system on these early bodies caused bad water leaks. If debris and/or leaves made it through the vent grills on the rear deck, the drainage cavity would clog and cause the drain cavity tofill with water during rainstorms. This water would eventually overflow into the rear compartment, and into the #4 mount cavity causing everything to rust. Yes, mine were clogged. Here is a photo of the drain line from the inside and you can even see the rubber seals were deteriorated.
Here are some views of the mount from the inside and the underside of the car. Note the cracks all over the mount tower and where the washer on the inside had almost worn completely through the fiberglass. That most likely occurred due to the body mount bolt rusting, the mount coming loose and the body sliding back and forth on the mount. Lots of fiberglass repair to be done here. All that stuff in the cavity is the old inner mounting bracket, the square nut and the square nut cage.
Here are photos of the old parts and the new ones together.
I got all new parts, the outer cage, the inner cage, the square nut and the cage nut and had them powder coated. Installing them was another story. If they were not mounted EXACTLY where they needed to be, it affected the #4 mount and how the body sat on the frame. After cleaning everything up, I made the required adjustments to the mounts so they lined up exactly with the original rivet holds in the body. Used silicone sealant to prevent any water intrusion.
Didn't use the same rivets that Corvette used, but you will not see them after the carpets are installed. #4 Body Mounts are now repaired.
went into a body shop for paint while I was on sea trials May - June 1971, and the car was actually stolen by body shop owner May-June 1971
Did you strangle the thief?
I pressed charges, and when we went to court, I got a bad feeling right off the bat when the judge said we must retire to his chamber for this one. Inside his chamber, he said I could not press charges against the boy who wrecked the car, because he had permission to drive it. I said I never gave permission for anyone to drive it, only paint it. The judge said the boy was 16, a minor and had his fathers permission to drive it. I said the father did not have the right to give that permission, and the judge said a minor does not know that. It gets better! I said I would then press charges against the father. The judge said I couldn't do that either because I knew the father had the car, therefore it was not stolen. The father said he had to close his shop and he was "protecting" my car. The judge said my only recourse was Civil court. Here is where it REALLY gets good. I walked out of the courthouse, into a lawyers office and filed a lawsuit against them. It was time for me to go to sea again on the sub's next sea trials, and the attorney said when I get back we would be in court. When I got back and contacted the attorney, he said we could go to court as soon as we found out what part of Oklahoma he moved to and got him back into Virginia, as I cannot sue in Oklahoma for an something that occurred in Virginia and cannot sue in Virginia unless he was in Virginia. Needless to say, I wound up eating the bill. But, fortunately, at the time, a single, First Class Nuclear trained operator on a Sub making Sea pay, Nuclear Pro pay, and Sub pay made really good money, and could not spend much of it at sea, so I was able to recover from it quickly.
I pressed charges, and when we went to court, I got a bad feeling right off the bat when the judge said we must retire to his chamber for this one. Inside his chamber, he said I could not press charges against the boy who wrecked the car, because he had permission to drive it. I said I never gave permission for anyone to drive it, only paint it. The judge said the boy was 16, a minor and had his fathers permission to drive it. I said the father did not have the right to give that permission, and the judge said a minor does not know that. It gets better! I said I would then press charges against the father. The judge said I couldn't do that either because I knew the father had the car, therefore it was not stolen. The father said he had to close his shop and he was "protecting" my car. The judge said my only recourse was Civil court. Here is where it REALLY gets good. I walked out of the courthouse, into a lawyers office and filed a lawsuit against them. It was time for me to go to sea again on the sub's next sea trials, and the attorney said when I get back we would be in court. When I got back and contacted the attorney, he said we could go to court as soon as we found out what part of Oklahoma he moved to and got him back into Virginia, as I cannot sue in Oklahoma for an something that occurred in Virginia and cannot sue in Virginia unless he was in Virginia. Needless to say, I wound up eating the bill. But, fortunately, at the time, a single, First Class Nuclear trained operator on a Sub making Sea pay, Nuclear Pro pay, and Sub pay made really good money, and could not spend much of it at sea, so I was able to recover from it quickly.
Odd request....do you have any pictures of the Mako hinges when the front end was mounted? Bohannon built me a kit 20-25 yrs ago, and I was looking at my hinges a couple days ago trying to remember the orientation. John passed before I could take advantage of him offering to help me hang the nose, so now I'm on my own. It would help if I had one to look at.
The Phantom (Dave) is running a tilt front end on his C3 build.
I have no idea what his car started out as, but you might pm him to see if he would be willing to send you some pictures of his hinges.
Hi Bob. It's good to see you on this forum also instead of just on Tim's forum. I plan to get back to serious work on mine in a few weeks once the weather warms up a bit more. I (and the rest of us) look forward to more updates on your progress. I did notice that you used blind rivets on your body mount repairs which surprised me a bit. Even though they won't be visible from the inside, they can be seen from the outside. If you were working alone I guess that would've been the only way to do it. I had to get my son over to help me set the regular rivets and the whole process was a pain in the ***...
Yes, I was working alone, which made using the correct rivet difficult. After the car is finished, they will be the same color as the rest of the undercarriage, so they will not be that noticeable. Besides, that's more points I can loose when I have it judged by NCRS!
Odd request....do you have any pictures of the Mako hinges when the front end was mounted? Bohannon built me a kit 20-25 yrs ago, and I was looking at my hinges a couple days ago trying to remember the orientation. John passed before I could take advantage of him offering to help me hang the nose, so now I'm on my own. It would help if I had one to look at.
Yes. I bought John Bohannon's hinges with the nose kit. I was sorry to hear of his passing. He passed 3 months after I bought my Mako kit. I may have his last one. The hinge came in 2 parts, one that mounted onto the frame and the other that mounted to the nose. They bolt together to allow for shimming and alignment. Also, there is front to rear alignment on the frame extensions as well. The hinge itself is stainless steel, which I had polished to remove the heat marks from welding. The other part which mounts to the body is steel.
Here is a photo of John Bohannon holding the hinge set. That's also my Mako nose in the background.
He did not just make Mako kits, he custom built Corvette frames and suspensions as well. Here is a photo I took in his shop of a C2 he was building. Sort of radical, ya think?
Here are the photos I have of how it is mounted to the frame. I bolted the hinges to the existing bumper extension.
Let me go over to Vetteworks in the morning and take some close-ups of how the part of the hinge that mounts to the nose was done.





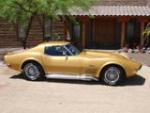








 1968 Mako Resto-Mod