




Body Mount Help - 1970 Vert

Thread Starter
Drifting


Joined: Mar 2003
Posts: 1,608
Likes: 3
From: Canberra AUSTRALIA
St. Jude Donor '05-'06
 Body Mount Help - 1970 Vert
I have tried to loosen both Right Hand #3 and #4 body mount so I can adjust the gap on the door.
Good news is that with a jackstand under #3 the door gap opened up about 1/8" when the car is in the air. #3 body mount bolt came loose really easy. If I can remove a shim from under #4 then the gap will be real close and I can take about 1/16" of the centre rear of the door to get it nice.
Bad news is #4. I saturated the #4 for 2 days with PB Blaster from the top (I think the nut is under the RH spring for the deck lid).
#4 bolt turns and it sound like the nut is turning.
Question is: Is this nut a nut? or a body nut that was supposed to be riveted but it has broke loose?
Thanks,
Pete
Good news is that with a jackstand under #3 the door gap opened up about 1/8" when the car is in the air. #3 body mount bolt came loose really easy. If I can remove a shim from under #4 then the gap will be real close and I can take about 1/16" of the centre rear of the door to get it nice.
Bad news is #4. I saturated the #4 for 2 days with PB Blaster from the top (I think the nut is under the RH spring for the deck lid).
#4 bolt turns and it sound like the nut is turning.
Question is: Is this nut a nut? or a body nut that was supposed to be riveted but it has broke loose?
Thanks,
Pete

The ORIGINAL and bestest


Joined: Oct 2000
Posts: 10,009
Likes: 240
From: Toronto Ontario
Toronto Events Coordinator
Body mount #4 is a caged nut. The cage is riveted to the body, and in most case, the rivets have long since corroded away and the cage and nut spin. You need a second person to hold the cage inside the car while you turn the bolt outside.
Thread Starter
Drifting
Joined: Mar 2003
Posts: 1,608
Likes: 3
From: Canberra AUSTRALIA
St. Jude Donor '05-'06
Bruce,
I figured (and was afraid) that was the case. Now I have to take the decklid off, remove the deck lid spring and get to that stupid nut.
Let you know how I go.
Pete
I figured (and was afraid) that was the case. Now I have to take the decklid off, remove the deck lid spring and get to that stupid nut.
Let you know how I go.
Pete
Le Mans Master


Joined: Nov 2004
Posts: 6,128
Likes: 21
From: North Alabama
I just cut my bolt off under the car. This freed the nut and cage to come out of the top. If the cage is spinning (with the nut) you need new mounting hardware anyway...do you really have to remove the decklid?
Thread Starter
Drifting
Joined: Mar 2003
Posts: 1,608
Likes: 3
From: Canberra AUSTRALIA
St. Jude Donor '05-'06
Originally Posted by Jclgodale3
I just cut my bolt off under the car. This freed the nut and cage to come out of the top. If the cage is spinning (with the nut) you need new mounting hardware anyway...do you really have to remove the decklid?
I may get away with not removing the decklid but I have to remove the spring that holds it up anyway. Will be alot easier to remove the spring if there is no wright on it. If the LID is out of the way I can work on the hinge/spring and see what is going on.
I didn't think of cutting of the bolt. That is an option though.
Did you do this on a convertible or a coupe?
Pete
Le Mans Master
Joined: Nov 2004
Posts: 6,128
Likes: 21
From: North Alabama
Pete...it was on a coupe...hence the question about removing the deck lid. I had 1 of the 2 back there spin the rivets off. So I just used a grinder with cutting disc (2 or 3") and cut it off above the head...hope this helps...just don't cut into the mount welded to the frame. It took me about 30 minutes
Thread Starter
Drifting
Joined: Mar 2003
Posts: 1,608
Likes: 3
From: Canberra AUSTRALIA
St. Jude Donor '05-'06
Originally Posted by Jclgodale3
Pete...it was on a coupe...hence the question about removing the deck lid. I had 1 of the 2 back there spin the rivets off. So I just used a grinder with cutting disc (2 or 3") and cut it off above the head...hope this helps...just don't cut into the mount welded to the frame. It took me about 30 minutes
At least I have started though. I was too chicken to start on the door because I knew something like this would happen. Hate it when I am right!
Burning Brakes

Joined: Aug 2004
Posts: 856
Likes: 2
From: Tyler Texas
Peter: You have to remove the decklid (and springs, hinge assembly, etc.) to get to the interior #4 body mount cage nut on a C3 convertible. The cage nut is in the corner interior area under the entire hinge assembly.
Corvette Stories
The Best of Corvette for Corvette Enthusiasts

Top 10 Most Explosive Corvettes Ever Made: Power-to-Weight Ratio Ranked!
Joe Kucinski
150 hp to 1,250 hp: Every Corvette Generation Compared by the Specs That Matter
Joe Kucinski
8 Coolest Corvette Pace Cars (and Replicas) of All Time
Verdad Gallardo
Top 10 Corvette Engines RANKED by Peak Torque (70+ Years of Muscle!)
Joe Kucinski
Corvette ZR1X Will Be Pacing the Indy 500, And Could Probably Race, Too!
Verdad Gallardo
Top 10 Corvettes Coming to Mecum Indy 2026!
Brett Foote
Top 10 C9 Corvette MUST-HAVES to Fix These C8 Generation Flaws!
Michael S. Palmer
10 Revolutionary 'Corvette Firsts' Most People Don't Know
Joe Kucinski
5 Reasons to Upgrade to an LS6-Powered Corvette; 5 Reasons to Stay LT2
Michael S. Palmer
Thread Starter
Drifting
Joined: Mar 2003
Posts: 1,608
Likes: 3
From: Canberra AUSTRALIA
St. Jude Donor '05-'06
Originally Posted by Patrick73
Peter: You have to remove the decklid (and springs, hinge assembly, etc.) to get to the interior #4 body mount cage nut on a C3 convertible. The cage nut is in the corner interior area under the entire hinge assembly.
Thanks. I am going out to do it now. I better take some pictures for the others that follow in my footsteps.
Pete

Instructor


Joined: Jan 2005
Posts: 162
Likes: 0
From: Formerly DFW Missing Texas Now in NJ
Originally Posted by stingry
Patrick,
Thanks. I am going out to do it now. I better take some pictures for the others that follow in my footsteps.
Pete
Thanks. I am going out to do it now. I better take some pictures for the others that follow in my footsteps.
Pete
Anyone have a trick for getting the deck lid hinges out? The top two bolts are virtually impossible to get to. I got one out with a distributor wrench and a lot of bad language. Any hint on removing the hinges would be great. Also, how do you get the mount cage out if it's still attached but the bolt is turning free?
Pete,
I don't mean to hijack your post. I figure you're going to have the same problems or you'll have a great solution to share.
Thanks,
Whiplash
Thread Starter
Drifting
Joined: Mar 2003
Posts: 1,608
Likes: 3
From: Canberra AUSTRALIA
St. Jude Donor '05-'06
Originally Posted by Whiplash71
I'm doing the exact same thing on my 71 Convertible today. Got one #4 mount out. Had to cut the bolt head off and remove the deck lid hinge w/spring. On the other side the bolt spun so I cut the head off. Unfortunately the cage is still in place over the top of the mount and now I can't push it out. I'm going to have to pull the spring on this side too.
Anyone have a trick for getting the deck lid hinges out? The top two bolts are virtually impossible to get to. I got one out with a distributor wrench and a lot of bad language. Any hint on removing the hinges would be great. Also, how do you get the mount cage out if it's still attached but the bolt is turning free?
Pete,
I don't mean to hijack your post. I figure you're going to have the same problems or you'll have a great solution to share.
Thanks,
Whiplash
Anyone have a trick for getting the deck lid hinges out? The top two bolts are virtually impossible to get to. I got one out with a distributor wrench and a lot of bad language. Any hint on removing the hinges would be great. Also, how do you get the mount cage out if it's still attached but the bolt is turning free?
Pete,
I don't mean to hijack your post. I figure you're going to have the same problems or you'll have a great solution to share.
Thanks,
Whiplash
I have another post with pictures. I cannot find it but here is the scoop.
The spring has to come out before you remove the deck lid hinge. You need to either pry it off and pull the spring out in its compressed state or jam some wood (think door shims) between the coils when it is expanded to keep it around 5.5" long (coils, 7.5" total length). A pry bar will get the spring out without wedges. To put it back in you will need to expand it (I used a vice) and put a bracket on it to hold the coils at 5.5". The GM special tool J-9559 details this. I can email you pics if needed.
The deck lid hinge bracket has 3 bolts. Two are easy as you know. The outer bolt is a SOB. You need to get a 1/4" rachet with about a 1" extension and come up BEHIND the bracket to get at that bolt. You need small hands to get behind there. It is a bear to get out.
Once the bracket is out of the way just break off the cage nut. There is no other way to get that bolt out. I manufactured a cage plate for want of a better name. Get some carboard and cut it out the same size as the are of the recess where the cage nut sits. with the cardboard in place push up a pencil from under the car to mark where the bolt would go. I made a 1/8" plate and drilled a hole. Then I welded a locknut to the hole. Now the nut will never turn and the cage will not brake off in future. An alternative is to buy a new cage nut and rivet the braket in if you want to stay 100% original.
If you need pics email me.
Pete

Le Mans Master
Joined: Aug 2003
Posts: 7,720
Likes: 12
From: Chattanooga TN
I have seen this done as follows:
-grind the head off the bolt
-tap gently on the remaining bolt and hope the mounting has corroded away
-remove the bolt and the cage with a magnet
-drop in a new bolt on a large washer from the top-you must hold your mouth just right for this step
This is much easier than taking the hinge and spring out if the mount is not attached to the fiberglass very well. I did this on my car and it worked out well. If it doesn't come out easy you will have to disassemble, but it doesn't cost anything to try.
-grind the head off the bolt
-tap gently on the remaining bolt and hope the mounting has corroded away
-remove the bolt and the cage with a magnet
-drop in a new bolt on a large washer from the top-you must hold your mouth just right for this step
This is much easier than taking the hinge and spring out if the mount is not attached to the fiberglass very well. I did this on my car and it worked out well. If it doesn't come out easy you will have to disassemble, but it doesn't cost anything to try.

Team Owner


Joined: Jul 2004
Posts: 40,375
Likes: 788
From: Redondo Beach, California
I had this same problem with a #4. The nut cage for this bolt is attached with aluminum rivets. If the nut is going to be hard to turn, it will shear the rivets and then you have your "spinning nut."
I was really reluctant to remove the spring (especially since at the time I didn't know how.) What I did was to drill a 1/4 inch hole in the "body mount reinforcement." The idea was to push a steel rod (actually a machinists punch) into the hole to jamb the nut and then unscrew the bolt. I think this was a pretty good idea and really could have worked. Anyhow to make a long story shorter, the nut wouldn't turn. When I eventually got it out it was crossthreaded! Someone at the factory must have used an air impact wrench. There was no way it would have ever loosened. I cut the bolt head off, and since I had by now expanded the size of the 1/4 hole, I went ahead and made the hole larger and removed the nut and remaining bolt out the side of the car. Needless to say an approximate 1 inch hole looks pretty ugly.
I've since bought a new "body mount reinforcement." It's part BM98E in the Volunteer Vette Product catalog. When I remove the body, I can pretty much repair my damage! I wish this thread had appeared a month ago.
I was really reluctant to remove the spring (especially since at the time I didn't know how.) What I did was to drill a 1/4 inch hole in the "body mount reinforcement." The idea was to push a steel rod (actually a machinists punch) into the hole to jamb the nut and then unscrew the bolt. I think this was a pretty good idea and really could have worked. Anyhow to make a long story shorter, the nut wouldn't turn. When I eventually got it out it was crossthreaded! Someone at the factory must have used an air impact wrench. There was no way it would have ever loosened. I cut the bolt head off, and since I had by now expanded the size of the 1/4 hole, I went ahead and made the hole larger and removed the nut and remaining bolt out the side of the car. Needless to say an approximate 1 inch hole looks pretty ugly.
I've since bought a new "body mount reinforcement." It's part BM98E in the Volunteer Vette Product catalog. When I remove the body, I can pretty much repair my damage! I wish this thread had appeared a month ago.
Instructor
Joined: Jan 2005
Posts: 174
Likes: 0
From: Tampa Bay Florida
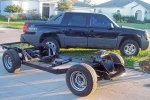
I just removed the body from the frame on my 68 vert. Body bolts #2, #3 and #4 spun on me! 
Ended up cutting a grinding.
All the old body mount bushings looked like cement. Not rubber, but cement!
Ended up cutting a grinding.
All the old body mount bushings looked like cement. Not rubber, but cement!
Safety Car


Joined: Aug 2001
Posts: 3,683
Likes: 202
From: Waterford Mi
Originally Posted by cannonfl
I just removed the body from the frame on my 68 vert. Body bolts #2, #3 and #4 spun on me!
Ended up cutting a grinding.
All the old body mount bushings looked like cement. Not rubber, but cement!
Ended up cutting a grinding.
All the old body mount bushings looked like cement. Not rubber, but cement!
Body-Off
