


The body is off!!!!
Thread Starter
Instructor


Joined: Apr 2003
Posts: 156
Likes: 0
From: Oakdale Ct
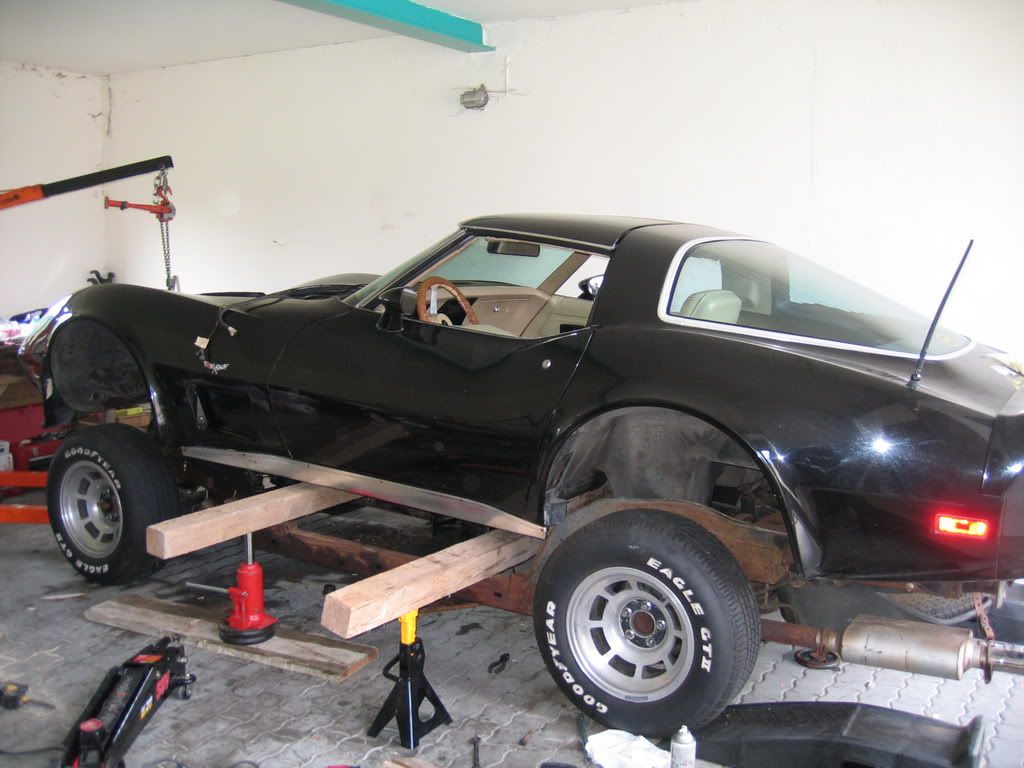
I cant begin to express how satisfying it is to have accomplished this!!!!! Here are some pictures:


All in all it went pretty smoothly. Highlights:
-For anybody who builds the dolly from the Adams plans, the front is about 4 inches to short, need to fix that tomorrow
-I used straps from Home depot ($30 for two) They worked great and are adjustable.
-I was lucky enough to get the balance right the first time thanks to researching and finding lots of good pics here on the forum
-I never rolled the passenger window down before removing battery, cables, interior... etc., so I had to lift with the straps on the inside of the door so I wouldnt break the window, But it worked out just fine.
-the A-frame you see in the pics is built with 10' 4x4 posts and a 8' 4x6 accross the top. it was plenty sturdy, no wobbling. I reccomend it to anyone who doesnt have garage clearance like me.
-The build sheet was still there on top of the gas tank, but the only thing legible was "Gary (something) Chevrolet, (something) street, Newport.. Since I am in the northeast, I imagine that is Newport Rhode Island, who knows....
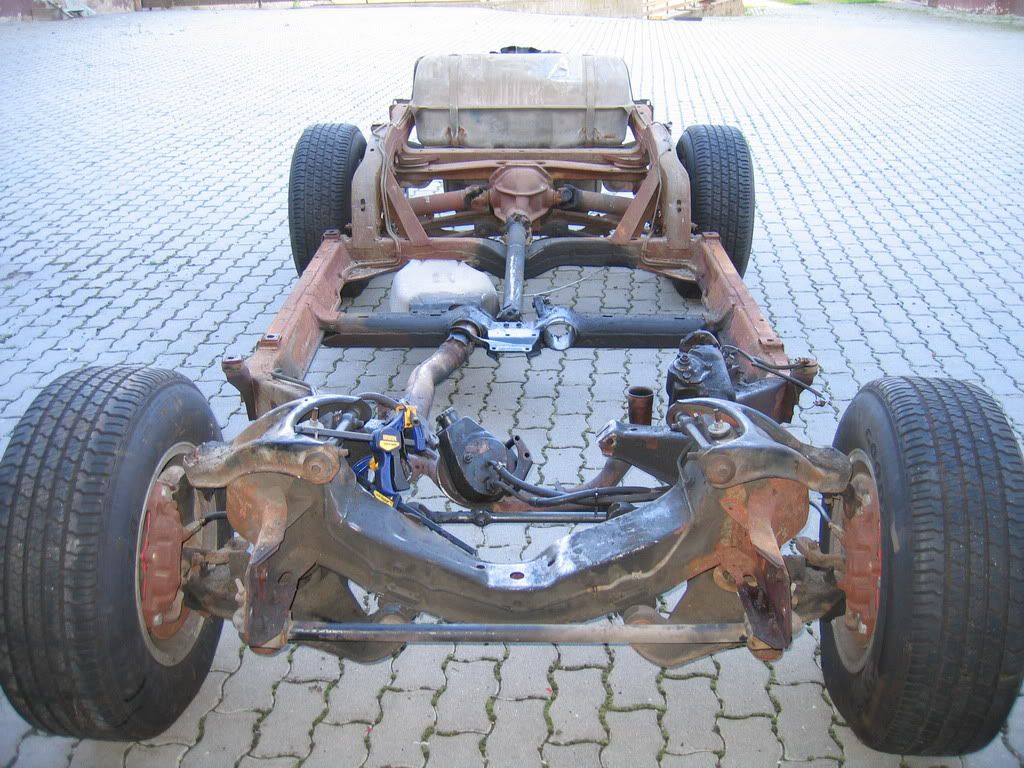
The frame is in great shape, just minimal surface rust. NO ROT!!! Thank goodness.
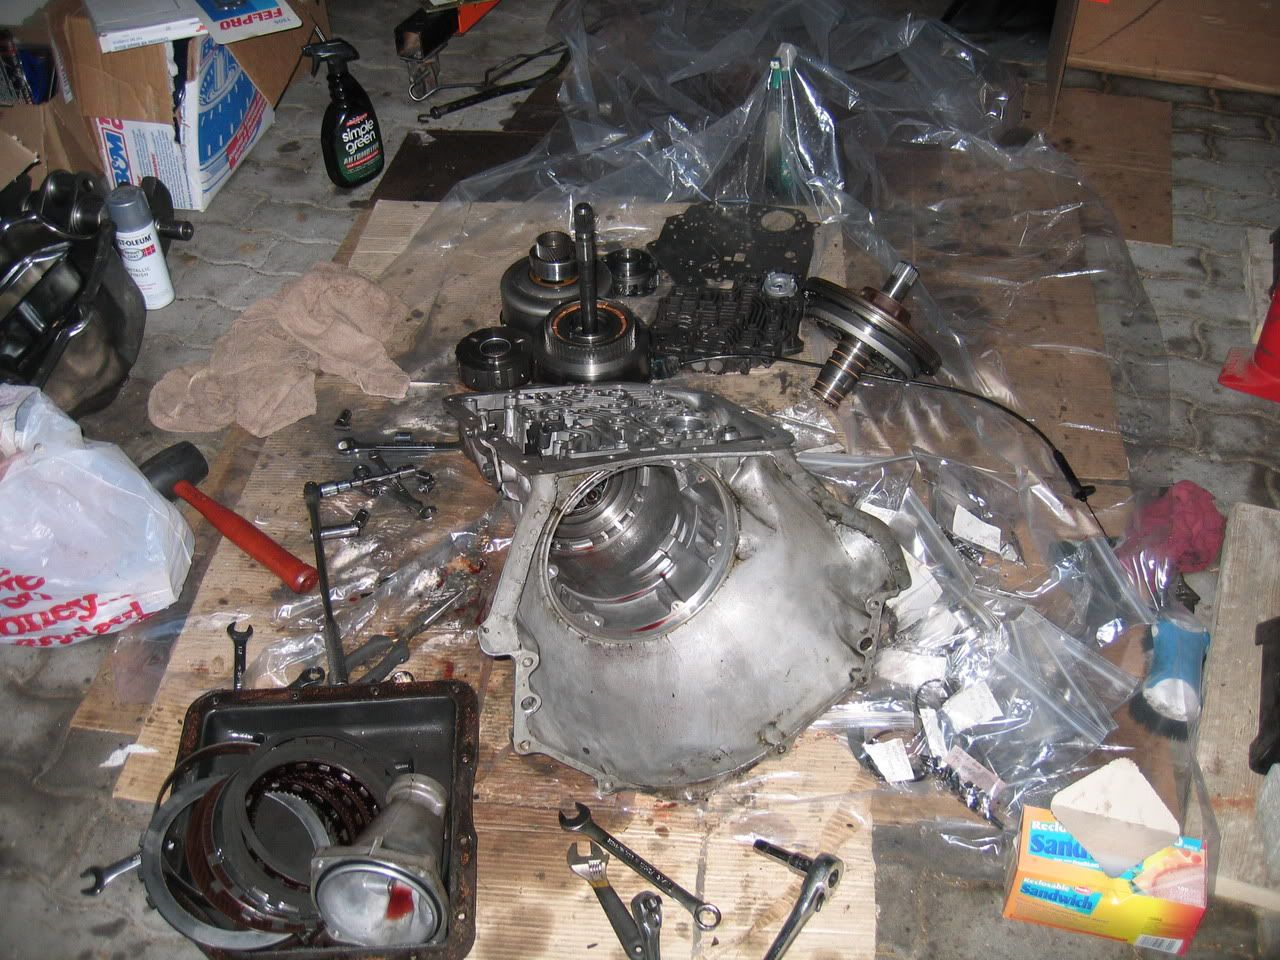
Now its time to start breaking down the frame. (And maybe finish stripping the paint

All in all it went pretty smoothly. Highlights:
-For anybody who builds the dolly from the Adams plans, the front is about 4 inches to short, need to fix that tomorrow
-I used straps from Home depot ($30 for two) They worked great and are adjustable.
-I was lucky enough to get the balance right the first time thanks to researching and finding lots of good pics here on the forum
-I never rolled the passenger window down before removing battery, cables, interior... etc., so I had to lift with the straps on the inside of the door so I wouldnt break the window, But it worked out just fine.
-the A-frame you see in the pics is built with 10' 4x4 posts and a 8' 4x6 accross the top. it was plenty sturdy, no wobbling. I reccomend it to anyone who doesnt have garage clearance like me.
-The build sheet was still there on top of the gas tank, but the only thing legible was "Gary (something) Chevrolet, (something) street, Newport.. Since I am in the northeast, I imagine that is Newport Rhode Island, who knows....
The frame is in great shape, just minimal surface rust. NO ROT!!! Thank goodness.
Now its time to start breaking down the frame. (And maybe finish stripping the paint
Thread Starter
Instructor
Joined: Apr 2003
Posts: 156
Likes: 0
From: Oakdale Ct
Thanks for the comments!
I have already gone through two boxes of Ziplock bags... Labling each bag as I go and documenting each step in a notebook... hopefully that notebook can be used as "directions" when its time to put it back together.
A few things I missed but thankfully caught as I lifted:
-wire going to brake proportioning valve
-ground to bellhousing near starter (I disconnected the starter months ago and thought I would remember that darn wire.... I didnt!)
-one vacum hose connected to the front crossmember. I saw the two obvious ones but missed this one as it was all the way over on the side.
I started the lift by myself, but quickly realized I needed help to guide the body up as it rotated a bit as it came up. Other than that, it was alot easier than I thought it would be.
Corvette Stories
The Best of Corvette for Corvette Enthusiasts

Top 10 Most Expensive Corvettes Ever Sold on Bring A Trailer
Brett Foote
10 Things Every Corvette Owner Needs (2026 Edition)
Michael S. Palmer
8 Most "Only Corvette Owners Understand" Quirks and Problems
Pouria Savadkouei
10 Reasons the C6 Z06 is Still A Performance Benchmark After 20 Years
Joe Kucinski
How Much Horsepower Every Corvette Engine "LOST" in 1972
Joe Kucinski
Top 10 DOs and DON'Ts for Protecting Your Convertible Top!
Michael S. Palmer
Top 10 Most Explosive Corvettes Ever Made: Power-to-Weight Ratio Ranked!
Joe Kucinski
150 hp to 1,250 hp: Every Corvette Generation Compared by the Specs That Matter
Joe Kucinski
8 Coolest Corvette Pace Cars (and Replicas) of All Time
Verdad GallardoRace Director


Joined: Feb 1999
Posts: 19,659
Likes: 34
From: Lenoir City Tennessee
Ci 6, 8 & 10 Veteran
St. Jude Donor '05-'06-'07-'08-'09-'10-'11-'12-'13-'14-'15
Nice work. I look forward to this time of year and getting to see all the projects going on. Be sure to take lots of pics and keep them on the computer for easy viewing. Those will be very helpful when it comes time to put it all back together. I have several files of pics that I use all the time.
Keep up the good work and keep the pics coming.
Keep up the good work and keep the pics coming.

Racer


Joined: Sep 2004
Posts: 482
Likes: 1
From: Brandon Manitoba
That is the most motivating thing to see members getting at a body off restoration. Looks great, the body dolly in waiting from the 3 rd photo is priceless. Keep up the pictures , I live for these well documented body off's . 


Melting Slicks

Joined: Jan 2006
Posts: 3,028
Likes: 2
From: North NJ
Congrats, the feeling is undescribable. I had it a month ago, although I lifted a few inches and dropped the frame out underneath since i had no drivetrain installed.
Have to do some major fiberglassing on the floorpans then spray with Lizardskin heat & sound insulation and install new SS brake lines.
Then frame goes back on and the parts I have accumulated for the past year get installed. Wooo hoo.


Have to do some major fiberglassing on the floorpans then spray with Lizardskin heat & sound insulation and install new SS brake lines.
Then frame goes back on and the parts I have accumulated for the past year get installed. Wooo hoo.

Intermediate
Joined: Jul 2006
Posts: 41
Likes: 0
From: Manakau City Auckland
Well done, I have to admit the best part was when I put the body back on after 2 years of toil (and a lot of Ecklers parts)
Nearly finished now, but I live in New Zealand and this Government has just announced that they are going to outlaw old cars on the road, not let anything in that is over 7 years old.
Because I have not registered it yet over here, I may be in the ****e after spending this money.
Nearly finished now, but I live in New Zealand and this Government has just announced that they are going to outlaw old cars on the road, not let anything in that is over 7 years old.
Because I have not registered it yet over here, I may be in the ****e after spending this money.
Safety Car

Joined: May 2005
Posts: 4,176
Likes: 7
From: Jennings LA
Originally Posted by Tony S
Well done, I have to admit the best part was when I put the body back on after 2 years of toil (and a lot of Ecklers parts)
Nearly finished now, but I live in New Zealand and this Government has just announced that they are going to outlaw old cars on the road, not let anything in that is over 7 years old.
Because I have not registered it yet over here, I may be in the ****e after spending this money.
Nearly finished now, but I live in New Zealand and this Government has just announced that they are going to outlaw old cars on the road, not let anything in that is over 7 years old.
Because I have not registered it yet over here, I may be in the ****e after spending this money.

Team Owner


Joined: Jun 2001
Posts: 23,380
Likes: 1,067
From: Virginia USA
Originally Posted by Tony S
Well done, I have to admit the best part was when I put the body back on after 2 years of toil (and a lot of Ecklers parts)
Nearly finished now, but I live in New Zealand and this Government has just announced that they are going to outlaw old cars on the road, not let anything in that is over 7 years old.
Because I have not registered it yet over here, I may be in the ****e after spending this money.
Nearly finished now, but I live in New Zealand and this Government has just announced that they are going to outlaw old cars on the road, not let anything in that is over 7 years old.
Because I have not registered it yet over here, I may be in the ****e after spending this money.

So everyone in New Zealand is rich enough to buy a new car every 7 years? Wow what a great economy you guys have down there! Oh, ya, what a wacky government you have too.
 That sucks
edit - sorry for the attempted post hijack - I just think it's silly.
Last edited by theandies; Oct 16, 2006 at 09:23 PM.


Melting Slicks

Joined: Jul 2000
Posts: 2,848
Likes: 0
From: Beacon NY
Originally Posted by Eddie 70
Be sure to take lots of pics and keep them on the computer for easy viewing. Those will be very helpful when it comes time to put it all back together. I have several files of pics that I use all the time.
good note taking and keeping the parts you take off the car well organized will save you a lot of headache when it comes time to put the car back together!
I just installed my rebuilt 383 and transmission a week ago and I'm still buzzing off the high I got from my accomplishment. I knew absolutely nothing about working on cars before I started this project over a year ago and I've come a long way. I hope to have the car running by this spring (which exactly what I said this time last year).
My hooker side exhaust should be in the mail today and work is absolute torture for me right now! Once I get my headers installed, I plan on putting the body back on the car.
Just for your own motivation, your project hopefully will look something like this:


Here are some older pictures of my progress:


Regardless of how frustrated you may get with the car, just keep working on it. Eventually the end will be in sight. Be sure to post pictures of your work on the forum. Most of us love seeing other people's projects!
Victor
Melting Slicks
Joined: Jul 2000
Posts: 2,848
Likes: 0
From: Beacon NY
Originally Posted by SuprJames
I'm on my second body-off and it is a great feeling when the body comes off. Sucks watching that bank account empty out though.....