


Vacuum relay valves
Race Director

Joined: May 2006
Posts: 16,528
Likes: 53
From: Dayton, Ohio
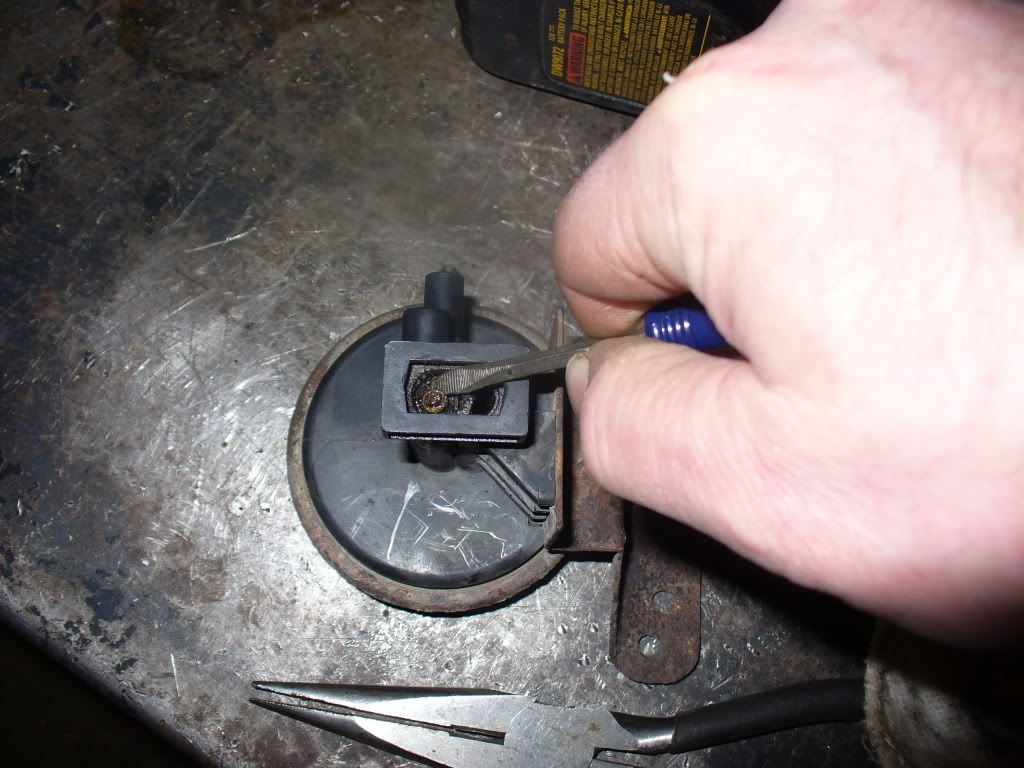
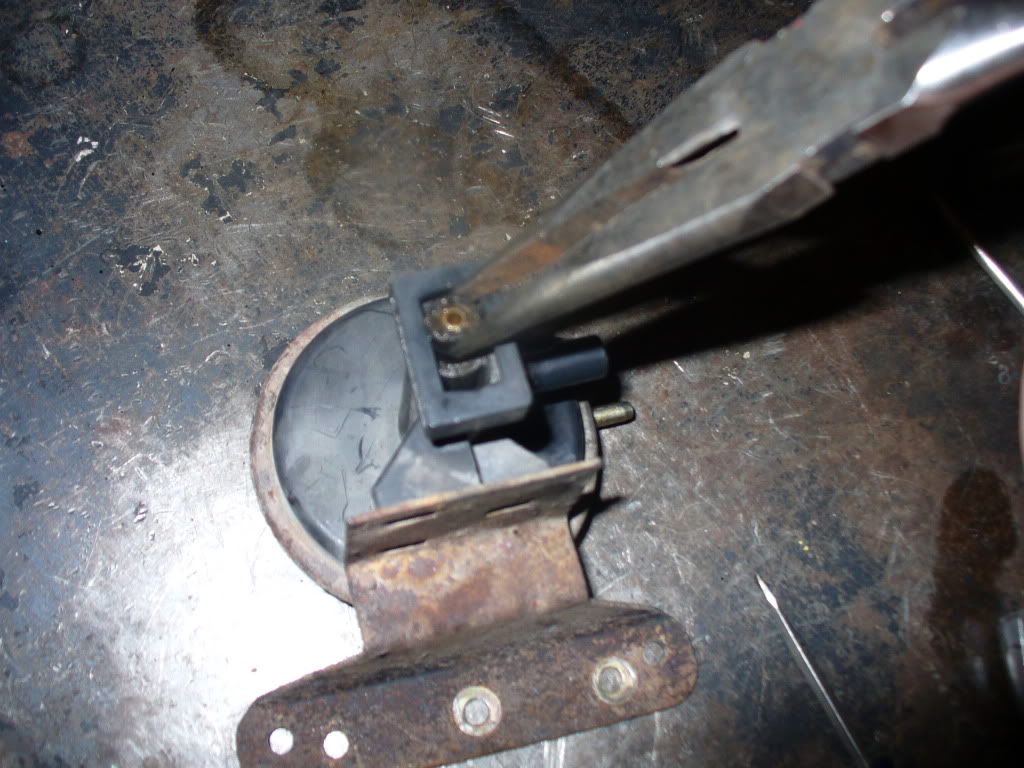
There's a small washer looking clip on the bottom end, just pried it off with a small screwdriver, then put the small screwdriver into the ports and gently moved the spool out enough to get ahold of it. Don't know if that retainer piece will stay on later, I might have to crimp something else onto the metal rod.
I was just out trying to get that little washer off and its not easy once you get the washer off to get the piston to slide over the crimped end SO I came up with another way.
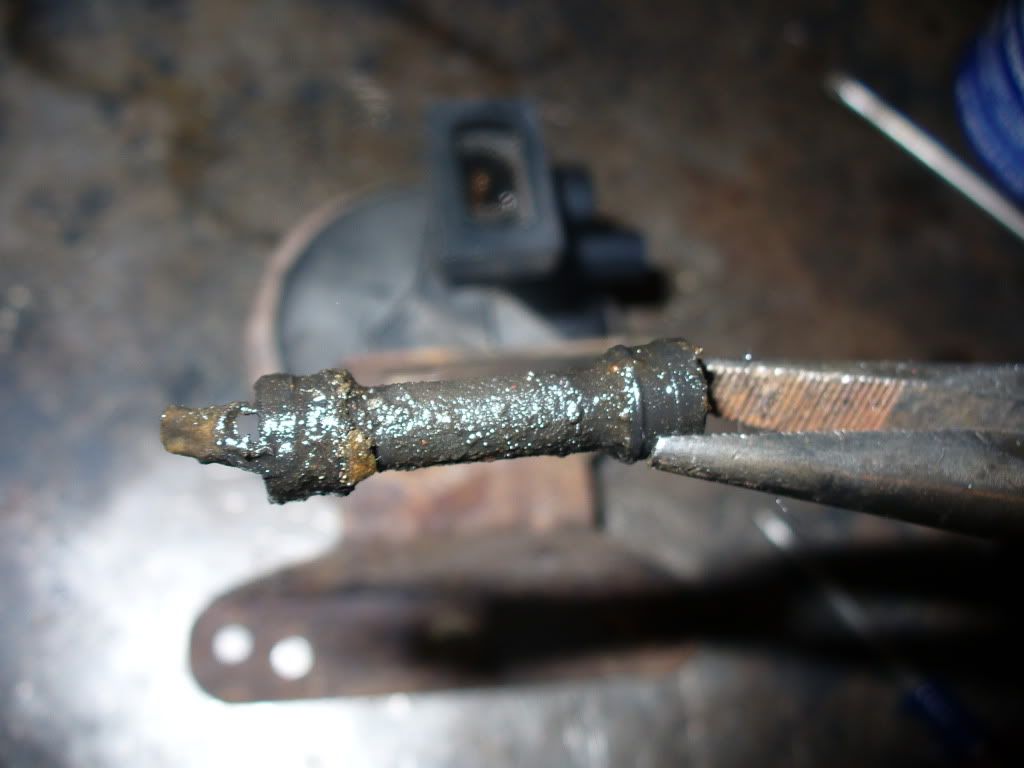
I took a 5/32 split pin and cut a .050 slot in the end,put the split pin in my die grinder and went down over the shaft and took off the high points.
The piston slipped right out , now I think when going back together you can slip the washer in place and use needle nose vice grips to crimp the shaft and hold the washer in place.
( if you use a drill make sure its fast and don't force it because you don't want the split pin to grab the shaft and twist it out of the diaphragm.)

Instructor

Joined: Nov 2007
Posts: 156
Likes: 1
From: Edgewood Kentucky
I fixed one relay with the above method, but the other spool was dry rotted. I made a new spool piece from a 3/8" aluminum dowell. I ground it down in a drill press and put 2 o-rings on it... works great.
Drifting


Joined: Jul 2006
Posts: 1,259
Likes: 154
From: Deplorableville Nebraska
Bingo! I believe we have a winner......What if someone manufactured a replacement piston with an o-ring seal at each end? Sure gets the mind working.
Advanced
Joined: Aug 2011
Posts: 71
Likes: 1
From: Coshocton Ohio
Try using a "push nut" on the end of the rod instead of, or in conjunction with, the removed washer to secure the job. Push nut looks like a thin washer with the center split about 8 ways. Ace Hardware carries a large selection. I have used these on lots of applications and they do stay put. Uncle Maddog....
Race Director
Joined: May 2006
Posts: 16,528
Likes: 53
From: Dayton, Ohio
Try using a "push nut" on the end of the rod instead of, or in conjunction with, the removed washer to secure the job. Push nut looks like a thin washer with the center split about 8 ways. Ace Hardware carries a large selection. I have used these on lots of applications and they do stay put. Uncle Maddog....
Advanced
Joined: Aug 2011
Posts: 71
Likes: 1
From: Coshocton Ohio
.095=3/32", Ace part# is PUN-XB in the "Servalite" hardware pull-out trays. If your Ace doesn't stock it, they can get it if they're using Servalite. Otherwise, Fastenal can get Au-ve-co part# 8862 from Auto-Vehicle Parts Company, for whom they are a distributor. Au-ve-co has everything imaginable for restoring cars! They have fasteners, grommets, wire looms, key blanks, you name it. A very good place to look for hard to finds. The clips that hold the hood release cable to the distributor shield on the later C3s without chrome covers is Au-ve-co # 14529. They work great, and can be released to allow servicing the distributor. Best regards, U. M........
Corvette Stories
The Best of Corvette for Corvette Enthusiasts

Corvette & Porsche 911: How Two Icons Conquered the Last 25 Years
Joe Kucinski
2027 Chevrolet Silverado 1500 First Look: Everything You NEED to Know!
Michael S. Palmer
5 Best & 5 Worst Corvette Daily Drivers
Joe Kucinski
The Headlights of Every Corvette Generation Explained
Joe Kucinski
5 Best & 5 Most Overrated Corvette Track Packages of All Time!
Joe Kucinski
Every 2027 Corvette Engine Explained
Joe Kucinski
Designer Imagines A Corvette That Looks More Like a Corvette Than the Corvette
Verdad Gallardo
10 Ugly Corvettes That We Still Kinda Love
Joe Kucinski
Top 10 Most Expensive Corvettes Ever Sold on Bring A Trailer
Brett Foote
Team Owner


Joined: Jan 2006
Posts: 37,637
Likes: 3,118
From: Crossville TN
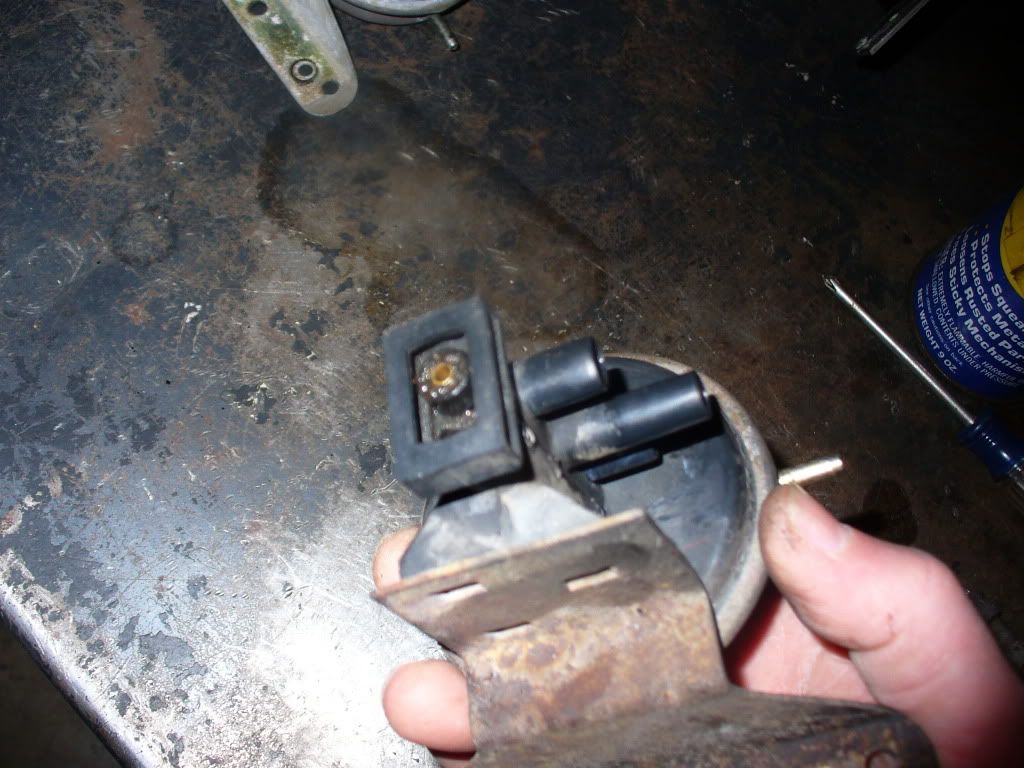
I actually did almost the same thing a few months ago, out of curiosity. But, I didn't glue the O-rings in place. There are washers at the ends of the shuttle valve. Put the O-ring down inside the recess at each end of the shuttle valve, then put a washer next to it and install on the center rod. Then put the other washer on the rod following the shuttle valve [and the other O-ring]. Now, you want to retain that shuttle valve assembly on the rod while maintaining some amount of pressure on those O-rings. That will cause them to press outward on the shuttle valve's seal lips to make a good seal with the relay valve bore.
I locked my shuttle valve onto the rod with some JBWeld epoxy. But any method of permanently retaining that shuttle valve to the rod will work...as long as there is still some squeeze on those O-rings.
Generally, I would say that this fix is relatively easy and it actually works pretty well. But, for the majority of C3 owners, it would be easier to just buy another relay, than to do the rebuild of the leaky units.
Many thanks to goinbroke for 'breaking the ice' on this one. I was a little hesitant to offer this as a fix, because it required taking a Dremel to the original relay (to remove the swedged area on the rod) and was "unconventional" [to say the least]. But it works. The next question is "for how long?".
Racer

Joined: May 2005
Posts: 417
Likes: 0
From: Red Deer Alberta
Warning....DO NOT deform or bend or dent the rings if you elect to cut the ring to get the piston out through the top. They will never again give you a seal.
Warning... do not attempt to take a Dremel to the bottom end of the shaft to remove the swage (pinched part of shaft) holding the piston onto the shaft. You will now have a relay with destroyed piston.
I have waisted tons of time and $ trying to rebuild 4 of these things and just do not understand why they sell them without testing them.
Can you tell I'm frustrated ?
Race Director
Joined: May 2006
Posts: 16,528
Likes: 53
From: Dayton, Ohio
A spring pin or roll pin. I put it in a drill and very slowly run it down on the shaft.I believe its a 5/32 that I use.
http://www.engineersedge.com/roll_pin.htm
http://www.engineersedge.com/roll_pin.htm
Melting Slicks

Joined: Sep 2011
Posts: 3,372
Likes: 215
From: Peoria Arizona
 You've inspired me to dig into this as well. Sounds like a good project and a great way to save some hard earned $$.
Racer


Joined: Apr 2011
Posts: 471
Likes: 3
There's a small washer looking clip on the bottom end, just pried it off with a small screwdriver, then put the small screwdriver into the ports and gently moved the spool out enough to get ahold of it. Don't know if that retainer piece will stay on later, I might have to crimp something else onto the metal rod.

The rod is "pinched" at the end and it doesnt allow the washer get out.... I dont have space to cut the washer....
Burning Brakes


Joined: Apr 2011
Posts: 975
Likes: 108
From: Phoenix, AZ
There's a small washer looking clip on the bottom end, just pried it off with a small screwdriver, then put the small screwdriver into the ports and gently moved the spool out enough to get ahold of it. Don't know if that retainer piece will stay on later, I might have to crimp something else onto the metal rod.
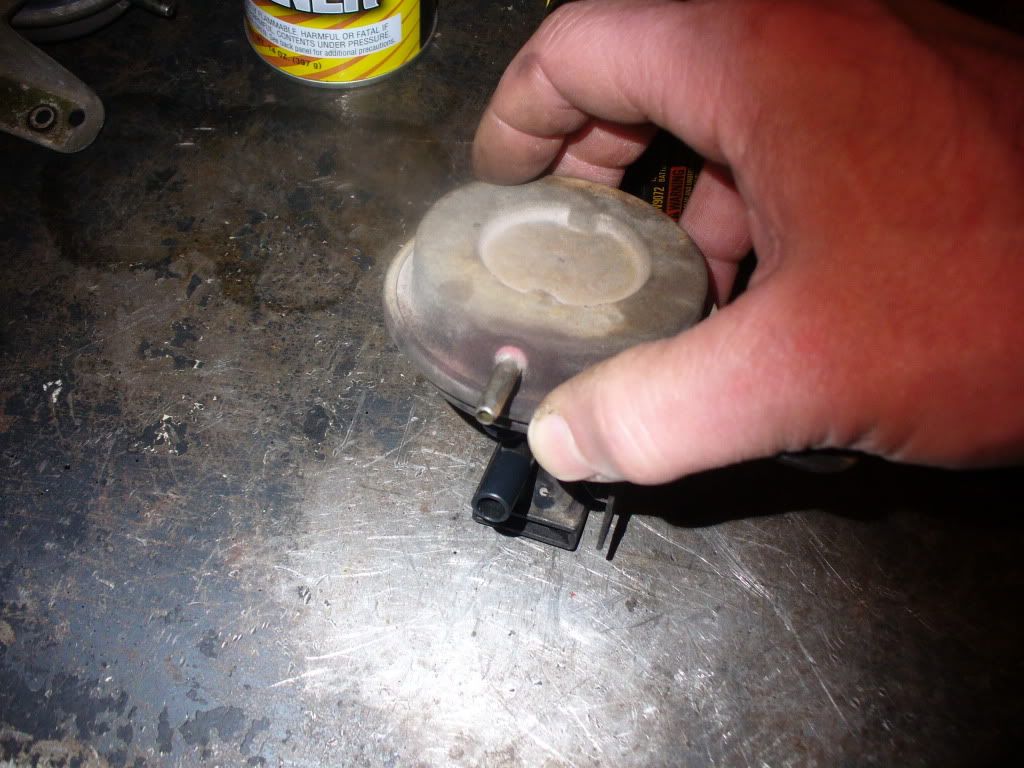
 Excellent thread-after removing the relays, I used the Mityvac vacuum pump to learn the diaphram worked perfectly, but the yellow port would not hold a vacuum.
The spool takes less than three minutes to extract. I did spray a few shots of brake cleaner onto the washer prior to removing the washer.
Pry and twist washer off with a small screwdriver. I was worried that the washer would fly off into oblivion and placed my finger over the opening.

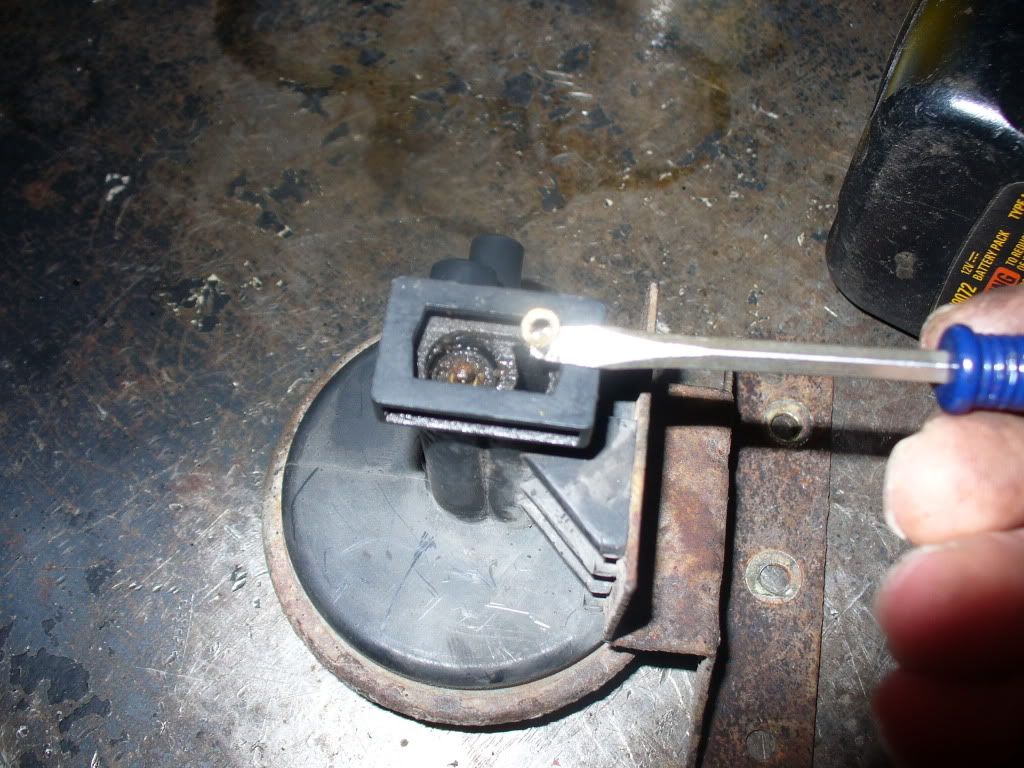
I tapped the relay onto the workbench and and the spool popped out enough to grab onto with the needlenose pliers. The other spool I dug out with the small screwdriver.
Off to McLendon's to buy the O rings-thanks for the measurements!