
Body mounts replaced with pics!


 03-27-2009, 09:45 PM
#62
Melting Slicks

Looking at the picture where you have the block of wood placed? Mine seems real thin and flimsy there, i am scared it would crack the car all to crap if i lifted it there? Did you cause any damage lifting it there?
03-27-2009, 11:31 PM
#63
Safety Car


Thread Starter

If it appears too flimsy use a large piece of 3/4 plywood and place it under the floor pan (using as much surface area as you can to distribute the weight) and raise it very slowly.
03-29-2009, 11:43 PM
#66
Safety Car
Thread Starter
 03-30-2009, 10:38 AM
#68

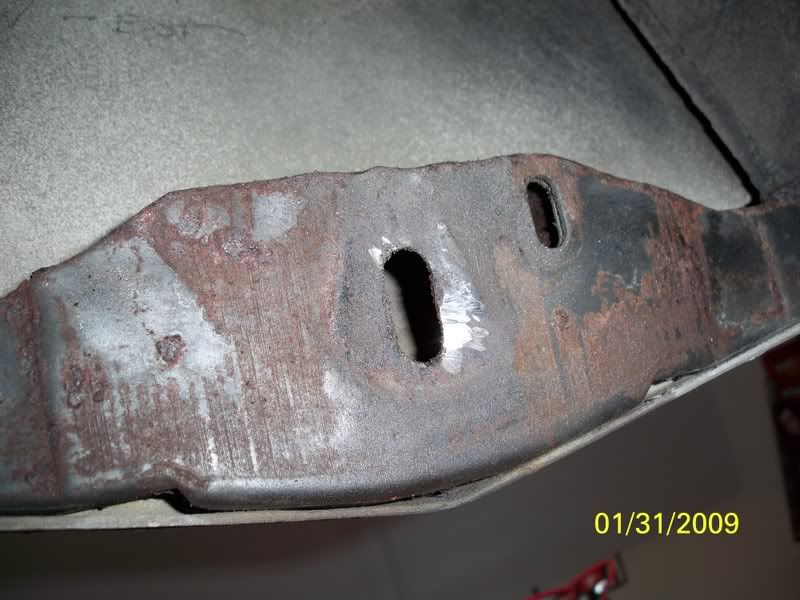
Rudolph, I think Grumpy might be referring to these bolts.

Those 2 rusty holes were where the front frame extension attaches, and I believe that nut just forward of those holes which the frame extension covers has to come out. Yes? I see by your pics that you also removed the frame extensions.
Those 2 rusty holes were where the front frame extension attaches, and I believe that nut just forward of those holes which the frame extension covers has to come out. Yes? I see by your pics that you also removed the frame extensions.
 03-30-2009, 10:00 PM
#70
Safety Car
Thread Starter
Rudolph, I think Grumpy might be referring to these bolts.
Those 2 rusty holes were where the front frame extension attaches, and I believe that nut just forward of those holes which the frame extension covers has to come out. Yes? I see by your pics that you also removed the frame extensions.
Those 2 rusty holes were where the front frame extension attaches, and I believe that nut just forward of those holes which the frame extension covers has to come out. Yes? I see by your pics that you also removed the frame extensions.
Last edited by rudolph schenker; 03-30-2009 at 10:05 PM.
08-25-2009, 09:10 PM
#71
Pro


Hey Rudolph (or anyone),
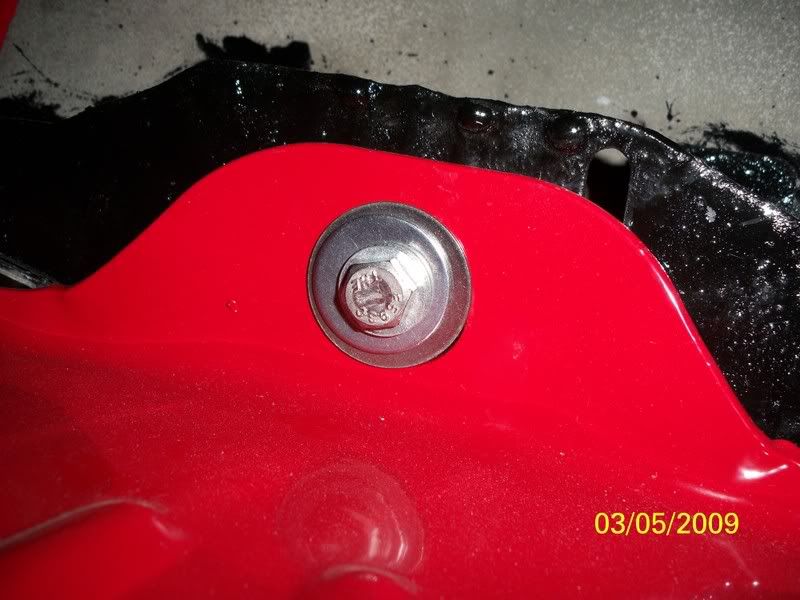
In this pic it shows a rubber(??) support/bushing
between the frame & nose (directly under the badge).
Did you replace this mount ???
If so where did you get it ???
I cant find it anywhere in my aim or at vendors sites.
Could it be a normal body mount ???
Why isn't it mentioned anywhere ??????

Thanks for your continued HELP & patience,

GAV
08-25-2009, 10:33 PM
#72
Melting Slicks

Hey Rudolph (or anyone),
In this pic it shows a rubber(??) support/bushing
between the frame & nose (directly under the badge).
Did you replace this mount ???
If so where did you get it ???
I cant find it anywhere in my aim or at vendors sites.
Could it be a normal body mount ???
Why isn't it mentioned anywhere ??????
Thanks for your continued HELP & patience,
GAV
After some searching around I found a post that identified this mount as the SAME as the 1964-67 body mount. I am away from home headed to Carlisle
 and I am away from my regular computer so I don't have the original source. The mount (upper and lower) are part numbers 9023141 and 9023140 ($8.50 and $12.50 respectively) in the Dr Rebuild link below. I am sure other vendors have them as well, although I got mine from DrR.
 They DO NOT list these mounts as applicable for use as the front cushion on a C3 (my 1980). As such they DO NOT guarantee they will work. Knowing this I ordered them anyway.
The lower mount comes complete with a metal sleeve that holds the rubber cushion in position. This metal sleeve had a FLAT bottom. The sleeve on the front mount of my 1980 has a rounded bottom.
The RUBBER part of the mount however looked IDENTICAL between my old mount and the DrR replacement. I removed the old rubber parts and cleaned the rust off the old metal piece of the mount. Then I pulled the new rubber part off the new mount (flat) and put it on my old metal mount piece (rounded).
I have not put my car back together yet. But, absent the deterioration of the old rubber, the rubber pieces are the same. I believe this will work without a problem.
http://www.docrebuild.com/DR-R-WEB/BODY-MT.pdf
03-02-2011, 04:19 PM
#73
Le Mans Master


Member Since: Jun 2007
Location: Where it's always hot as Hell-South Louisiana.
Posts: 7,666
Likes: 0
Received 1 Like
on
1 Post
St. Jude Donor '07-'08-'09-'10-'11-'12-'13
In anticipation of doing this replace job of all 8 body mounts I started on them today. I will not be able to do the job until next week so thought I would remove the old bolts , clean & apply anti-sieze, then replace to save time when I do the job.
For this posting I will reference the mounts as DS front number 1 to DS rear as number 4.... PS front as number 5 thru PS rear as number 8.
Also IMHO ,Kano-Kroil will beat the hell out of PB blaster. I had soaked 1 & 5 studs a few times in the past 2 weeks with PB Blaster...... the K-K did the job better for me. This is just my observation, you may have better results w/ PB Blaster.
I twisted off number 1 stud. Period. Used an impact on bottom with a socket on top..... nothing doing. Used brute force (LOL) and snapped the stud.
On number 5, the impact did the trick after I initially busted the hold on the nut. Lots of K-K helped.
Number 2 and 6 are in the kick panels. These were the easiest to back out... added anti-sieze and reinstalled. Left the kick panels off.
Numbers 3 and 7 were "not too bad" , but they began to get more into a bind the more I backed these studs out. I used copious amounts of K-K spraying at the stud for it to run down the stud,thru the old mount and hopefully into the threads. When the stud loaded up with torque, I sprayed heavily, screwed the stud BACK IN A FEW THREADS, sprayed again, then back out until it became "hard' again.Repeated. These 2 studs took 1.5 hours total alone. Just take your time. Oh, and number 7 had an old rats nest of carpet fibers in the box area......
Numbers 4 and 8 are a lost cause. When I get my buds Sawsall next week, they'll come off. Both twisted the capture nut today. I'll approach them from the inside with new studs for the mounts.
No pictures today, camera is with newborn grand daughter -which took priority says my wife... Pictures to come when I do the job next. week. I feel fortunate the studs were workable and all came off -save Number 4 and 8.... Also, there was zero rust in the kick panels, they looked great for a 31 y.o. car.
Thanks for all the advice and help in this thread prior to my posting. More to come next week.
Last edited by mikejpss; 03-02-2011 at 04:23 PM. Reason: spelling - 15 points ! hahaha
03-05-2011, 01:04 PM
#74
Le Mans Master
Member Since: Jun 2007
Location: Where it's always hot as Hell-South Louisiana.
Posts: 7,666
Likes: 0
Received 1 Like
on
1 Post
St. Jude Donor '07-'08-'09-'10-'11-'12-'13
Front nose mount:
Part numbers 9023141 and 9023140 ( 1 of each) from Dr Rebuild are $32.45 delivered. Zip has them for $19.45 delivered. Dr.'s are GM discontinued, Zip's are reproductions.
Zip item numbers:
M-3894 and M-3895 ... 1 of each
Part numbers 9023141 and 9023140 ( 1 of each) from Dr Rebuild are $32.45 delivered. Zip has them for $19.45 delivered. Dr.'s are GM discontinued, Zip's are reproductions.
Zip item numbers:
M-3894 and M-3895 ... 1 of each
03-11-2011, 08:12 PM
#75
Le Mans Master
Member Since: Jun 2007
Location: Where it's always hot as Hell-South Louisiana.
Posts: 7,666
Likes: 0
Received 1 Like
on
1 Post
St. Jude Donor '07-'08-'09-'10-'11-'12-'13
Started on my body mounts (alone) Wednesday morning, finished up this afternoon installing the new mounts and still have the nose plastic and associated stuff up front to install. Gearbox re-installation was a challenge. The new mounts were 1/2 inch higher, this increased the angle of the steering shaft ever so slightly, as such the gearbox would not re-install without loosening the steering column bolts (4) under the dash. This allowed the shaft to "fall" about 1/16 inch, the 3 gearbox bolts then slipped right into place in their dedicated holes in the frame.
Otherwise, Rudolph's original posting was followed to a "T" and no unexpected issues arose.... save the steering gearbox. Thanks Rudolph for the insight and a pictorial to follow.
The car definetly sits higher on the frame by 5/8 inch all around.... and it may just be my imagination, but it rides better or so it seems.
Thanks to Jim Shea for his technical assistance with the gearbox/steering knowledge. His writeup is just what you need for steering 101, and above.And also to HamadUp for his insight on the same issue.
Here are a few pics of my 1980's old mounts.... supposedly with 31,*** miles and 100% covered garaged car:
Pics: mounts numbers 3 and 4 drivers side-top pass side - bottom row
[IMG]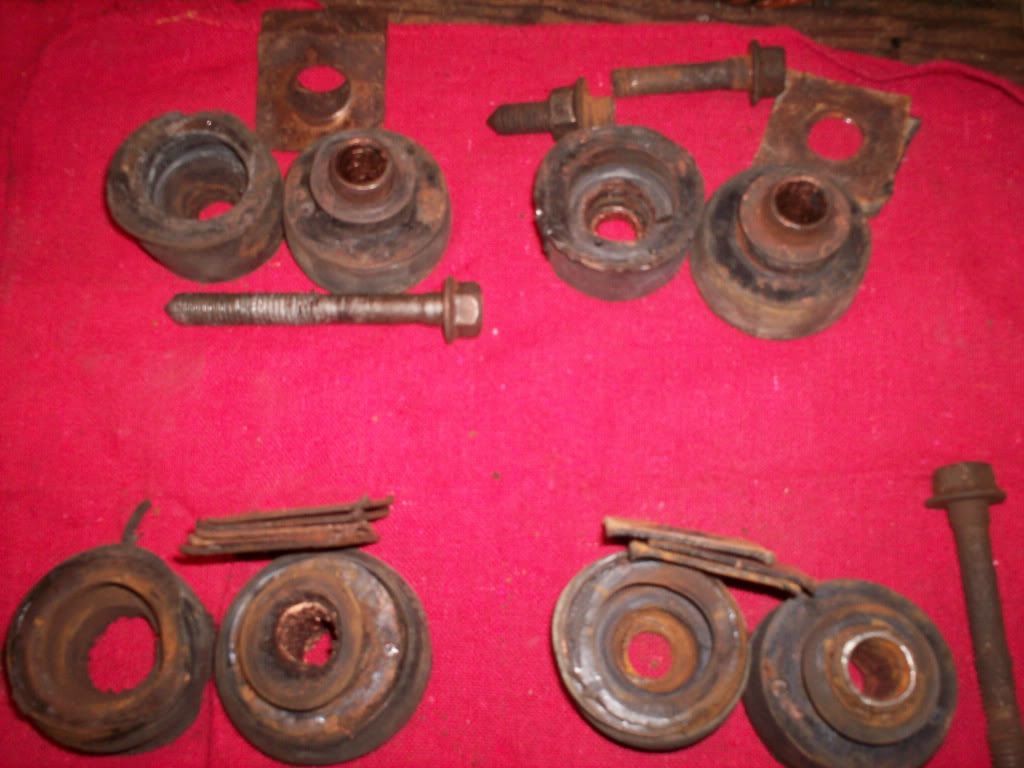 [/IMG]
mounts 3's 1 and 2 ... drivers side-top, pass side- bottom row
[IMG]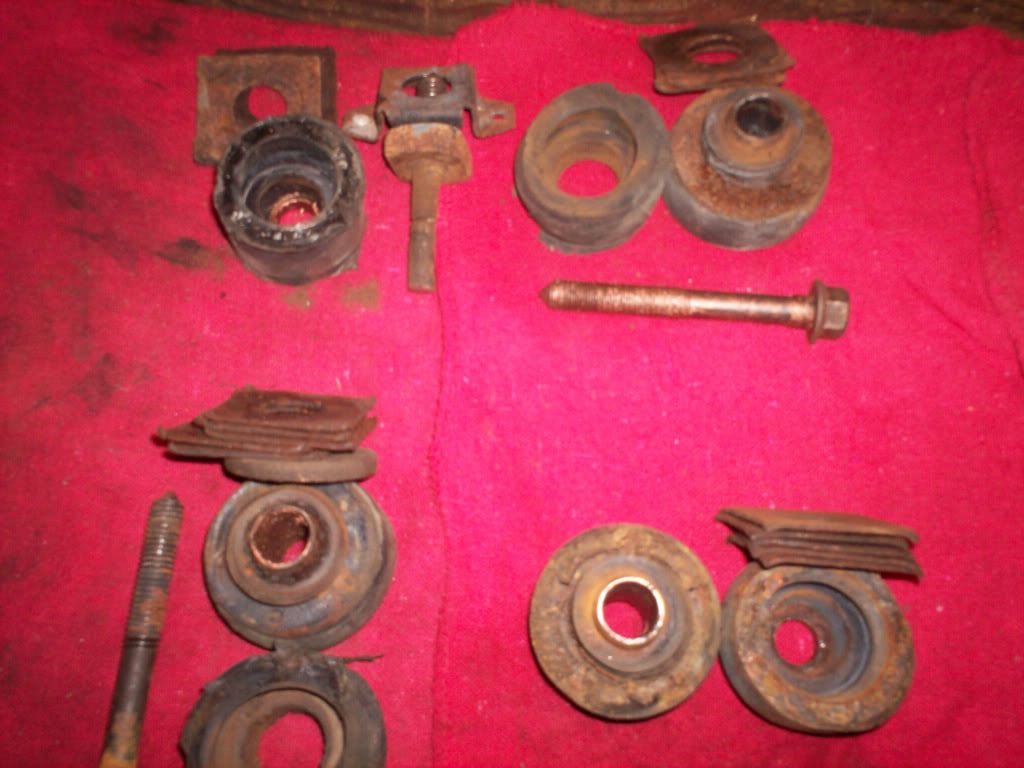 [/IMG]
ugly and flat- reminds me of a girlfriend I had one time LOL :
[IMG]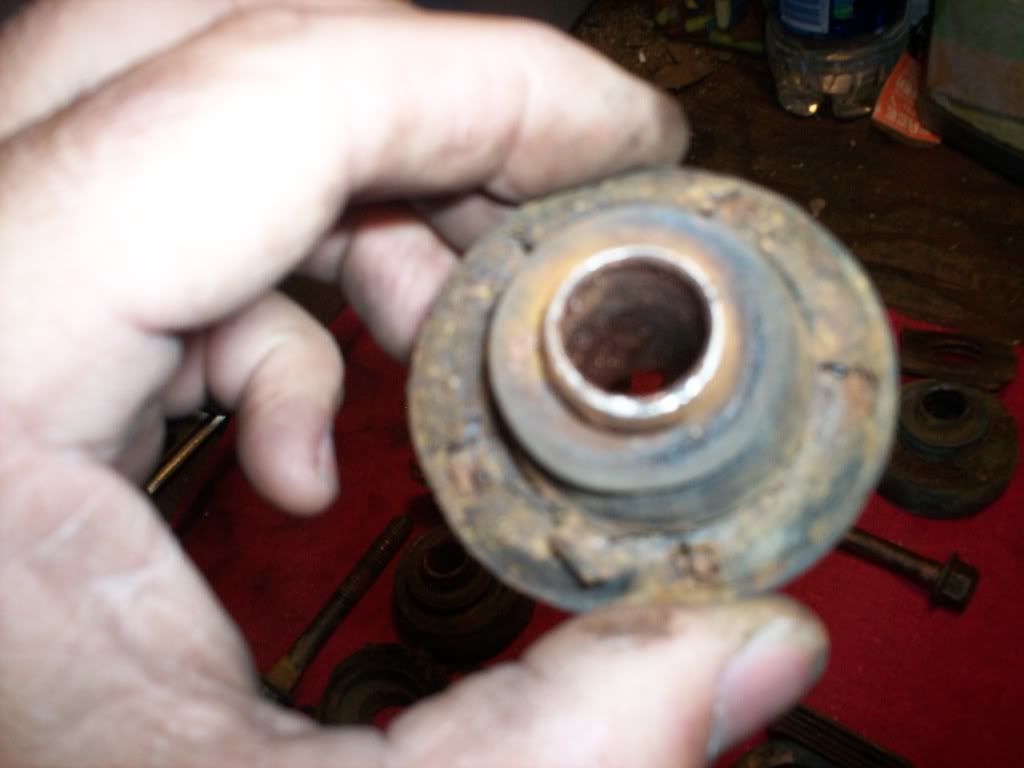 [/IMG]
Each pass. side mount had this - 5 shims.... drivers side had 2 shims each ???
[IMG]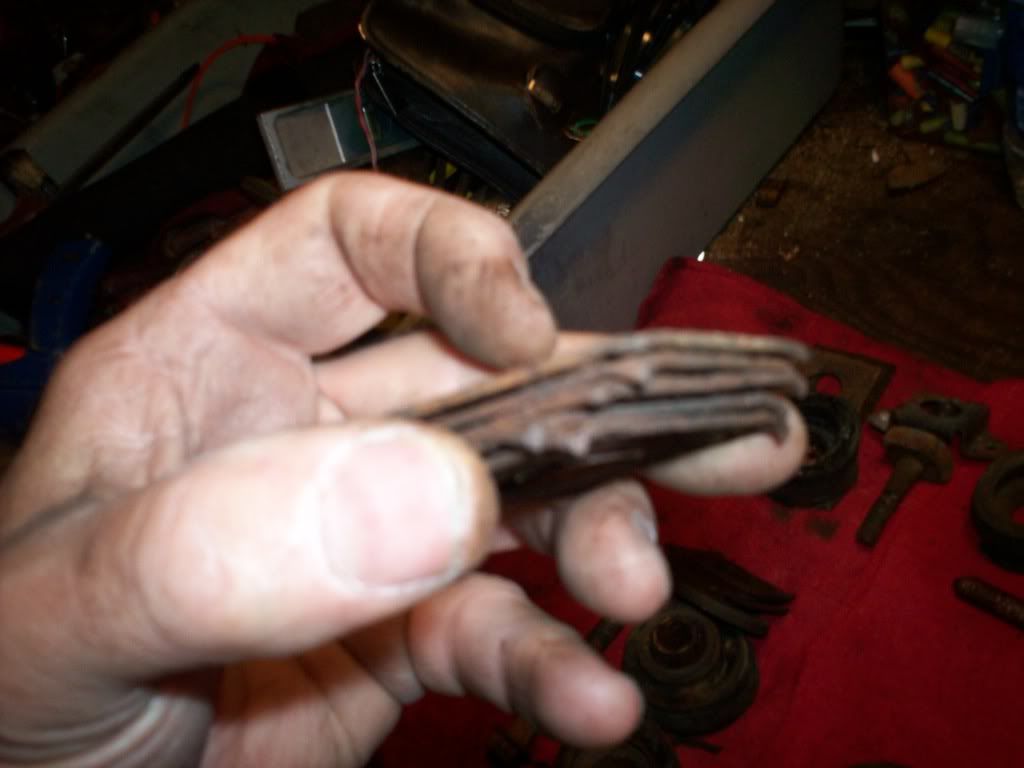 [/IMG]
I'm glad its over (almost) too.
Otherwise, Rudolph's original posting was followed to a "T" and no unexpected issues arose.... save the steering gearbox. Thanks Rudolph for the insight and a pictorial to follow.
The car definetly sits higher on the frame by 5/8 inch all around.... and it may just be my imagination, but it rides better or so it seems.
Thanks to Jim Shea for his technical assistance with the gearbox/steering knowledge. His writeup is just what you need for steering 101, and above.And also to HamadUp for his insight on the same issue.
Here are a few pics of my 1980's old mounts.... supposedly with 31,*** miles and 100% covered garaged car:
Pics: mounts numbers 3 and 4 drivers side-top pass side - bottom row
[IMG]
[/IMG]mounts 3's 1 and 2 ... drivers side-top, pass side- bottom row
[IMG]
[/IMG]ugly and flat- reminds me of a girlfriend I had one time LOL :
[IMG]
[/IMG]Each pass. side mount had this - 5 shims.... drivers side had 2 shims each ???
[IMG]
[/IMG]I'm glad its over (almost) too.
03-13-2011, 01:06 PM
#76
Safety Car
Thread Starter
Started on my body mounts (alone) Wednesday morning, finished up this afternoon installing the new mounts and still have the nose plastic and associated stuff up front to install. Gearbox re-installation was a challenge. The new mounts were 1/2 inch higher, this increased the angle of the steering shaft ever so slightly, as such the gearbox would not re-install without loosening the steering column bolts (4) under the dash. This allowed the shaft to "fall" about 1/16 inch, the 3 gearbox bolts then slipped right into place in their dedicated holes in the frame.
Otherwise, Rudolph's original posting was followed to a "T" and no unexpected issues arose.... save the steering gearbox. Thanks Rudolph for the insight and a pictorial to follow.
The car definetly sits higher on the frame by 5/8 inch all around.... and it may just be my imagination, but it rides better or so it seems.
Thanks to Jim Shea for his technical assistance with the gearbox/steering knowledge. His writeup is just what you need for steering 101, and above.And also to HamadUp for his insight on the same issue.
Here are a few pics of my 1980's old mounts.... supposedly with 31,*** miles and 100% covered garaged car:
Pics: mounts numbers 3 and 4 drivers side-top pass side - bottom row
[IMG][/IMG]
mounts 3's 1 and 2 ... drivers side-top, pass side- bottom row
[IMG][/IMG]
ugly and flat- reminds me of a girlfriend I had one time LOL :
[IMG][/IMG]
Each pass. side mount had this - 5 shims.... drivers side had 2 shims each ???
[IMG][/IMG]
I'm glad its over (almost) too.
Otherwise, Rudolph's original posting was followed to a "T" and no unexpected issues arose.... save the steering gearbox. Thanks Rudolph for the insight and a pictorial to follow.
The car definetly sits higher on the frame by 5/8 inch all around.... and it may just be my imagination, but it rides better or so it seems.
Thanks to Jim Shea for his technical assistance with the gearbox/steering knowledge. His writeup is just what you need for steering 101, and above.And also to HamadUp for his insight on the same issue.
Here are a few pics of my 1980's old mounts.... supposedly with 31,*** miles and 100% covered garaged car:
Pics: mounts numbers 3 and 4 drivers side-top pass side - bottom row
[IMG]
[/IMG]mounts 3's 1 and 2 ... drivers side-top, pass side- bottom row
[IMG]
[/IMG]ugly and flat- reminds me of a girlfriend I had one time LOL :
[IMG]
[/IMG]Each pass. side mount had this - 5 shims.... drivers side had 2 shims each ???
[IMG]
[/IMG]I'm glad its over (almost) too.

 11-29-2012, 10:04 PM
#78
Intermediate


Member Since: Jul 2012
Posts: 45
Likes: 0
Received 0 Likes
on
0 Posts
Wow, these are some great posts! I'm in middle of mine right now. After soaking mine for 3 days (each day a new soaking) I got a tip from an old hot rod guy. He said to take my air impact with a blunt tip bit and hit the side of the bolt head, maybe 3-4 hits. I couldn't believe it, they came right out. Thanks for the tip on how to jack-up the body!
04-28-2021, 08:43 AM
#79

I see this thread is eons old but it is still relevant to those of us about to tackle the replacement of all body mounts.
I would greatly appreciate any comments from members experienced with the layout of a 1980 which is different to earlier C3's:
Assuming the goal is to jack up the body 4" one side at a time...
1. Do you need to remove the rocker panels?
2. Do you need to remove the front bumper cover and frame extensions?
3. Do you need to remove the rear bumper and supporting struts (or perhaps just loosen)?
Thank you in advance!
04-28-2021, 06:16 PM
#80
Administrator
Member Since: Jul 2000
Location: About 1100 miles from where I call home. Blue lives matter.
Posts: 51,414
Received 5,331 Likes
on
2,775 Posts

I see this thread is eons old but it is still relevant to those of us about to tackle the replacement of all body mounts.
I would greatly appreciate any comments from members experienced with the layout of a 1980 which is different to earlier C3's:
Assuming the goal is to jack up the body 4" one side at a time...
1. Do you need to remove the rocker panels?
2. Do you need to remove the front bumper cover and frame extensions?
3. Do you need to remove the rear bumper and supporting struts (or perhaps just loosen)?
Thank you in advance!
I would greatly appreciate any comments from members experienced with the layout of a 1980 which is different to earlier C3's:
Assuming the goal is to jack up the body 4" one side at a time...
1. Do you need to remove the rocker panels?
2. Do you need to remove the front bumper cover and frame extensions?
3. Do you need to remove the rear bumper and supporting struts (or perhaps just loosen)?
Thank you in advance!
