


DIY Cold Air Intake
Thread Starter
Burning Brakes


Joined: Jun 2004
Posts: 1,012
Likes: 5
From: Granbury, TX
My wife wanted me out of the house so she could cook and clean for the holidays. She didn't have to ask me twice. I took off to the garage and fabbed up this cold air intake. Pictures and steps are below. Let me know if you have any questions.
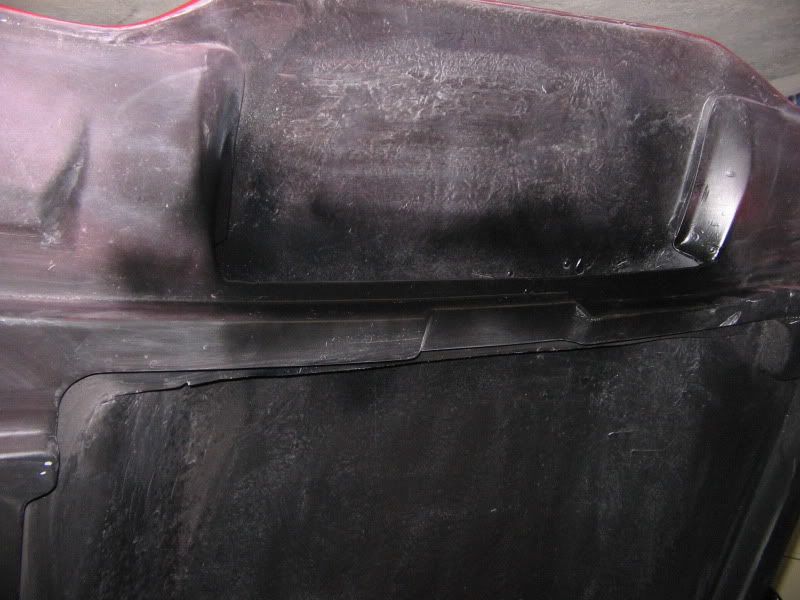
Back of the L-88 hood opened up to a 3" tall opening for air flow.
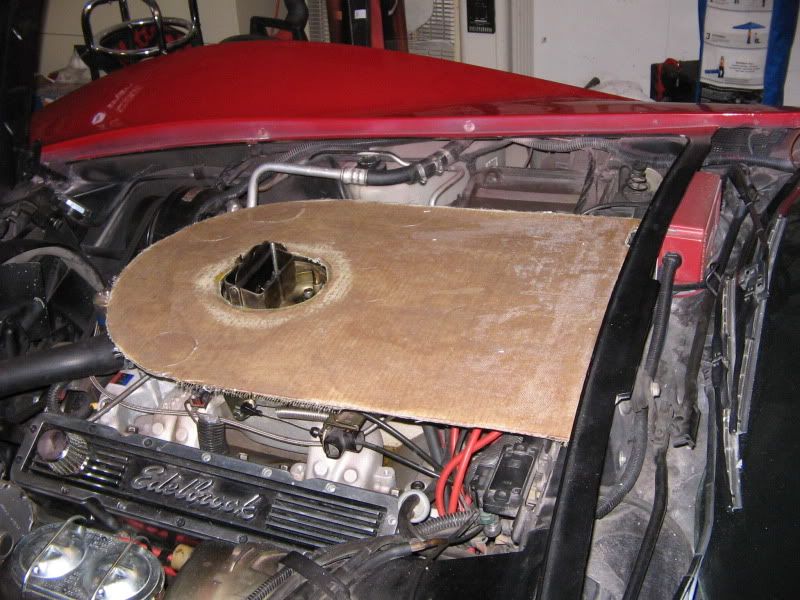
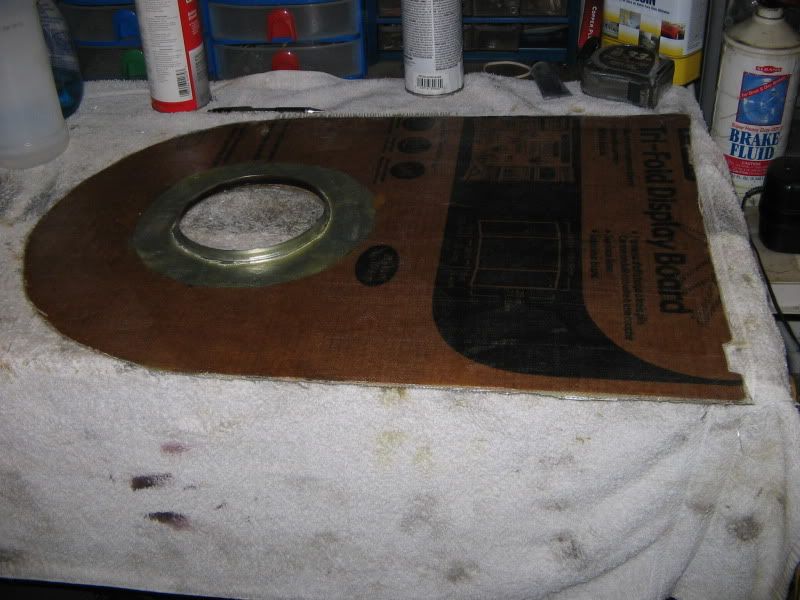
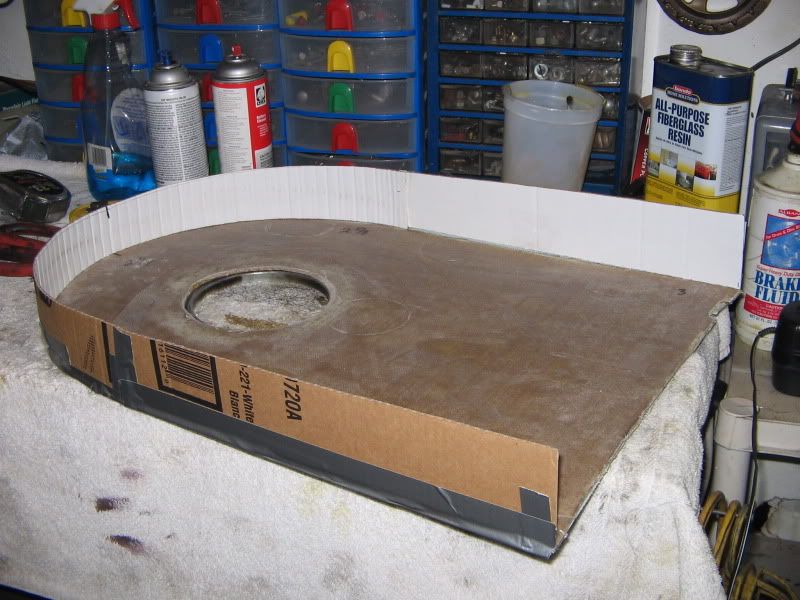
1 layer of fiberglass and poyester resin applied to the top of a sheet of cardboard , resin and fiberglass from Home Depot. Base plate from 9" air cleaner glassed to bottom.
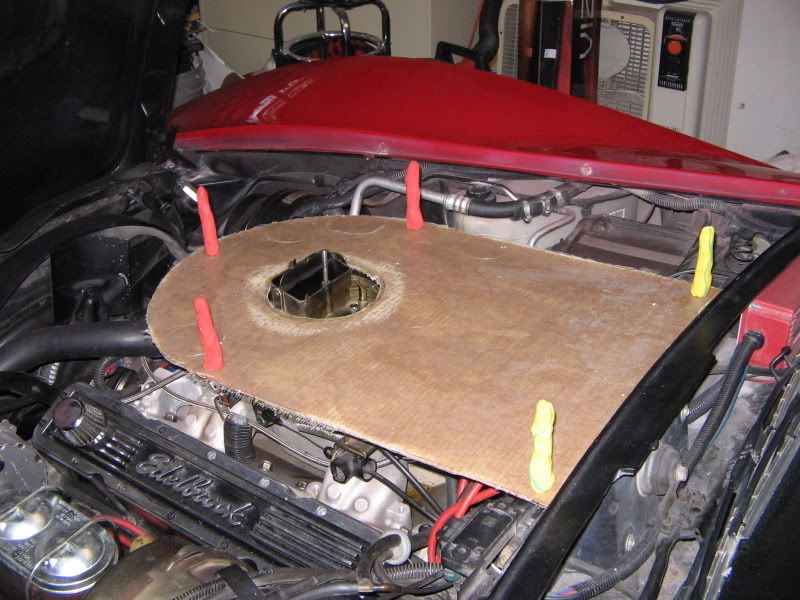
Clearance to hood checked with modeling clay.
Cardboard cut for sides.
One layer of glass applied to inside of side walls. Tape removed and outside glassed.
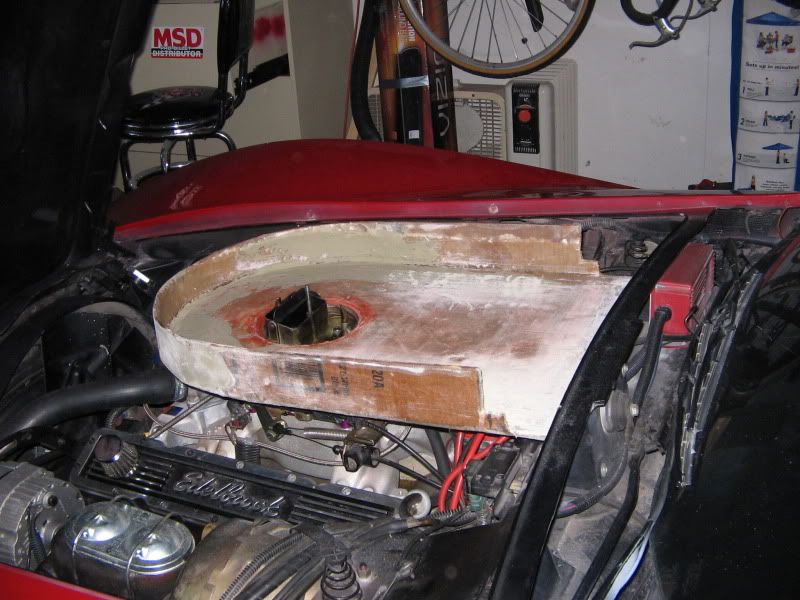
About a half a tube of glazing putty used to smooth eveything up.
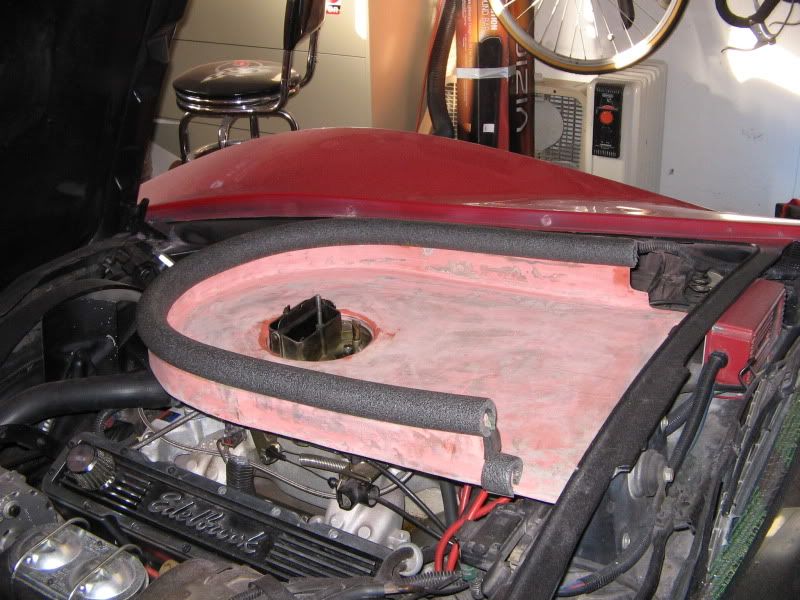
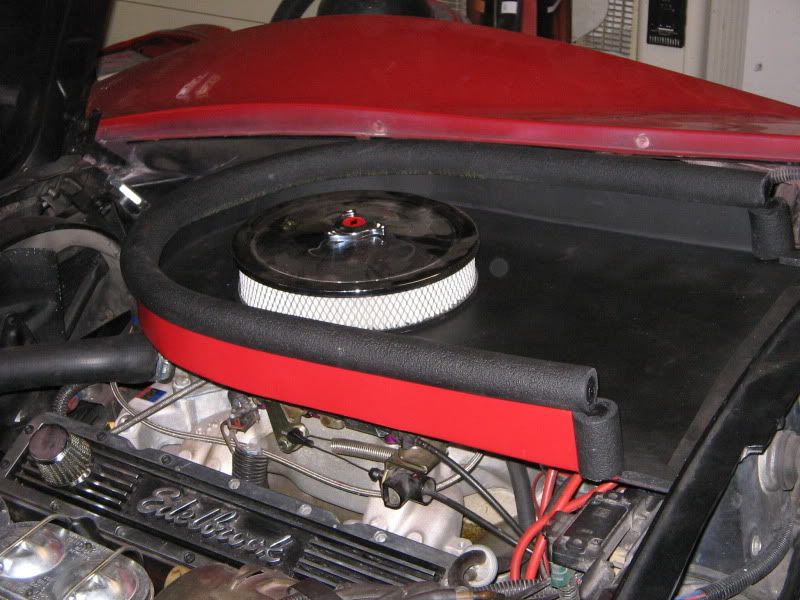
Round pipe insulation used to seal CAI to hood.
I was going to paint it completely black but a buddy suggested I use red. I went half and half.
Some shots of the finished project.
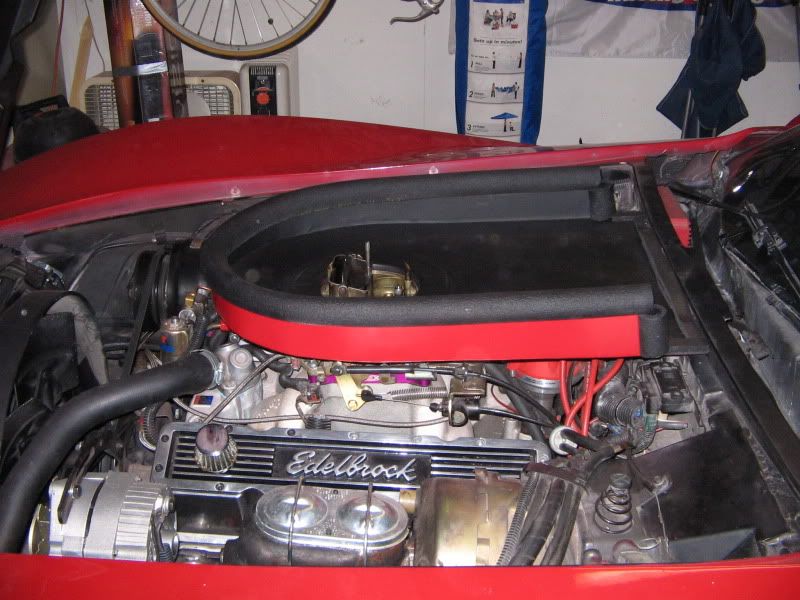
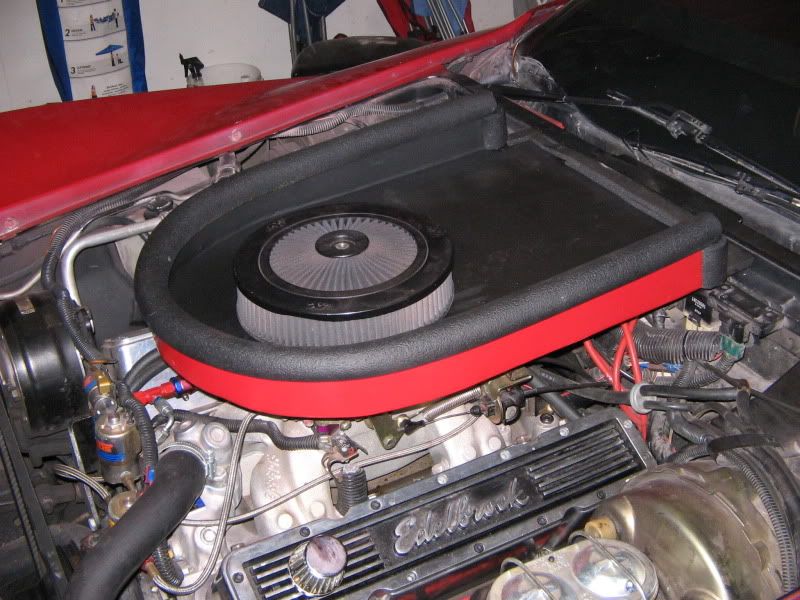
I ordered a larger air cleaner with a flow through lid and chrome accents. Should look better.
Back of the L-88 hood opened up to a 3" tall opening for air flow.
1 layer of fiberglass and poyester resin applied to the top of a sheet of cardboard , resin and fiberglass from Home Depot. Base plate from 9" air cleaner glassed to bottom.
Clearance to hood checked with modeling clay.
Cardboard cut for sides.
One layer of glass applied to inside of side walls. Tape removed and outside glassed.
About a half a tube of glazing putty used to smooth eveything up.
Round pipe insulation used to seal CAI to hood.
I was going to paint it completely black but a buddy suggested I use red. I went half and half.
Some shots of the finished project.
I ordered a larger air cleaner with a flow through lid and chrome accents. Should look better.
Safety Car


Joined: Jan 2001
Posts: 3,637
Likes: 27
From: Norwalk Ct
Nice execution.
Maybe a "CHEVROLET" script decal on both sides or maybe just one around the front edge would add a little "finishing" touch. Let me know and I will cut them for you.
Nick
Maybe a "CHEVROLET" script decal on both sides or maybe just one around the front edge would add a little "finishing" touch. Let me know and I will cut them for you.
Nick
Last edited by lvrpool32; Nov 30, 2009 at 01:26 PM.
Team Owner


Joined: Jan 2006
Posts: 37,637
Likes: 3,116
From: Crossville TN
Nicely done. Just a thought... you could have kept the 'seal' as a single piece by cutting 90 degree notches in it at the back ends of your intake. But your sealing method will work just as well, I'm sure. Let us know how it works and how it affects fuel mileage. Good job.

Le Mans Master


Joined: Oct 2000
Posts: 8,897
Likes: 1,353
From: Santa Ana CA
Nice work!
I did up a cardboard template to do something similar on my '64 with a '67 BB hood and an opened front scoop, but never followed through with the fiberglassing. My hat's off to you!
My only problem with doing such a thing is that you really cover the view of the engine, which may be a good or bad thing.
Corvette Stories
The Best of Corvette for Corvette Enthusiasts

150 hp to 1,250 hp: Every Corvette Generation Compared by the Specs That Matter
Joe Kucinski
8 Coolest Corvette Pace Cars (and Replicas) of All Time
Verdad Gallardo
Top 10 Corvette Engines RANKED by Peak Torque (70+ Years of Muscle!)
Joe Kucinski
Corvette ZR1X Will Be Pacing the Indy 500, And Could Probably Race, Too!
Verdad Gallardo
Top 10 Corvettes Coming to Mecum Indy 2026!
Brett Foote
Top 10 C9 Corvette MUST-HAVES to Fix These C8 Generation Flaws!
Michael S. Palmer
10 Revolutionary 'Corvette Firsts' Most People Don't Know
Joe Kucinski
5 Reasons to Upgrade to an LS6-Powered Corvette; 5 Reasons to Stay LT2
Michael S. Palmer
2027 Corvette vs The World: Every C8 vs Its Closest Competitor
Joe Kucinski
Thread Starter
Burning Brakes
Joined: Jun 2004
Posts: 1,012
Likes: 5
From: Granbury, TX
Thanks everyone. 
I am not too proud to copy or listen to a good idea!

I think 45 degree angle cuts to make the round seals match and generate a 90 degree angle would look a lot better. Unfortunately the underside of the hood has a step and the seals have to match. I am still up for suggestions...
Nick,
I will take you up in your Corvette script offer. I�ll send you a PM.
I�m looking forward to seeing if the track time improves. It�s counter intuitive that a reverse facing scoop will force air into the carb but I have a buddy with a 66 Chevy II and his reverse facing scoop took .2 sec off his 1/4 mile time.
I was doing this mostly for function. It's easy to remove and I was planning to take it off for car shows. Since I followed my buddy's suggestion of painting it red, it looks better than I hoped. Now with some Corvette scripts......
I worked on this project off and on for at least 3 days and several 6 packs. I had to wait for the resin and glazing putty to cure between applications, good time to put up the tools and drink beer. I do like working with fiberglass and resin. I don�t like sanding but it�s better than cooking and cleaning.
I am not too proud to copy or listen to a good idea!
I think 45 degree angle cuts to make the round seals match and generate a 90 degree angle would look a lot better. Unfortunately the underside of the hood has a step and the seals have to match. I am still up for suggestions...
Nick,
I will take you up in your Corvette script offer. I�ll send you a PM.
I�m looking forward to seeing if the track time improves. It�s counter intuitive that a reverse facing scoop will force air into the carb but I have a buddy with a 66 Chevy II and his reverse facing scoop took .2 sec off his 1/4 mile time.
I was doing this mostly for function. It's easy to remove and I was planning to take it off for car shows. Since I followed my buddy's suggestion of painting it red, it looks better than I hoped. Now with some Corvette scripts......
I worked on this project off and on for at least 3 days and several 6 packs. I had to wait for the resin and glazing putty to cure between applications, good time to put up the tools and drink beer. I do like working with fiberglass and resin. I don�t like sanding but it�s better than cooking and cleaning.
Race Director


Joined: Sep 2004
Posts: 11,874
Likes: 263
From: Arlington Va Current ride 04 vert, previous vettes: 69 vert, 77 resto mod
i think it looks really good. i have added the original style dual snorkle factory air cleaner and i agree they are not pretty on the eye but.....at some point its fun to have a change....i still need to get the plastic tubing that connects it all so i cant give you any info on added performance but cool exterior air has to be helpful in a big way....

4th Gear

Joined: Nov 2009
Posts: 4
Likes: 0
this is AWESOME! what a great idea. looks like your 82 is very similar to my 79 under the hood. not sure how you have that much clearance. looks like you are running a performer rpm air gap from what i can tell. i just have a performer and have troubles with clearance. looks great just wanted to know how you got it all in there
Thread Starter
Burning Brakes
Joined: Jun 2004
Posts: 1,012
Likes: 5
From: Granbury, TX
this is AWESOME! what a great idea. looks like your 82 is very similar to my 79 under the hood. not sure how you have that much clearance. looks like you are running a performer rpm air gap from what i can tell. i just have a performer and have troubles with clearance. looks great just wanted to know how you got it all in there
I really like the L-88 hood but I bought it from a company in Canada and had to rework it big time to make it fit. There may be other suppliers of L-88 hoods that fit better.

Team Owner
Joined: Jan 2006
Posts: 37,637
Likes: 3,116
From: Crossville TN
Not really counter-intuitive... The windshield is another "air dam" and blocks the airflow; so that causes pressure to build at the junction of hood and windshield. You are making good use of that pressure. Just think...when you 'floor' it, your fuel mileage [at WOT] is better than those that don't have that intake because you are lowering wind resistance at the windshield. 
Melting Slicks


Joined: May 2006
Posts: 2,590
Likes: 403
From: Nashville TN
St. Jude Donor '09
Great project. I was wanting to try to make CAI to work with my '76 cowl hood . . . was thinking of trying with sheet metal. I never thought about making a fiberglass box. I think I'll give it a try. Nice write up.
Thread Starter
Burning Brakes
Joined: Jun 2004
Posts: 1,012
Likes: 5
From: Granbury, TX
Not really counter-intuitive... The windshield is another "air dam" and blocks the airflow; so that causes pressure to build at the junction of hood and windshield. You are making good use of that pressure. Just think...when you 'floor' it, your fuel mileage [at WOT] is better than those that don't have that intake because you are lowering wind resistance at the windshield.
I agree, but when I try to explain the fluid dynamics to some of my friends all I get are dumb looks 
Redman,
Give it a try. Cost is ~ $20 in materials. Take your time and I'm sure you will be sucessful.
Contact me if any questions.

Race Director
Joined: Jan 2000
Posts: 13,014
Likes: 2,257
From: Corsicana, Tx
2020 C2 of the Year - Modified Winner
2020 Corvette of the Year (performance mods)
C2 of Year Winner (performance mods) 2019
2017 C2 of Year Finalist
Great job! One of the better ones I've seen for sure!
Thanks for posting!
JIM
Thanks for posting!
JIM