


Replacing my 75 Heater Core.
Thread Starter
Racer


Joined: Jul 2008
Posts: 306
Likes: 0
From: Riverside CA
I Recently won a New Heater Core on another forum,
and I thought I'd let you all know how the replacement goes.
I actually didn't know I needed to replace it till I was under the car and I noticed that the heater hoses ended in a u-turn fitting.
I figure if the heater wasn't even connected, it's probably leaking.
I also have a problem of getting into my work and forget to take pics, so I missed a few things.
I started about 10 days ago and i only get about an hour a day to work on it.
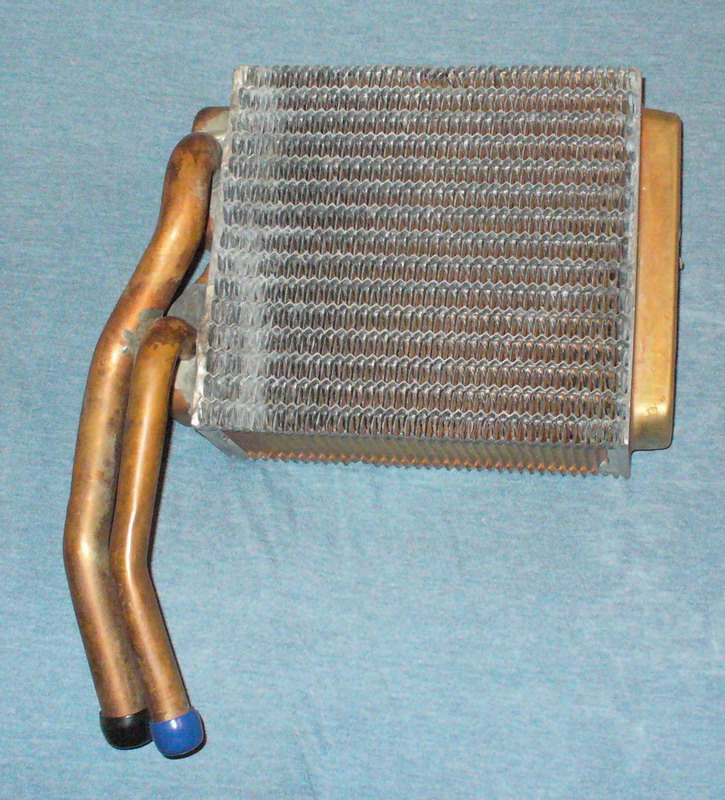
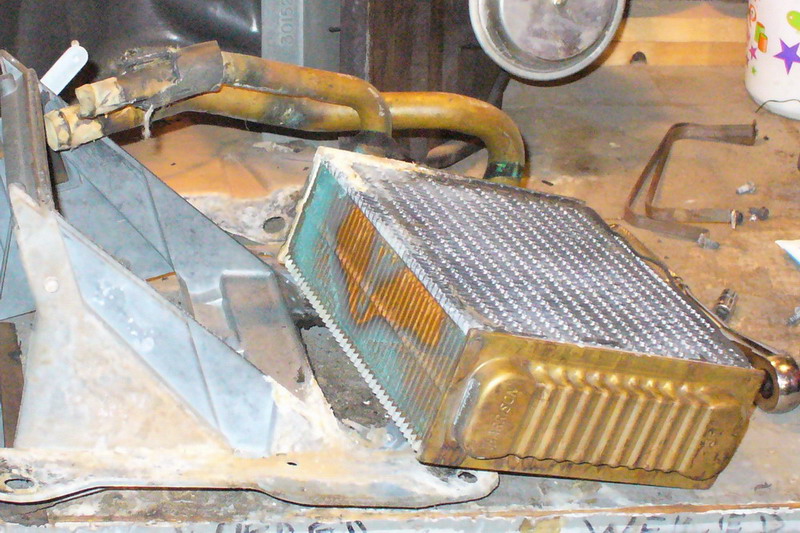
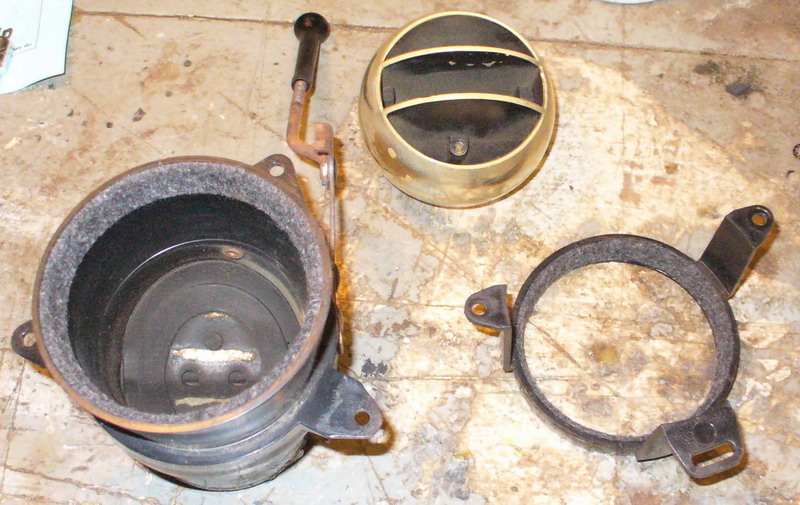
Here's the heater core, Came wrapped in old tshirts and towels, Thanks for the shop rags, came in quite handy.
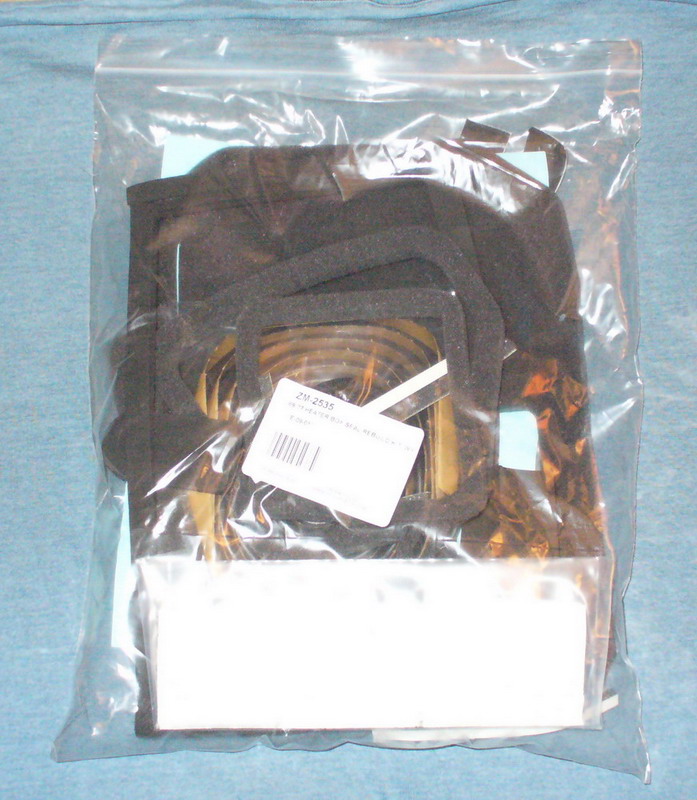
I got a Heater core rebuild seal kit from Zip Corvette.
The kit has a set of instruction that are kinda soso,
the major formed gaskets were perfect, and some seals only needed to be trimmed.
some i had to just guess at it and use what looked best of what was there.
I'm using the online tech articles at corvettemagazine.com to see what to do.
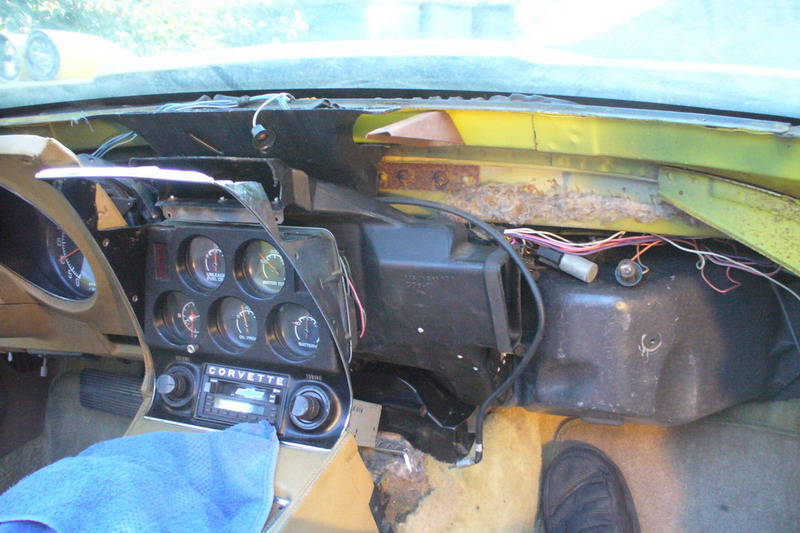
My removal took a bit more then they said to remove.
I had to remove most of the dash to get all the pieces out.

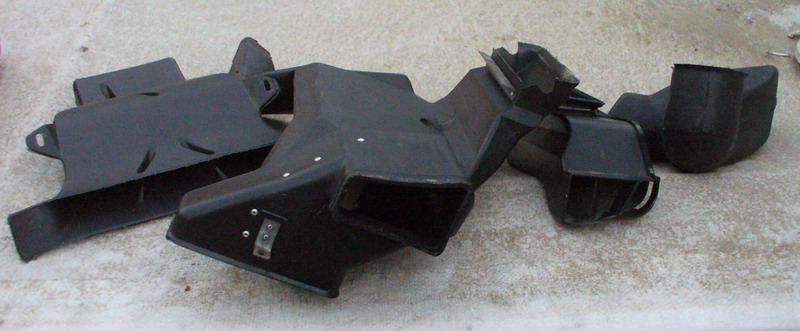
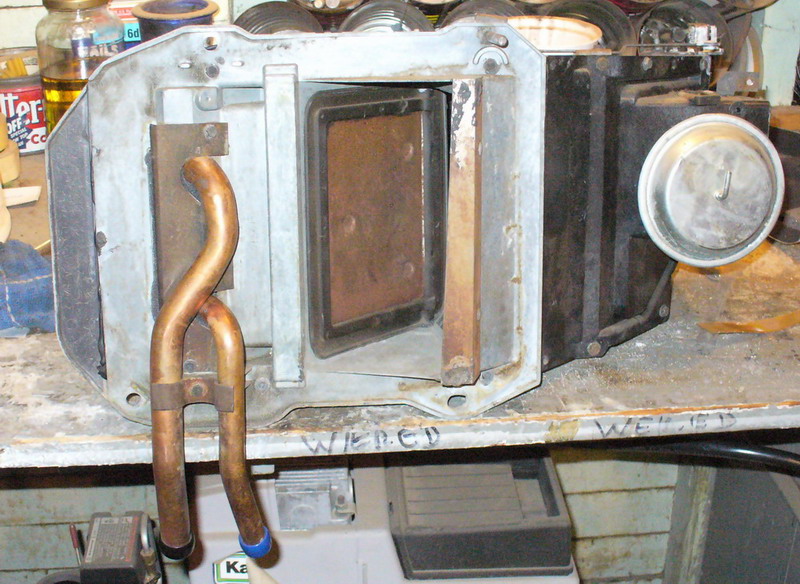
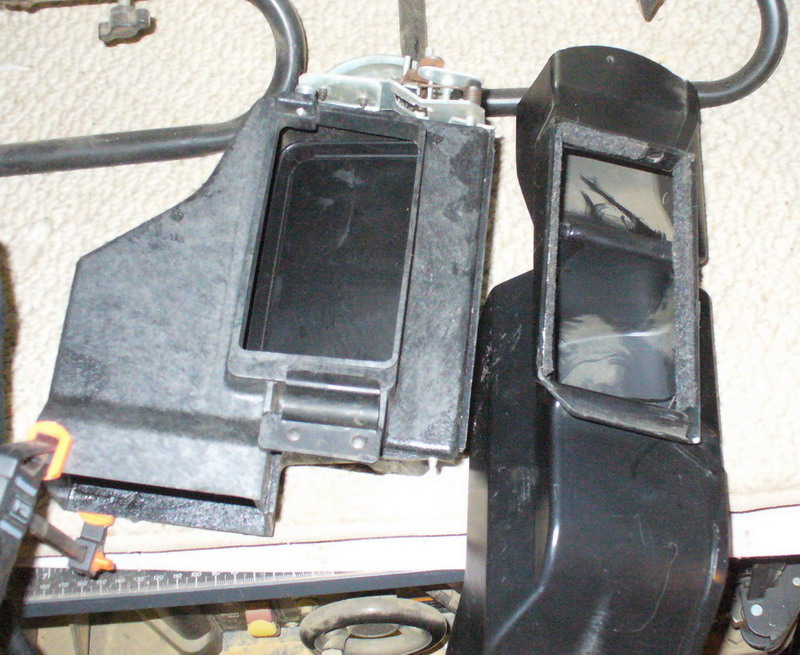
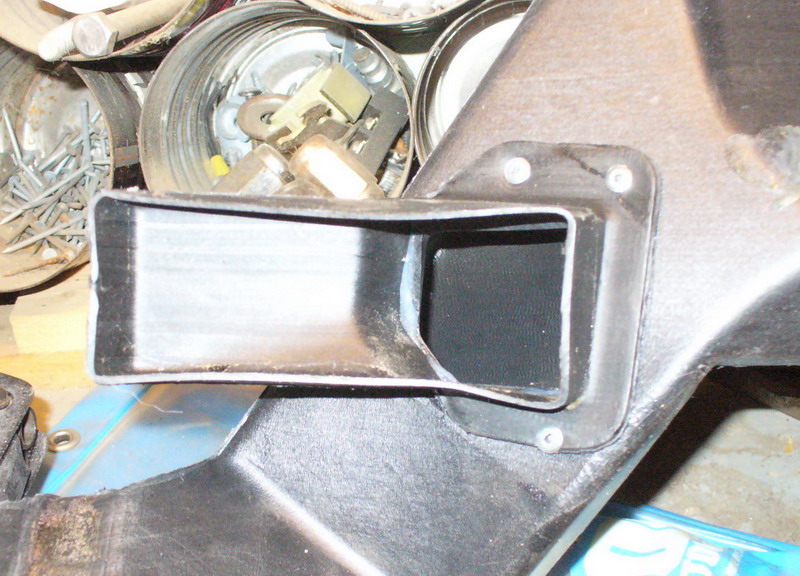
Here's the Ducting, I cleaned them up a bit, and realized I'm missing the one under the drivers dash.
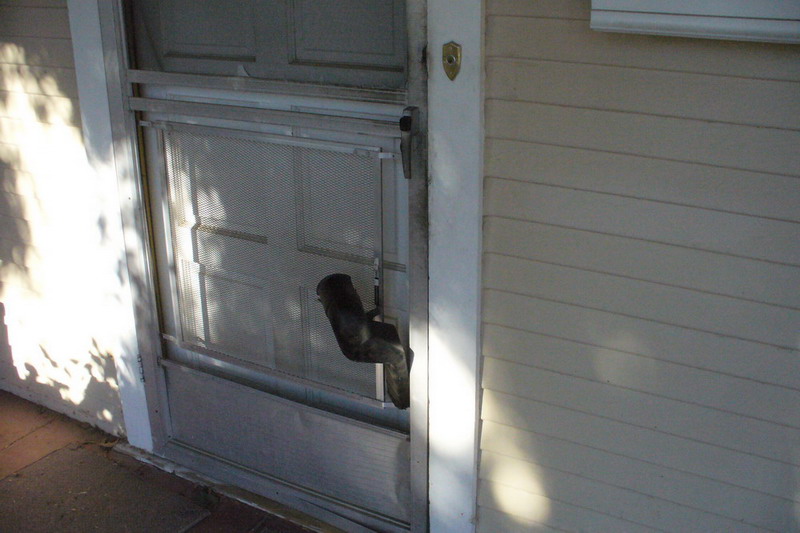
I mentioned the missing duct to the last owner, and today this was in my door
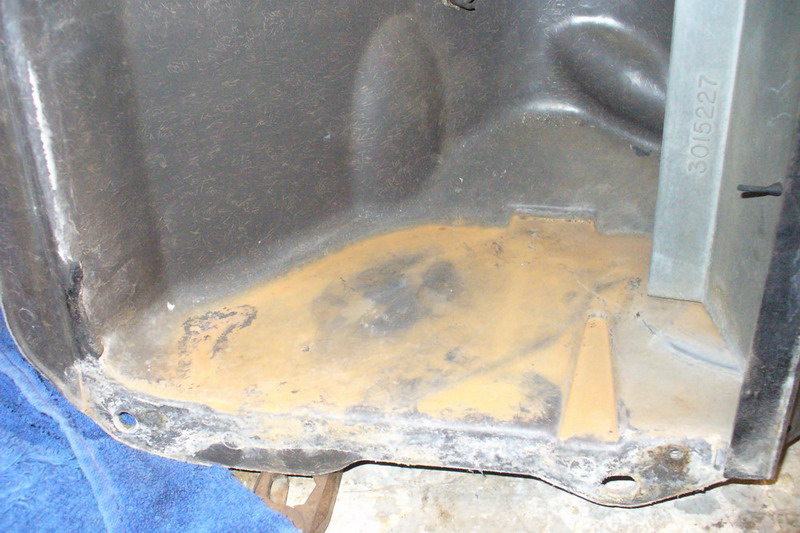
upon disassembly, I found that it was leaking at 1 time.
Don't worry, I made sure to clean everything before putting it back together.
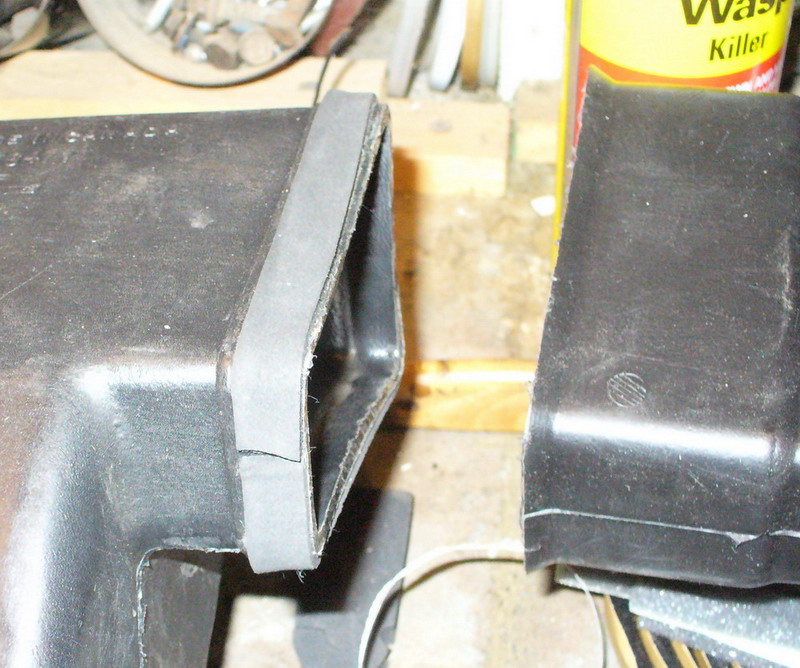
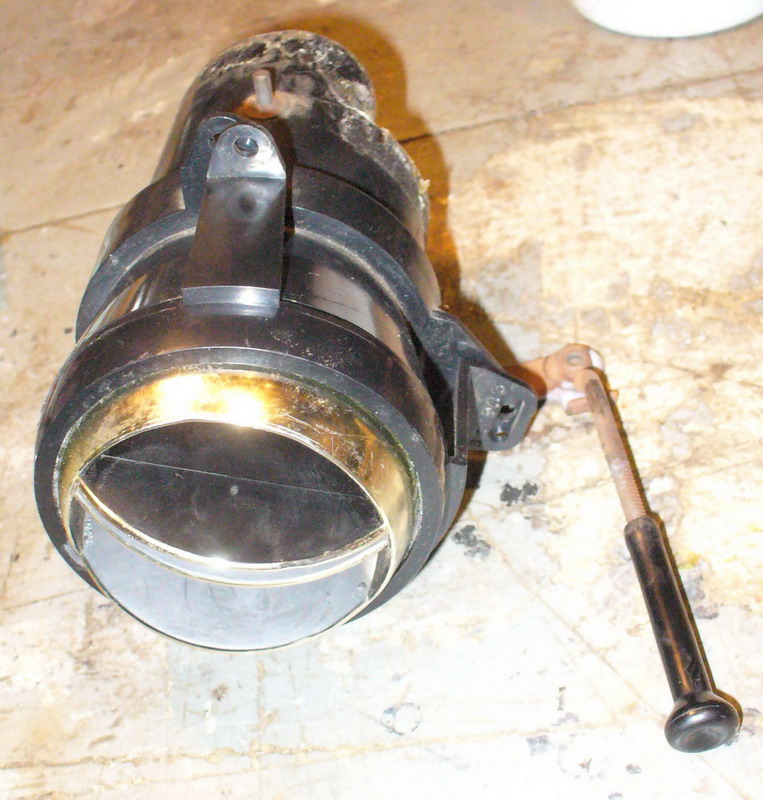
Here's with the new core already back in,
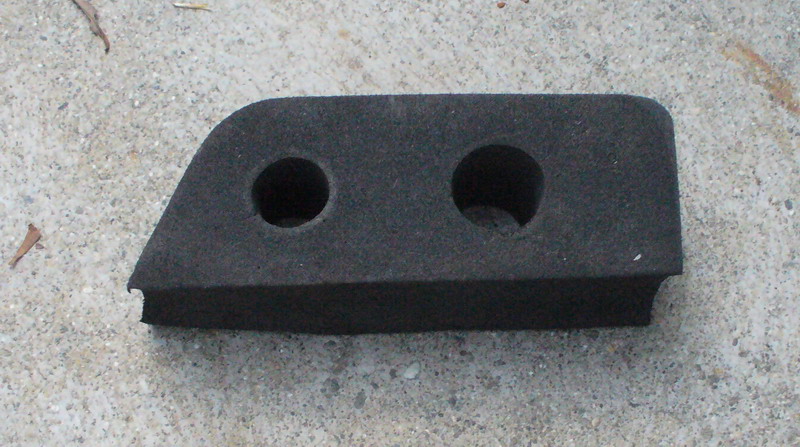
There was no seal for under the bracket where the tubes come out,
so i just used a scrap piece and cut it to fit.
And here it is back in the car

Special Note: Make sure your paying attention and reconnect everything Before tighting all the screws.
It only took me 4 times to get it right.
and I thought I'd let you all know how the replacement goes.
I actually didn't know I needed to replace it till I was under the car and I noticed that the heater hoses ended in a u-turn fitting.
I figure if the heater wasn't even connected, it's probably leaking.
I also have a problem of getting into my work and forget to take pics, so I missed a few things.
I started about 10 days ago and i only get about an hour a day to work on it.
Here's the heater core, Came wrapped in old tshirts and towels, Thanks for the shop rags, came in quite handy.
I got a Heater core rebuild seal kit from Zip Corvette.
The kit has a set of instruction that are kinda soso,
the major formed gaskets were perfect, and some seals only needed to be trimmed.
some i had to just guess at it and use what looked best of what was there.
I'm using the online tech articles at corvettemagazine.com to see what to do.
My removal took a bit more then they said to remove.
I had to remove most of the dash to get all the pieces out.
Here's the Ducting, I cleaned them up a bit, and realized I'm missing the one under the drivers dash.
I mentioned the missing duct to the last owner, and today this was in my door
upon disassembly, I found that it was leaking at 1 time.
Don't worry, I made sure to clean everything before putting it back together.
Here's with the new core already back in,
There was no seal for under the bracket where the tubes come out,
so i just used a scrap piece and cut it to fit.
And here it is back in the car
Special Note: Make sure your paying attention and reconnect everything Before tighting all the screws.
It only took me 4 times to get it right.
Thread Starter
Racer
Joined: Jul 2008
Posts: 306
Likes: 0
From: Riverside CA
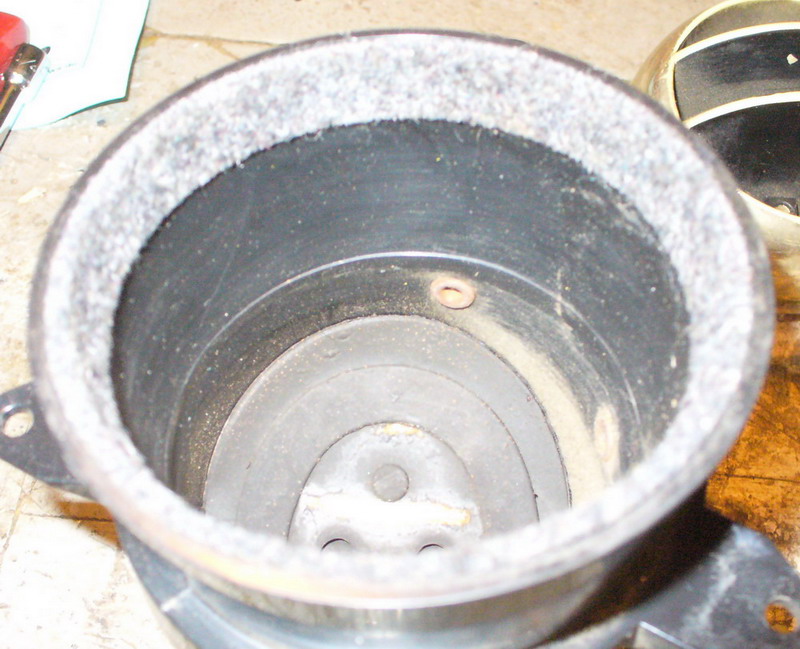
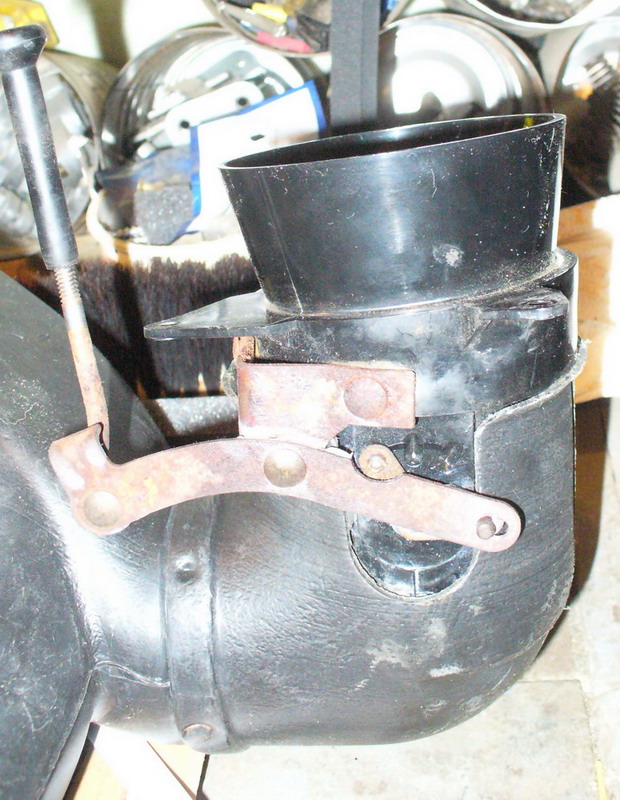
I went to work on the ducting.
This is the lower control box, for feet or defrost.
I had to recrimp the rivets and glue a corner of it.
and i thought it was rather loose so i added some felt seal on the connection.
it was too tight, only do 1 side next time.
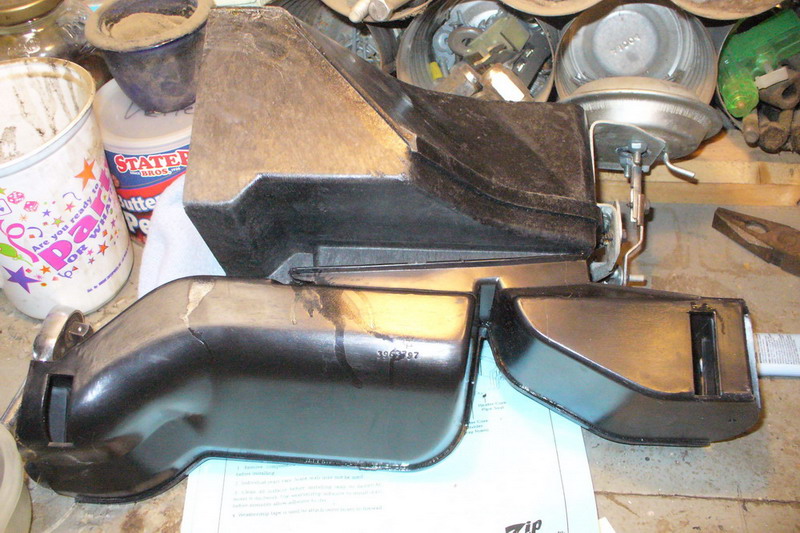
And here it is installed. Notice the gap?
Well there was nothing in the kit that would work so i had to McGyver it, with duct tape. I know, I'm Sorry!
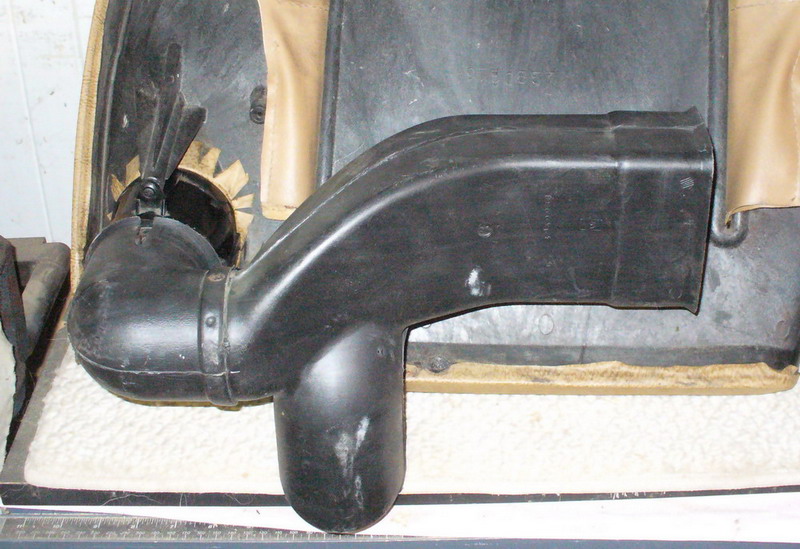
On the main AC ducting, i had to reattached the small AC port, I re-riveted and siliconed it back on.
There was some long strips that i cut in half to make seals for the main to side ducts.
Now i had to fix the side round ducts.
I had to replace the felt strip the ball rides on,
came in the kit, just trimmed to fit and glue it in.
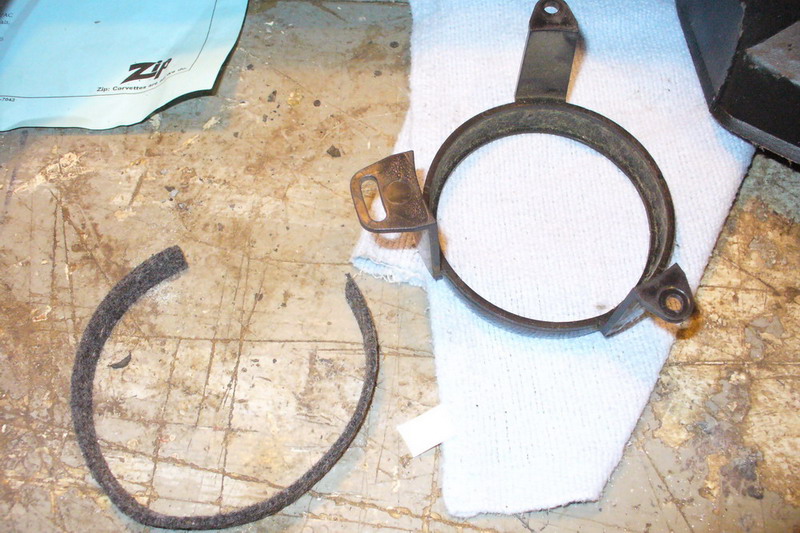
I used the same strips from the main to side duct to seal this to the side duct.
I made sure to use silicone grease everywhere I could, and silicone spray where I can't reach.

I put it in the duct to hold the pieces in place while drying.
Now putting vent in passenger side panel.


And with the duct on.
In that last picture, the tube protruding down has a 1-1/2" hole in it, what goes in there?
This is the lower control box, for feet or defrost.
I had to recrimp the rivets and glue a corner of it.
and i thought it was rather loose so i added some felt seal on the connection.
it was too tight, only do 1 side next time.
And here it is installed. Notice the gap?
Well there was nothing in the kit that would work so i had to McGyver it, with duct tape. I know, I'm Sorry!
On the main AC ducting, i had to reattached the small AC port, I re-riveted and siliconed it back on.
There was some long strips that i cut in half to make seals for the main to side ducts.
Now i had to fix the side round ducts.
I had to replace the felt strip the ball rides on,
came in the kit, just trimmed to fit and glue it in.
I used the same strips from the main to side duct to seal this to the side duct.
I made sure to use silicone grease everywhere I could, and silicone spray where I can't reach.
I put it in the duct to hold the pieces in place while drying.
Now putting vent in passenger side panel.
And with the duct on.
In that last picture, the tube protruding down has a 1-1/2" hole in it, what goes in there?
Thread Starter
Racer
Joined: Jul 2008
Posts: 306
Likes: 0
From: Riverside CA
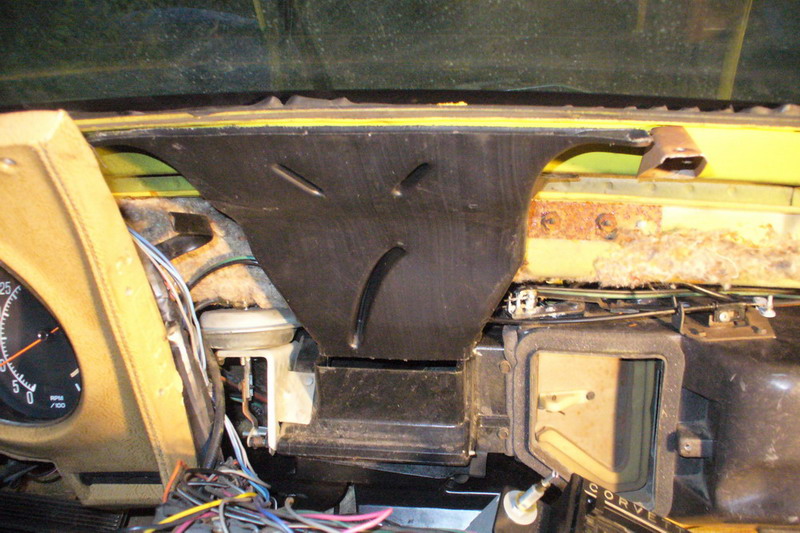
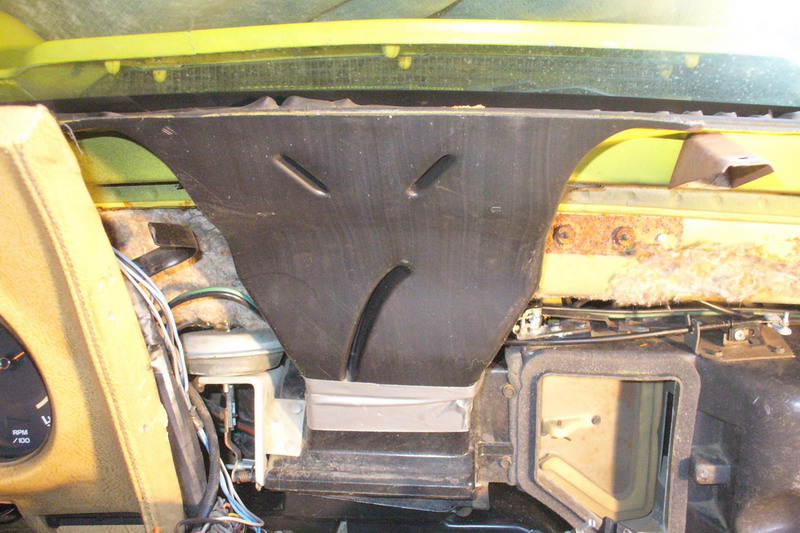
Here's the main AC duct installed, still took a bit of wiggling to get it in with the dash apart.

and i started reassembly of the center console.
At this point, the sun started going down so I started to rush and put the rest of it back together, and forgot to take pictures.
I know I'll be tearing it apart again someday, and now I know what's needed next time.
and i started reassembly of the center console.
At this point, the sun started going down so I started to rush and put the rest of it back together, and forgot to take pictures.
I know I'll be tearing it apart again someday, and now I know what's needed next time.

Racer
Joined: Sep 2007
Posts: 288
Likes: 1
Thanks lilmonster for posting the write up and pics. I still have to do this to my 68. I've read that replaceing the heater core is a bear of a job. You didn't seem to stressed out in your post. I was wondering if your new core fit ok. I've read that the in and outlet tubes are offen bent wrong. I've even read that the tubes have broken off while trying to bend them to fit. How did the new one compare (size wise) to the old Harrison core?
charlie
charlie
Thread Starter
Racer
Joined: Jul 2008
Posts: 306
Likes: 0
From: Riverside CA
No, I don't stress very easily, and i knew it would take a while,
plus, I had the time while waiting for my window motor to come in.
the core was almost a perfect fit from the start, just a little tube moving required, size was exact.
plus, I had the time while waiting for my window motor to come in.
the core was almost a perfect fit from the start, just a little tube moving required, size was exact.

Instructor


Joined: May 2004
Posts: 209
Likes: 6
From: Glendale AZ
Good pics, I have to do my 75 heater core also. I intended to replace all the seals at the same time. Carpet will be replaced since my heater core leaked inside. I have to buy the core and am thinking about extending the tubed down an inch to help with the hose clamps. Mine is Yellow with Med Saddle interior, don't see many.
Melting Slicks


Joined: Feb 2003
Posts: 3,053
Likes: 4
St. Jude Donor '03,'11
Corvette Stories
The Best of Corvette for Corvette Enthusiasts

Top 10 Most Expensive Corvettes Ever Sold on Bring A Trailer
Brett Foote
10 Things Every Corvette Owner Needs (2026 Edition)
Michael S. Palmer
8 Most "Only Corvette Owners Understand" Quirks and Problems
Pouria Savadkouei
10 Reasons the C6 Z06 is Still A Performance Benchmark After 20 Years
Joe Kucinski
How Much Horsepower Every Corvette Engine "LOST" in 1972
Joe Kucinski
Top 10 DOs and DON'Ts for Protecting Your Convertible Top!
Michael S. Palmer
Top 10 Most Explosive Corvettes Ever Made: Power-to-Weight Ratio Ranked!
Joe Kucinski
150 hp to 1,250 hp: Every Corvette Generation Compared by the Specs That Matter
Joe Kucinski
8 Coolest Corvette Pace Cars (and Replicas) of All Time
Verdad GallardoRace Director

Joined: Mar 2006
Posts: 14,112
Likes: 28
From: Florida
Thread Starter
Racer
Joined: Jul 2008
Posts: 306
Likes: 0
From: Riverside CA
Part 2.
It started raining the next day after finishing the inside of the car so i never finished installing.
so here's the small part i missed, hooking up the hoses.
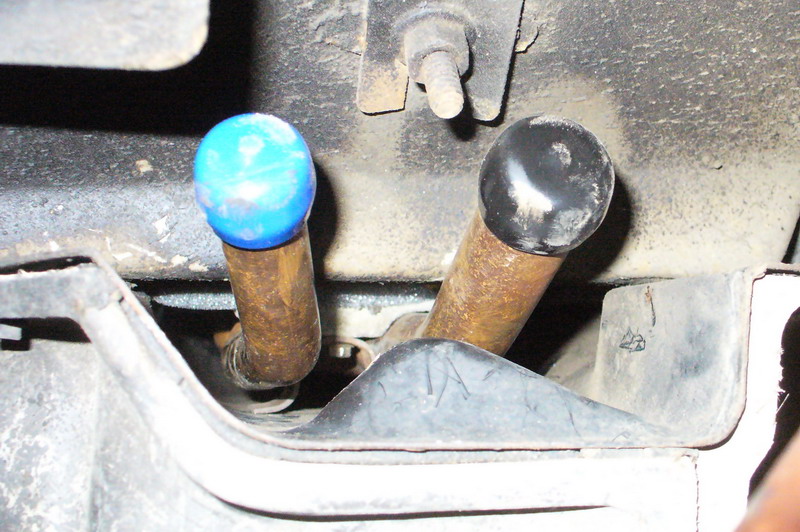
Here is a seal the goes on the tubes going into the engine compartment.
The instructions say to install it from the inside while installing the heater core and box.
That was a huge pain in the A$$!
So i left it out to install from under the car, which turned out to work much better.
Here is the foam spacer going on, It's here that i start to notice something.
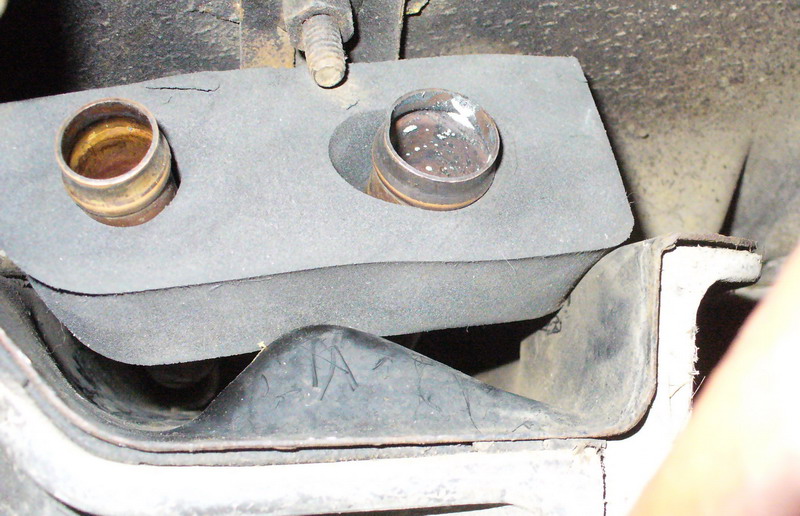
the foam seal goes in all the way, and I put the hoses on.
I didn't see the metal touching the hose until i saw this picture.
It's going back on the ramps tomorrow to bend that metal out of the way.
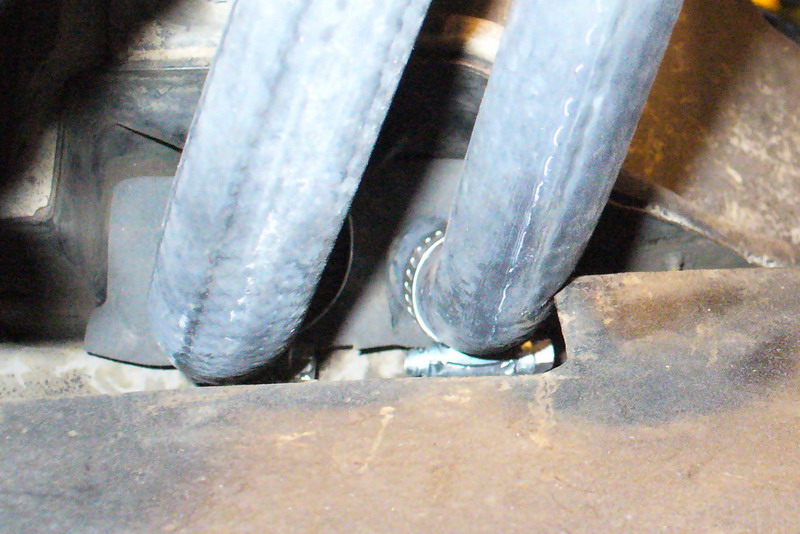
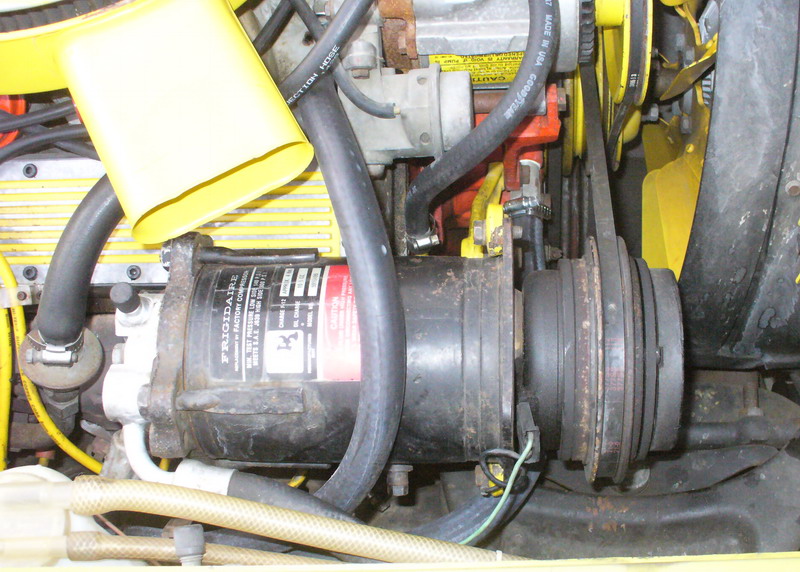
And here was how they bypassed the heater.

I change from the stock hose routing because the one i removed was kinked so badly going under the AC and smog pump.
Instead I went up over the AC unit to the top fitting.
So now everything is in and working,
it blows very hot, and no leaks anywhere.
I do have a weird noise in the top of the dash when it's on high, but thats for another day.
Thanks for tagging along.
It started raining the next day after finishing the inside of the car so i never finished installing.
so here's the small part i missed, hooking up the hoses.
Here is a seal the goes on the tubes going into the engine compartment.
The instructions say to install it from the inside while installing the heater core and box.
That was a huge pain in the A$$!
So i left it out to install from under the car, which turned out to work much better.
Here is the foam spacer going on, It's here that i start to notice something.
the foam seal goes in all the way, and I put the hoses on.
I didn't see the metal touching the hose until i saw this picture.
It's going back on the ramps tomorrow to bend that metal out of the way.
And here was how they bypassed the heater.
I change from the stock hose routing because the one i removed was kinked so badly going under the AC and smog pump.
Instead I went up over the AC unit to the top fitting.
So now everything is in and working,
it blows very hot, and no leaks anywhere.
I do have a weird noise in the top of the dash when it's on high, but thats for another day.
Thanks for tagging along.
Race Director

Joined: Jul 2004
Posts: 12,706
Likes: 329
From: Scottsdale Arizona
Here is a seal the goes on the tubes going into the engine compartment.
The instructions say to install it from the inside while installing the heater core and box.
That was a huge pain in the A$$!
So i left it out to install from under the car, which turned out to work much better.

I decided to do this job before putting my engine in so that I'll have better access. I'm still not looking forward to it


Safety Car

Joined: Mar 2007
Posts: 3,652
Likes: 49
From: Bridgewater nj
Thank you for making the effort to take pics while doing a difficult job!!! I have been dreading  tearing into my 82. I wish someone had pics of the late model C3s. The manuels are almost useless
tearing into my 82. I wish someone had pics of the late model C3s. The manuels are almost useless
Racer
Joined: Nov 2009
Posts: 289
Likes: 0
From: Franksville Wisconsin
I need to do it on my '81 some day. I only drive in warm weather so will put it off for awhile until I'm bored and want to tear my dash out...lol.... that will be a few years down the road. Someone had been in there before.
Thread Starter
Racer
Joined: Jul 2008
Posts: 306
Likes: 0
From: Riverside CA
Well, it passed the test with flying colors today.
I took it to my mom's, which is an 1 1/2hrs away,
it was very cold outside on the way home,
But the inside of the car was very toasty.
I took it to my mom's, which is an 1 1/2hrs away,
it was very cold outside on the way home,
But the inside of the car was very toasty.
