When you click on links to various merchants on this site and make a purchase, this can result in this site earning a commission. Affiliate programs and affiliations include, but are not limited to, the eBay Partner Network.
Some years back I owned a Jag XJR and had entered it in an open concour where Jag was featured marquee.
Parked in the Jag group, spotted a 65 Corvair kind of parked in the middle of nowhere some 75 feet away. I walked over to have a look at it and as I was admiring it an older gentleman likely in mid 80’s came over to me introducing himself as owner and asked what I thought.
I said I thought very nicely done and then asked why he was sort of in the middle of nowhere. He responded by opening the hood,,,normally the trunk on a Corvair and saying with a smile that the Jag guys nor the Chevy guys would have him, so thought best to park off by himself.
Turns out had a Jag V 12 under the hood(again trunk). We spoke for some time about the car. He told me that as the Jag engine with its carbs, he could not close the hood. To resolve this he had taken the fuel injection units off of a pair of Buick V 6 engines and adapted to the Jag engine and all was well with closing the hood.
Also told me that he wanted Air Conditioning but no room for it in engine compartment(again Corvair trunk).
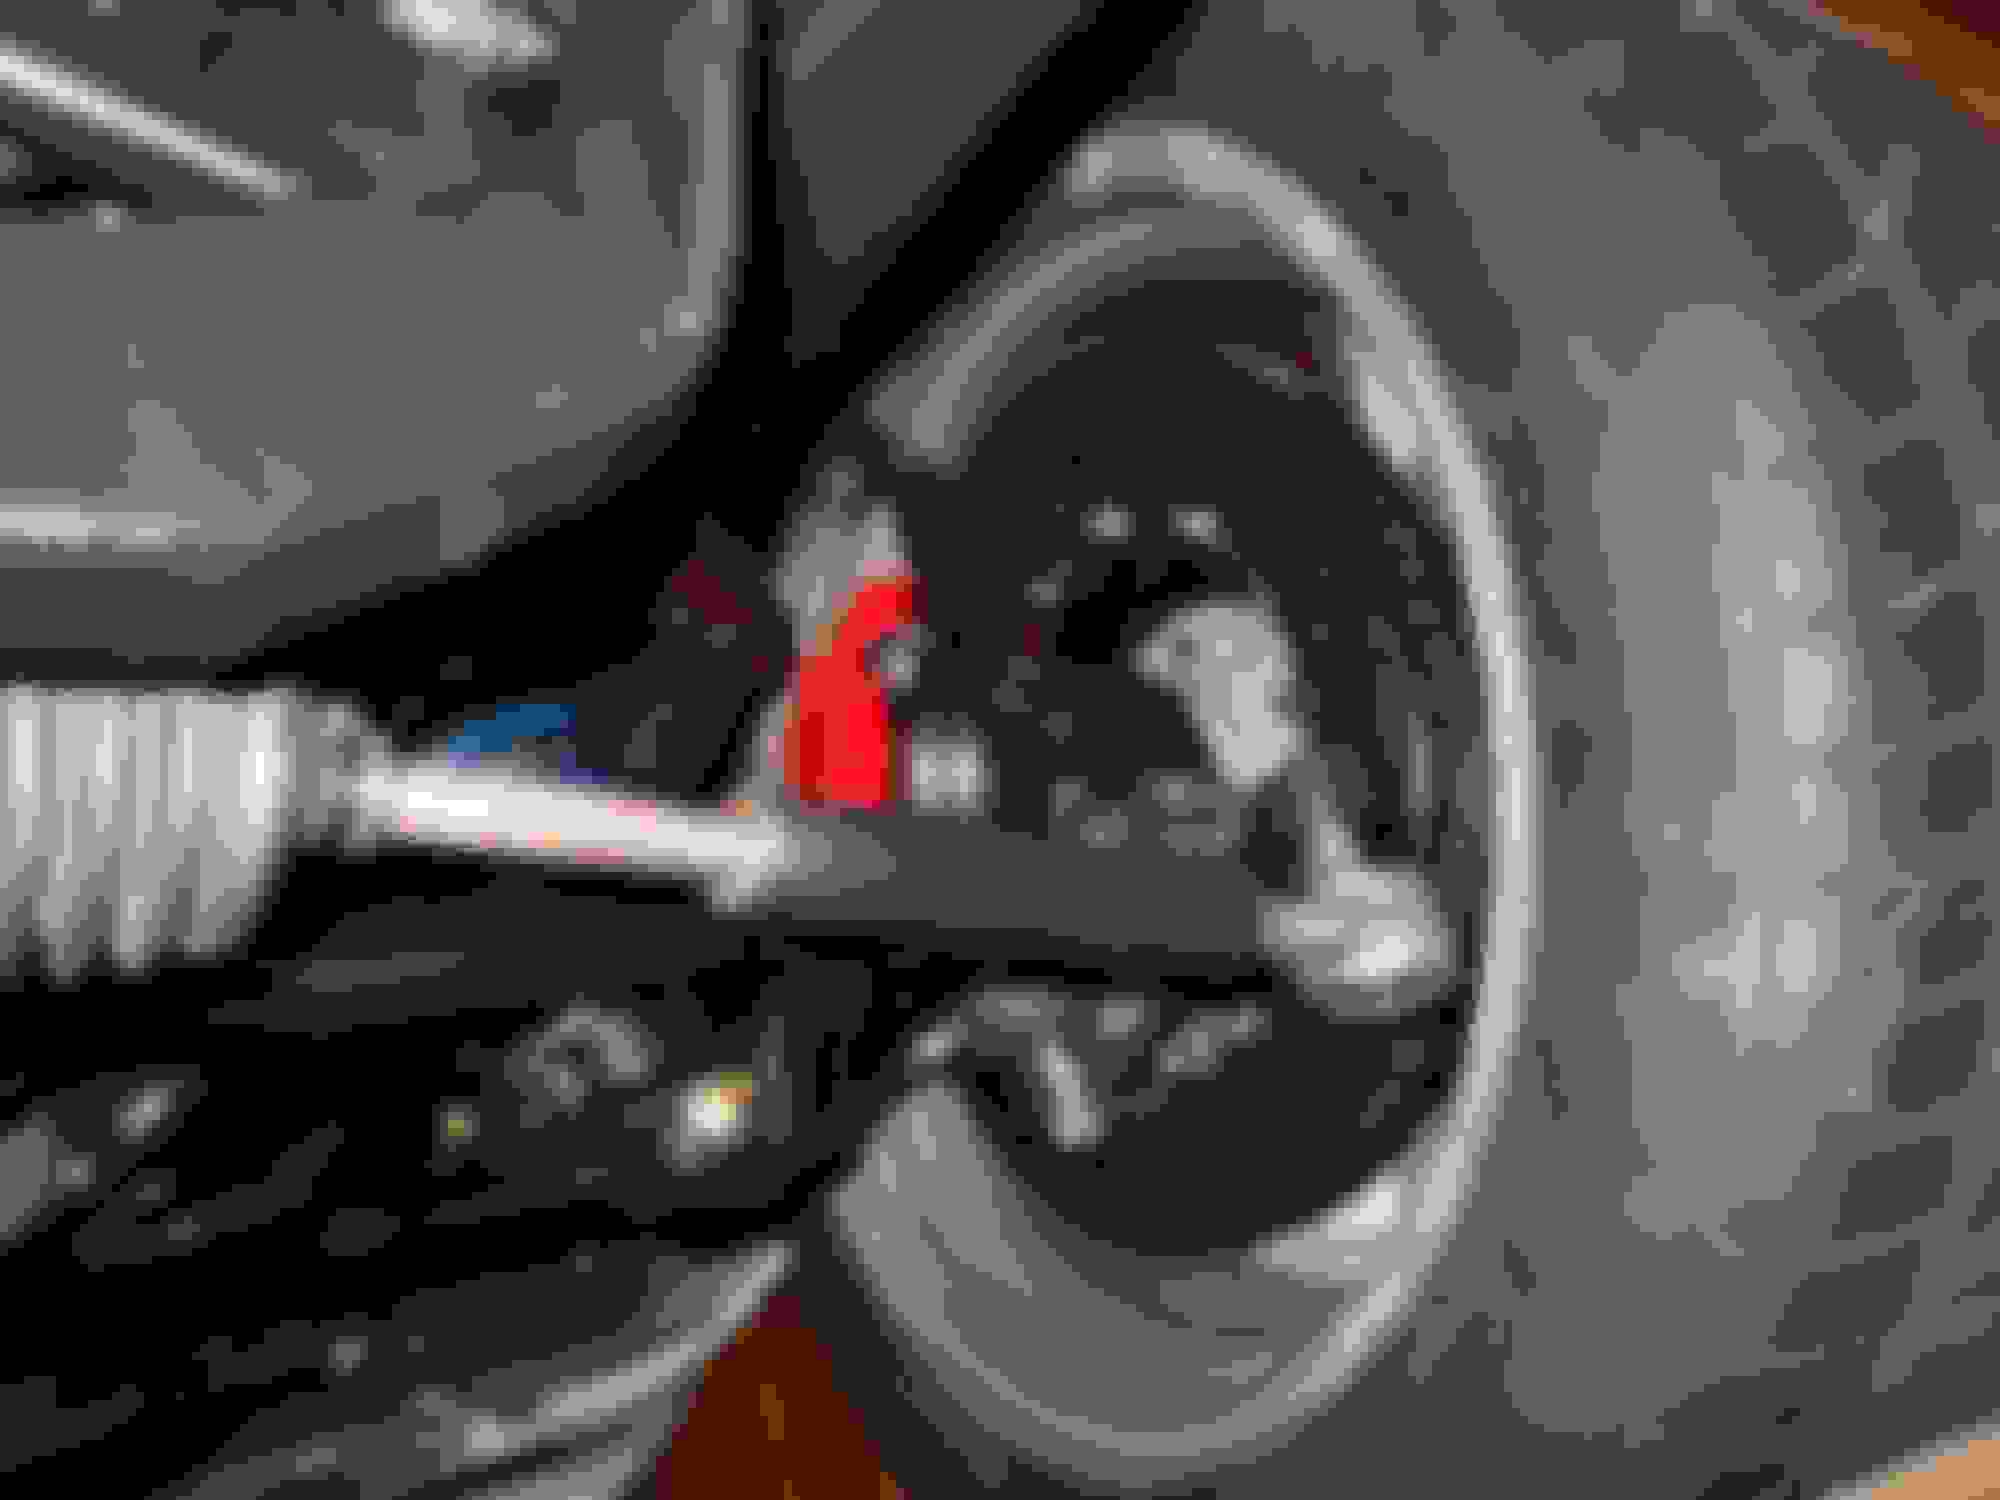
He then had me take a look under the car. At rear wheels just in front of differential/axle housing was mounted a regular old style GM v6 air conditioning compressor driven off drive shaft by I forget now, either a belt or a chain.
He had told me that he was a retired Engineer and was over 80 when he built the car.
Another interesting swap that I have seen at Pleasanton Goodguys meets is a 65 Corvette coupe with side exhaust. Car is running a Chrysler 392 Hemi. As a 56 Chrysler 300 B owner myself, I was very impressed. Car looked quite stock, but I knew when I first heard it drive past me I had to flag the guy down as I knew from its exhaust banter that this not a regular old Chevy engine.
Found some really neat throttle linkage ends- made by "Steinjager." They make a lot of Jeep parts- but also have a lot of neat stuff in the "Builder's parts" section.
These are stainless steel- quick disconnect and with some 10-32 threaded rod and some 1/4" stainless steel tubing -it turned out professional looking-
I ended up using the Holley Hydromat for the pick-up. It was a little expensive ($150) but after having to drop the tank and remove previous Aeromotive foam that dissolved in the tank- I had two walbro pumps - went ahead and put in a redundant pump- Wired it so I can switch between them. The Aeromotive set-up was designed to handle two pumps,
I only had red wire- so I just used a Sharpe to strip one wire to differentiate them-
Here's the Gas cap
I redid the fill neck and gas cap- as it wouldn't fit my Dodge Challenger gas cap lid-
I used a 'remote fill'- welded in the smaller thread for a gas gap from Tanks Inc.
The cap has a flap and is sealed- worked out great
Had it welded to the stock filler neck after I cut it down- then I powdercoated it matte black-
Fellow forum member 'Madhatr' Chris sketched this up for me-
"DAS HAIFISCH" or "The Shark"
I followed his lead- my wife bought the nailpolish and I dabbed it on- I'm gonna have her redo it as it was the first time I used nail polish...OK 35 years ago in High School doesn't count!!!
What do you think?
Corvette Stories
The Best of Corvette for Corvette Enthusiasts
10 Ugly Corvettes That We Still Kinda Love
Joe Kucinski
Top 10 Most Expensive Corvettes Ever Sold on Bring A Trailer
Brett Foote
10 Things Every Corvette Owner Needs (2026 Edition)
Michael S. Palmer
8 Most "Only Corvette Owners Understand" Quirks and Problems
Pouria Savadkouei
10 Reasons the C6 Z06 is Still A Performance Benchmark After 20 Years
Joe Kucinski
How Much Horsepower Every Corvette Engine "LOST" in 1972
Joe Kucinski
Top 10 DOs and DON'Ts for Protecting Your Convertible Top!
Michael S. Palmer
Top 10 Most Explosive Corvettes Ever Made: Power-to-Weight Ratio Ranked!
Joe Kucinski
150 hp to 1,250 hp: Every Corvette Generation Compared by the Specs That Matter
Joe Kucinski
8 Coolest Corvette Pace Cars (and Replicas) of All Time
but I'd add some ''jam/lock'' nuts to the tie-rods,and while their off,cut a couple grooves so you can fit an open end wrench for alignment
keep posting pics ,very cool
No nuts, dust boots or zerks on tie rods, And steel still appears bare on adjusters, I'd say he's just not finished there. Love the OCD details of this build and a V12 Vette.... Badass!! Subscribed for rest of the build. Amazing some of the talent on this board with these Vettes!!
Jesus, even the spark plug wires are treated as A-part. At least YOU have an excuse for taking so long.
Yep- 24 connections-12 thermal sleeves and 100ft of wire- NOW that's A part!!!
Originally Posted by DblTrbl
Love the build and the progress. In fact, I'm so motivated by this, I'm getting off the computer and getting in the garage.
THANKS!!! Glad I can motivate!!!
Originally Posted by cardo0
I think you are in love with details Richard.
Love- obsessed- same thing!!
Originally Posted by ddawson
Looking good
Thank you!!!
Originally Posted by Priya
Perhaps I missed it if you mentioned it, but what kind of transmission is that and are you running any kind of intake air filtration?
I made a custom bellhousing with a Chevy bolt pattern, Started out with a Richmond 6 speed- but now have Tremec TKO 500 5-speed
As far as air filter set up-
I'll incorporate the housing in the hood- open the hood and you'll just see the throttle bodies- rubber gasket-bellows will seat from the hood
Gaskets are actually cut sections of hose from a leaf blower!!!
Here' the air filter boxes- from IIRC a small v6 Buick- I'll run 2 of them- should be enough filter.
Originally Posted by dmaxx3500
great work
but I'd add some ''jam/lock'' nuts to the tie-rods,and while their off,cut a couple grooves so you can fit an open end wrench for alignment
keep posting pics ,very cool
Thanks...not quite finished....
Originally Posted by Hemi John
No nuts, dust boots or zerks on tie rods, And steel still appears bare on adjusters, I'd say he's just not finished there. Love the OCD details of this build and a V12 Vette.... Badass!! Subscribed for rest of the build. Amazing some of the talent on this board with these Vettes!!
OCD? Really?!!! Thank you sir!!!
Been busy the past week with Family stuff....hope to get some time in the garage this weekend. The list is getting shorter
Richard,
The creativity and details in your engineering are inspiring, I really appreciate the quality of the work that you do. Keep moving forward friend!
Eddy
Fascinating build! I spent a few hours over two days last weekend reading your entire thread. You are doing some exceptional work and showing some real engineering chops here!
Anyways, I just signed up here to ask you if you considered the n73 motor and went with the m70 and 73 for a specific reason? When you were getting started, the n73 wasn�t that old, so probably wasn�t as easy to find a parts car. It a DOHC engine and does have about 100hp more stock. And it looks like it has the sump to the rear with the front of the oil pan pretty low profile, so you might have avoided what sounds like was the trickiest part of your swap.
I�m not knocking your choice at all here. I honestly just wondered if there�s something about the N73 that makes the older motors better for this.
Thank you sir-
Ahhhh- but the N73/74 is about 2 inches longer(see below)- in an already tight engine compartment PLUS it has the vanos which makes it really tough to control by an aftermarket piece and the OEM is basically impossible to fool into running standalone.
Then there was engine management.... When I started - the stock computers(M70 Bosch) could be run as a standalone. All the aftermarket standalone pieces were $5000 that could handle 12 cylinders. My initial game plan quickly changed when I ran across a great deal on a M73....About that time Megasquirt came out with their piece that could control 12 coils and 12 injectors without any additional pieces. Not to mention at under $1500 -it was a no brainer...then I found Jenvey ITBs as the Megasquirt could control ITBs as well...and went from there.
If I were do it again- the only change would be going with the Jenvey ITBs- that look like Weber carbs-for the old school look!!! Just came out about a year ago-neat idea!!!
Thanks for looking!!!
M70/70 upper pan and a N73 gasket- almost 2" longer....
[QUOTE=Richard454;1598687400]Thank you sir-
Thanks for the quick reply. BTW, how�s it coming along? I was really excited to see a video with it running through your exhaust
Right, I�d forgotten about the length. I had seen that picture with the longer gasket before. But the info about the vanos is exactly what I was wondering. I thought it might be something like that. I gathered that you went with the Megasquirt as a personal preference thing, but it sounds like the original computers can�t be made to work?
-Edit- ok, I reread what you wrote. It�s the vanos that can�t be run stand-alone correct? The original Bosch units would have worked by themselves.
Those Webber lookalikes are really nice looking! Ah well, at least you have an upgrade path now!