C3 Tech/Performance V8 Technical Info, Internal Engine, External Engine, Basic Tech and Maintenance for the C3 Corvette
Sponsored by:
Sponsored by:

598 cid and 4-link Stingray Build

Thread Tools
 
Search this Thread
 
Old 01-31-2011, 05:32 PM
  #41  
Billysvette
Melting Slicks
 
Billysvette's Avatar
 
Member Since: Jul 2006
Location: Baltimore MD
Posts: 2,373
Likes: 0
Received 6 Likes on 6 Posts
Default

Gota watch this
Old 01-31-2011, 05:35 PM
  #42  
632C2
Drifting
Support Corvetteforum!
 
632C2's Avatar
 
Member Since: Jul 2002
Location: Puyallup WA
Posts: 1,779
Received 202 Likes on 52 Posts

Default

Very nice!

I admire someone that can TIG weld like you do. Your fabrication skills look to be top notch. BTW, I got a 3" drive shaft in my '67.

Steve
Old 01-31-2011, 07:45 PM
  #43  
pef427
Burning Brakes
 
pef427's Avatar
 
Member Since: Dec 2004
Location: Nederland Texas
Posts: 1,020
Likes: 0
Received 1 Like on 1 Post
Default

I don't think the C3 has as much tunnel room as the C2. Mine is the same as Jims.
Old 01-31-2011, 08:47 PM
  #44  
BACNBLK
Drifting
 
BACNBLK's Avatar
 
Member Since: Mar 2006
Location: West Coast
Posts: 1,284
Received 31 Likes on 24 Posts

Default

Unbelievable , very nice work, should be a beast!
Old 01-31-2011, 09:34 PM
  #45  
13brenova
Advanced
Thread Starter
 
13brenova's Avatar
 
Member Since: Dec 2010
Location: Burleson Tx
Posts: 91
Likes: 0
Received 18 Likes on 11 Posts
Default

Originally Posted by pef427
You can but I highly recommend cutting the end off and having a new 1350 end welded back on. You will definitely want to avoid putting weak links in this chain when you drop the hammer on the 598. Jim Moore 427Hotrod suggested a wall thickness to me at the time and I was able to find it and just made a whole new shaft with 1350's on both ends. I can't recall the thickness but the driveshaft shop said it would hold up well. Jim may can give you some input.
And your welds look great!

-Patrick
We're definitely going with a stouter driveshaft before the new engine goes in. In the mean time, we're going to use the stock one just so we can get the car back under it's own power.
Old 01-31-2011, 09:37 PM
  #46  
13brenova
Advanced
Thread Starter
 
13brenova's Avatar
 
Member Since: Dec 2010
Location: Burleson Tx
Posts: 91
Likes: 0
Received 18 Likes on 11 Posts
Default

Originally Posted by 632C2
Very nice!

I admire someone that can TIG weld like you do. Your fabrication skills look to be top notch. BTW, I got a 3" drive shaft in my '67.

Steve
Thanks. My brother and I used to work in a friends fabrication shop on nights and weekends.
Old 02-01-2011, 07:12 PM
  #47  
JoeC427
Drifting
 
JoeC427's Avatar
 
Member Since: Jun 2002
Location: Orlando Florida
Posts: 1,619
Received 7 Likes on 7 Posts

Default

Originally Posted by BACNBLK
Unbelievable , very nice work, should be a beast!
Old 02-01-2011, 08:05 PM
  #48  
13brenova
Advanced
Thread Starter
 
13brenova's Avatar
 
Member Since: Dec 2010
Location: Burleson Tx
Posts: 91
Likes: 0
Received 18 Likes on 11 Posts
Default

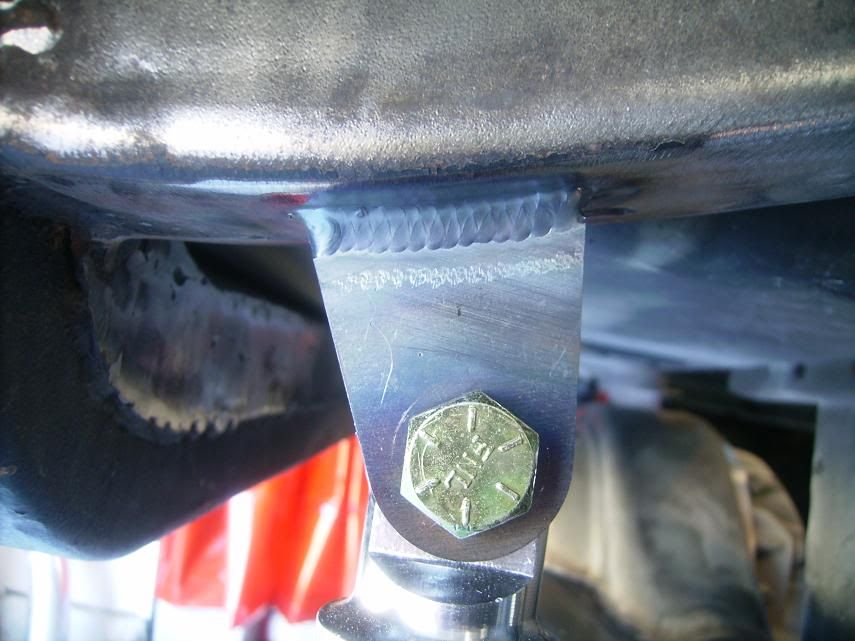
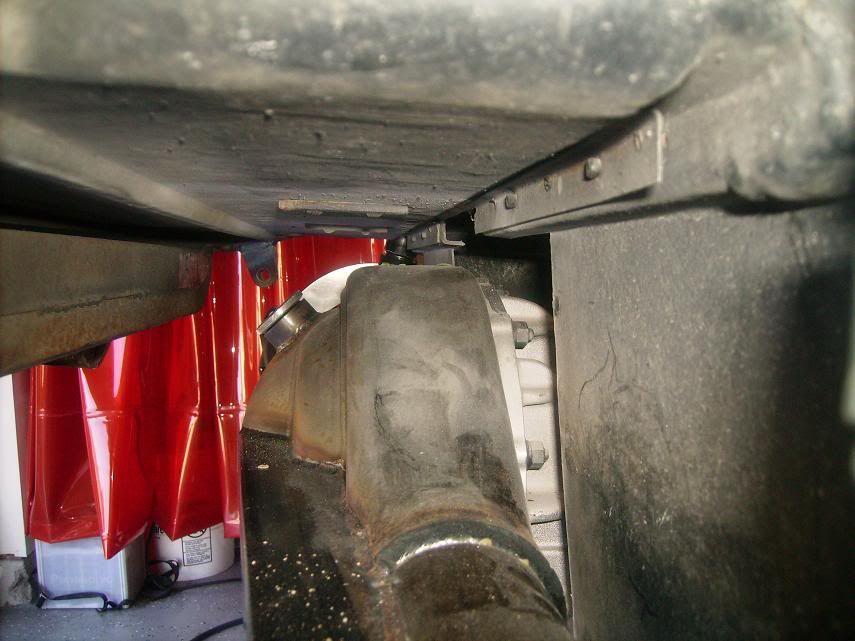
Talked to Josh at Autofab today about the cracked weld on the 4-link arm and the missing shock mounts. He was great and said that he would rather send us a new 4-link arm than having me weld another pass on it. He wanted to see it in person so he could find out why it cracked. He also said the shock mounts are on their way. They've been really responsive and great to deal with.
Old 02-02-2011, 09:53 AM
  #49  
pef427
Burning Brakes
 
pef427's Avatar
 
Member Since: Dec 2004
Location: Nederland Texas
Posts: 1,020
Likes: 0
Received 1 Like on 1 Post
Default

Keep the pics coming! This should be a 9 sec car!
Old 02-04-2011, 08:07 PM
  #50  
l88rocket
Melting Slicks
 
l88rocket's Avatar
 
Member Since: Feb 2006
Location: Mo
Posts: 2,209
Likes: 0
Received 0 Likes on 0 Posts

Default

How's it going
Old 02-06-2011, 05:32 PM
  #51  
13brenova
Advanced
Thread Starter
 
13brenova's Avatar
 
Member Since: Dec 2010
Location: Burleson Tx
Posts: 91
Likes: 0
Received 18 Likes on 11 Posts
Default

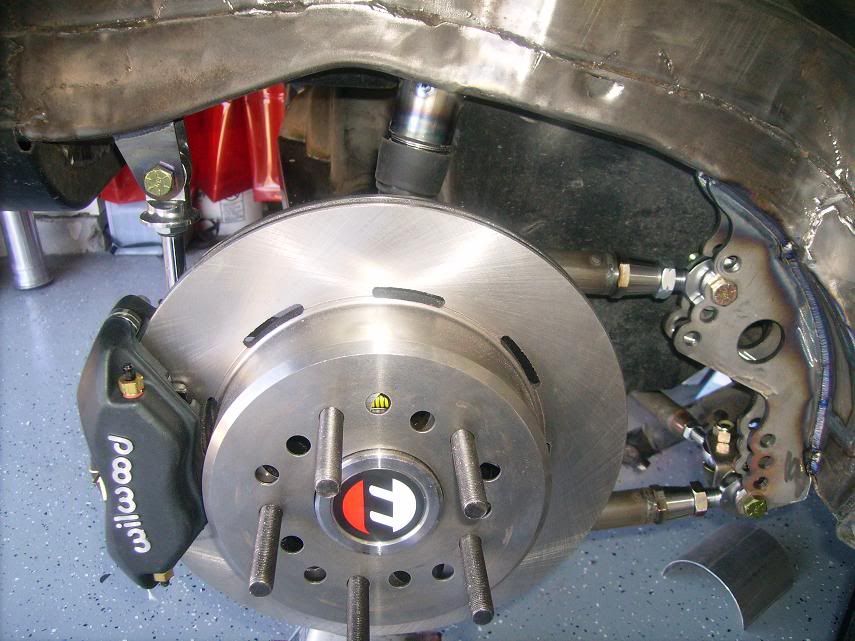
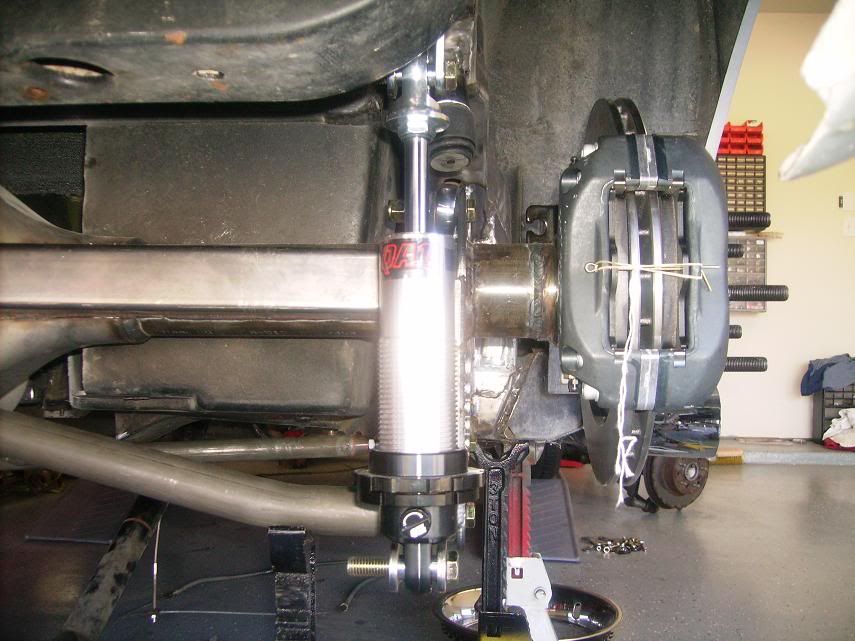
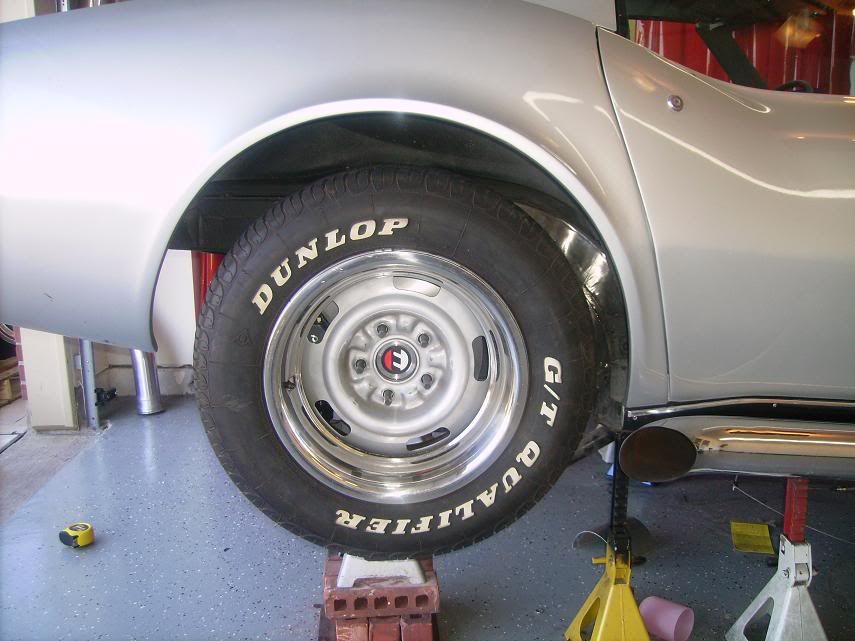
A little more progress this weekend. Adjusted all of the link bars, centered the axle and set the pinion angle. We moved the axle back a little further than the Autofab instruction said (3/8") to make sure there is plenty of tire to frame clearance up front. We welded in the shock mounts, trimmed some more clearance for the diff and made some bump stops to make sure we could have a low and mean stance without any expensive axle to fiberglass "whoopsies." The steel to finish the cross member should be in early this week. We also decided on rims and tires. We're going to keep it retro with 15x8" rallys with 4.5" backspacing and 26x11.5 Hooser Quick Time Pros, which we'll order on Monday.


Old 02-06-2011, 05:51 PM
  #52  
northern77
Advanced
 
northern77's Avatar
 
Member Since: Jun 2010
Location: Pulaski Wisconsin
Posts: 86
Likes: 0
Received 0 Likes on 0 Posts
Default

That is the hot set-up. Some day soon I will have to do the same conversion. Question, the wheel studs look like 5/8 inch and I would like to know how the rally wheels passed over them?
Old 02-06-2011, 05:52 PM
  #53  
13brenova
Advanced
Thread Starter
 
13brenova's Avatar
 
Member Since: Dec 2010
Location: Burleson Tx
Posts: 91
Likes: 0
Received 18 Likes on 11 Posts
Default

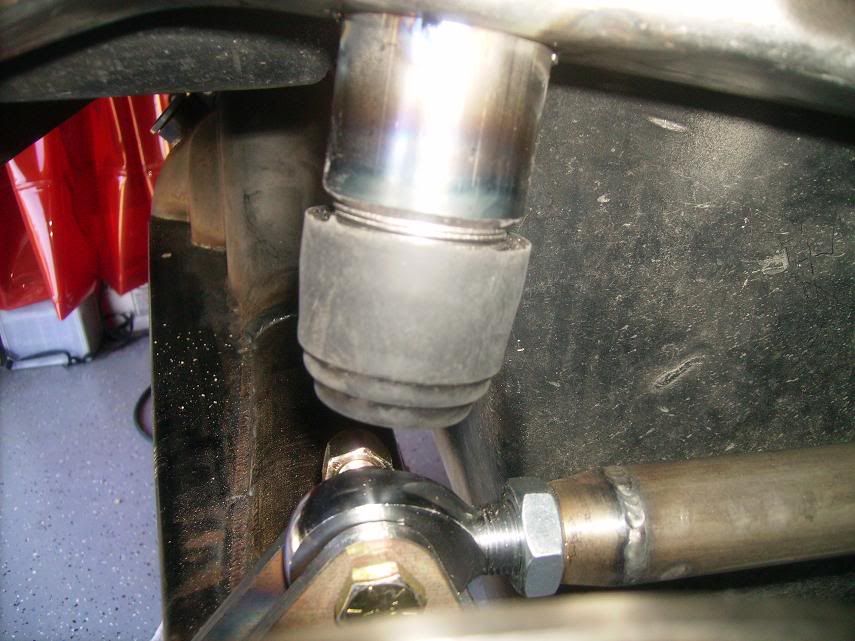
What fitting is everyone using to adapt the main brake line to the new lines? The original distribution block by the rear driver's side frame has two outlets which won't work with the new setup.
Old 02-06-2011, 06:15 PM
  #54  
northern77
Advanced
 
northern77's Avatar
 
Member Since: Jun 2010
Location: Pulaski Wisconsin
Posts: 86
Likes: 0
Received 0 Likes on 0 Posts
Default

Not sure if its 1/8 or 3/16 line back there but you probably are going to -3 or -4 AN steel braided brake line. Check these out.


https://www.racerswholesale.com/prod...m?InvKey=41496

https://www.racerswholesale.com/product.cfm?InvKey=4394
Old 02-06-2011, 08:29 PM
  #55  
l88rocket
Melting Slicks
 
l88rocket's Avatar
 
Member Since: Feb 2006
Location: Mo
Posts: 2,209
Likes: 0
Received 0 Likes on 0 Posts

Default

Whens the motor coming
Old 02-06-2011, 09:04 PM
  #56  
13brenova
Advanced
Thread Starter
 
13brenova's Avatar
 
Member Since: Dec 2010
Location: Burleson Tx
Posts: 91
Likes: 0
Received 18 Likes on 11 Posts
Default

Originally Posted by l88rocket
Whens the motor coming
It'll be a little bit. We're trying to get the 4-link done before the engine for the Nova comes back. (I blew it up at 28 psi of boost) After the Nova is back on the road, we'll start on the engine and tranny for the vette. We'll probably do the cage for the vette before the engine and tranny too.
Old 02-07-2011, 12:10 AM
  #57  
68 NJConv 454
Melting Slicks
 
68 NJConv 454's Avatar
 
Member Since: Jan 2006
Location: North NJ
Posts: 3,028
Likes: 0
Received 2 Likes on 2 Posts
Default

Great job

Get notified of new replies

To 598 cid and 4-link Stingray Build

Old 02-07-2011, 01:33 AM
  #58  
stinger12
Safety Car
 
stinger12's Avatar
 
Member Since: Oct 2006
Location: Calgary Alberta
Posts: 3,922
Likes: 0
Received 13 Likes on 9 Posts

Default

Someone has a TIG welder

Pretty stout setup!
Old 02-07-2011, 01:25 PM
  #59  
Vesa
Burning Brakes
 
Vesa's Avatar
 
Member Since: Mar 2004
Location: Finland
Posts: 816
Likes: 0
Received 1 Like on 1 Post
Default

This is some serious ****

A real monster goming out there...exellent job quality!!! Cant wait to see the engine
Old 02-07-2011, 06:49 PM
  #60  
pef427
Burning Brakes
 
pef427's Avatar
 
Member Since: Dec 2004
Location: Nederland Texas
Posts: 1,020
Likes: 0
Received 1 Like on 1 Post
Default

This is what I did.
https://www.racerswholesale.com/prod...m?InvKey=41496


Quick Reply: 598 cid and 4-link Stingray Build


All times are GMT -4. The time now is 03:20 PM.