
Clutch/brake pedal assembly slop/repair question
 10-04-2011, 05:12 PM
#1
Tech Contributor
Thread Starter
Member Since: Jun 2004
Location: I tend to be leery of any guy who doesn't own a chainsaw or a handgun.
Posts: 18,363
Received 771 Likes
on
553 Posts

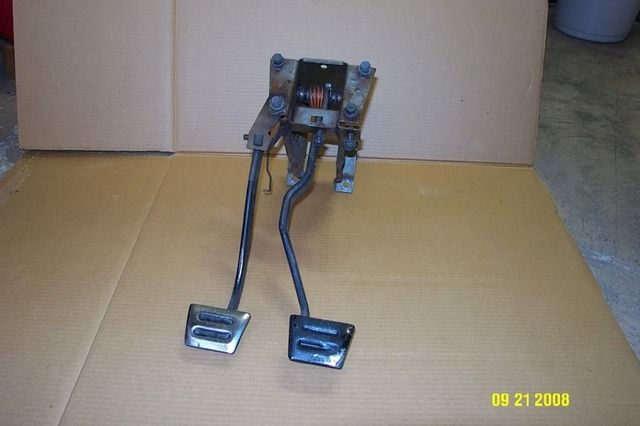
It looks like I need to rebuild the pivot assembly for my clutch and brake pedals. How much PITA is it to pull out and rebuild the assembly?
Any insight or help is appreciated.
Thanks,
Mike
Any insight or help is appreciated.
Thanks,
Mike
 10-04-2011, 08:26 PM
#2
Drifting


I admit up front that I'm not all that familiar with C3s, but removing the steering column will make life a whole lot easier. You may be able to do it without having to remove the instrument cluster. Once it's out, the rebuild is easy. The clutch pedal had come loose from the pivot shaft on mine and I had to get it rewelded, but that's relatively rare. You should be able to get away with new bushings.
10-04-2011, 09:02 PM
#3
The ORIGINAL and bestest

Member Since: Oct 2000
Location: Toronto Ontario
Posts: 10,009
Received 234 Likes
on
143 Posts
Toronto Events Coordinator

It is a total PITA job!
Assuming you have a '69 vette:
-remove the driver's seat
-remove the driver's door sill plate
-remove the driver's kick panel
-remove the steering column and associated parts
-remove the neutral safety switch
-remove the clip holding the brake booster rod to the brake pedal
-unbolt the master cylinder from the booster
-remove the 4 nuts between the pedal box and the brake booster
-with the brake lines still connected, push the master cylinder out of the way to remove the brake booster; remove booster
-remove wiper grille
-remove wiper door
-remove wiper arm linkage from wiper motor
-remove 4 upper bolts from pedal box that are in the wiper cowl area
-remove 4 nuts holding up the steering column support lower bracket; remove bracket
-remove all screws holding driver's side instrument dash pad in place to let it drop down slightly so you can see the 2 bolts holding the steering column support to the birdcage
-loosen but don't remove 2 bolts holding cast upper steering column support in place to the bottom of the bird cage; this lets it drop down enough to...
-remove pedal box!
I can do this in a little over 2 hours; and it takes me about 4 hours to put it all back in again.
I have left most of the small details out, but this is basically how to do it
Hope this helps!
Last edited by 7t2vette; 10-04-2011 at 09:21 PM.
10-04-2011, 11:01 PM
#4
Tech Contributor
Thread Starter
Member Since: Jun 2004
Location: I tend to be leery of any guy who doesn't own a chainsaw or a handgun.
Posts: 18,363
Received 771 Likes
on
553 Posts
It is a total PITA job!
Assuming you have a '69 vette:
-remove the driver's seat
-remove the driver's door sill plate
-remove the driver's kick panel
-remove the steering column and associated parts
-remove the neutral safety switch
-remove the clip holding the brake booster rod to the brake pedal
-unbolt the master cylinder from the booster
-remove the 4 nuts between the pedal box and the brake booster
-with the brake lines still connected, push the master cylinder out of the way to remove the brake booster; remove booster
-remove wiper grille
-remove wiper door
-remove wiper arm linkage from wiper motor
-remove 4 upper bolts from pedal box that are in the wiper cowl area
-remove 4 nuts holding up the steering column support lower bracket; remove bracket
-remove all screws holding driver's side instrument dash pad in place to let it drop down slightly so you can see the 2 bolts holding the steering column support to the birdcage
-loosen but don't remove 2 bolts holding cast upper steering column support in place to the bottom of the bird cage; this lets it drop down enough to...
-remove pedal box!
I can do this in a little over 2 hours; and it takes me about 4 hours to put it all back in again.
I have left most of the small details out, but this is basically how to do it
Hope this helps!

This definitely looks like a winter project where I can work on it at my leisure.
I appreciate the information. At least I can go into this knowing it's going to be a PITA rather than finding out midway through the process.
Thanks again!
10-05-2011, 12:23 PM
#5
Terrorizing Orange Cones

7t2Vette offers great advice on what to expect. Nice write up.
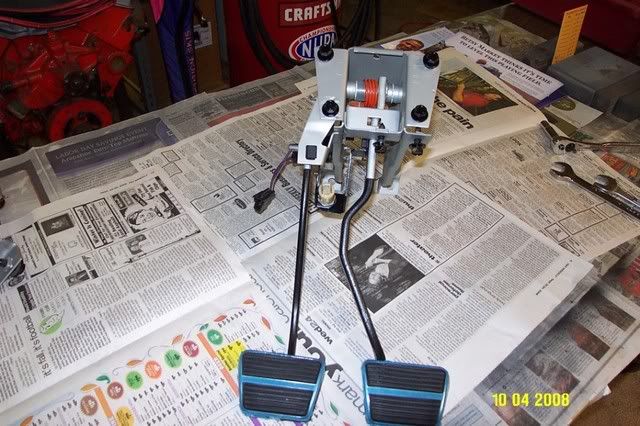
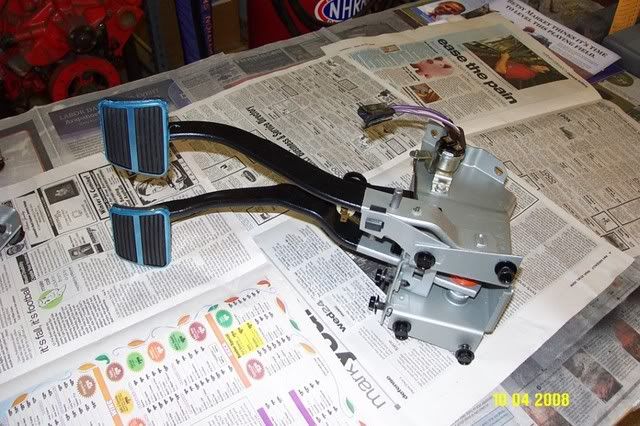
The upside is you can end up with a nicely rebuilt pedal set once you replace the worn components. This was a good excuse to media blast and repaint mine:
Good luck and stay warm once the temps fall.
The upside is you can end up with a nicely rebuilt pedal set once you replace the worn components. This was a good excuse to media blast and repaint mine:
Good luck and stay warm once the temps fall.
Last edited by Dustup7T2; 10-05-2011 at 12:24 PM. Reason: remove text
10-05-2011, 04:32 PM
#6
Race Director

Fun fun fun,if your back doesn't hurt now it will. This is also one of those "while I'm in there" projects. Also be glad you have a coupe,those vert braces are a pain.
Good Luck and please turn a recorder on so we can hear the cussin.
Good Luck and please turn a recorder on so we can hear the cussin.
10-05-2011, 06:04 PM
#7
Tech Contributor
Thread Starter
Member Since: Jun 2004
Location: I tend to be leery of any guy who doesn't own a chainsaw or a handgun.
Posts: 18,363
Received 771 Likes
on
553 Posts
I've had one of the later stamped steel brackets (versus the present cast piece) gathering dust on the shelf for the past while. Maybe I'll throw that in there too while I'm at it.
10-05-2011, 06:18 PM
#8
Race Director
I thought I remembered something you were going to do in that area,must have been the support. The instrument bulb wires have a habit of breaking off at the socket,when repairing those adding some length to the gray wire will make going back in much easier.
10-05-2011, 06:19 PM
#9
The ORIGINAL and bestest
Member Since: Oct 2000
Location: Toronto Ontario
Posts: 10,009
Received 234 Likes
on
143 Posts
Toronto Events Coordinator
Sorry to be the bearer of bad news!!It is a awkward job because of the tight confines under the dash. Have fun with the neutral safety switch and the clip holding the brake rod to the brake pedal!!
The wiper door may give you grief if it has not been off in a long time, the bolts tend to seize in place.

 06-27-2017, 09:53 AM
#11
Team Owner

Member Since: Sep 2006
Location: Westminster Maryland
Posts: 30,173
Likes: 0
Received 2,878 Likes
on
2,515 Posts
Hi R-T,
The AIM indicates that some grease was originally used on the bushing… I think I remember the bushing is nylon (?)… so perhaps some white lithium on it?
Regards,
Alan
What NICE work by D7T2 !!!!
The AIM indicates that some grease was originally used on the bushing… I think I remember the bushing is nylon (?)… so perhaps some white lithium on it?
Regards,
Alan
What NICE work by D7T2 !!!!
Last edited by Alan 71; 06-27-2017 at 09:55 AM.
06-28-2017, 02:30 PM
#12
Safety Car


Member Since: May 2004
Location: los altos hills california
Posts: 3,611
Received 1,126 Likes
on
730 Posts
69427: You may want to have a look up in there. Years ago my clutch arm came off its pivot while I was out and about. If memory serves it was a cotter pin that wore out. Nice little adventure getting back home in whatever gear I could get into without a clutch and without having to stop for a red light.
 06-28-2017, 02:34 PM
#13
Tech Contributor
Thread Starter
Member Since: Jun 2004
Location: I tend to be leery of any guy who doesn't own a chainsaw or a handgun.
Posts: 18,363
Received 771 Likes
on
553 Posts
69427: You may want to have a look up in there. Years ago my clutch arm came off its pivot while I was out and about. If memory serves it was a cotter pin that wore out. Nice little adventure getting back home in whatever gear I could get into without a clutch and without having to stop for a red light.
Thanks.
