
My rear Astro ventilation restore thread
 02-19-2012, 12:53 AM
#1
Burning Brakes

Thread Starter
Thought I'd put together my own restoration thread as I begin the ramp up to the final push for getting my interior back in.
It's Feb 18th out and about 40 degrees outside with no wind, so an absolutely beautiful day for MN this time of year. So I got my butt in gear and started to tear out my rear ventilation system to replace the foam and respray the parts black.
Hopefully it won't take me too long to finish up with the rear vents. Some photos with comments below.
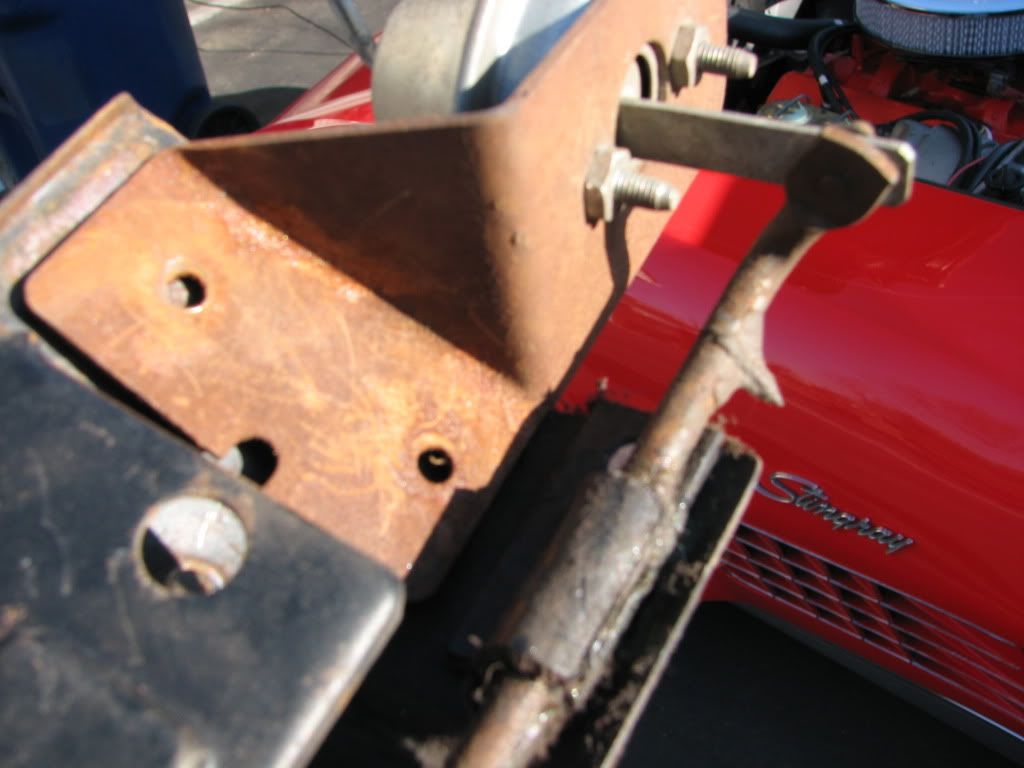
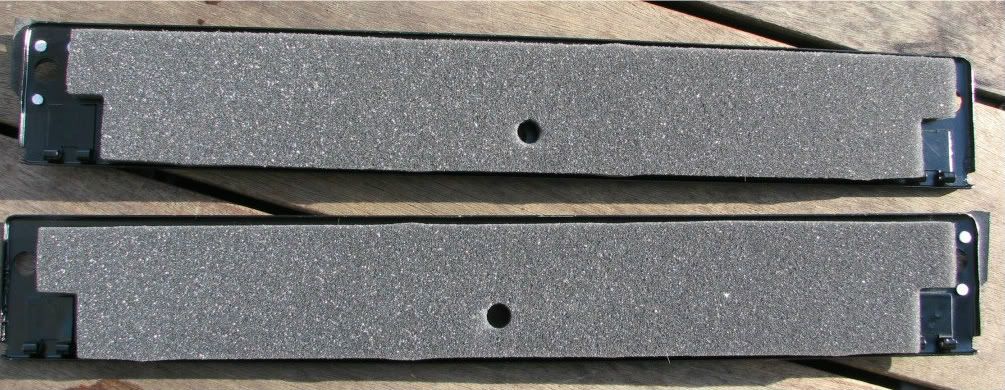
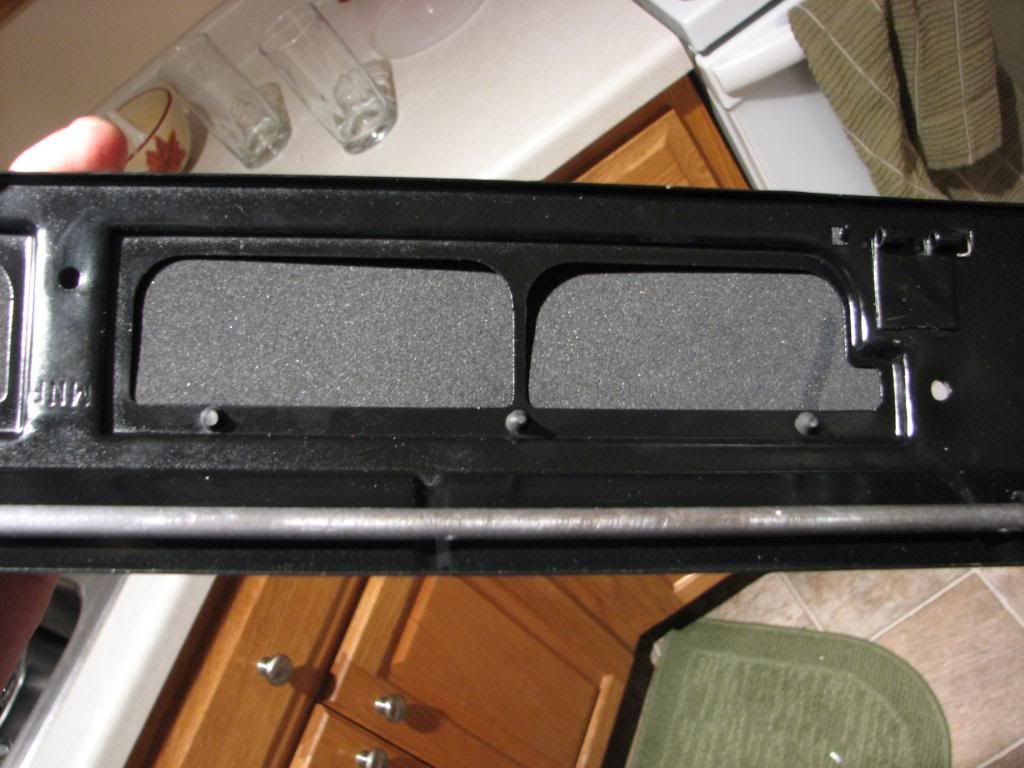
First the removal of the entire assembly is required. There are 3 phillips screws that hold each side onto the fiberglass:
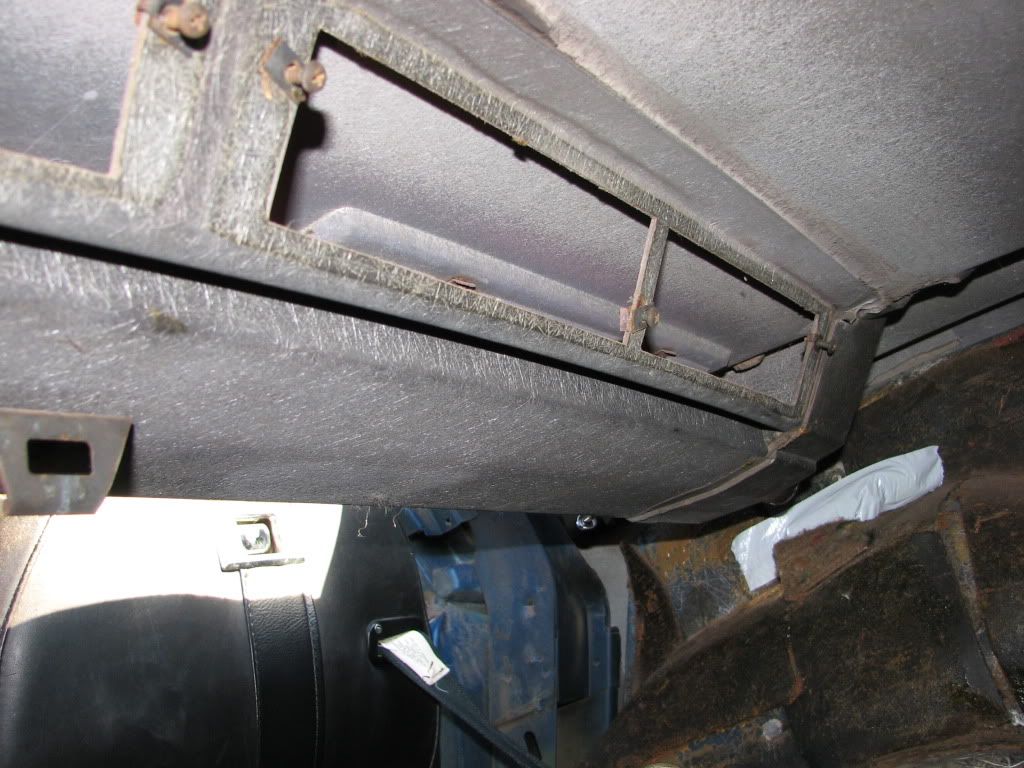
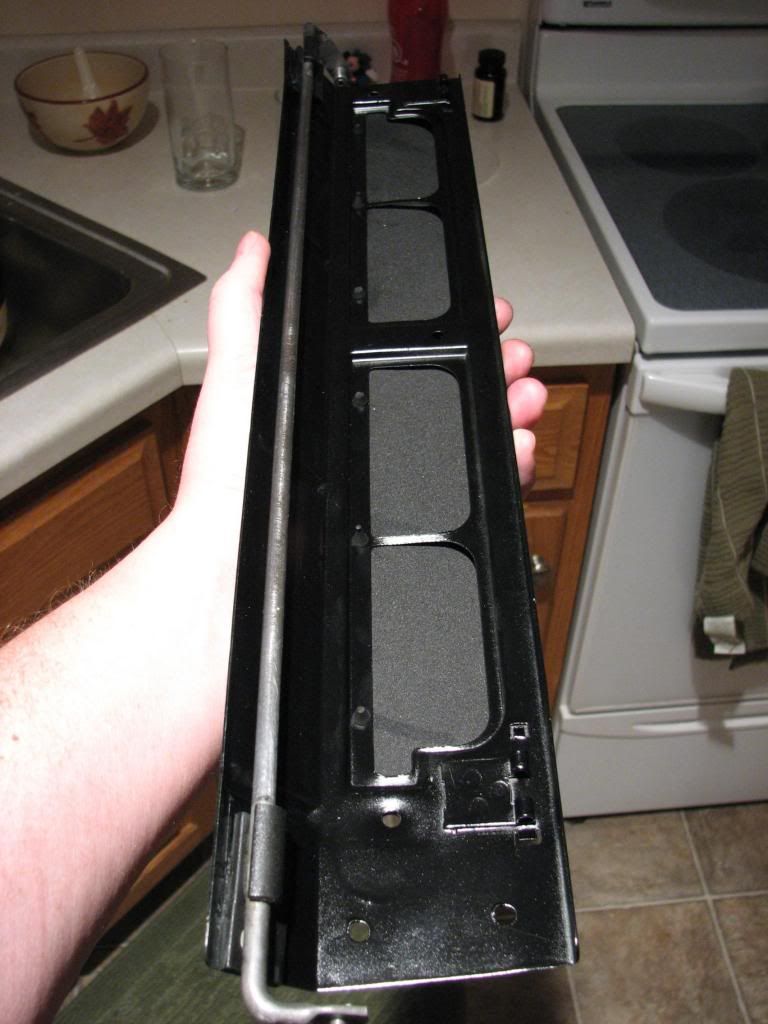
Here's one side after removal with the old, slightly worn foam awaiting removal:
The vacuum can from the drivers side:
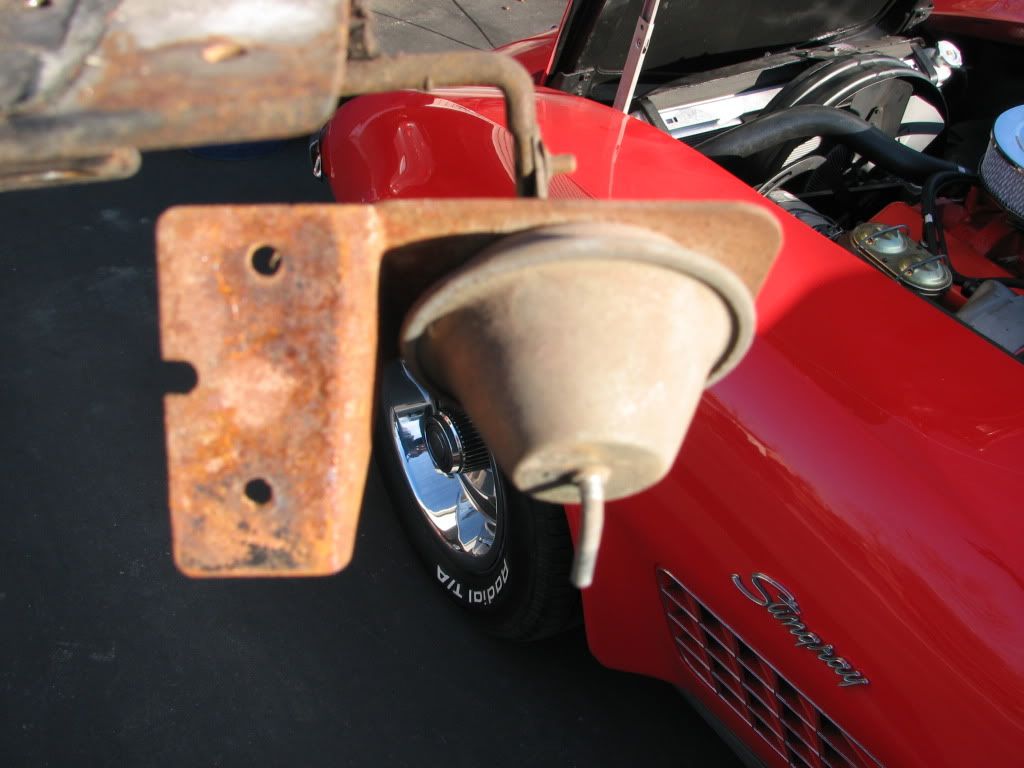
the other side:
How the end looks:
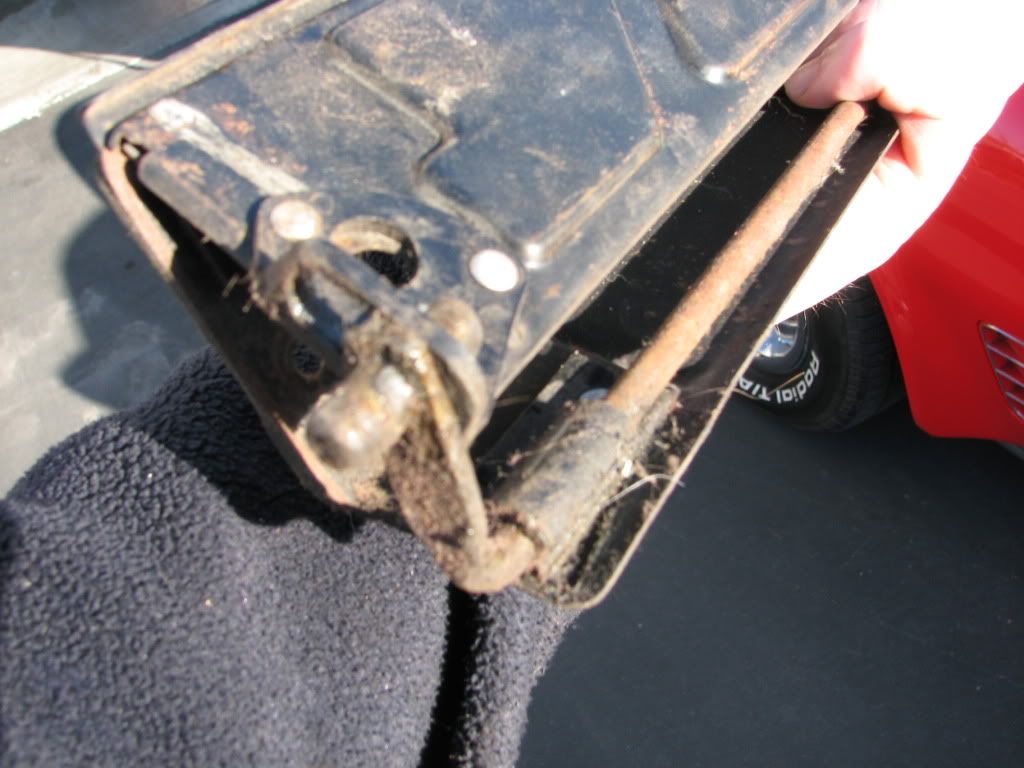
The other end with the vacuum can:
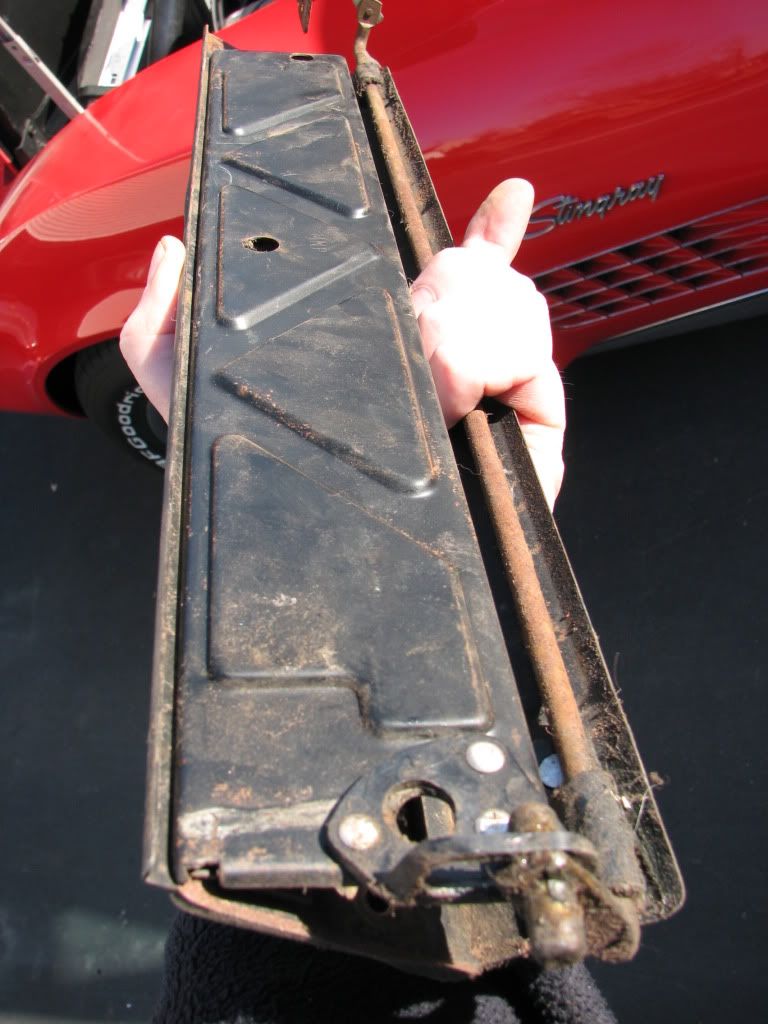
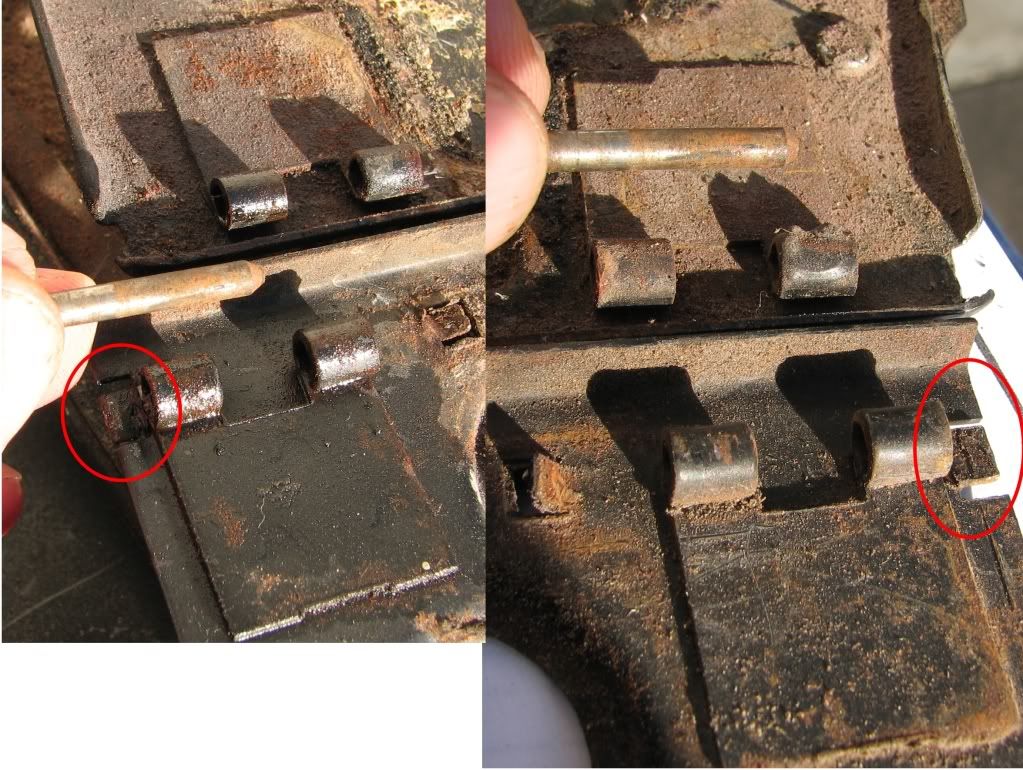
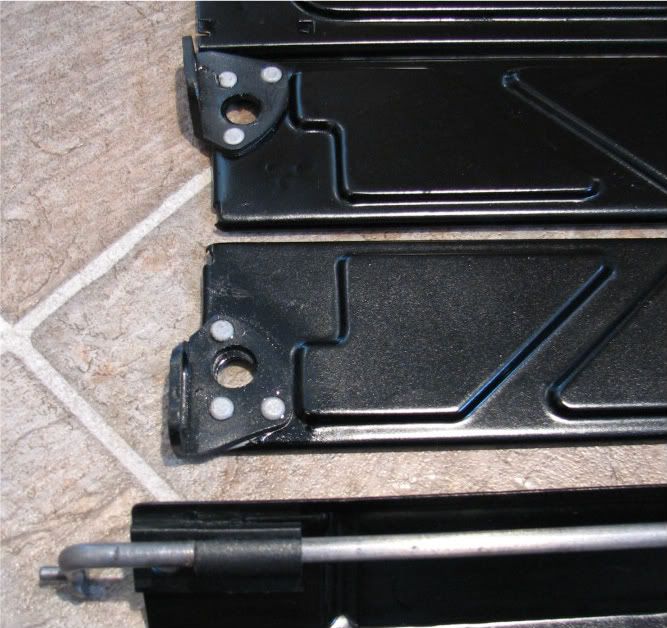
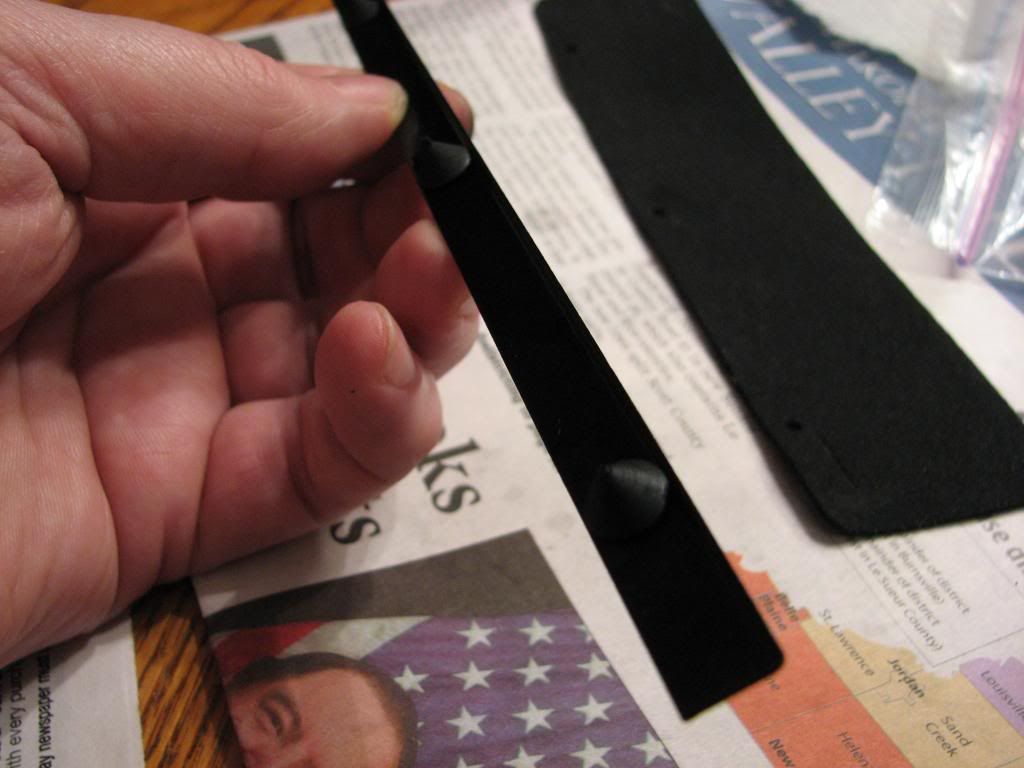
To get the 2 door parts separated, you need to remove the hinge pin on both sides. To do this, you need to bend the little tab circled in red in the pictures down and then use some sort of punch/tool to push the pins out:
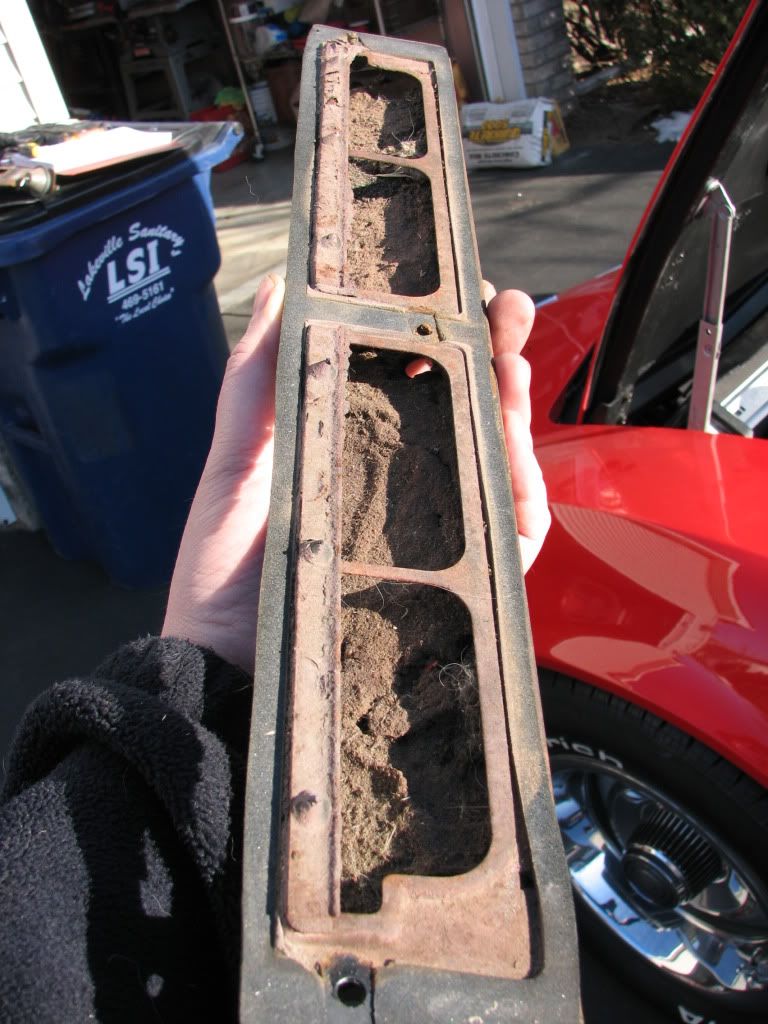
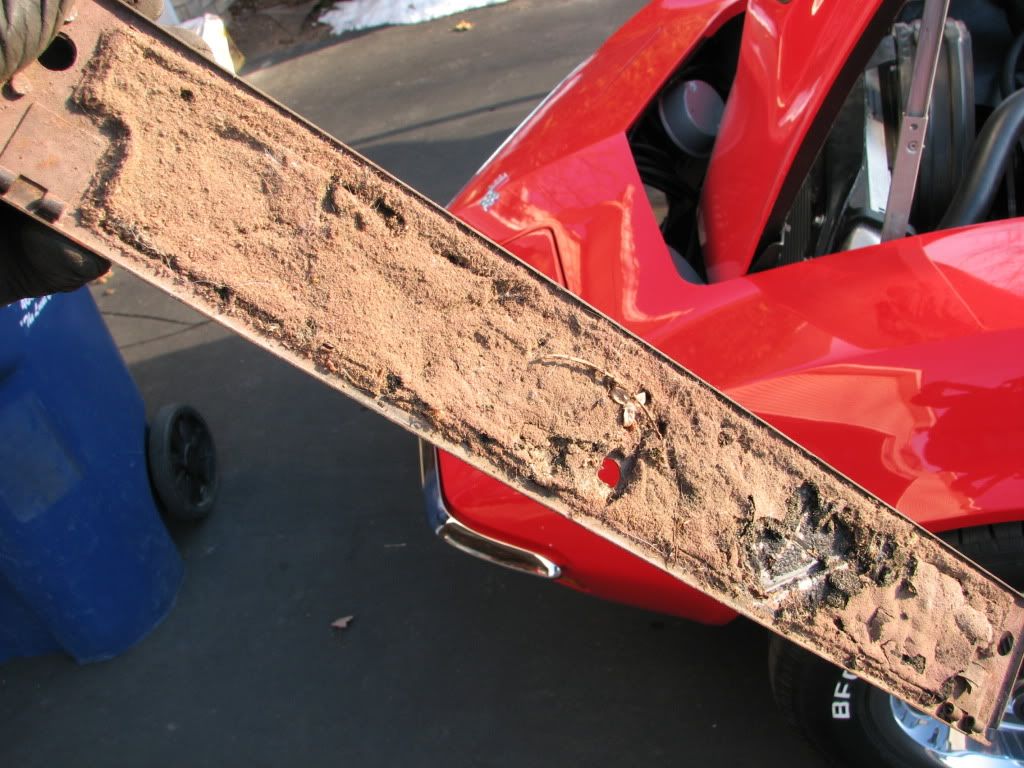
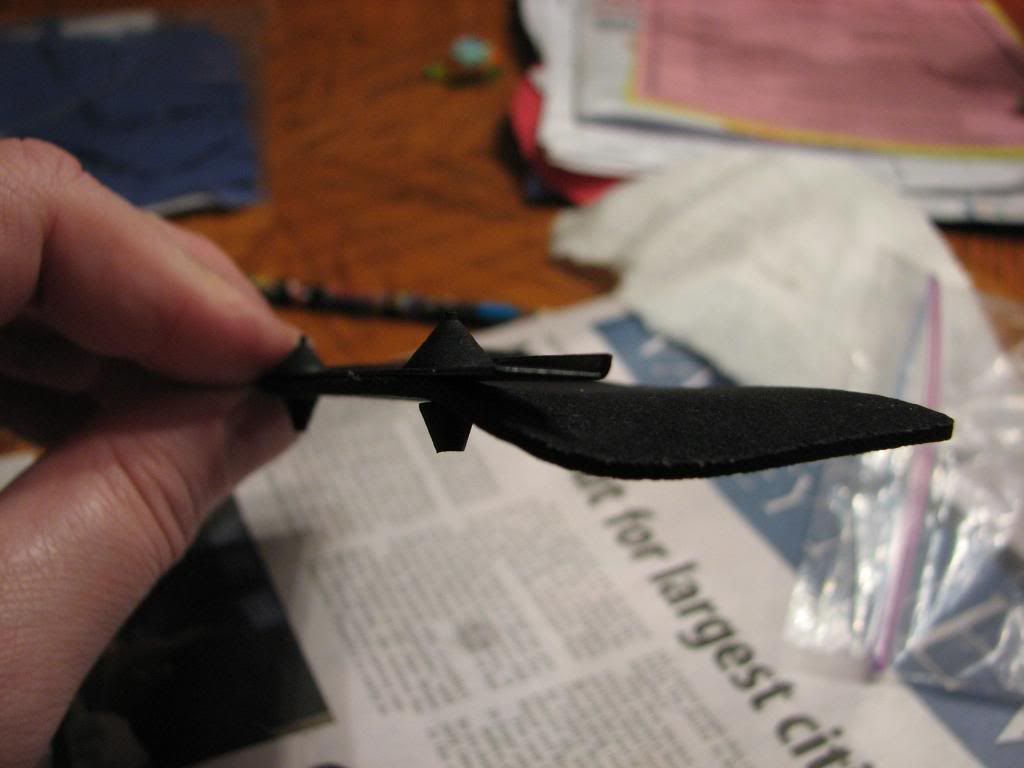
Here is the back side after the door were separated, lots of scraping to do:
My big question is, what type of glue did you use to glue the new foam pieces back onto the doors? I have some 3M glue I'll use for the carpet, would that work?
It's Feb 18th out and about 40 degrees outside with no wind, so an absolutely beautiful day for MN this time of year. So I got my butt in gear and started to tear out my rear ventilation system to replace the foam and respray the parts black.
Hopefully it won't take me too long to finish up with the rear vents. Some photos with comments below.
First the removal of the entire assembly is required. There are 3 phillips screws that hold each side onto the fiberglass:
Here's one side after removal with the old, slightly worn foam awaiting removal:
The vacuum can from the drivers side:
the other side:
How the end looks:
The other end with the vacuum can:
To get the 2 door parts separated, you need to remove the hinge pin on both sides. To do this, you need to bend the little tab circled in red in the pictures down and then use some sort of punch/tool to push the pins out:
Here is the back side after the door were separated, lots of scraping to do:
My big question is, what type of glue did you use to glue the new foam pieces back onto the doors? I have some 3M glue I'll use for the carpet, would that work?
 02-19-2012, 09:11 AM
#2


Great thread and walk through. I have very limited experience with the Astro ventilation system but it's really intriguing. As far as the foam I would choose a method that is easy to undo if you have to restore these again. Maybe hot glue or a rubber cement? Something that is fairly easy to peel off or pop off? Everything else looks great so far.
02-19-2012, 09:31 AM
#3
Race Director


Great bunch of pics. Another one of those things that needs to be done on mine. There are a couple of different places that sell rebuild kits for the doors that has everything needed to rebuild. I also want to redo the drains while I am working back there too. My drains are mostly silicone sealant from the previous bubba!!
02-19-2012, 11:53 AM
#5
Team Owner

Member Since: Sep 2006
Location: Westminster Maryland
Posts: 30,173
Likes: 0
Received 2,878 Likes
on
2,515 Posts

Hi SL,
Nice pictures and info to add to those in MS72's thread!
Glue... I've had very good luck using a glue from the crafts store.
Beacon Craftfoam Glue. It comes in a small white plastic bottle. Easy to use, dries clear, sticks well.
I look forward to following your progress.
Regards,
Alan
Nice pictures and info to add to those in MS72's thread!
Glue... I've had very good luck using a glue from the crafts store.
Beacon Craftfoam Glue. It comes in a small white plastic bottle. Easy to use, dries clear, sticks well.
I look forward to following your progress.
Regards,
Alan
02-20-2012, 01:58 PM
#6
Burning Brakes
Thread Starter
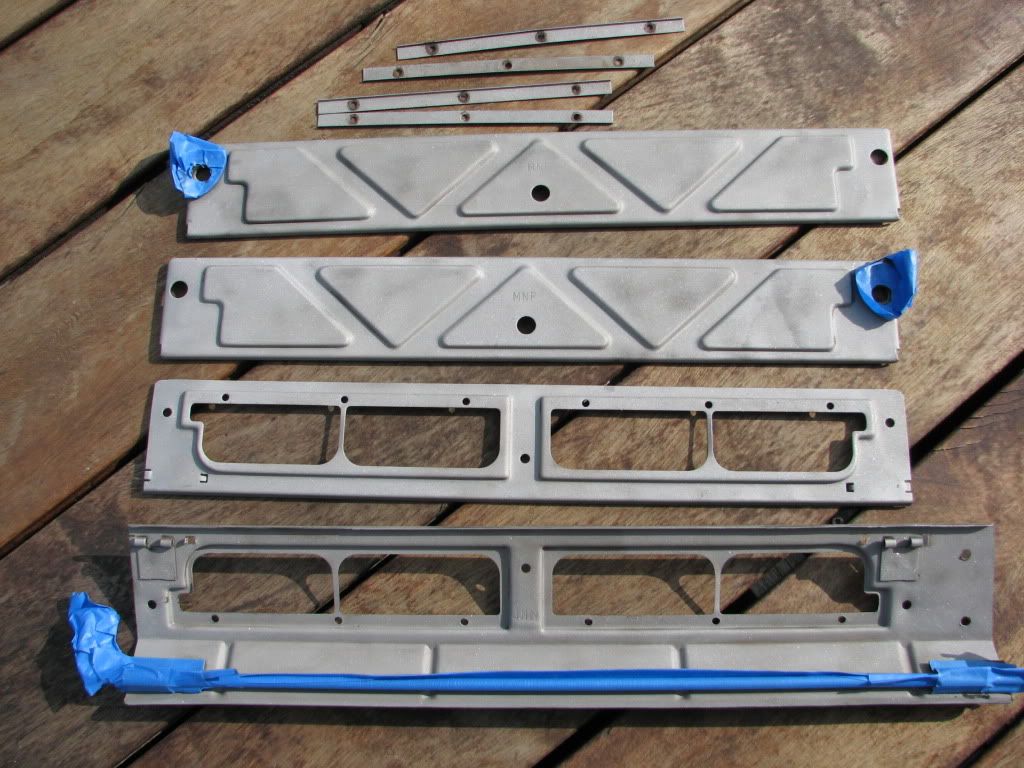
I got the parts sand blasted and masked, ready for paint. Would it be easier to just paint everything black, sure, but I thought I'd take a bit more time to cover things that shouldn't be black like the rivets and the metal arm that swings them closed. Maybe it's a bit too much for a part that will probably never be seen again for 40 years on my resto-mod, but it's winter and I've got time.
More pictures later after I get them painted.
fronts:
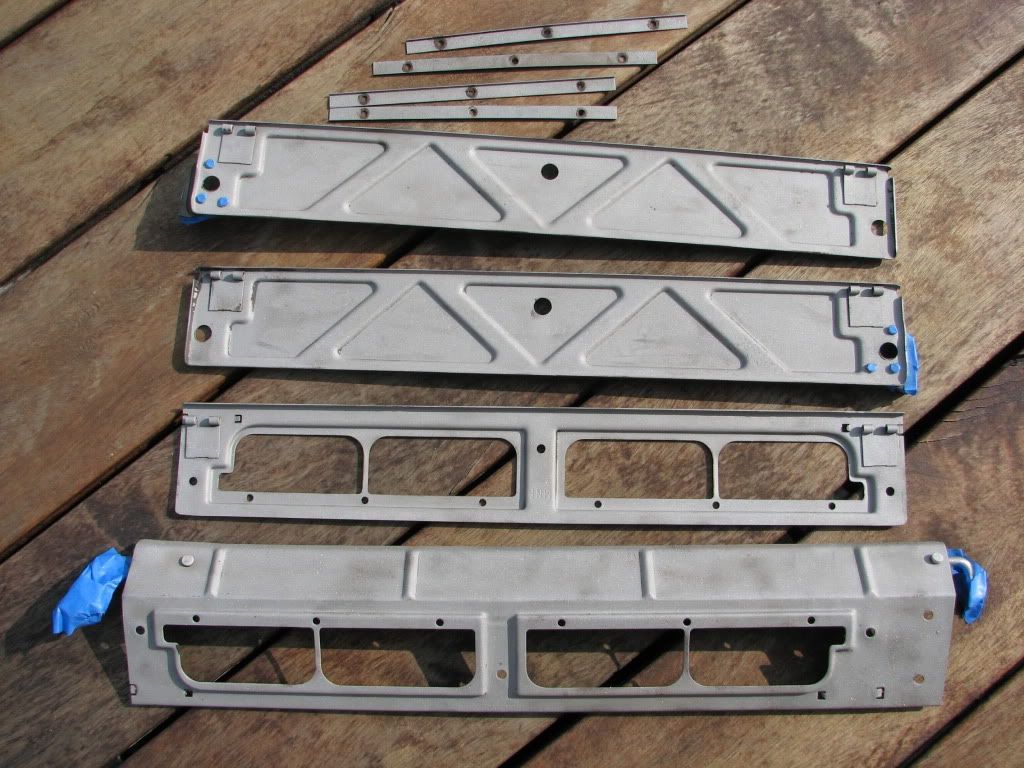
backs:
More pictures later after I get them painted.
fronts:
backs:
02-22-2012, 11:41 AM
#7
Burning Brakes
Thread Starter
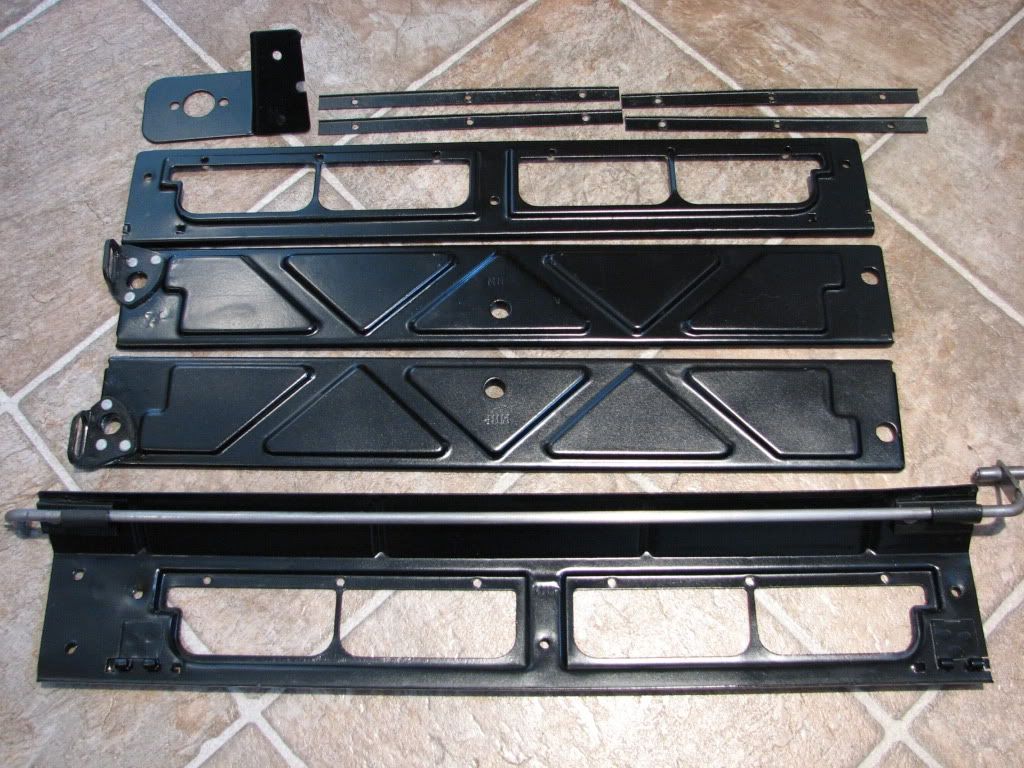
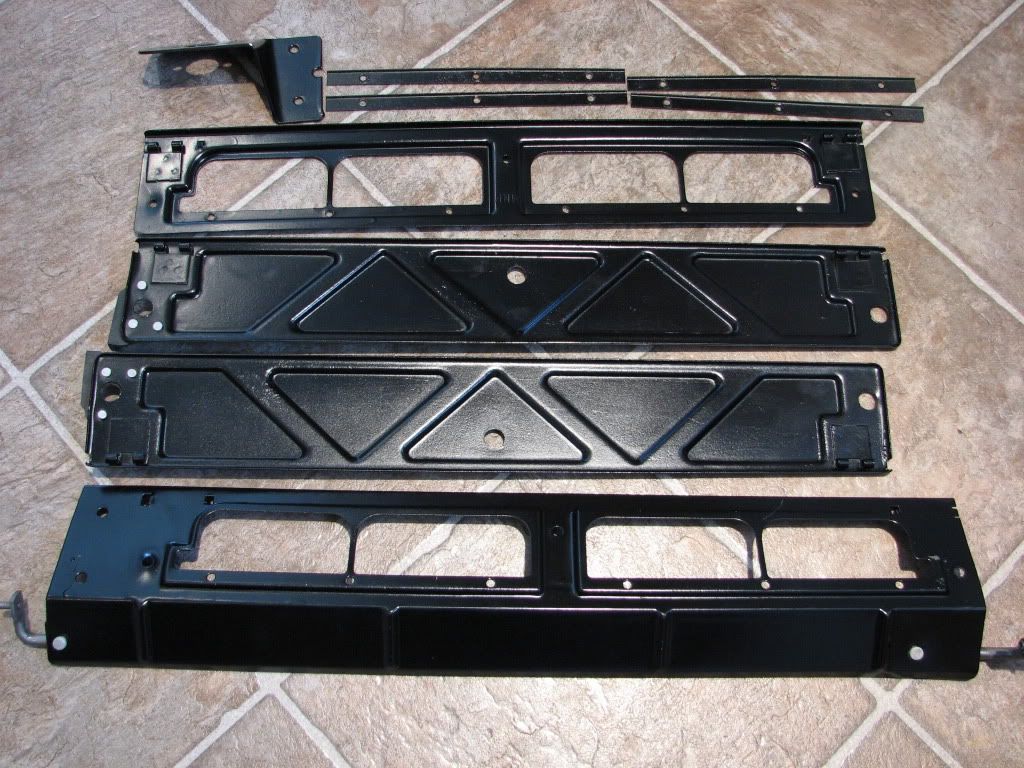
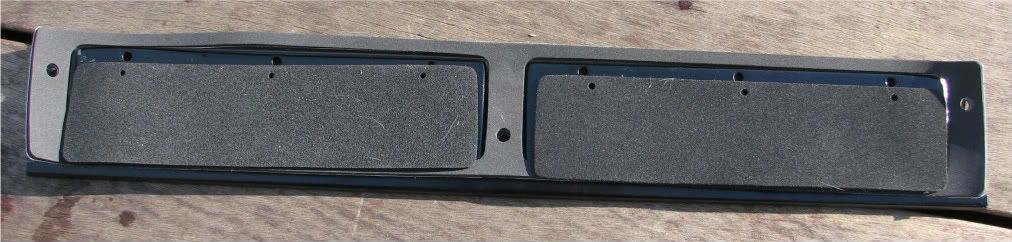
So here's what they look like after paint:
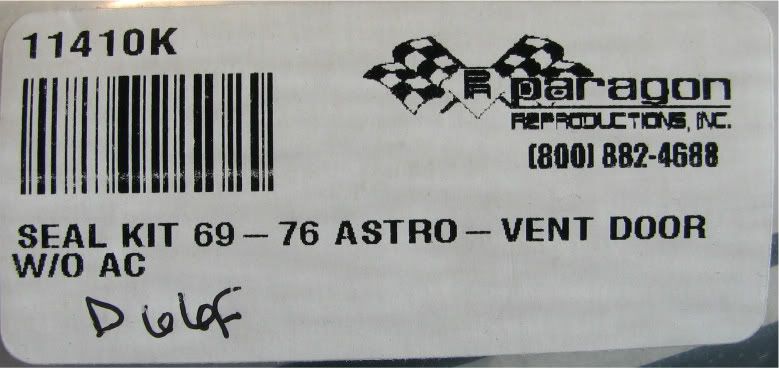
Here's the foam kit I used from Paragon:
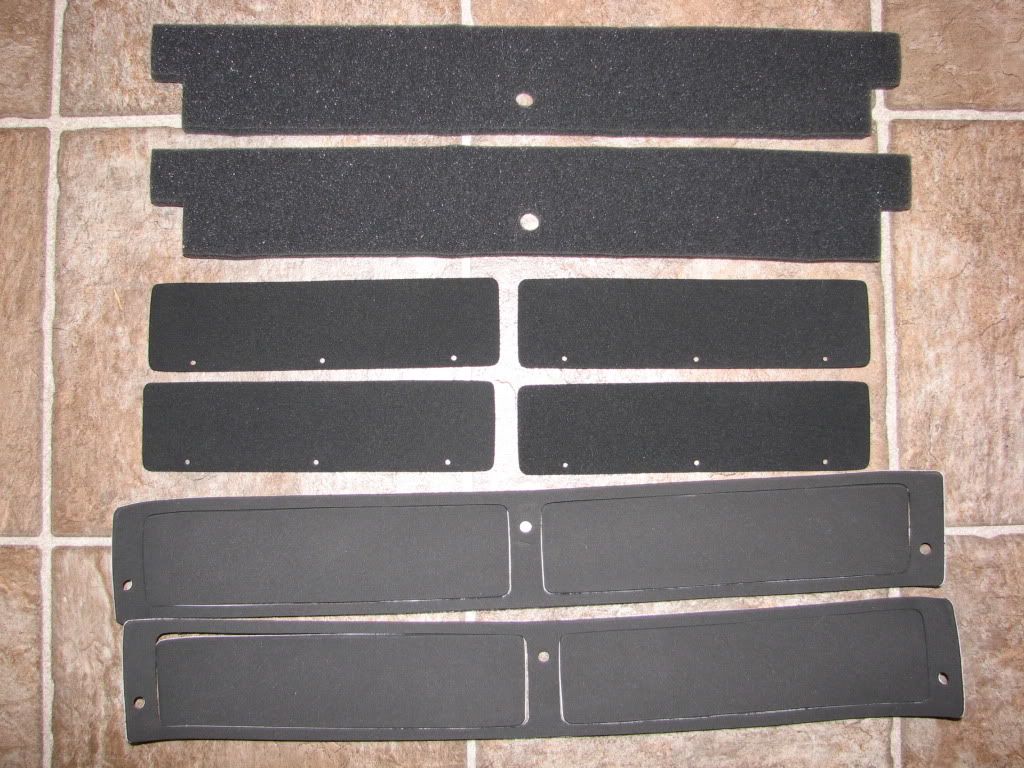
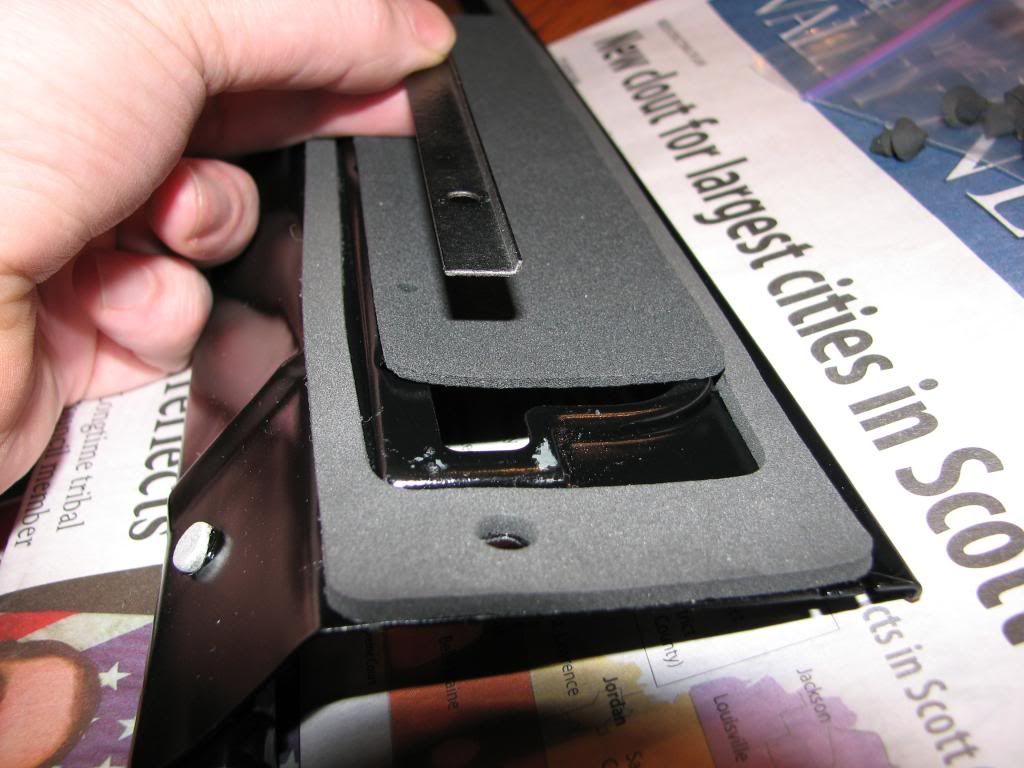
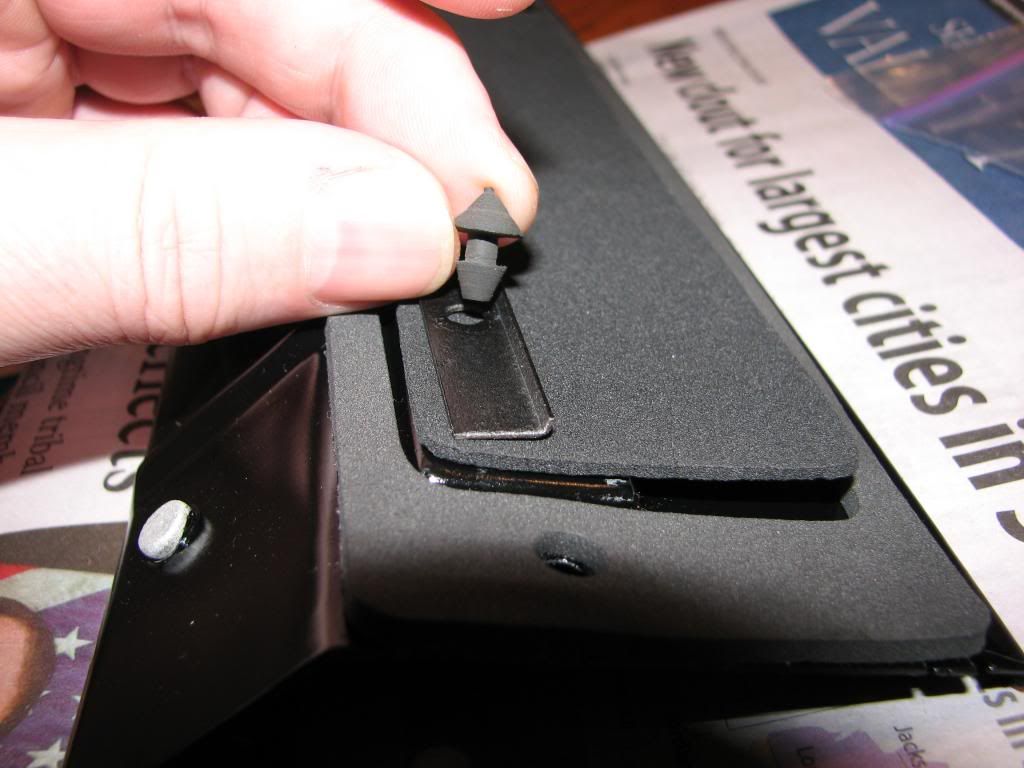
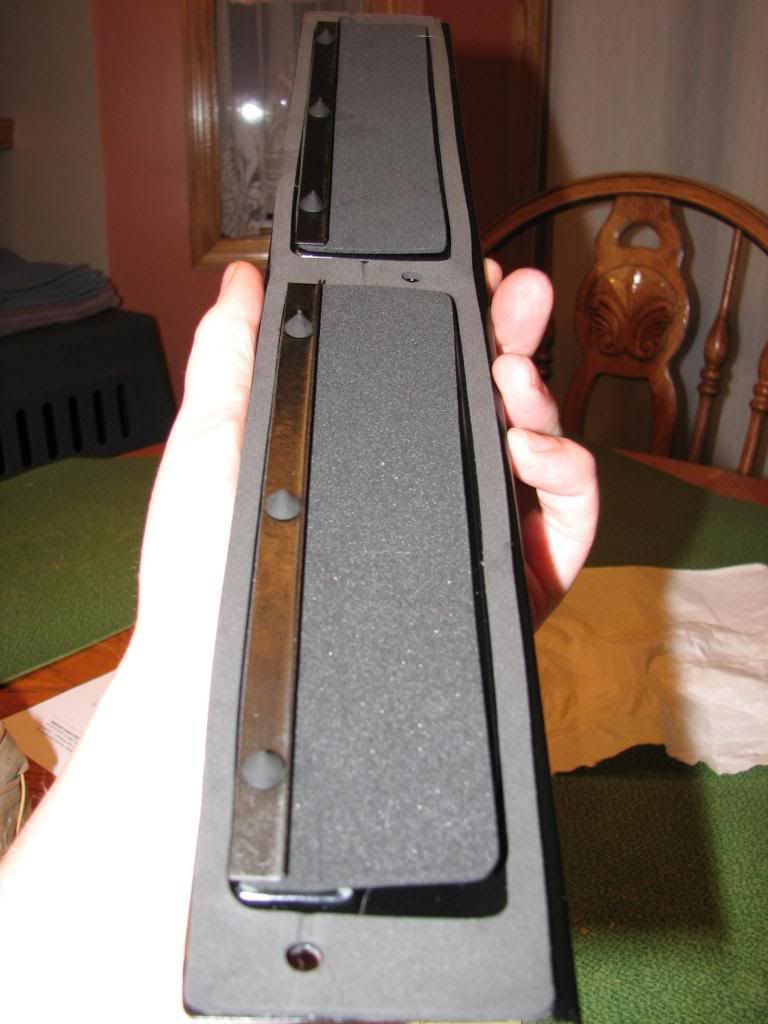
Here's the layout of how the foam pieces will eventually go together. The middle flaps, that were completely missing from mine originally, use rubber "rivets" to hold them on. The rest of the foam either has double-sided tape or is held on by glue.
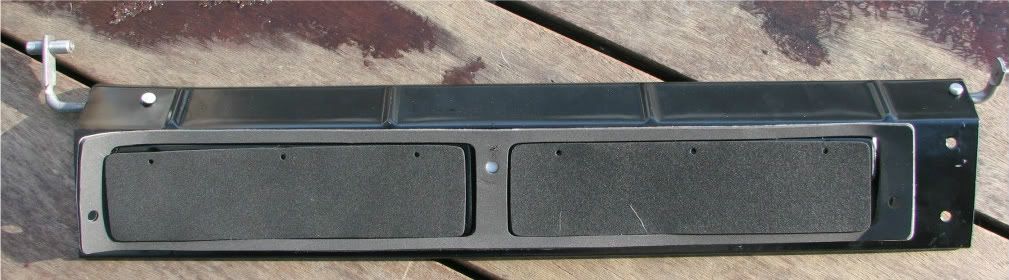
The metal rod that shuts the doors was pretty rusty before sandblasting. After sandblasting it looked rather dull as a consequence, so I took some sandpaper and shined it up a bit. The plastic I should have covered before sandblasting as it too also lost the top sheen from the process. A quick shot of clear sealer on the rod will hopefully help prevent future rusting and the plastic dullness after sandblasting was brought back to a nice shine after the clear coat.
I'll post some final pictures after I get them all together.
Here's the foam kit I used from Paragon:
Here's the layout of how the foam pieces will eventually go together. The middle flaps, that were completely missing from mine originally, use rubber "rivets" to hold them on. The rest of the foam either has double-sided tape or is held on by glue.
The metal rod that shuts the doors was pretty rusty before sandblasting. After sandblasting it looked rather dull as a consequence, so I took some sandpaper and shined it up a bit. The plastic I should have covered before sandblasting as it too also lost the top sheen from the process. A quick shot of clear sealer on the rod will hopefully help prevent future rusting and the plastic dullness after sandblasting was brought back to a nice shine after the clear coat.
I'll post some final pictures after I get them all together.
02-22-2012, 01:27 PM
#8
Team Owner
Member Since: Sep 2006
Location: Westminster Maryland
Posts: 30,173
Likes: 0
Received 2,878 Likes
on
2,515 Posts
Hi sl,
Attention to detail!!!!
Regards,
Alan
Attention to detail!!!!
Regards,
Alan
12-24-2012, 11:33 PM
#9
Race Director
Hey, did you ever get the final pictures taken since I just started nearly the same thread as you today. I am going to be using some of the sheet foam and making my own gaskets. Hopefully, all of my rubber rivets will come out also and can be reused.
12-25-2012, 12:16 AM
#10
Burning Brakes
Thread Starter
I ended up shaving the new foam a bit near the hinge so that it closed easier. All that was left after that is to assemble the pieces, put in the hinge pins, and install them in the vette.
Ho Ho Ho,
Jeff
 12-25-2012, 01:41 AM
#11
Safety Car

I hope you don't mind Eddie,but I'm going to post a link to your thread to make this thread even better for anyone who does a search in the future...
http://forums.corvetteforum.com/c3-t...t-rebuild.html
http://forums.corvetteforum.com/c3-t...t-rebuild.html
03-30-2013, 08:10 AM
#13
Team Owner
Member Since: Sep 2006
Location: Westminster Maryland
Posts: 30,173
Likes: 0
Received 2,878 Likes
on
2,515 Posts
Hi g,
I'd first try a local plumbing or a/c supply shop and then check out Dr.Rebuild.
He shows it in his catalogue. #9222130
Good Luck!
Regards,
Alan
I'd first try a local plumbing or a/c supply shop and then check out Dr.Rebuild.
He shows it in his catalogue. #9222130
Good Luck!
Regards,
Alan
03-30-2013, 09:28 PM
#14
Navigator

Member Since: Sep 2012
Posts: 9
Likes: 0
Received 0 Likes
on
0 Posts

I could not find it on their online catalog so I emailed the good Doctor. They said lots of parts not uploaded to the web yet. Part # was correct and $24.95 was the price. Thanks for the Info.
04-19-2013, 05:03 PM
#15
Burning Brakes
Thank you all for this informative and helpful thread. I am in the process of restoring my Astrovent damper and would appreciate a detailed photo of a known original/correct attaching screw.
The OP's first photo shows the subject screws. I would like to see some close ups and I'd like to know size,length, etc.
The OP's first photo shows the subject screws. I would like to see some close ups and I'd like to know size,length, etc.
04-19-2013, 06:29 PM
#16
Team Owner
Member Since: Sep 2006
Location: Westminster Maryland
Posts: 30,173
Likes: 0
Received 2,878 Likes
on
2,515 Posts
Hi Don,
I believe the original screws are filister, cross head, self tapping # 8 screws with a black oxide finish.
At least that's what is on my mid -January built car.
Regards,
Alan
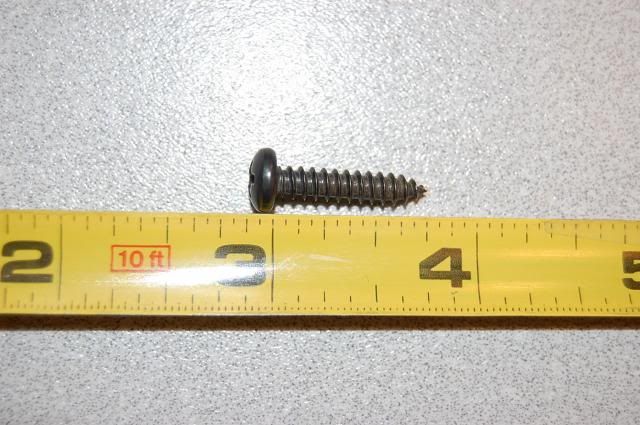
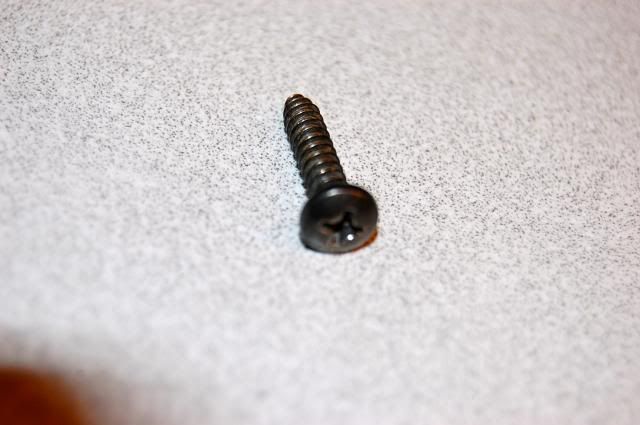
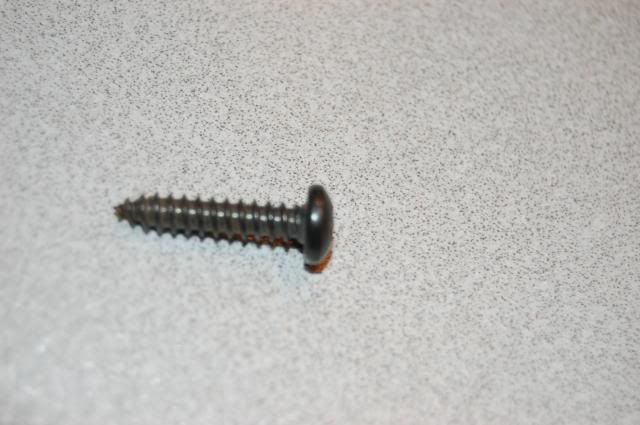
I believe the original screws are filister, cross head, self tapping # 8 screws with a black oxide finish.
At least that's what is on my mid -January built car.
Regards,
Alan
04-19-2013, 08:03 PM
#17
Burning Brakes
Thanks a million Alan!! I hoped you would have good pics like these.
I am about to re-install, and with all the work I've invested into getting it to look like when it was new, I thought I'd check on this. I've read where some cars have rivets and some have screws. I found screws and pop rivets in mine, so I'll go with all screws.
Thanks again,
Don
I am about to re-install, and with all the work I've invested into getting it to look like when it was new, I thought I'd check on this. I've read where some cars have rivets and some have screws. I found screws and pop rivets in mine, so I'll go with all screws.
Thanks again,
Don
04-19-2013, 08:45 PM
#18
Team Owner
Member Since: Sep 2006
Location: Westminster Maryland
Posts: 30,173
Likes: 0
Received 2,878 Likes
on
2,515 Posts
Hi Don,
I believe there were 8 of those screws used on the doors/flappers on my 71.
Regards,
Alan
I believe there were 8 of those screws used on the doors/flappers on my 71.
Regards,
Alan
12-10-2017, 11:48 PM
#19
Melting Slicks


Reviving an old thread hoping pictures can be uploaded from something other than photo bucket. They now charge $399 a year to be able to access photos originally hosted for free by photo bucket.
I removed the assembly from my 70 Convertible today.
I am concerned about the plastic guides breaking when I pop out the bars that open and close the doors.
Did you drill out the rivets that attach the plastic guides/holders or just tape around them to paint?
Were the bars originally bare steel? Mine have evidence of black paint.
I am curious about the finish on the retainer for the flaps with the rubber retainers.
Were the washers that hold on the actuator the toothed type?
Kind Regards,
Bill
12-11-2017, 08:28 PM
#20
Parts Sherpa

Reviving an old thread hoping pictures can be uploaded from something other than photo bucket. They now charge $399 a year to be able to access photos originally hosted for free by photo bucket.
I removed the assembly from my 70 Convertible today.
I am concerned about the plastic guides breaking when I pop out the bars that open and close the doors.
Did you drill out the rivets that attach the plastic guides/holders or just tape around them to paint?
Were the bars originally bare steel? Mine have evidence of black paint.
I am curious about the finish on the retainer for the flaps with the rubber retainers.
Were the washers that hold on the actuator the toothed type?
Kind Regards,
Bill
I removed the assembly from my 70 Convertible today.
I am concerned about the plastic guides breaking when I pop out the bars that open and close the doors.
Did you drill out the rivets that attach the plastic guides/holders or just tape around them to paint?
Were the bars originally bare steel? Mine have evidence of black paint.
I am curious about the finish on the retainer for the flaps with the rubber retainers.
Were the washers that hold on the actuator the toothed type?
Kind Regards,
Bill
Good luck with the project Bill and sorry i have nothing to add