


Hood Alignment--Need Help!
Thread Starter
Racer


Joined: Sep 2008
Posts: 454
Likes: 7
From: SB County CA
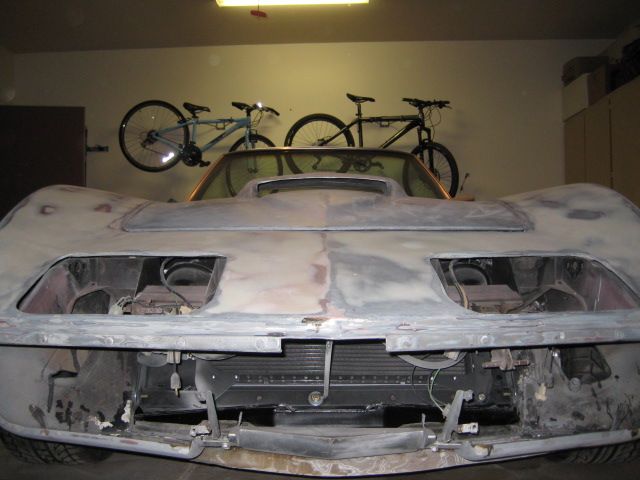
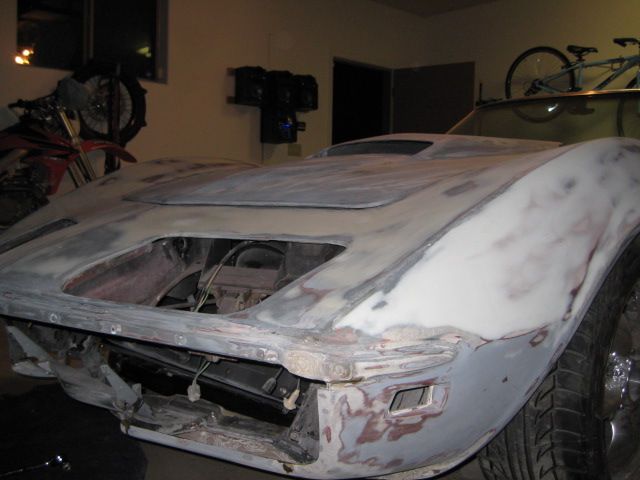
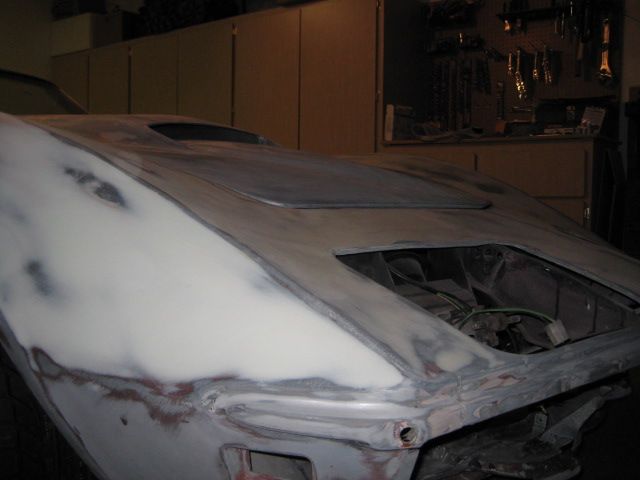
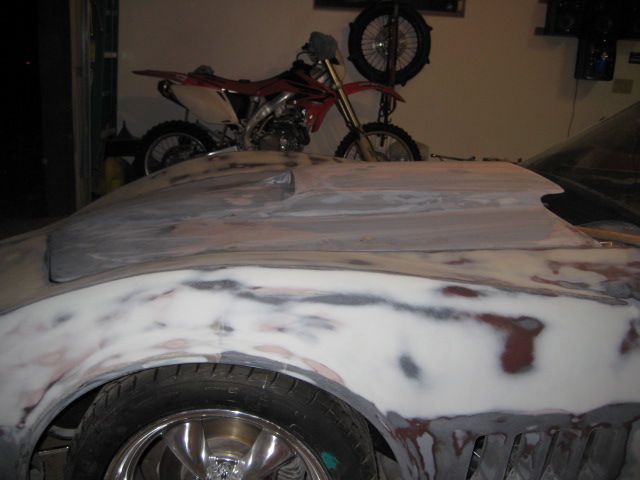
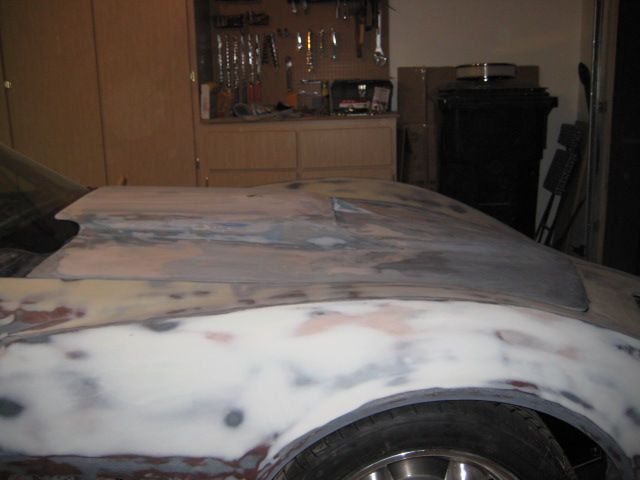
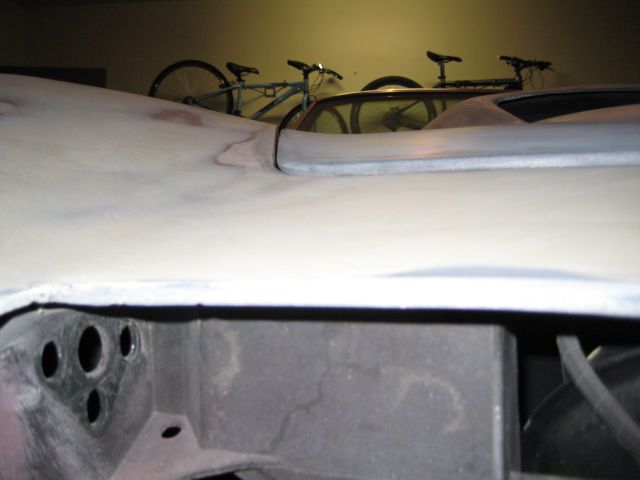
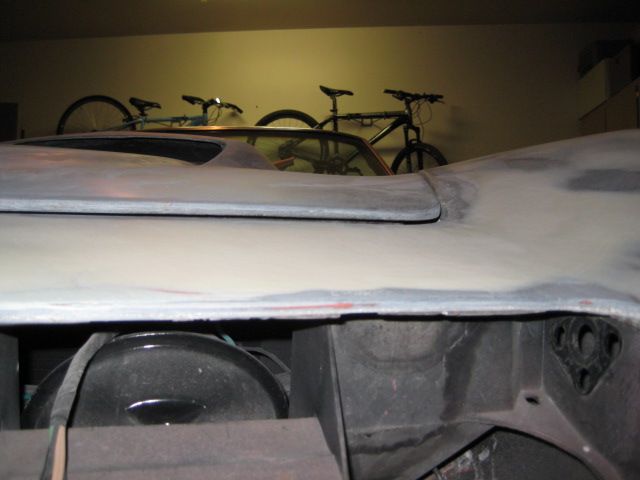
Was feeling like the light at the end of the tunnel was just coming into sight...then the hood install. What I'm trying to illustrate in the pics is that the side-side and fore-aft gaps are fine. Also, the vertical hood-to-surround alignment is pretty much spot on....right up to the last 2.5", or so just forward of the hood hinge line.
Does anyone have an idea how to approach this. Frustrated to the point that I took some pics, closed up the garage and decided to seek some advice here before I try something reckless. Luckily, I'll be out of town for a few days.
As it sits...the body mounts are only slightly snug (because I was going to try to shift the rear about 1/8" left. The core support bolts to the inner fenders and frame are tight. It fit better before the body was lifted from the stock frame, but its had to believe it could have sagged like this. I can flex the front fender corners up slightly. I have a feeling there will be tweaks in a few areas in order to resolve this. Anyone know were to begin? I'll take guesses too at this point.
Thanks in advance guys,
Rob

Melting Slicks

Joined: Jul 2009
Posts: 3,264
Likes: 3
From: Vero Beach FL
Hello Rob.
I had a similar problem on my 71. I found a post on the forum a few years ago that gave the simple instruction for lifting the nose on a steal bumper car. It help me correct my problem. I will see if I can find it or at least the hard copy that I had.
I had a similar problem on my 71. I found a post on the forum a few years ago that gave the simple instruction for lifting the nose on a steal bumper car. It help me correct my problem. I will see if I can find it or at least the hard copy that I had.
Team Owner


Joined: Sep 2006
Posts: 31,274
Likes: 4,366
From: Westminster Maryland
Hi Rob,
I agree with Roco about raising the nose.
Do you get any sense that the fenders (directly over the wheels) are bowed out at all?
If the nose is sagged ,the reaction might be seen and FELT at that point?
If you can feel an unnatural 'bow' that might reassure you what the problem at the hood front is.
Regards,
Alan
Melting Slicks
Joined: Jul 2009
Posts: 3,264
Likes: 3
From: Vero Beach FL
Its hard to tell from your photos if all the support brackets are in place I do not see the "horse collar" are the bumper bracket that extend from the frame in place? Do the holes line up? It has been some years ago since I did this take a look at the fifth post on this link.
http://forums.corvetteforum.com/c3-t...mess-with.html
I remember some saying that this would raise the hood hinges as well but I think this is what I did to help correct my problem.
http://forums.corvetteforum.com/c3-t...mess-with.html
I remember some saying that this would raise the hood hinges as well but I think this is what I did to help correct my problem.
Team Owner


Joined: Jun 2000
Posts: 38,923
Likes: 1,482
From: Southbound
Cruise-In II Veteran
Has the radiator support been out of the car? If so, did you shim it correctly when it was reinstalled?
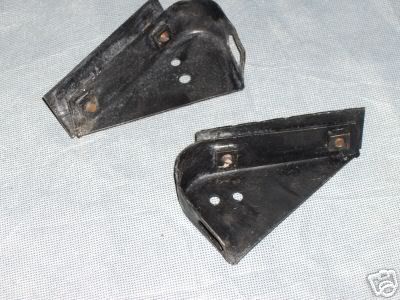
Tweaking the nose bar will raise the panel slightly.
Is the clip original?
These work:
Tweaking the nose bar will raise the panel slightly.
Is the clip original?
These work:
Last edited by Easy Mike; May 22, 2012 at 10:30 AM.
Melting Slicks
Joined: Jul 2001
Posts: 2,609
Likes: 12
From: Massapequa Park NY
 The horse collar bumper bracket & nose support rod will help take the sag out of the nose. It's pretty flexible without them. The brackets Easy Mike posted can help with alignment the corners of the hood. If the fender supports are already bonded to the nose you will not get much if any movement there.
 The only way to get the hood & fenders aligned to each other along the sides is to break the bond along the top edge & re do it. Not an easy task while also leaving the skirts attached to the sides of the fender.
I say this every time, but it's well worth repeating. You must install all the support & bumper brackets as well as the bumper in order to get the nose aligned properly. Yes it's a PITA but every time you make an adjustment of one thing it affects all the others.
It took me more than a year working on nice weekend days to get mine adjusted & bonded

Good luck
Jim
Melting Slicks
Joined: Jul 2009
Posts: 3,264
Likes: 3
From: Vero Beach FL
Mine was not so far out that I needed to break the bond but I did put all the brackets in place. At the time I did not have a bumper so I ran bolts into the bumper brackets that in it self made a difference.
Thread Starter
Racer
Joined: Sep 2008
Posts: 454
Likes: 7
From: SB County CA
Thank you all for the replies and I apologize for responding so late, but
I'm on the road for a few days.
As far as I know it is the original body, but it was in pretty rough shape to begin with. It is now on an SRIII frame, and although I did attempt to support things when lifted, I have a feeling I caused a little extra droop in the process. As I'm sure everyone knows, most of the supporting brackets are still out of the car, so I'm hoping there is a lot of adjustment to be had.
Roco71, the innner-fender/core support bolts are something i haven't considered yet, but it makes sense and will be the first thing i try...along with using an up adjustment on the the frame horns. Thanks!
Easy Mike, I've found a few other threads on the topic, and i'm led to believe that my car ('68) did not come with those supports. I'm not sure what other differences exist, but apparently this was a common problem with '68s and the factory added a few supports to '69 and later cars. In the thread that I ran across, the owner took the '68 into Jamison and had them install the later OEM pieces. I think I'll try to go this route as well.
Alan, thanks for the tip. Actually there was a crack in the left fender radius along the bond line, but I thought this was caused by an inner-fender panel that had broken loose along the bottom and outboard edges. It's been repaired, as it sits, so hopefully I haven't aggravated my problem by glassing the cracked area with the fender sagging. I may need to 'relieve' it in order to bring it up to height.
Corvette Stories
The Best of Corvette for Corvette Enthusiasts

Top 10 Most Expensive Corvettes Ever Sold on Bring A Trailer
Brett Foote
10 Things Every Corvette Owner Needs (2026 Edition)
Michael S. Palmer
8 Most "Only Corvette Owners Understand" Quirks and Problems
Pouria Savadkouei
10 Reasons the C6 Z06 is Still A Performance Benchmark After 20 Years
Joe Kucinski
How Much Horsepower Every Corvette Engine "LOST" in 1972
Joe Kucinski
Top 10 DOs and DON'Ts for Protecting Your Convertible Top!
Michael S. Palmer
Top 10 Most Explosive Corvettes Ever Made: Power-to-Weight Ratio Ranked!
Joe Kucinski
150 hp to 1,250 hp: Every Corvette Generation Compared by the Specs That Matter
Joe Kucinski
8 Coolest Corvette Pace Cars (and Replicas) of All Time
Verdad GallardoSafety Car


Joined: Feb 2012
Posts: 4,705
Likes: 983
From: Orlando FL
Team Owner
Joined: Jun 2000
Posts: 38,923
Likes: 1,482
From: Southbound
Cruise-In II Veteran
You mention a frame change. Try a shim or two under the radiator support to raise it a bit.
Melting Slicks
Joined: Jul 2009
Posts: 3,264
Likes: 3
From: Vero Beach FL
Racer
Joined: May 2005
Posts: 417
Likes: 0
From: Red Deer Alberta
Hi Rob,
I agree with Roco about raising the nose.
Do you get any sense that the fenders (directly over the wheels) are bowed out at all?
If the nose is sagged ,the reaction might be seen and FELT at that point?
If you can feel an unnatural 'bow' that might reassure you what the problem at the hood front is.
Regards,
Alan
I agree with Roco about raising the nose.
Do you get any sense that the fenders (directly over the wheels) are bowed out at all?
If the nose is sagged ,the reaction might be seen and FELT at that point?
If you can feel an unnatural 'bow' that might reassure you what the problem at the hood front is.
Regards,
Alan
Melting Slicks
Joined: Jul 2001
Posts: 2,609
Likes: 12
From: Massapequa Park NY
Sorry have to disagree, adding shims under the radiator support will not help in this situation. Once the inner fenders are bonded adding shims there will raise the entire nose, hood and all. The hood hinges are attached to the inner fenders which is bonded to the nose. Adding shims under the radiator support will raise the hood in relation to the fenders only if the inner fenders are not bonded.
I prefer to have the hood low when bonding everything together & add at least one shim under the hood hinges. It provides flexibility for a hood swap in the future.
In this case the nose is assembled and attached to the car. Looking at the pictures it appears that the issue is only in front of the hinge area. I believe this is a simple matter of installing nose support rod to support the nose forward of the radiator support. Then install the horseshoe bracket, side bumper brackets, bumper, etc. to make sure it all fits.
After that everything except the nose support rod can come off to complete bodywork & paint.
Good luck
Jim
Last edited by 70BBvert; May 24, 2012 at 11:31 AM.
Burning Brakes

Joined: Mar 2006
Posts: 793
Likes: 1
From: Houston Texas
Rob,
I just went through this on my '69, here's what I found.
1. The side-face of the core support, the face that bolts to the inner fender wells, extended too far above the mounting surface of the fender well where the hood hinge attaches, and was making contact with the bolt head that attaches the hinge to the hood. This was causing the hood to rise slightly above the surround. I had to cut the core support down to get clearance. I had the original core support to use as a pattern and marked the repro support accordingly. It now looks exactly like the original.
2. The bottom of the core support is designed to move fore and aft where it attaches to the front crossmember. The nose support rod attaches to the core support. The way it is designed, if you move the bottom forward, you get more lift of the nose surround via the rod which will reduce the number (if required) of shims between the rod and support to make the hood flush with the surround.
However, you will also reduce the clearance between the fan shroud and fan because the top of the support will "tilt" back and down. If that clearance is reduced to less than that called out in the AIM (.70 inches +/- .20) and you reach the vertical travel limit of the shroud, you need to add at most 2 shims under the core support. More than 2 shims and you will cause stress problems on the fiberglass fender wells. I believe that Paragon (and probably others as well) have the correct shims.
Also, the nose rod can be moved fore and aft where it bolts to the hood surround close to where the bumper nose is, which can also give you more or less "lift" of the surround.
3. The frame extensions that the front crossmember attaches to, have the ability to move vertically as well as horizontally, thus you can use the vertical movement component to reduce the need for shims under the core support as well.
All of these pieces (rod/core support/frame extensions/front crossmember/fan shroud) have a happy place. So you really should have all of them installed while making your adjustments or you may have other issues when they all go together.
As Jim said above, the best situation you can have is to have the hood a little low and just plan to shim it up in the final assembly.
Dan
Last edited by jetjockey; May 24, 2012 at 09:39 AM.
Melting Slicks
Joined: Jul 2009
Posts: 3,264
Likes: 3
From: Vero Beach FL
Hey Jet Jockey
That is a very good explanation to the geometry involved easy to understand and relate to. When I made my adjustment all the bolts to my radiator support where lose and the bottom did move forward. The AIM doses show the shims as you described.
Thanks
That is a very good explanation to the geometry involved easy to understand and relate to. When I made my adjustment all the bolts to my radiator support where lose and the bottom did move forward. The AIM doses show the shims as you described.
Thanks
Team Owner
Joined: Jun 2000
Posts: 38,923
Likes: 1,482
From: Southbound
Cruise-In II Veteran
Melting Slicks
Joined: Jul 2001
Posts: 2,609
Likes: 12
From: Massapequa Park NY
Good explanation Every time you make one adjustment everything else moves and needs to be readjusted. Eventually it all comes together. Every car is different. I looked at many examples while struggling with my nose install. In my case no shims were needed under the radiator core support. Of course I did have them in and out several times while experimenting/installing

Jim