When you click on links to various merchants on this site and make a purchase, this can result in this site earning a commission. Affiliate programs and affiliations include, but are not limited to, the eBay Partner Network.
The only adjustment fix I can see, is to jack up the rear of the t-top to level the door glass seal with the top of the window glass and then crank the window glass up and rear ward another 1/8 inch. Problem with this is the t-top will sit higher than the Halo and I don't believe the rear gasket on the t-top will seal well then.
Other than the single little "wedge" gap as mentioned, all else fits perfectly right now.
I agree this is a fitment difference in materials from OEM, not an adjustment issue.
It's also an identical issue side to side. Both sides have the same issue. Again, not a large enough issue to lose any sleep over though.
Interseting. Glass panels are supposed to sit higher than the halo panel according to the books, you might be on to something.
Interseting. Glass panels are supposed to sit higher than the halo panel according to the books, you might be on to something.
I had a set of glass panels. They sat up 1/4" in the rear and still had the same gap in the front as my current Moon tops. Fit was no different. I still believe the issue is in the gaskets.
First I’d like to clear up my question about the roof panels to the OP. The weatherstrip used on fiberglass and glass tops is the same and the fit should be exactly the same. The issue that can bite one of you is that one aftermarket t-top company and/or the uni-roof manufacture uses a generic weatherstrip that can cause a problem.
Today I uncovered the original 78 with the original weatherstrips still intact and took a few pictures. Then I removed the cover from my 72 and took more pictures. While the 1968-1972 cars used a different pillar and roof panel weatherstrip it did seem to offer up a better picture of what I look for when putting the weatherstrips in the car. (And, I installed the 72 weatherstrips myself about 8 years ago) .
Looking at the top picture you’ll see this is the original fit of the weatherstrip as delivered from GM. This car is a 1 owner climate control stored car. To me, the roof panel weatherstrip seems a bit too high on the pillar. But remember, the pillar weatherstrip location is dictated by the upper hole and it should be flush with the top edge of the chrome header. There is no mistaking where the top of the pillar weatherstrip should be located.
The same picture is located below right shows three arrows marked A B and C. You'll notice that I marked the gap between the top of the door glass and the roof panel weatherstrip too which is about what has been described above. The gap is 1/8" aprox.
Please notice again the A B and C arrows. You'll notice that I didn't make them touch the top of the glass and this was intentional. We did a seal test on this door while taking pictures and the glass is sealed to the weather-stripping directly above A and B and the entire flat area above C. You can do a seal test with some window cleaner... You squirt it on the weatherstrip and shut the door, everywhere the glass touches the weatherstrip will show up as a gloss black behind the glass.
So.. While this factory original car may not allow the door glass to run all the way up to a point where it jambs into the roof panel weatherstrip, it is still sealed and to my knowledge this car has never leaked when washed.
Now lets move on to the lower left picture. This is a 1972 car and while a very original car (numbers wise) the black is not nor is the weather-stripping. But you'll notice how crisp the roof panel weatherstrip is in relation to the pillar weatherstrip. This is the look that I try to achieve when installing weatherstrips. The edges just flow in to each other.
Now.. What I am sure of is the dimensions of the CRC pillar weatherstrip in comparison to the 3966565 GM pillar weatherstrip and there are very little differences. I have NOS here and used it in this comparison below: The only difference in the OEM original GM weatherstrip is the little metal tabs made inside the ends of the weatherstrip and the wire that runs from top to bottom. Both of which are not needed if the weatherstrip is installed properly.
I think when I'm finished with the help page on weatherstrips on the web site, I'll also cover the dimensions of both parts in hopes of eliminating speculation that there are differences that would cause fitment issues.
IMHO,
Willcox
Last edited by Willcox Corvette; Jun 7, 2012 at 07:38 PM.
I think the problem is the Astro tops, mine don't seal as good as the original factory ones do. I think the OP needs to fit their original tops on to see if they will seal correctly, then try to get the others to seal could be a big problem if they are too short. Sounds like if the tops are new, they need to call Astro and present this problem to them.
Not if you get CRC brand! I see people post all the time about how soft the NOS weatherstrips were. They were soft in regards to the pillar, door glass rears and roof panel weatherstrips and the CRC brand is just as soft.
When it came to the main core on the door main, the NOS was not soft it was actually harder than the CRC brand. I wish I could flash back 20 years to when these NOS weatherstrips were available and record all the people that fussed about how hard the door mains made it to close the doors.
I have a few sets still here and it is easy for me to show people in the parts store the difference.. it is not so easy to show you in pictures. I think the next step for me is to have the NOS weatherstrips IFD tested and compare that to the figures of the CRC brand reproductions.
Last edited by Willcox Corvette; Jun 7, 2012 at 08:17 PM.
That was a quick response! I don't think anyone here is blaming you guys at all. I wish I where closer and you guys could have mine for a day and work your majic.
There is a metal strip in the t-top weatherstrip that can be pulled out some to help with the gap in the front correct?
Nope.. there is a tiny metal strip in the pillar on the original weatherstrips that was molded in the rubber. It added reinforcement for the screws.
Oh, I don't feel as if anyone is blaming me (us) we don't make the weatherstrips! All I can offer here is what I see as one that has installed CRC brand for a very long time. There are some junk brand weatherstrips out there and I think this is partly to blame.
You want a laugh.. go look at my ebay listing for the 84 weatherstrip kit that is imported. I don't carry it, I've never installed it.. but we can drop ship it should someone be.. well lets just say "reading challenged" and buys it.
Here is how the heading reads... 84-96 CORVETTE REAR ROOF AND DOOR GLASS REAR WEATHERSTRIP IMPTD SEE NOTES***!
Imported from India!!!! <-- Yes, we'll tell you in advance!
Since customers continue to purchase the imported version of this weatherstrip, we thought we'd throw this one out there and also inform you a bit more than our competition.... So before you purchase this item please read!
This part is NOT constructed to the quality of the CRC brand weatherstrip and will probably leak on your new interior. You may have a void to fill to sell your car, you may just not care and we're fine with that. We just want you to know that this part is not up to OEM standards. Translation.. if you want a cheapo.. this is your part! :-). Warranty questions? I suppose we could send out three or four until you find one that works or get tired of installing them. But seriously, there is no warranty, we've told you in advance this part is not up to snuff... Again, if you want one that is fully covered for one year, please see our other listing.
The top picture shows the dfference to me, same as what I did and saw after doing the first top and finding the gap.
Where your two fingers are pinching the leading edge together, look at the total width / height of the NOS vs repro and you see how short in depth / height the repro is compared to the NOS; this is why the gap is present. If the repro had that same dimension we would not have a gap.
Hope this makes sense, thanks for replying and caring enough to try to help us out!
I assure you there is no difference enough to cause the window not to seat properly and to add to that take a close look at the picture of the original car with the gap.. is this the same gap you are speaking of?
Here...the top one is shorter than the bottom, but this view is like looking up at it from the bottom, not the side view as if it were installed...it has the same difference in dimension looking at it from the side as installed, and that is why the gap exists...can you do the same again but put them back to back to show the side profiles?
I have installed all new weather stripping from wilcox, have new astro tops with new weather stipping on them. the windows go up all the way however there is a small gap at the top front of the window. i have adjusted until i am blue in the face it almost seems like the astro top weather stripping doesnt come down enough to fill the gap. anyone seen this or have a suggestion as to how i solve this problem ? thanks in advance
Could you post a picture of the gap so that I can understand if it's the same gap I have? Thanks
I have the moon roof like the op and have the same problem. I didn't realize until recently that the moon roof was not an original corvette t-top.
The old gasket that I took off of them (old, dried out and cracking) was much flatter then the new gaskets. The old gaskets did let the tops sit low on the car and had an even gap parallel with the top of the window. Here's a picture of my passenger side top. I had to cut the gasket and shim it, then used silicone to fill in the gaps. It looks like hell but it does seal.
Last night I tried a fiberglass t-top from a 71 corvette. It is an original corvette t-top with new gaskets. It sits perfectly on the 71. It fits my car really well, I needed to adjust the pin, but the gap above the top edge of the window is perfect.
I think my problem is the aftermarket moon roof. I guess the moon roof manufacturer had their own gaskets.
I'm going to buy a set of used t-tops and new gaskets.
I bought my Vette just a year ago, so a very proud owner now. This is going to be my first full year. Previous owner changed all weatherstripping but I have no idea if this a real deal or some cheap imported stuff. There is a gap on both windows. My mechanic told me, the window cannot be raised more because it is already hitting the chrome molding (the door panels were down). I am not sure about the original possition. Should I change the weathestripping to the one Wilcox sells or can it be somehow adjusted? Maybe a problem with a weatherstripping on a t-top? Thanks
I had a similar problem as yours and no matter what I did there was no way I could get rid of the gap at the top.
So first I adjusted the window to fit correctly at the front pillar and at the rear.
Second, I unscrewed the metal fitting that holds the T Top seal in place (this fitting has slotted holes for adjustment but needed moved further than they would allow) and worked out where it needed to be to seal correctly.
Three, I used silicone windscreen sealant to form a gasket and packing piece to hold the fitting where it needed to be. No more leaks and no gaps:-)
Might be "bubbarish" to some but everything looks standard and works way better than when I got the car. FWIW the PO had fitted new seals, I don't know from what source.
I had a similar problem as yours and no matter what I did there was no way I could get rid of the gap at the top.
So first I adjusted the window to fit correctly at the front pillar and at the rear.
Second, I unscrewed the metal fitting that holds the T Top seal in place (this fitting has slotted holes for adjustment but needed moved further than they would allow) and worked out where it needed to be to seal correctly.
Three, I used silicone windscreen sealant to form a gasket and packing piece to hold the fitting where it needed to be. No more leaks and no gaps:-)
Might be "bubbarish" to some but everything looks standard and works way better than when I got the car. FWIW the PO had fitted new seals, I don't know from what source.
Do you think it was the bad choice of the weatherstripping? What did you have, CRC?
Hi Vogast, sorry I don't know what brand of seals the PO used. I believe that it is a combination of body/door alinement as part of the issue, but no easy fixes there. The passenger door was the much worse than the drivers, I cant see how another brand of seal would have helped in this instance and it is an expensive exercise to get parts imported to experiment here!
Still, the silicone sealant made an excellent fix. I have no qualms about using a product that didn't hardly exist when the car was built.
Hi Vogast, sorry I don't know what brand of seals the PO used. I believe that it is a combination of body/door alinement as part of the issue, but no easy fixes there. The passenger door was the much worse than the drivers, I cant see how another brand of seal would have helped in this instance and it is an expensive exercise to get parts imported to experiment here!
Still, the silicone sealant made an excellent fix. I have no qualms about using a product that didn't hardly exist when the car was built.
Thanks for the tip. When I can take her outside, I will try to fix it.





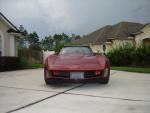













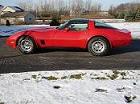


 I don't have the upper pulled up all the way up.. I will double check it again tomorrow..