



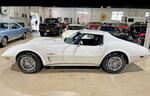



my hurst shifter install procedure

Thread Starter
Pro


Joined: May 2001
Posts: 571
Likes: 5
From: usa
 my hurst shifter install procedure
I searched all though the site looking for info on the install, bu couldn't really find wha I was looking for, so I just kinda started pulling stuff off.
here is what I found , hope it helps someone else down the road.
I ordered the complete hurst kit from corvette central. it shipped quick and was here in 3 days ordered on tuesdat evening and it was here friday morning.
it will take a little pateints but you can do it.
get the car safely on jack stands were you can get under ez has well has get inside.
I removed my seats because I was doing seatbelt at the same time, also removed the steering wheel which just made things easier looking down the shifter hole.
you want to also remove the console, this is a good thing has to not worring about getting it dirty and greasey......you will get greasey!
with the console removed , remove the shifter boot, you will easily see the 1st mounting bolt 5/8 wrench, the second bolt is kinda behind the shift leavers, I got under he car and removed the rods at he trans, 9/16 wrench. I left the rev paw on the trans due to the extra linkage, just pull the pin on the rod.
now back inside you can slide the shift leavers toward the back to bearly expose the 9/16 bolt, I used a 1/4" drive ratchet and short 9/16 socket. its a little tight but I got it, an after thought would be the try removing this bolt after clearing out the following stuff from under nieth.
from under the car remove the the factory shifter mount, there are 2 1/2" bolts at the rear pointing forward and 2 1/2" bolts in the front pointing up . slide the mount out toward the rear. now you should be able the snke the shifter and rods up and out from this inside of the car.
now you need to remove the trans mount bracket, remove the 2 5/8 bolts at the front of the mount bracket, these release the mount bracket from the mount it self, the mount will still be on the trans.
now before you do anyhing else , you need the jack up the engine/trans off the the mount. I put a floor jack on the bell housing just behind the oil pan DO NOT JACK UP AT THE OIL PAN IT SELF.
you only need to jack it up about an inch, don't lift the car it self.
now with the trans lifted off the mount bracket you can remove the 9/16 bolts, 2 are in the top of the cross member, these are nuts and bolts so you'll need a wrnch on top, you'll also see the nut/bolt on either side on the front side of the cross member.
should slide out forward.
now you can remove the trans mount it self 5/8 bolt on either side, this will also release the exhaust hanger, which has a U-bolt exhaust clamp holding the piped just in front of the cross member..
SIDE NOTE
This is a good time the inspect you trans mount, and replace if needed, but remember if you have solid motor mounts , you need a rubber trans mount, if you install a solid trans mount with solid motor mounts you'll likely bust your trans case.
here is what I found , hope it helps someone else down the road.
I ordered the complete hurst kit from corvette central. it shipped quick and was here in 3 days ordered on tuesdat evening and it was here friday morning.
it will take a little pateints but you can do it.
get the car safely on jack stands were you can get under ez has well has get inside.
I removed my seats because I was doing seatbelt at the same time, also removed the steering wheel which just made things easier looking down the shifter hole.
you want to also remove the console, this is a good thing has to not worring about getting it dirty and greasey......you will get greasey!
with the console removed , remove the shifter boot, you will easily see the 1st mounting bolt 5/8 wrench, the second bolt is kinda behind the shift leavers, I got under he car and removed the rods at he trans, 9/16 wrench. I left the rev paw on the trans due to the extra linkage, just pull the pin on the rod.
now back inside you can slide the shift leavers toward the back to bearly expose the 9/16 bolt, I used a 1/4" drive ratchet and short 9/16 socket. its a little tight but I got it, an after thought would be the try removing this bolt after clearing out the following stuff from under nieth.
from under the car remove the the factory shifter mount, there are 2 1/2" bolts at the rear pointing forward and 2 1/2" bolts in the front pointing up . slide the mount out toward the rear. now you should be able the snke the shifter and rods up and out from this inside of the car.
now you need to remove the trans mount bracket, remove the 2 5/8 bolts at the front of the mount bracket, these release the mount bracket from the mount it self, the mount will still be on the trans.
now before you do anyhing else , you need the jack up the engine/trans off the the mount. I put a floor jack on the bell housing just behind the oil pan DO NOT JACK UP AT THE OIL PAN IT SELF.
you only need to jack it up about an inch, don't lift the car it self.
now with the trans lifted off the mount bracket you can remove the 9/16 bolts, 2 are in the top of the cross member, these are nuts and bolts so you'll need a wrnch on top, you'll also see the nut/bolt on either side on the front side of the cross member.
should slide out forward.
now you can remove the trans mount it self 5/8 bolt on either side, this will also release the exhaust hanger, which has a U-bolt exhaust clamp holding the piped just in front of the cross member..
SIDE NOTE
This is a good time the inspect you trans mount, and replace if needed, but remember if you have solid motor mounts , you need a rubber trans mount, if you install a solid trans mount with solid motor mounts you'll likely bust your trans case.
Thread Starter
Pro
Joined: May 2001
Posts: 571
Likes: 5
From: usa
now you should have room to install the new hurst shifter
from here its pretty much staight forward.
mount your shifter bracket, before I mounted the shifter bracket to the trans, I used a 3/8 NC tap to clean the threads along with so brake clean to flush the holes out.
I started the forward bolt first, and then the 2 other rear and top bolts, not too tight remember the trans case on a muncie is aluminum.
next go ahead a bolt the shifter to the bracket. with out the rods.
make the you have the aligning pin in the shift, I had to pull it out and put it back in using the short part of the pin in the shifter. it may help to lower the trans to give you clearence on the 5/8 top bolt
now with the shifter mounted , attach the new shifter paws to the solid end of the rods, and the threaded connector to the other end, I used the shorter rev rod. it easier to get the spring pins in on the bench rather then under the car. if you lowered the trans earlier you should raise it up again.
under the car I remove the rev linkage and paw that I left on earier. my car didn't have anything attached to this linkage so I left it off and put it aside for later resto.
it removes from the trans side plate with 2 1/2" bolts, you'll need 2 washers if your not using the rev linkage (now that I think about it this may operate the rev lights, I 'll have to look into that)
although the hurst rev shifter paw looks the same it is different and you need to use the hurst paws.
I bolted the rev rod and paw to the trans first, the paw for rev should point up and be in the forward position. the bend in the paw should bend in toward the trans just like the factory one, the rod should come threw the paw from the trans side pointing away from the trans. then spinning the adjuster to align with the shifter, make sure you have the plastic bushings in, getting the pin through the rod can be a pain , I used a small pry bar(screw driver type with a bent end) to push the pin through.
now move the the middle paw, again this one point up
but this one has 3 positions , it should be in the middle position, the paw bend should bend in toward the trans and the rod coming threw pointing awat from the trans, be sure to put the adjusting end up near the shifter or you wont be able to swing it up once its on the trans.
now again spin the adjuster with the bushing to align with the shifter.
now the final rod , this one again should be in the middle position . but the bend in the paw will be away from the trans and the rod coming from the out side pointing in toward the trans, now again spin the adjuster to align the the shifter.
now you should be able to remove the aligning pin in the shifter, might have to wiggle it a bit but should be too hard, if you can't get it out go back and make sure all the rod adjuster slide in to the shifter levers freely.
now reameble the exhaust hanger, trans mount, and bractket. again remember the the trans housing is alum dont over tighten, also once its all back in , you can't install the bracket to mount bolts til you lower the jack holding up the trans
now back inside you can install the shifter arm , then boot , console then the ball.
shifter with the clutch in not running should move freely through all gears. note the hurst shifter rev lock out is nonfuctional , but it not "slip" into rev, it has a positive resistance for engauging rev.
hope this helps someone avoid the aggrevation I had figuring it all out.
from here its pretty much staight forward.
mount your shifter bracket, before I mounted the shifter bracket to the trans, I used a 3/8 NC tap to clean the threads along with so brake clean to flush the holes out.
I started the forward bolt first, and then the 2 other rear and top bolts, not too tight remember the trans case on a muncie is aluminum.
next go ahead a bolt the shifter to the bracket. with out the rods.
make the you have the aligning pin in the shift, I had to pull it out and put it back in using the short part of the pin in the shifter. it may help to lower the trans to give you clearence on the 5/8 top bolt
now with the shifter mounted , attach the new shifter paws to the solid end of the rods, and the threaded connector to the other end, I used the shorter rev rod. it easier to get the spring pins in on the bench rather then under the car. if you lowered the trans earlier you should raise it up again.
under the car I remove the rev linkage and paw that I left on earier. my car didn't have anything attached to this linkage so I left it off and put it aside for later resto.
it removes from the trans side plate with 2 1/2" bolts, you'll need 2 washers if your not using the rev linkage (now that I think about it this may operate the rev lights, I 'll have to look into that)
although the hurst rev shifter paw looks the same it is different and you need to use the hurst paws.
I bolted the rev rod and paw to the trans first, the paw for rev should point up and be in the forward position. the bend in the paw should bend in toward the trans just like the factory one, the rod should come threw the paw from the trans side pointing away from the trans. then spinning the adjuster to align with the shifter, make sure you have the plastic bushings in, getting the pin through the rod can be a pain , I used a small pry bar(screw driver type with a bent end) to push the pin through.
now move the the middle paw, again this one point up
but this one has 3 positions , it should be in the middle position, the paw bend should bend in toward the trans and the rod coming threw pointing awat from the trans, be sure to put the adjusting end up near the shifter or you wont be able to swing it up once its on the trans.
now again spin the adjuster with the bushing to align with the shifter.
now the final rod , this one again should be in the middle position . but the bend in the paw will be away from the trans and the rod coming from the out side pointing in toward the trans, now again spin the adjuster to align the the shifter.
now you should be able to remove the aligning pin in the shifter, might have to wiggle it a bit but should be too hard, if you can't get it out go back and make sure all the rod adjuster slide in to the shifter levers freely.
now reameble the exhaust hanger, trans mount, and bractket. again remember the the trans housing is alum dont over tighten, also once its all back in , you can't install the bracket to mount bolts til you lower the jack holding up the trans
now back inside you can install the shifter arm , then boot , console then the ball.
shifter with the clutch in not running should move freely through all gears. note the hurst shifter rev lock out is nonfuctional , but it not "slip" into rev, it has a positive resistance for engauging rev.
hope this helps someone avoid the aggrevation I had figuring it all out.
Thread Starter
Pro
Joined: May 2001
Posts: 571
Likes: 5
From: usa
looks like I am going to make an addition, the shifter arm first was tight against the left side of the console with out the shifter plate, I removed the arm, and reinstalled it at 180*.
looked good got it all together with the shift plate, but now it's leaning to the right and does even feel good.
so I will pull it back off and heat the base and bend it straight up, looks like it doesn't the offset of the bend.
will update how it goes.
Will
looked good got it all together with the shift plate, but now it's leaning to the right and does even feel good.
so I will pull it back off and heat the base and bend it straight up, looks like it doesn't the offset of the bend.
will update how it goes.
Will
Thread Starter
Pro
Joined: May 2001
Posts: 571
Likes: 5
From: usa
I pulled it off again today, and remembers that hurst had given a spacer with the shifter.
I tried the shifter in both direction with and without the spacer. no way it was fitting in that console correctly. instead of heating the handle, I decided to try to flatten it in the vise, got it about 85% straight. had to redrill the upper mounting hole has it was destorted when straightening it out, reinstalled with the spacer on the drivers side of the handle.
it now nice and centered does hit the shifter plate anywhere and is very comfordable position.
whioch led to the rest of the days problems!
ARG!!!
I tried the shifter in both direction with and without the spacer. no way it was fitting in that console correctly. instead of heating the handle, I decided to try to flatten it in the vise, got it about 85% straight. had to redrill the upper mounting hole has it was destorted when straightening it out, reinstalled with the spacer on the drivers side of the handle.
it now nice and centered does hit the shifter plate anywhere and is very comfordable position.
whioch led to the rest of the days problems!
ARG!!!

Melting Slicks


Joined: Sep 2016
Posts: 2,213
Likes: 970
From: Wauconda IL
I believe he was responding to this thread he started, not realizing it was 9 years old.
https://www.corvetteforum.com/forums...ot-a-clue.html
https://www.corvetteforum.com/forums...ot-a-clue.html
Corvette Stories
The Best of Corvette for Corvette Enthusiasts

Top 10 Most Explosive Corvettes Ever Made: Power-to-Weight Ratio Ranked!
Joe Kucinski
150 hp to 1,250 hp: Every Corvette Generation Compared by the Specs That Matter
Joe Kucinski
8 Coolest Corvette Pace Cars (and Replicas) of All Time
Verdad Gallardo
Top 10 Corvette Engines RANKED by Peak Torque (70+ Years of Muscle!)
Joe Kucinski
Corvette ZR1X Will Be Pacing the Indy 500, And Could Probably Race, Too!
Verdad Gallardo
Top 10 Corvettes Coming to Mecum Indy 2026!
Brett Foote
Top 10 C9 Corvette MUST-HAVES to Fix These C8 Generation Flaws!
Michael S. Palmer
10 Revolutionary 'Corvette Firsts' Most People Don't Know
Joe Kucinski