When you click on links to various merchants on this site and make a purchase, this can result in this site earning a commission. Affiliate programs and affiliations include, but are not limited to, the eBay Partner Network.
Quite possibly...
..and this is why I will be replacing the Delco HEI distributor with one that has a rev limiter built in.
I seem to recall that MSD has a electronic module that will drop in the standard HEI that has a rev limiter. It may save a few $$ rather than replacing the entire HEI.
The short block is now completely done. Oil pump in, oil pan on, cam installed, timing gears, timing chain, timing cover, lifters in too. Heads will go on next and before you know it... this thing will be ready to rock. I am starting to get excited!
The weekend was very productive.
The post above shows the short block assembled. We installed the oil filter and primed the bottom end so the oil pump and filter are not starving the bearings for oil on initial start.
After that, we prep'd the block's head mating surfaces. Next we unboxed the new heads and cleaning the first. We coated the block with Permatex copper and laid in the gasket included with the Edelbrock kit. We then torqued the ARP head bolts (also provided) per the included instructions.
...and we do it a second time...
Next we copper-ize the intake mating surfaces on the heads and lay the intake gaskets. We also clean and prep the china walls . We are ready for the intake manifold install !! It drops in perfectly and the bolts are torqued. We cover the openings on the intake so we don't drop any items in it accidentally.
The pushrods are dropped in with careful technique to make sure they hit the landing of the lifters (as opposed to riding on the outer edge ).
Assembly lube is used on either end and along the guide plate. The CompCam rockers I ordered are looking pretty slick and installation is also fairly easy. Rotate the crank so the valve being worked on has zero cam action, then turn the fastener down while hand checking for zero-lash contact on the pushrod, tighten another half rotation and lock it in. Repeat 16 times.
At this point, we hand tighten spark plugs in just to keep the engine sealed up. I will be thinking about how far to take the cosmetic enhancements at this point, and there is plenty of front suspension work to do before we drop the engine back in.
We will put the rest of the accessories on it after the engine is installed, which makes for an easier engine drop-in, even if it makes the accessories harder to put on... choose your battles I guess.
One thing is for sure, I am going to be very excited to hear this thing fire up for the first time. Once it is broken in... (500 miles?) I will take it for a dyno run so we can all see if Edelbrock's advertised numbers are good.
A few more boring pictures. It's finally time to get that suspension back together. The shop press made quick work of the lower control arm bushings after cutting a jig-board to fit its odd shape and protruding lip edges. It bolted on with only a little difficulty caused by too much paint in the bolt holes from the reconditioning process. There is very little rust on the car thanks to an undercoating that was installed long ago.
The upper arm was not very nice. There was so much rust that the arm itself had to be cut just to get the shaft out... and a replacement ordered.
The replacement upper control arm went right in... being careful to replace the shims in exactly the same position in which they came out.
Doesn't look like much, but its a step in the right direction.
Thank you Gripp! I will take a vote of confidence right about now. hehe.
We spent a bit more time on it and got the passenger's side assembled. The Uppers had to be drilled as they shipped with small holes , expecting rivets, not bolts. The super beefy ball joints I am using are all part of the Energy kit that was ordered and I'm happy to be using the bigger diameter hardware.
The spindle was looking a bit gross. Shooting it with a bit of break clean wasn't doing the job.
A quick solvent bath brought it back to life nicely!
With a bit of ingenuity and determination we got the new spring that also came in the Energy kit installed with the spindle. Since there is no engine in the car to weigh it down the spring didn't want to compress very much before lifting the car upward. I'm not a fan of using spring compressor tools either, as they can break (and often do) and injury occurs. Its much easier to just anchor the frame down and jack up the lower arm to meet the spindle distance.
The steering knuckle , caliper mount and dust shield are installed. It is starting to look like a car again!
Hello again. Big update this time around. Lots of work has been going on. The front suspension work continued threw the weekend. The task of dismantling the driver's side was a real chore, but we got it done. This was the side that had a slightly grippy caliper, which over time really took its toll in the form of added forces. The ball joints would NOT come out. We ended up grinding the pickle fork tangs short just so we could get the tool in further. But like I said, eventually everything came out. Before we start putting everything back in, a visual inspection of the spring perch seems prudent. Everything looks good, just minor surface rust.
With easy access available, we bolt up the new sway bar that came in the kit.
We prep the new control arms and install the Energy suspension bushings and kit-supplied ball joints. We did finally break down and buy a spring compressor tool which allows the installer to control the bend direction in the spring from the inside of the coil. It was worth it even though the things scare me to death (ever see one break?). The new matched shock slides right in too.
Finally, the front corners are assembled! That means we can focus our attention on the steering. The kit comes with new tie rods and a new idler arm so this should be a breeze right? The new Idler arm looks good.
We had already disconnected the power steering lines days ago, so they were pretty dry. We got all new power steering lines, valve and cylinder to replace this old stuff.
We got about half way threw the job when we very sadly discovered the kit had done us an injustice. The bags say LH and RH indicating the thread direction of the tie rod ends, but when it came time to assemble... well.. it lied. They were both LH. So much for my unconditional praise of this kit. The first problem has arisen and its too late at night to fix it. All the auto stores are closed.
The next day we get what we need and finish up the steering. It bolts back on and car and that means the front end is DONE!!!
We celebrate by goofing off a little bit. I like to call this picture... "You're doing it wrong"
OK, so he isn't just in there being absurd, we take this chance to replace the torque converter seal before the engine goes back in.
We also replace the cruise control module which has been acting up. It is pretty dry and nasty, and was also causing sporadic MPH readings at low speeds because of the grind and bind going on. (The computer programmer side of me gets a real kick out of "clockworks" type items like this cruise control box. It is basically the physical embodiment of an "If-Then-Else" statement using physics rather than code logic. What a trip!
With the front suspension and steering done, and lots of the little "while you have the chance" items replaced, it is time to refocus on that engine we rebuilt. We need to get it all jazzed up for the show. I ordered some blue powder-coat powder (redundant?) and we take it and the valve covers (and brake master lid) to my friend's house to apply it. Unfortunately, it didn't darken up as much as I liked. The car has a dark blue to purple (top to bottom) faded paint job. So since we were unable to match the blue very well, we decided to mix in some metallic flake red and go for purple. We did a 'rough mix' of the two colors hoping for a slight marbled look. You can see them pretty clearly here in the pre-baked picture.
We place them in the auxiliary oven and 20 minutes later we have a finished durable awesome looking product! Powder coating is so cool.
We took them out in the sun to see if we got any of the marbling effect and/or metallic flake coming through. I'm not sure the picture does it justice, because its there! so cool!
So how good was our off-the-cuff color matching? Again, the photo may not show it super well, but the color match to the bottom of the car is spot on. We couldn't have computer matched it any better. This stuff is so much fun!
We finish off the day by turning off the rear shop lights and embellishing in the ultra cool glowing nose of the GRID CAR!!
I can't wait to hear and see this thing back up and running. You might even get it finished up in time to make it to a Columbus Cars and Coffee before Carlisle! You know, to give it a test drive and shake down before the longer trip.
From: Some days your the dog and some days your the hydrant.
Royal Canadian Navy
Originally Posted by REELAV8R
I seem to recall that MSD has a electronic module that will drop in the standard HEI that has a rev limiter. It may save a few $$ rather than replacing the entire HEI.
Look forward to your future posts.
Yes they do. It was included in the MSD Super HEI upgrade kit I bought.
You might even get it finished up in time to make it to a Columbus Cars and Coffee before Carlisle!
Yes, it would be nice to give it a good shakedown before hand.
Soo that Cars and Coffee.... that is by the Lennox24 theater right? Doesn't that parking lot have really nasty curbs going in? I'd hate to bottom out my glow in the dark nose.
Soo that Cars and Coffee.... that is by the Lennox24 theater right? Doesn't that parking lot have really nasty curbs going in? I'd hate to bottom out my glow in the dark nose.
Depends on which entrance you use. The best one seems to be the entrance coming off of 315 South and you go thru the light straight towards the theater. Lots of low profile cars go in and out of there every Saturday. Mine has a bit more clearance, but I still typically go in at just a slight angle to help. If the weather holds up tomorrow morning, I plan to go out.
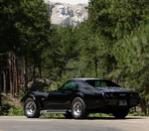
But I got her out this morning as it is the official "Drive your Corvette to Work" day!
Sometimes things just go "too well." Like those valve covers. They are purple-y, shine-y, goodness and we couldn't very well just slap them on the old greased up engine block now could we. So we cleaned it, and scrubbed it, and brushed it... masked off some accessories...
and shot it with some pearl-ized purpleness... !!!
Tadaa!!!! Super awesomeness. Fun times! Hooray!
I almost think this thing could moonlight as a Decepticon with such purple madness.
Now its ready to go in the car... Stay tuned for that!
I really like the way you masked and painted the intake. Very cool looking that way.
Thank you very much!
I know it was a bit of a risk to try it that way, but its not fun without a "little" bit of risk, and we are all about fun!!
The contrast pattern of purple/shiny/purple/shiny was the goal.
I figured worst case would have been the intake got trashed, which, is not all that expensive in the grand scheme of things and right on top the engine. So it would be quick to replace at this point in the project if things went south.
Car projects are always so interesting, especially on a car this old. First you worry about what will break (or disintegrate) when you try to remove it. Then you wonder which replacement parts you may not be able to find (like the cruise control servo I'm still hunting for.) Granted this is less of a concern with a corvette, but age still plays a part. Then there is the problem of new parts. Maybe they will fit, maybe not. Maybe they will come with all the hardware as described, or not. Maybe things that say "bolt-on" really are just that easy... or not.
Such concerns can potentially change the direction of a project mid stream. One such problem occurred with the ordering of Wilwood's amazing brake kit for this car from summit racing. After carefully reading the description and speaking with the sales rep I decided to spend 2 whole buckets and one cereal bowl full of money on the upgraded system to all 4 corners of the car. After all, it says "bolt-on" and comes with new hubs and bearings and even a partridge in a pear tree.
I was quite excited to dig in to the boxes when they arrived. It looked really cool and seemed like great quality! The unboxing didn't last as long as it should have though. Mainly because there were not enough parts. The kit only came with about half of what was spec'd. Most notable, no hubs, no bearings either.
I contacted Summit Racing and the sales rep had no good answer beyond what we originally discussed, and what was listed in their website description, so he put me in contact with Wilwood directly. They did some checking, came back and said that this particular kit did not come with hubs , or wheel bearings , or races for that matter. Instead they said I needed to "just" drill out the 5 flat-head solid rivets per hub (20 total) and reuse the hubs.
Now I have a few problems with this. First of all, I believe I said I paid 2 whole buckets AND a cereal bowl of money for the kit. It should have everything at that price. I certainly don't want 35 year old rusty bits bolted to the new expensive shiny bits.
Second, it said "bolt-on." To me this means no cutting, no drilling , no welding. Certainly not drilling out 20 solid industrial structural steel rivets with a hand held drill as explained by the Wilwood techy. Now, truth be told, I do have a 6 foot 1 HP drill press in my basement that I could have used if I felt like spending time and an extra $50 in drill bits, but there is one.. other.. little... problem.
Thirdly, I was told they were in the kit. I expected them to come in the kit. They were supposed to be in the kit!!! I already threw the old rotors/hubs away. After all, they were rusty and nasty and I was happy to see them go.
Long story cut a little short, the kit went back for a refund. For the money, it should of been perfect.
I hopped online and eventually found reconditioned hubs from Ecklers. They looked great, new races were already installed and they even came with new bearings and the bearing seal. I added to the order Stop-Tech rotors, rebuilt calipers with steel braided lines, and Hawk Red pads. We powder coated the calipers and the end result not only looks great but was quite a bit cheaper.
After all that , there was still time to work on a few other items. I pulled the drive shaft and replaced the output shaft seal on the transmission. I also replaced the u-joints before putting the drive shaft back in. The starter is in too. I got half of the spark plug wires run threw their respective heat shields on the block. There isn't much left to do now, just need the time to do it.
Read up about stretch on new rod bolts before you put the pan on
Are you going to have it balanced with the new rods and pistons?
Next time your buddy wants to take a rolock type disc to your deck dont let him theres no way to know if its flat or not and those can remove material
If using a stock thickness gasket you will probably be Ok
Keep us updated first driveway rebuilds are always good learning experiences. x2 on the tagged valve check them out to make sure they arent tweaked and seat properly. If it were me at least replace the one that was in the hole where the piston was. They can "snap:back appearing straight but break easier too. Your call...or just drive it
Edit :oops too late looks like its going in with new heads...looks like youre having fun
Wow....as your primary Wilwood dealer around these parts let me apologize on behalf of the poor and misguided info you were given. You should never have been told there were hubs included in your kit.
The front and rear "Caliper Kits" are pretty much just that: calipers, pads, hoses and some new rear bolts. How the info on hubs became part of the issue is beyond me. However dealing with a large retailer it's not uncommon go get bogus info. All the while asking for your cc info...By all means the sales folks should have not only known the answers but easily directed you to the PDF links (FRONT and REAR) that clearly state what is in the kit as well as what is required to install them.
The stock replacement rotors are also sold simply as "rotors" and do not nor have ever contained hubs that I am aware of. You should have been directed to the PDF again that noted exactly what was included in the kit. What rotors did you end up using here?
You are correct in that those instructions do not make mention of the need to remove the rivets holding the hub to the stock rotor. And I'd agree its a bit of an oversight. However the same is true if you purchase any REPLACEMENT stock rotor- the link being a Bendix replacement.
I'm not making excuses for the shortcomings of a few things here, but I will defend the product in that none of that is much different than had you purchased replacements from Autozone for example. The folks at Summit should also know more about their products too. I'd only ask that you perhaps reconsider the returns; thinking any return/refund costs are going to far exceed the cost of a few items needed to finish the install. If you feel the need to 'move on'..I understand that also.
If you need qualified help with any future Wilwood purchases please avoid the big box stores; it can often lead to more hassles than savings.
__________________ TCE
Your one stop...for Wilwood Brakes! 480.967.7901