


Muncie Install Tips Please
Thread Starter
Burning Brakes


Joined: Apr 2011
Posts: 975
Likes: 108
From: Phoenix, AZ
As the classic song goes, "So close, but so far away�" is the story of installing my 4 speed transmission back into my 69 350/350.
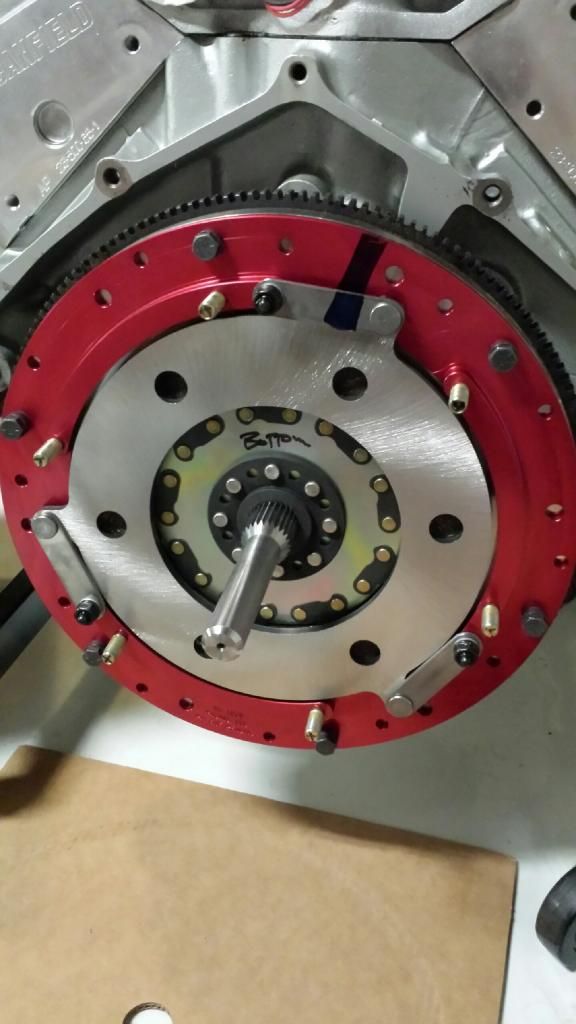
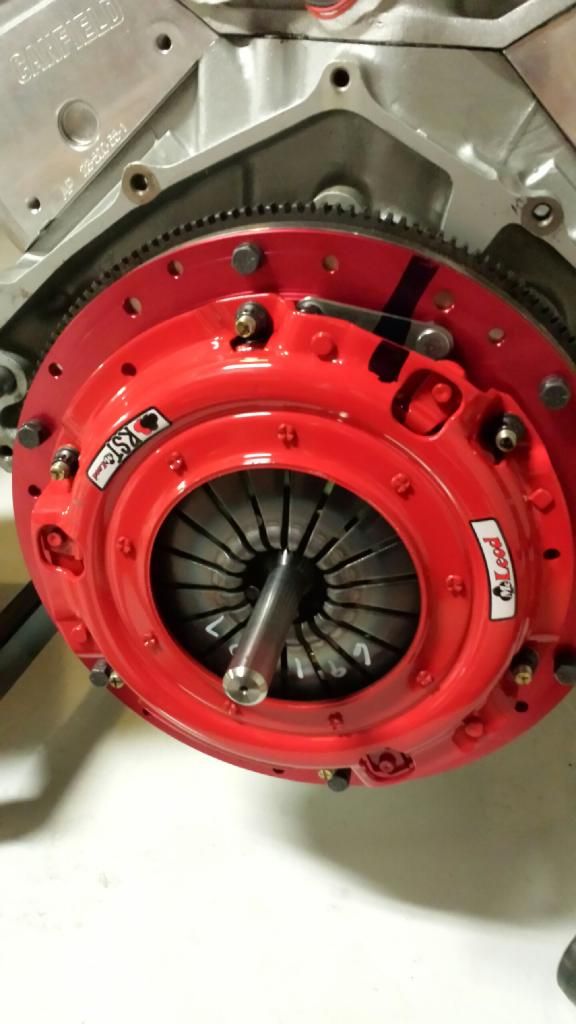
Lined up the disc with the plastic alignment toy, purchased 4'' bolts to guide transmission, and had my daughter push the clutch in. Slid in well except for the final 5/16". Already checked the pilot bushing for fit.
Suggestions and other tips are welcomed!
A view from the bottom--the bolts are not tightened.

A view in between frame and exhaust pipe to show gap against the top guide bolt.

Le Mans Master

Joined: Oct 2006
Posts: 7,123
Likes: 433
From: Gladstone MO
C3 of Year Finalist (appearance mods) 2019
Just keep shaking. Looks like it's in the disc OK, just needs to get into the pilot bearing. Get the gaps as close as you can and it should slide on in.
Thread Starter
Burning Brakes
Joined: Apr 2011
Posts: 975
Likes: 108
From: Phoenix, AZ
Ok, I've pushed and twisted with the chutzpah that would make Flex Crunch proud and the gap is now 3/16". Besides the pilot bushing, what else could be hanging up the transmission?
Racer


Joined: Feb 2012
Posts: 421
Likes: 27
From: Harrisburg PA
DO NOT TIGHTEN WITH THE BOLTS TO DRAW IT IN, YOU WILL SNAP THE EARS OFF THE TRANS.
That said, set up the clutch linkage and have someone press the clutch pedal, once the disc is released (clutch pedal held in), the trans should slide the rest of the way in with minimal effort (relatively, anyway)... Make sure that the clutch disc is fully released...If the linkage is a bit loos, lengthen the bottom rod for the time being...
Also, install the yoke in the back of the trans, and put the trans in 1st or reverse..working the yoke a bit might also help is get a slightly better slid through the disc into the pilot bushing...
Those plastic tools get it close, but not perfect...
Last edited by keithl1967; Nov 15, 2014 at 10:22 PM.
Safety Car


Joined: May 2008
Posts: 3,753
Likes: 721
From: Lafayette Louisiana
I can relate to this. In my case, I mushroomed the pilot bushing slightly installing it. So after this "close but no cigar" routine a few times, I pulled out the trans, miked the tip of the 4sp and then miked the inside of the bronze pilot bearing and found the bushing was a few thousands smaller than the trans tip. Opened up the bushing a few thousands and it finally slide in. This may or may not be your problem, but hope this might help.
Even after I cleaned up the pilot bushing id, I still had to wiggle the 4sp and get the wife to push clutch in and out to finally get it to mate up.
Even after I cleaned up the pilot bushing id, I still had to wiggle the 4sp and get the wife to push clutch in and out to finally get it to mate up.

Melting Slicks


Joined: Feb 2004
Posts: 2,111
Likes: 32
From: Damascus MD
You cannot force it in to place. I did use the bolts to pull in the trans the last 1/4" but there was NO resistance.
Did you change the pilot bushing? If not, than it is just an alignment issue. The alignment tool is such that all the parts should be aligned including pilot bushing. Did you make sure the alignment tool was pushed all the way in to engage the bushing?
Bill
Melting Slicks


Joined: Dec 2000
Posts: 3,363
Likes: 303
From: Lansdale 19446 PA
2024 C3 of the Year Finalist- Unmodified
St. Jude Donor '10-'11, '15, '19
I had the exact problem with my 69 350/350. When I reinstalled the input shaft cover, I just tightened the bolts but did not pay attention the their orientation. I pulled the Muncie out and examined everything. Turns out the that the bolt heads the input shaft cover were the culprit.
Make sure the bolt heads do not protrude over the outside edge. Sound simple but it was enough to stop the Muncie from going in. Reinstalled the tranny after adjusting the bolt heads. Viola! Done
Make sure the bolt heads do not protrude over the outside edge. Sound simple but it was enough to stop the Muncie from going in. Reinstalled the tranny after adjusting the bolt heads. Viola! Done
Corvette Stories
The Best of Corvette for Corvette Enthusiasts

Top 10 Most Expensive Corvettes Ever Sold on Bring A Trailer
Brett Foote
10 Things Every Corvette Owner Needs (2026 Edition)
Michael S. Palmer
8 Most "Only Corvette Owners Understand" Quirks and Problems
Pouria Savadkouei
10 Reasons the C6 Z06 is Still A Performance Benchmark After 20 Years
Joe Kucinski
How Much Horsepower Every Corvette Engine "LOST" in 1972
Joe Kucinski
Top 10 DOs and DON'Ts for Protecting Your Convertible Top!
Michael S. Palmer
Top 10 Most Explosive Corvettes Ever Made: Power-to-Weight Ratio Ranked!
Joe Kucinski
150 hp to 1,250 hp: Every Corvette Generation Compared by the Specs That Matter
Joe Kucinski
8 Coolest Corvette Pace Cars (and Replicas) of All Time
Verdad Gallardo
Burning Brakes
Joined: Aug 2008
Posts: 878
Likes: 55
From: Deep South Denmark
It's been my experience that the plastic installation tools are too loose and won't properly center the clutch plate.
I do use the tool to hold the clutch plate in place and then check the alignment at the edge of the clutch plate and flywheel and correct it when the clutch bolts are just finger tight.
I do use the tool to hold the clutch plate in place and then check the alignment at the edge of the clutch plate and flywheel and correct it when the clutch bolts are just finger tight.
Thread Starter
Burning Brakes
Joined: Apr 2011
Posts: 975
Likes: 108
From: Phoenix, AZ
CF members, I appreciate all of the contributions. My hunch, after reading through the replies, is the issue lies with the pilot bushing. Either the end was mushroomed or the inside diameter shrunk after installation.
If I discover the pilot bushing needs resizing, it is better to install a new one or is it ok to file and reshape as necessary?
If I discover the pilot bushing needs resizing, it is better to install a new one or is it ok to file and reshape as necessary?
Safety Car
Joined: May 2008
Posts: 3,753
Likes: 721
From: Lafayette Louisiana
CF members, I appreciate all of the contributions. My hunch, after reading through the replies, is the issue lies with the pilot bushing. Either the end was mushroomed or the inside diameter shrunk after installation.
If I discover the pilot bushing needs resizing, it is better to install a new one or is it ok to file and reshape as necessary?
If I discover the pilot bushing needs resizing, it is better to install a new one or is it ok to file and reshape as necessary?
I suggest you mike the od of the 4sp tip and your installed pilot bushing and see if you think you have an interference fit.
Hope this helps. BTW, my 4sp works fine after all of this, so that is one data point anyway, ha!
Last edited by 20mercury; Nov 17, 2014 at 12:59 PM.
Thread Starter
Burning Brakes
Joined: Apr 2011
Posts: 975
Likes: 108
From: Phoenix, AZ
After pulling the pilot bushing, I believe the cause is clearly illustrated from the darker bands captured in the comparison pics. Because the bushing was not installed correctly, that is uniformly seated, it ended up snagging the input shaft. A deep groove/gash visible on the inside.
While poking around the Team Chevelle site, the consensus opinion on pilot bushings is not to commit assumicide and think that a bushing right out of the box is ready to install. Take careful measurements and possibly account for the pressure of installation squeezing the inside diameter. One suggestion is to freeze the bushing before installation.
It's is my $10 lesson for the day and maybe it can help someone else.
Note the thickness of the darker colored band, it is about 1mm wider than the band showing on the opposite side of the bushing.

I've ordered a new bushing, hence my $10 lesson.


Melting Slicks
Joined: May 2006
Posts: 2,369
Likes: 103
From: Centerville Louisiana
I looked all over even listened to The guy at Napa say the roller bearing was better. I found the Bronze National part at Orielys. because the guy said their was a old one on the shelf in the back.
Melting Slicks
Joined: Feb 2004
Posts: 2,111
Likes: 32
From: Damascus MD
Best available bushings come from Autogear. Pure Oilite bronze and non-magnetic.
Bill

Drifting

Joined: Jun 2008
Posts: 1,565
Likes: 111
When I installed my clutch and mocked up the trans, it wouldn't slide in either. It ended up being the plastic clutch alignment tool having too much play. I bought this fancy tool from Ram clutches, re-aligned the discs, and the trans slid right in. I used input shaft would do the same thing, but they can be hard to find. I agree with the poster above, the AutoGear bushing is the one you want.
Last edited by Neil B; Nov 20, 2014 at 09:50 AM.

Team Owner

Joined: Jul 2004
Posts: 40,404
Likes: 791
From: Redondo Beach, California
I don't use those plastic ******. I have course spline and fine spline Muncie input shafts. They are so much more accurate than the plastic ******.
Good comment about the pilot bushing being distorted by installation.
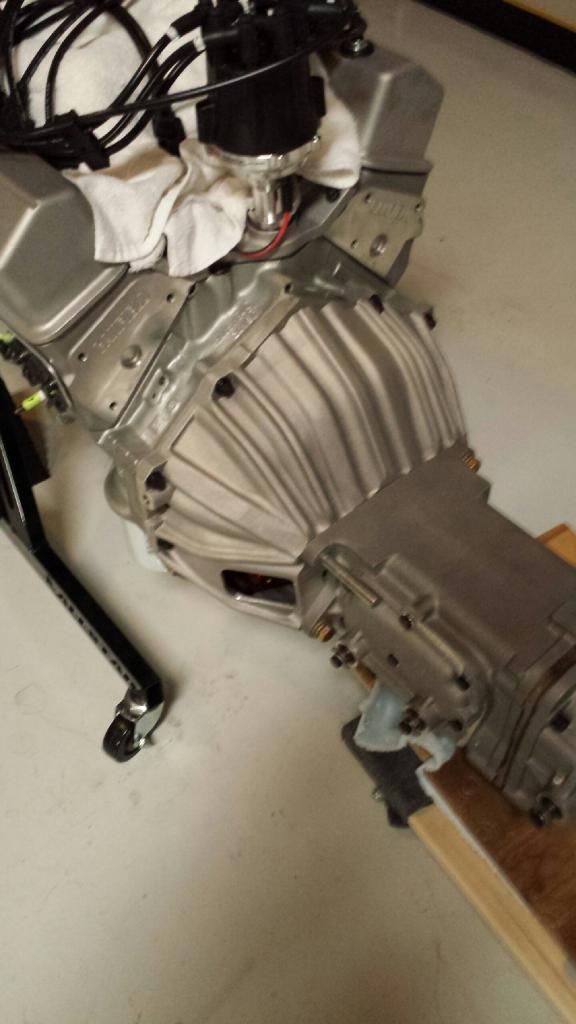
........I'm not really that good of a mechanic. If I personally had to replace a tranny. I'd just remove the entire engine/trannie stack and replace the tranny outside the car. I've pulled out an entire engine trannie stack from a Corvette three times, and re-installed two times. For a early C3 Corvette it's mechanically very easy to pull the entire engine/tranny stack....it is very tedious however. At my proficiency level, replacing a trannie laying under the car is not going to work. (Even though I have a trannie jack). With an open frame, and the trannie jack, I found installing my TKO600 into a dual disk McLoed clutch to be very fussy. The dual disk requires that the input shaft be inserted more accurately than with a single disk. Absolutely no way could I do this laying under the car, especially with the welded in tranny crossmember that manual C3's had.
Last edited by 68/70Vette; Nov 21, 2014 at 03:00 AM.
Thread Starter
Burning Brakes
Joined: Apr 2011
Posts: 975
Likes: 108
From: Phoenix, AZ
Following up� I purchased a Federal brand bronze bushing and left it overnight in the deep freezer. The next evening, I removed it from the freezer and was able to slide it over the input shaft.
The bushing was then pounded into the flywheel center and the effort was noticeably easier than the previous attempt using the bushing's room-temperature cousin.
I let the bushing set for awhile believing it would undergo thermal expansion and accept the input shaft. It did not go. The plastic alignment toy fit, but not the input shaft. The bushing's inner diameter had compressed. I mic'd the shaft and the plastic alignment toy tip and noticed 6-8 thousandths difference. After checking the measurements again, it still showed 6-8 thousandths difference.
Modeling the most uniform circular motion possible by human hands, I proceeded to enlarge the bushing's inner diameter with my drill motor and 1/2" drill bit. Cleaned up the debris. On the next attempt, the input shaft slid through the bushing. Success!
Tomorrow, I'll keep my fingers crossed and hope to mate the transmission to the bell housing.
CF members, thank you for all the help.
Transmission input shaft diameter

Plastic alignment toy tip diameter

