

FIA/L88 headlight kit assembly instructions needed

Thread Starter
Burning Brakes


Joined: May 2006
Posts: 1,136
Likes: 8
From: Chichester, UK
Thank you Nick,
Fair to say a PIG of a job, but once done it will be worth it.
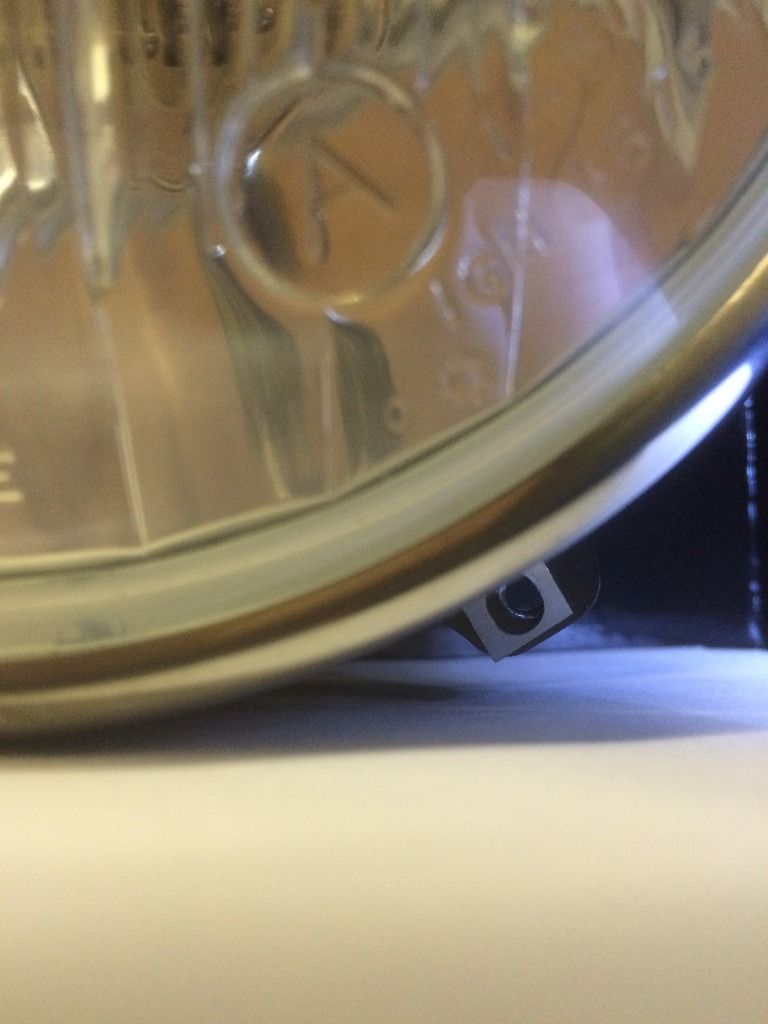
Did you managed to fit the retaining screw to this awkward 5 o'clock position???????
Almost done
Fair to say a PIG of a job, but once done it will be worth it.
Did you managed to fit the retaining screw to this awkward 5 o'clock position???????

Almost done


Safety Car


Joined: Jan 2001
Posts: 3,637
Likes: 27
From: Norwalk Ct
Race Director


Joined: Nov 2006
Posts: 19,445
Likes: 353
From: Athens GA
St. Jude Donor '12-'13, '15- '16-'17-'18-'19, '21
Bman

Thread Starter
Burning Brakes
Joined: May 2006
Posts: 1,136
Likes: 8
From: Chichester, UK
[QUOTE=bmans vette;1592727149]Or you could take the housing off the backing plate by disconnecting the spring and then sliding the 2 adjusters out of the tabs that hold it to the housing. Set the bulb into the housing, attach all 3 screws and then pop housing back in place.
Bman :thumbs
Good thinking, that may work!
I shall persist
Bman :thumbs
Good thinking, that may work!
I shall persist
Last edited by C3Paul; Jul 28, 2016 at 05:26 PM.

3rd Gear

Joined: Apr 2012
Posts: 3
Likes: 0
Has been a while since I did mine...its pretty easy and a lot of this is considered "fab work" as each car is a little different and not necessarily install work.
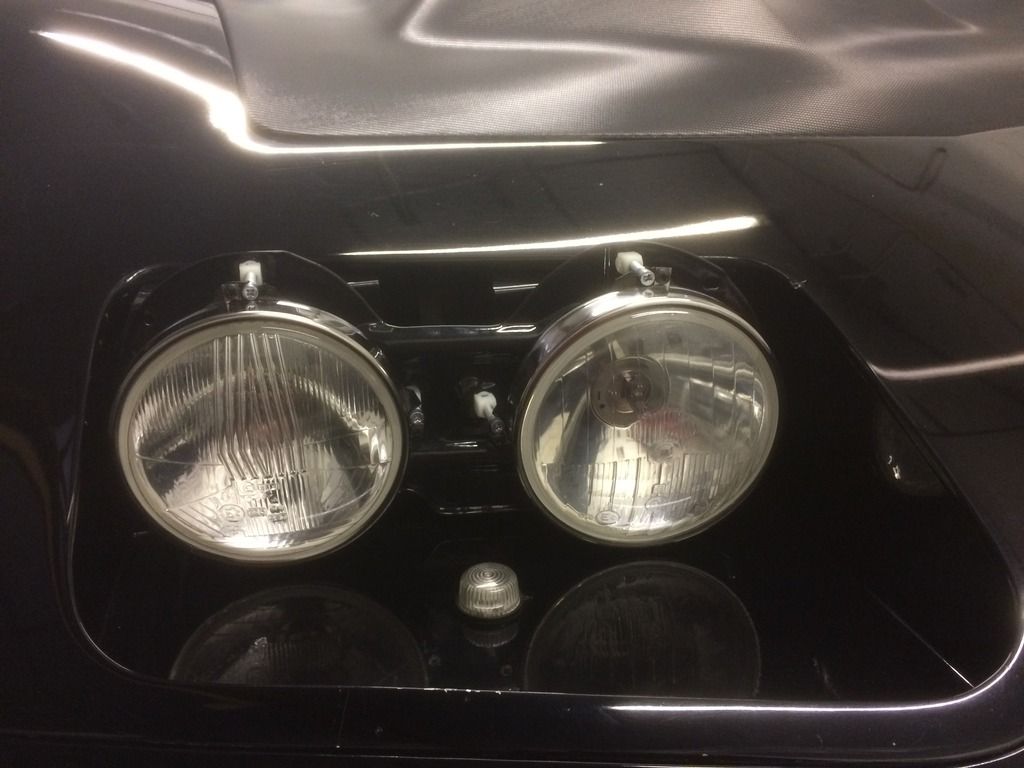
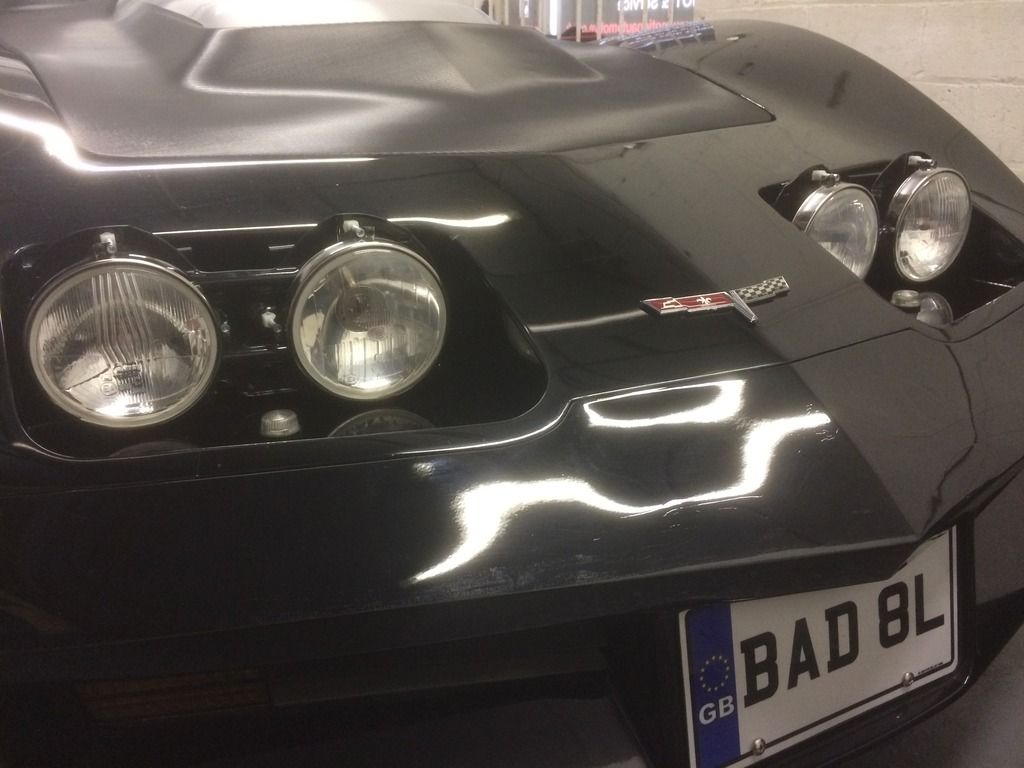
Obviuosly you have to remove the original lights and the housing that mounts to the underside of the nose.
The aluminum bucket slides into the opening from the radiator side, the three slotted holes should line up with the holes to the metal support brace under the nose and use what's in bag B to install.
The front of the bucket should rest on top of the L shaped metal support that runs along the very tip of the nose. I simply drilled down (3 holes) and use what's in bag A to mount.
The lamp holder/backing plate (which should be from a Corvair as per the originals) simply rivets to the aluminum bucket. This is where some trial and error comes in, make sure the big holes in the backing plate line up with the big holes in the aluminum bucket (its where the back of the lamp will come through) now you want to position them high enough up that the light will go over the lip of the nose area, but not too high that they will hit the lexan lense. You can get small spring clamps through the big hole and hold it in place whilst you check for height. Once your happy, drill 2 small holes through the backing plate and aluminum housing where they touch (around the big hole where the lamp goes through and rivet them in place, bag C)
The other thing here is that you MAY have to trim the backing plate to make it fit properly (to match the shape of the lense) Your backing plate seems to be missing a lamp adjuster (white plastic thing that pushes into the backing plate and has a screw with a slot around it that moves the cup in and out) you need to replace those (they are easy to find in autozone etc. etc.)
The last part is the lexan lense itself. Mounting can be done many ways, piano hinge at the front with a coupel of screws at the back, in theory you could do a no drilling version where you mount a L shaped bracket behind th ebumper so the cover slips under it and then use 3M trim tape on the back. A word of warning, look up some videos on line about cutting drilling this stuff as it can crack. I bought a couple of special drill bits that have a sharper cutting tip that helps prevent cracking and make sure the cover is always supported when you drill.
Nick

7th Gear

Joined: Jun 2008
Posts: 7
Likes: 0
I used your instructions (which helped a great deal) to assemble my headlamps system. I do have a problem though, the large aluminum back plates that the headlamp buckets hook up to are large in diameter did not fit so i had to butcher them a bit and they now keep my lexan clear covers co not close completely. Any ideas where I went wrong? Attached are a couple of pictures.
Thanks,
Jim
Classic Aircraft & Auto Inc.


